Use the Microsoft Enterprise SSO plug-in on macOS devices
The Microsoft Enterprise SSO plug-in provides single sign-on (SSO) to apps and websites that use Microsoft Entra ID for authentication, including Microsoft 365. This plug-in uses the Apple single sign-on app extension framework. It reduces the number of authentication prompts users get when using devices managed by Mobile Device Management (MDM), including any MDM that supports configuring SSO profiles.
Once set up, apps that support the Microsoft Authentication Library (MSAL) automatically take advantage of the Microsoft Enterprise SSO plug-in. Apps that don't support MSAL can be allowed to use the extension, including browsers like Safari and apps that use Safari web view APIs. Just add the application bundle ID or prefix to the extension configuration.
For example, to allow a Microsoft app that doesn't support MSAL, add com.microsoft. to the AppPrefixAllowList property. Be careful with the apps you allow, they'll be able to bypass interactive sign-in prompts for the signed in user.
For more information, see Microsoft Enterprise SSO plug-in for Apple devices - apps that don't use MSAL.
Note
Announced in March 2024, Microsoft Entra ID will be moving away from Apple’s Keychain for storing device identity keys. Starting in Q3 2026, all new device registrations will use Apple’s Secure Enclave by default. For more information see Microsoft Enterprise SSO plug-in for Apple devices.
This article applies to:
- macOS
This article shows how to deploy the Microsoft Enterprise SSO plug-in for macOS Apple devices with Intune, Jamf Pro, and other MDM solutions.
Prerequisites
To use the Microsoft Enterprise SSO plug-in on macOS devices:
- The device is managed by Intune.
- The device must support the plug-in:
- macOS 10.15 and newer
- The Microsoft Company Portal app must be installed and configured on the device.
Microsoft Enterprise SSO plug-in vs. Kerberos SSO extension
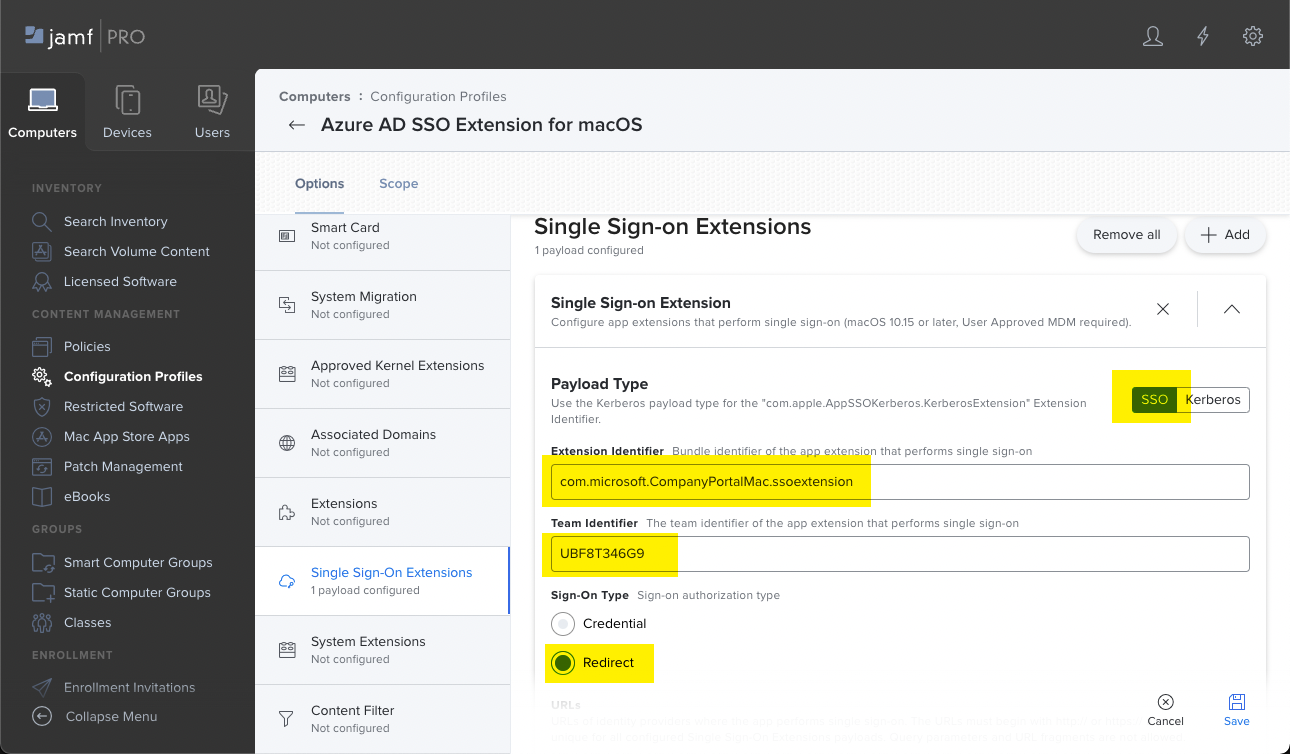
When you use the SSO app extension, you use the SSO or Kerberos Payload Type for authentication. The SSO app extension is designed to improve the sign-in experience for apps and websites that use these authentication methods.
The Microsoft Enterprise SSO plug-in uses the SSO Payload Type with Redirect authentication. The SSO Redirect and Kerberos extension types can both be used on a device at the same time. Be sure to create separate device profiles for each extension type you plan to use on your devices.
To determine the correct SSO extension type for your scenario, use the following table:
| Microsoft Enterprise SSO plug-in for Apple Devices | Single sign-on app extension with Kerberos |
|---|---|
| Uses the Microsoft Entra ID SSO app extension type | Uses the Kerberos SSO app extension type |
| Supports the following apps: - Microsoft 365 - Apps, websites or services integrated with Microsoft Entra ID |
Supports the following apps: - Apps, websites or services integrated with AD |
For more information on the single sign-on extension, go to Single sign-on app extension.
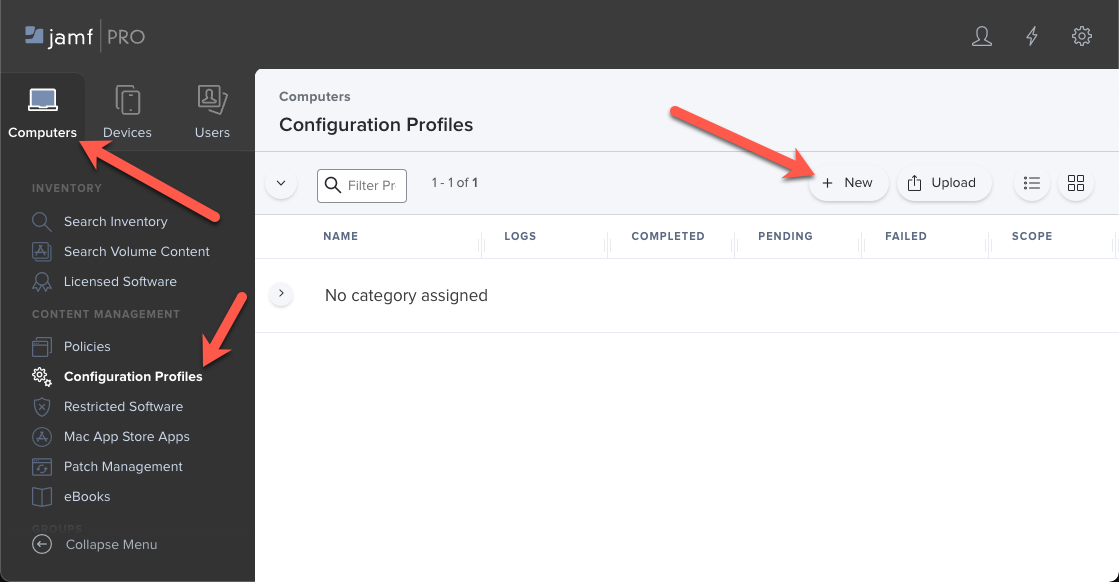
Create a single sign-on app extension configuration profile
In the Microsoft Intune admin center, create a device configuration profile. This profile includes the settings to configure the SSO app extension on devices.
Sign in to the Microsoft Intune admin center.
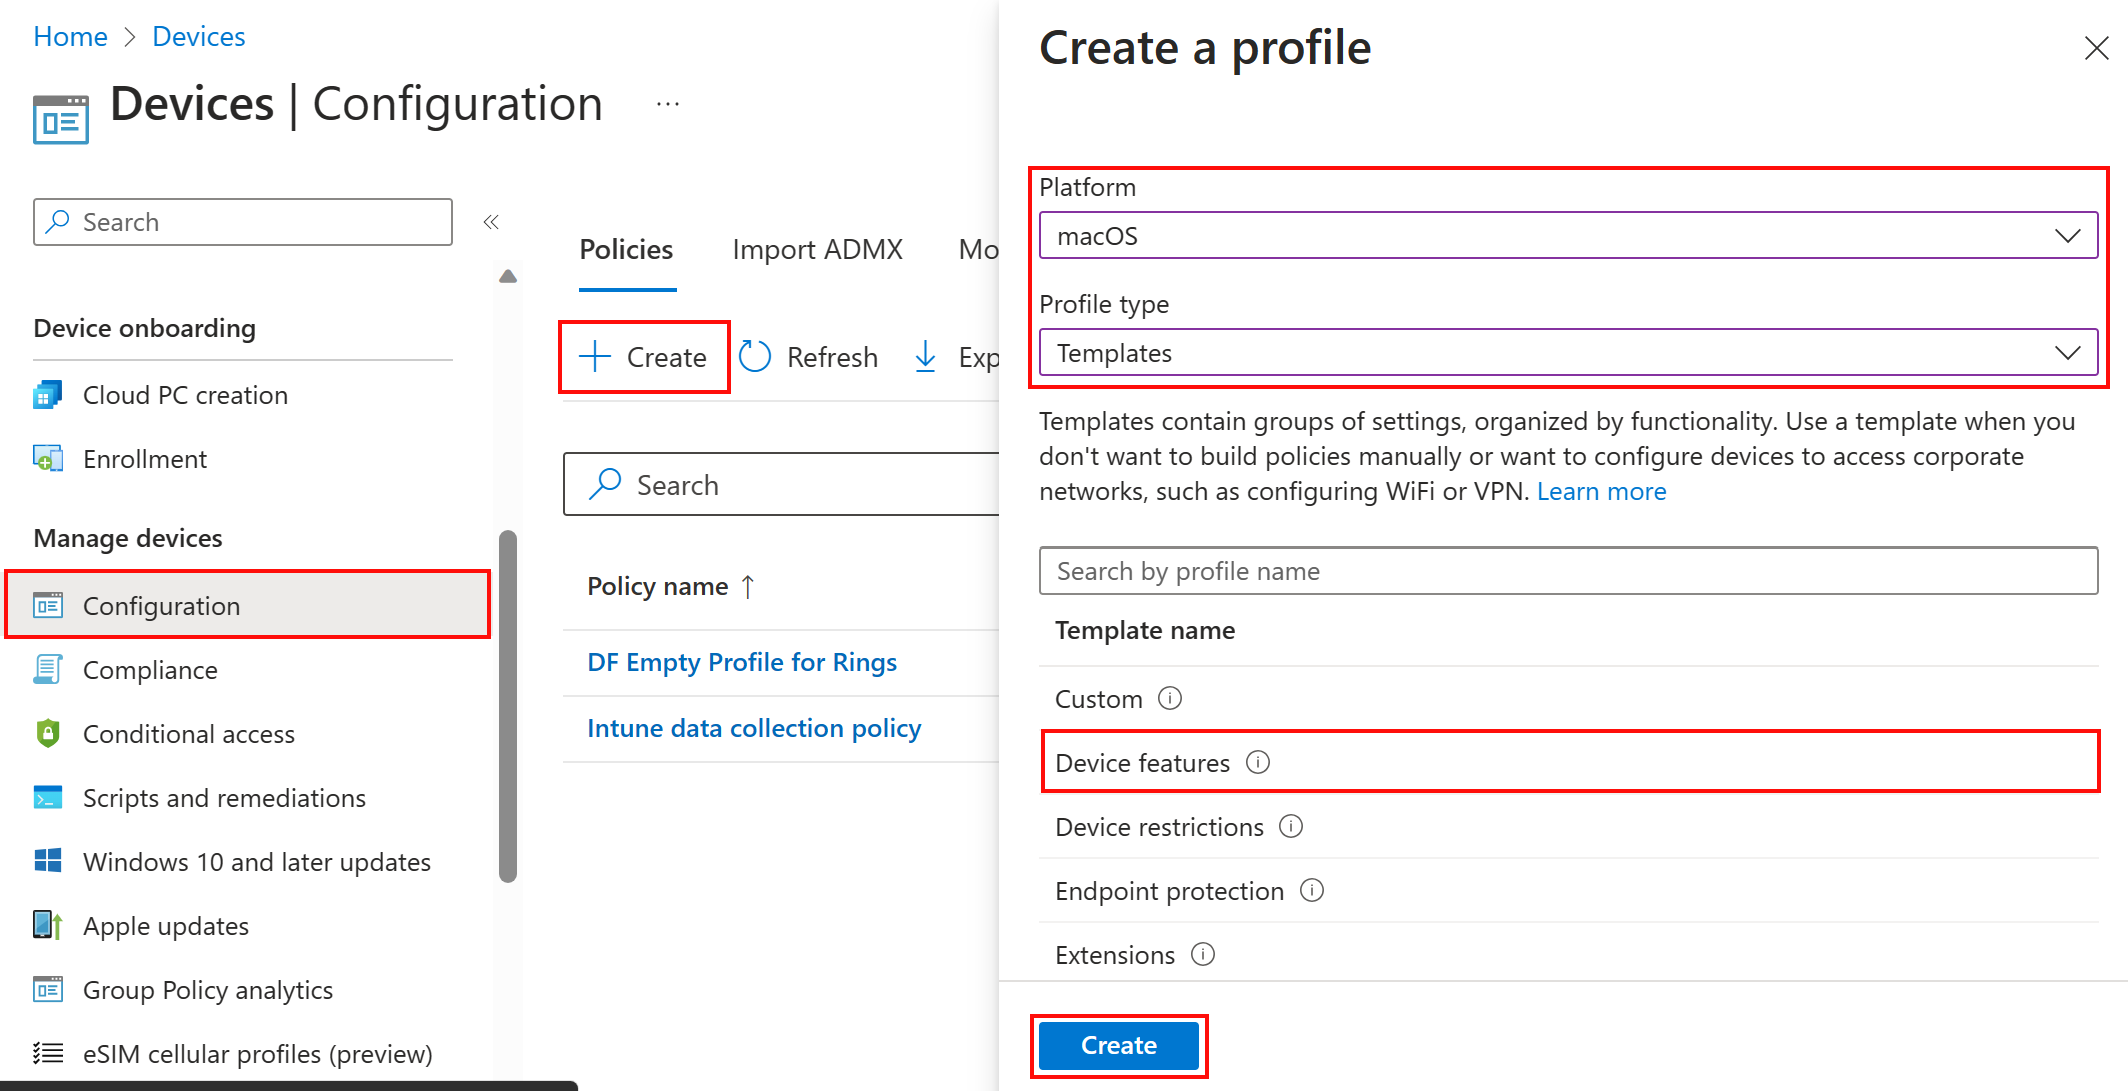
Select Devices > Configuration > Create.
Enter the following properties:
- Platform: Select macOS.
- Profile type: Select Templates > Device features.
Select Create:
In Basics, enter the following properties:
- Name: Enter a descriptive name for the policy. Name your policies so you can easily identify them later. For example, a good policy name is macOS: Microsoft Enterprise SSO plug-in.
- Description: Enter a description for the policy. This setting is optional, but recommended.
Select Next.
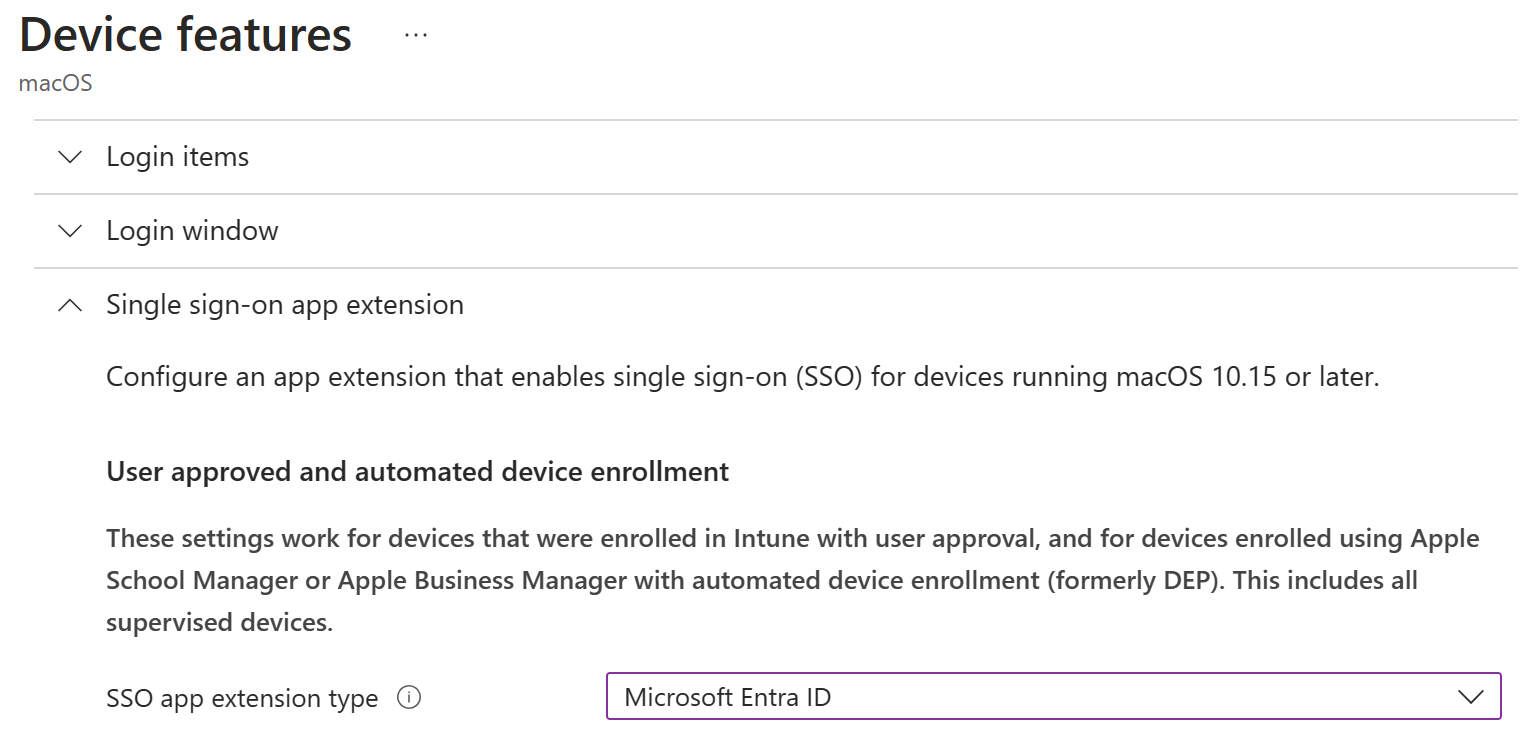
In Configuration settings, select Single sign-on app extension, and configure the following properties:
SSO app extension type: Select Microsoft Entra ID:
App bundle ID: Enter a list of bundle IDs for apps that don't support MSAL and are allowed to use SSO. For more information, go to Applications that don't use MSAL.
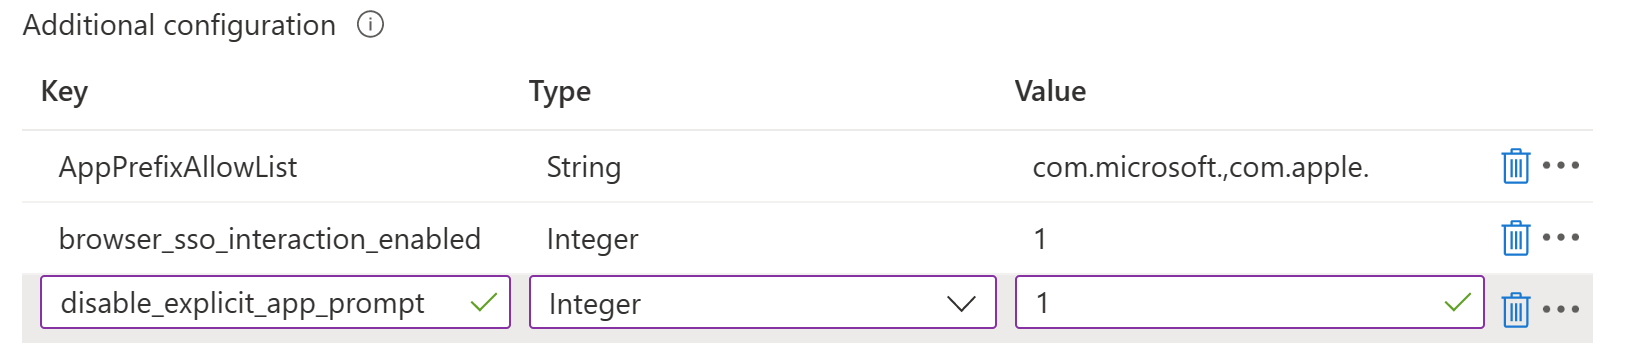
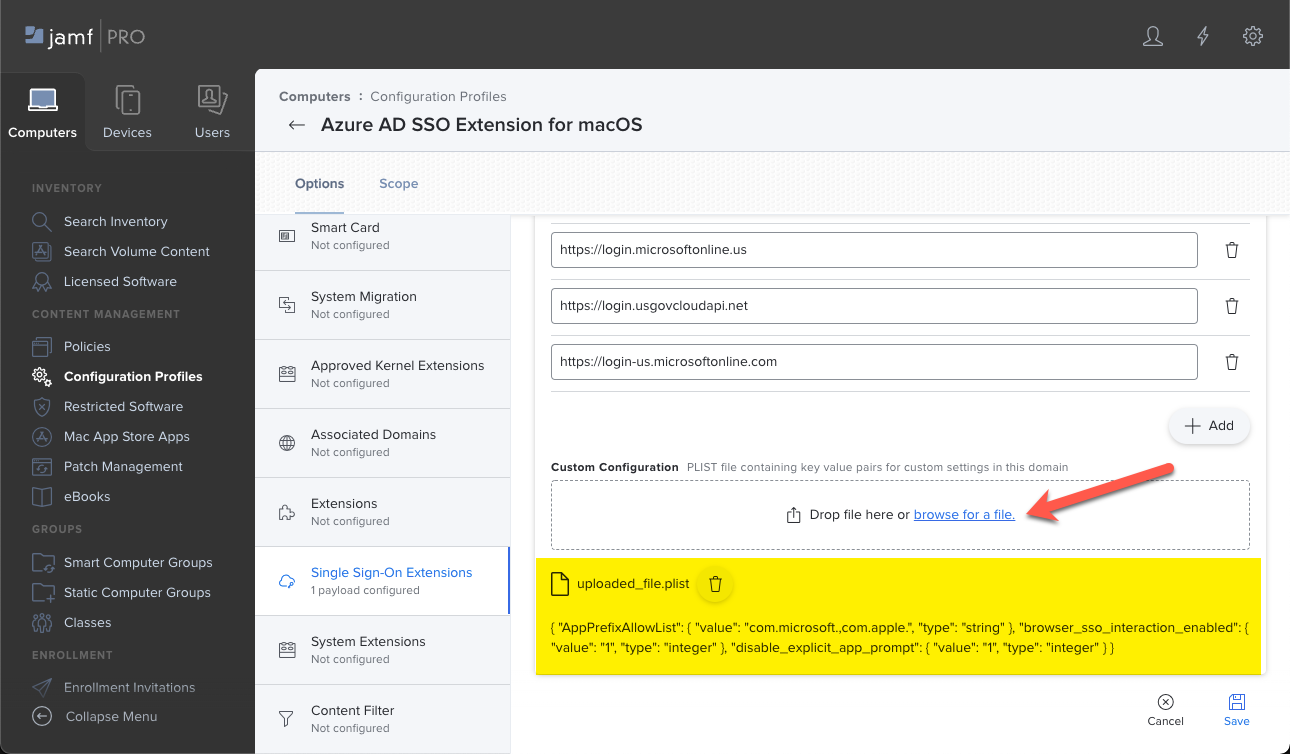
Additional configuration: To customize the end user experience, you can add the following properties. These properties are the default values used by the Microsoft SSO Extension, but they can be customized for your organization needs:
Key Type Description AppPrefixAllowList String Recommended value: com.microsoft.,com.apple.
Enter a list of prefixes for apps that don't support MSAL and are allowed to use SSO. For example, entercom.microsoft.,com.apple.to allow all Microsoft and Apple apps.
Be sure these apps meet the allowlist requirements.browser_sso_interaction_enabled Integer Recommended value: 1
When set to1, users can sign in from Safari browser, and from apps that don't support MSAL. Enabling this setting allows users to bootstrap the extension from Safari or other apps.disable_explicit_app_prompt Integer Recommended value: 1
Some apps might incorrectly enforce end-user prompts at the protocol layer. If you see this problem, users are prompted to sign in, even though the Microsoft Enterprise SSO plug-in works for other apps.
When set to1(one), you reduce these prompts.Tip
For more information on these properties, and other properties you can configure, see Microsoft Enterprise SSO plug-in for Apple devices.
When you're done configuring the recommended settings, the settings look similar to the following values in your Intune configuration profile:
Continue creating the profile, and assign the profile to the users or groups that will receive these settings. For the specific steps, go to Create the profile.
For guidance on assigning profiles, go to Assign user and device profiles.
When the device checks in with the Intune service, it will receive this profile. For more information, go to Policy refresh intervals.
To check that the profile deployed correctly, in the Intune admin center, go to Devices > Configuration > select the profile you created and generate a report:


End user experience

If you're not deploying the Company Portal app using an app policy, then users must install it manually. Users don't need to use the Company Portal app, it just needs to be installed on the device.
Users sign in to any supported app or website to bootstrap the extension. Bootstrap is the process of signing in for the first time, which sets up the extension.
After users sign in successfully, the extension is automatically used to sign in to any other supported app or website.
You can test single sign-on by opening Safari in private mode (opens Apple's web site) and opening the https://portal.office.com site. No username and password will be required.
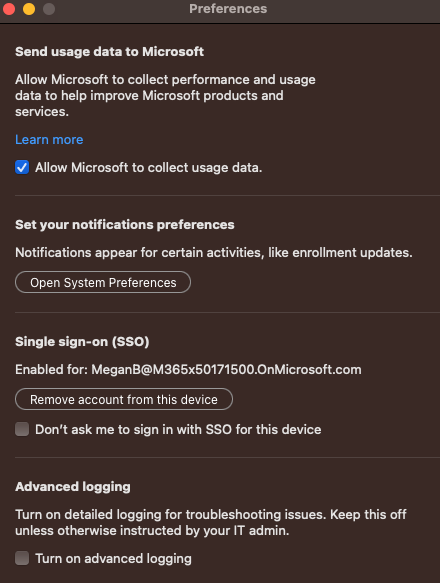
On macOS, when users sign in to a work or school app, they're prompted to opt in or out of SSO. They can select Don’t ask me again to opt out of SSO and block future requests.
Users can also manage their SSO preferences in the Company Portal app for macOS. To edit preferences, go to the Company Portal app menu bar > Company Portal > Settings. They can select or deselect Don’t ask me to sign in with single sign-on for this device.
Tip
Learn more about how the SSO plug-in works and how to troubleshoot the Microsoft Enterprise SSO Extension with the SSO troubleshooting guide for Apple devices.
Next steps
For information about the Microsoft Enterprise SSO plug-in, go to Microsoft Enterprise SSO plug-in for Apple devices.
For information from Apple on the single sign-on extension payload, go to single sign-on extensions payload settings (opens Apple's web site).
For information on troubleshooting the Microsoft Enterprise SSO Extension, go to Troubleshooting the Microsoft Enterprise SSO Extension plugin on Apple devices.
Feedback
Coming soon: Throughout 2024 we will be phasing out GitHub Issues as the feedback mechanism for content and replacing it with a new feedback system. For more information see: https://aka.ms/ContentUserFeedback.
Submit and view feedback for