Migrating servers from Microsoft Monitoring Agent to the unified solution
Applies to:
- Windows Server 2012 R2
- Windows Server 2016
This article guides you in migrating down-level servers from Microsoft Monitoring Agent (MMA) to the unified solution.
Prerequisites
- Microsoft Endpoint Configuration Manager (MECM) higher than 2207.
- Down-level OS devices in your environment onboarded with Microsoft Monitoring Agent. To confirm, verify that
MsSenseS.exeis running in Task Manager. - Presence of the MMA agent. You can verify it by checking if the correct Workspace ID is present in the Control Panel> Microsoft Monitoring Agent.
- Active Microsoft Defender portal with devices onboarded.
- A Device Collection containing down-level servers such as Windows Server 2012 R2 or Windows Server 2016 using MMA agent is set up in your MECM instance.
For more information on installing the listed prerequisites, see related topics section.
Gather required files
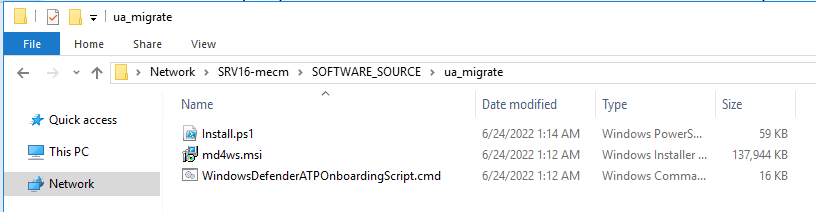
Copy the unified solution package, onboarding script and migration script to the same content source you deploy other apps with MECM.
Download Onboarding Script and the unified solution from Microsoft Defender XDR settings page.
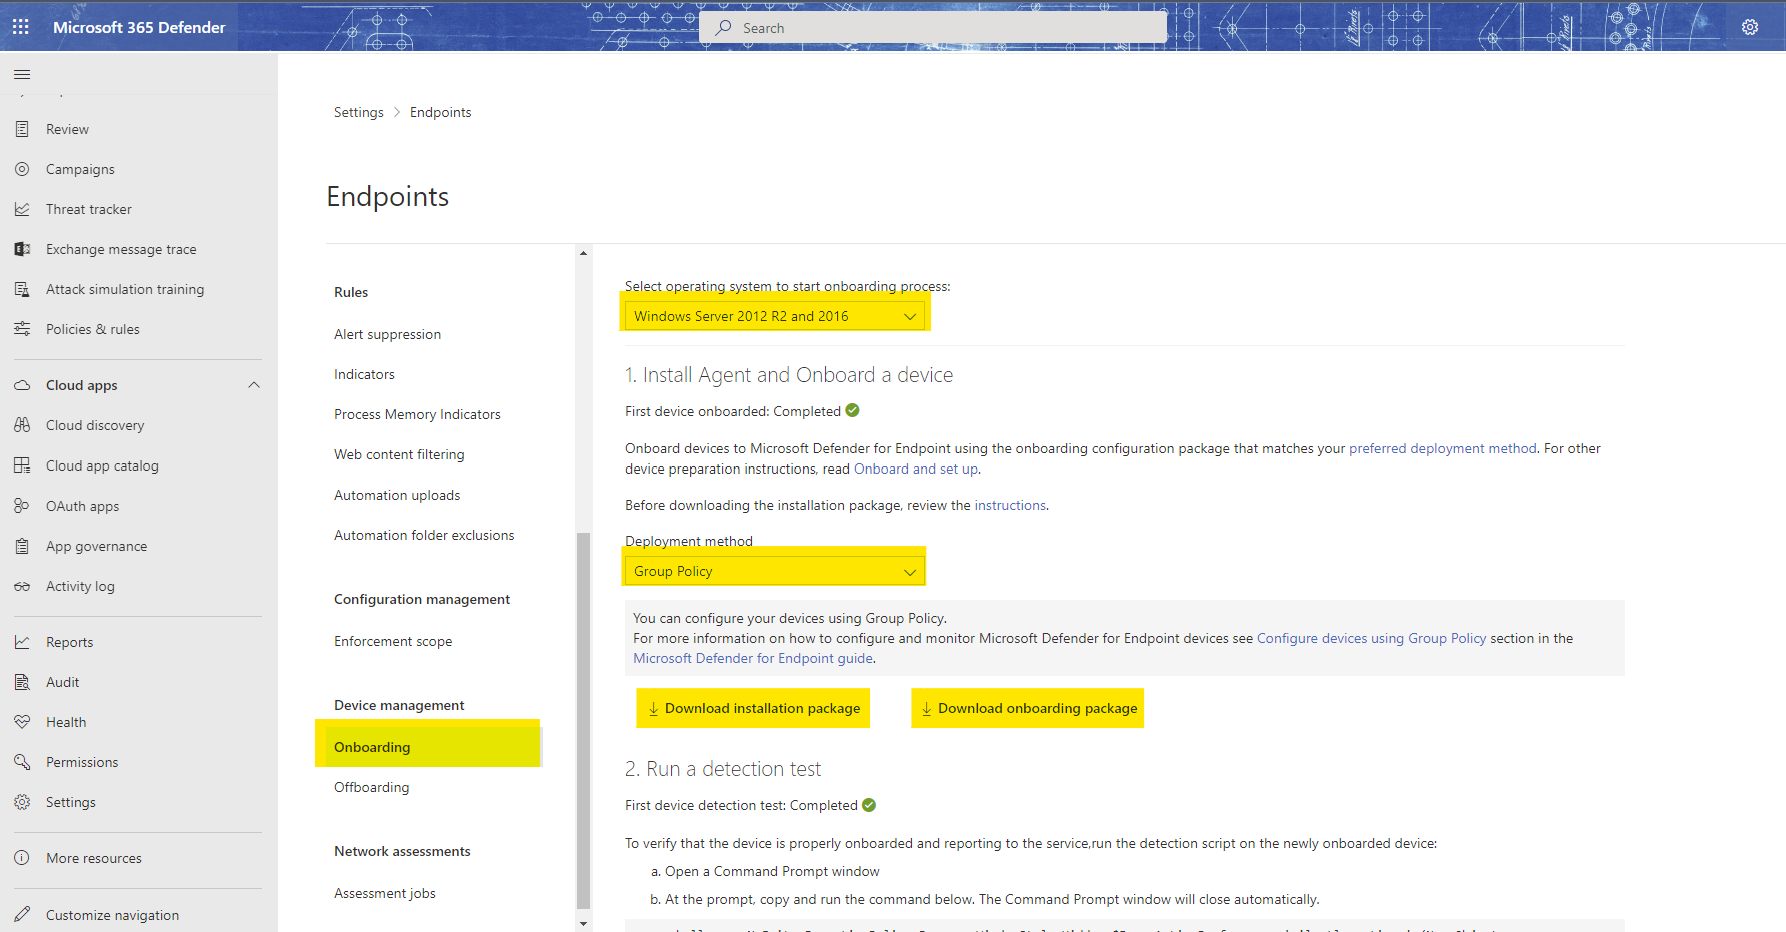
Note
You must select the Group Policy from the Deployment method dropdown to obtain the .cmd file.
Download the migration script from the document: Server migration scenarios from the previous, MMA-based Microsoft Defender for Endpoint solution. This script can also be found on GitHub: GitHub - microsoft/mdefordownlevelserver.
Save all three files in a shared folder used by MECM as a Software Source.

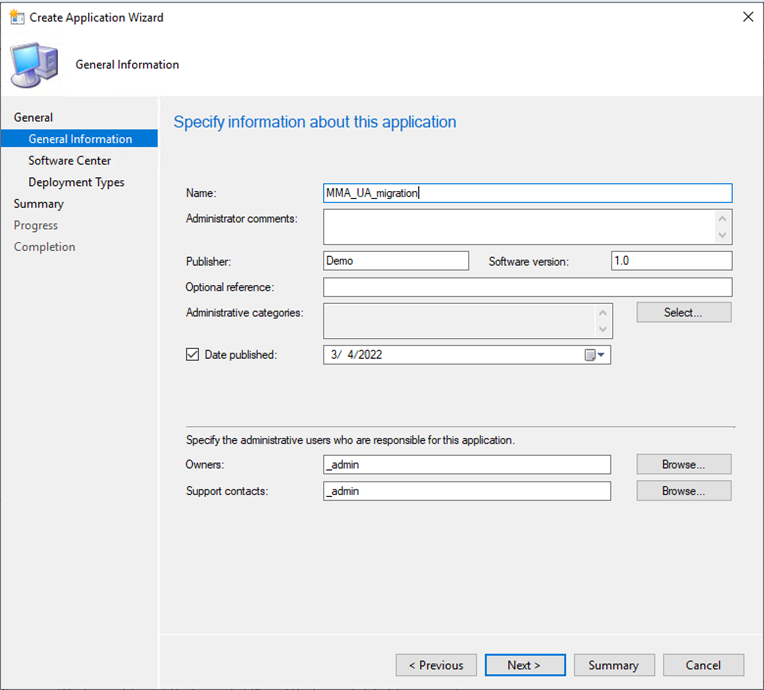
Create the package as an application
In the MECM console, follow these steps: Software Library>Applications>Create Application.
Select Manually specify the application information.

Select Next on the Software Center screen of the wizard.
On the Deployment Types, click Add.
Select Manually to specify the deployment type information and select Next.
Give a name to your script deployment and select Next.
On this step, copy the UNC path that your content is located. Example:
\\ServerName\h$\SOFTWARE_SOURCE\path.
Additionally, set the following as the installation program:
Powershell.exe -ExecutionPolicy ByPass -File install.ps1 -RemoveMMA <workspace ID> -OnboardingScript .\WindowsDefenderATPOnboardingScript.cmdClick Next and make sure to add your own Workspace ID in this section.
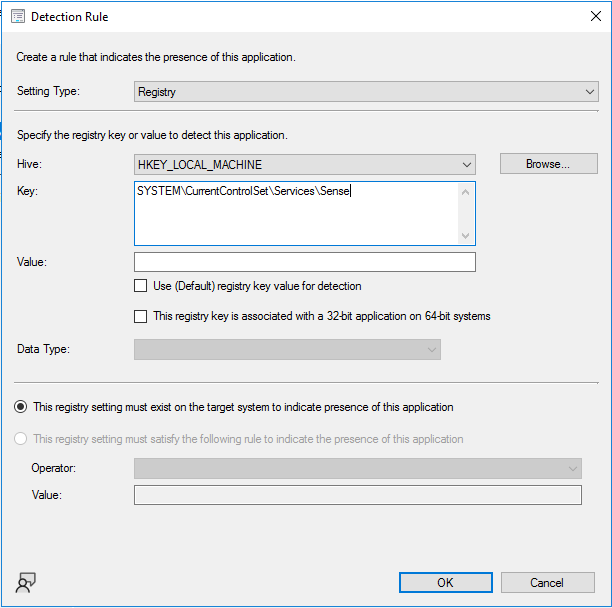
Click Next and click add a clause.
The detection method will be based on the registry key shown below.
HKEY_LOCAL_MACHINE\SYSTEM\CurrentControlSet\Services\SenseCheck the option: This registry setting must exit on the target system to indicate presence of this application.
Tip
The registry key value was obtained by running the Powershell command shown below on a device that has the unified solution installed. Other creative methods of detection can also be used. The goal is to identify whether the unified solution has already been installed on a specific device. You can leave the Value and Data Type fields as blank.
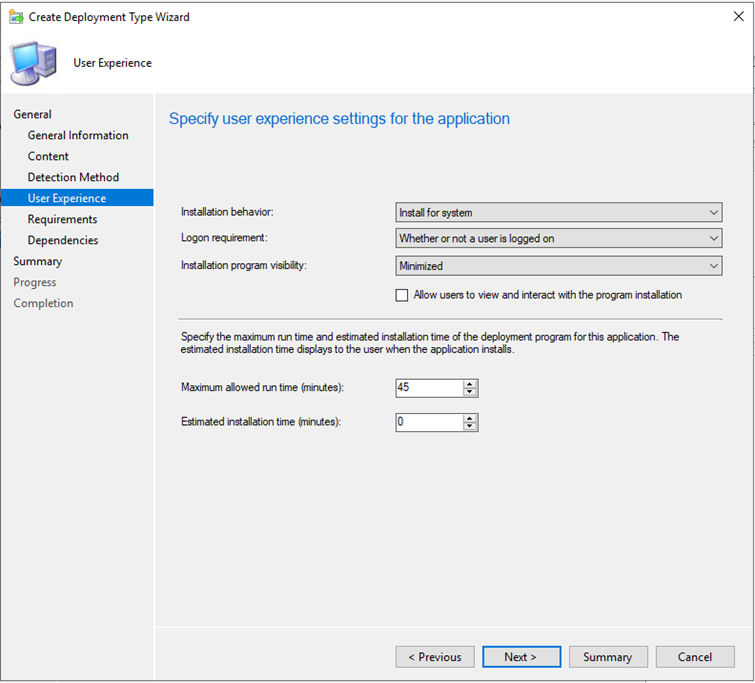
get-wmiobject Win32_Product | Sort-Object -Property Name |Format-Table IdentifyingNumber, Name, LocalPackage -AutoSizeIn the User Experience section, check the recommended settings shown in the screenshot. You can choose what suits your environment and click Next. For Installation program visibility, it's advisable to install with Normal during phase testing then change it to Minimized for general deployment.
Tip
The maximum allowed runtime can be lowered from (default) 120 minutes to 60 minutes.
Add any additional requirements then select Next.
Under the Dependencies section, select Next.
Select Next until completion screen comes up, then Close.
Keep select Next until the completion of Application Wizard. Verify all have been green checked.
Close the wizard, right-click on the recently created application and deploy it to your down-level-server collection. Locally, the installation can be confirmed at Software Center. For details, check the CM logs at
C:\Windows\CCM\Logs\AppEnforce.log.
Verify the status of the migration at MECM > Monitoring > Deployments.

Troubleshooting .ETL files will be created and automatically saved locally in each server at this location
C:\Windows\ccmcache\#\. These files can be leveraged by support to troubleshoot onboarding issues.


Related topics
- Microsoft Monitoring Agent Setup
- Deploy applications - Configuration Manager
- Microsoft Defender for Endpoint - Configuration Manager
- Onboard Windows servers to the Microsoft Defender for Endpoint service
- Microsoft Defender for Endpoint: Defending Windows Server 2012 R2 and 2016
Tip
Do you want to learn more? Engage with the Microsoft Security community in our Tech Community: Microsoft Defender for Endpoint Tech Community.
Feedback
Coming soon: Throughout 2024 we will be phasing out GitHub Issues as the feedback mechanism for content and replacing it with a new feedback system. For more information see: https://aka.ms/ContentUserFeedback.
Submit and view feedback for