Enable the Microsoft Report Message or the Report Phishing add-ins
Tip
Did you know you can try the features in Microsoft Defender XDR for Office 365 Plan 2 for free? Use the 90-day Defender for Office 365 trial at the Microsoft Defender portal trials hub. Learn about who can sign up and trial terms here.
Note
If you're an admin in a Microsoft 365 organization with Exchange Online mailboxes, we recommend that you use the Submissions page in the Microsoft Defender portal. For more information, see Use Admin Submission to submit suspected spam, phish, URLs, and files to Microsoft.
The Microsoft Report Message and Report Phishing add-ins for Outlook and Outlook on the web (formerly known as Outlook Web App or OWA) makes it easy for users to report false positives and false negatives to Microsoft for analysis. False positives are good email that was blocked or sent to the Junk Email folder. False negatives are unwanted email or phishing that was delivered to the Inbox.
Microsoft uses these user-reported messages to improve the effectiveness of email protection technologies. For example, suppose that people are reporting many messages using the Report Phishing add-in. This information surfaces in the Security Dashboard and other reports. Your organization's security team can use this information as an indication that anti-phishing policies might need to be updated.
The Report Message add-in provides the option to report both spam and phishing messages. The Report Phishing add-in provides the option to report phishing messages only.
Admins can install and enable the add-ins for the organization. Both add-ins are available through Centralized Deployment. Individual users can install the add-ins for themselves.
After the add-in is installed and enabled, users see the following icons based on their Outlook client:
Outlook for Windows:
The Report Message icon in the Classic Ribbon:
The Report Message icon in the Simplified Ribbon: Select
 More commands > Report Message in the Protection section.
The Report Phishing icon in the Classic Ribbon:
The Report Phishing icon in the Simplified Ribbon: Select
More commands > Report phishing in the Protection section.
Outlook on the web:
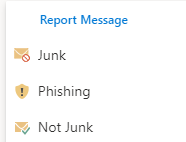
The Report Message add-in:

The Report Phishing add-in:


What do you need to know before you begin?
You need to be assigned permissions before you can do the procedures in this article. You have the following options:
- Microsoft Defender XDR Unified role based access control (RBAC) (Affects the Defender portal only, not PowerShell): Security operations/Security data/Response (manage) or Security operations/Security data/Read-only.
- Email & collaboration permissions in the Microsoft Defender portal: Membership in the Organization Management role group.
- Exchange Online permissions: Membership in the Organization Management role group.
- Microsoft Entra permissions: Membership in the Global Administrator role gives users the required permissions and permissions for other features in Microsoft 365.
For organizational installs, the organization needs to be configured to use OAuth authentication. For more information, see Determine if Centralized Deployment of add-ins works for your organization.
The Report Message and Report Phishing add-ins work with most Microsoft 365 subscriptions and the following products:
- Outlook on the web
- Outlook 2013 SP1 or later
- Outlook 2016 for Mac
- Outlook included with Microsoft 365 apps for Enterprise
- Outlook for iOS and Android
Currently, reporting messages in shared mailboxes or other mailboxes by a delegate using the add-ins isn't supported. Messages aren't sent to the reporting mailbox or to Microsoft. Built-in reporting in Outlook on the web in shared mailboxes or other mailboxes by a delegate is supported. Messages are sent to the reporting mailbox or to Microsoft.
The add-ins aren't available for on-premises Exchange mailboxes.
For more information on how to report a message using reporting in Outlook, see Report false positives and false negatives in Outlook.
Note
Reported messages are available to admins on the User reported tab of Submissions page at https://security.microsoft.com/reportsubmission?viewid=user only if both of the following settings are configured on the User reported settings page at https://security.microsoft.com/securitysettings/userSubmission:
- Monitor reported messages in Outlook is selected.
- Use the built-in "Report" button in Outlook is selected.
If the User reported settings in the organization send user reported messages (email and Microsoft Teams) to Microsoft (exclusively or in addition to the reporting mailbox), we do the same checks as when admins submit messages to Microsoft for analysis from the Submissions page:
- Email authentication check (email messages only): Whether email authentication passed or failed when it was delivered.
- Policy hits: Information about any policies or overrides that might have allowed or blocked the incoming email into the organization, thus overriding our filtering verdicts.
- Payload reputation/detonation: Up-to-date examination of any URLs and attachments in the message.
- Grader analysis: Review done by human graders to confirm whether or not messages are malicious.
So, submitting or resubmitting messages to Microsoft is useful to admins only for messages that have never been submitted to Microsoft, or when you disagree with the original verdict.
Organizations that use URL filtering or a third-party security solution (for example, a proxy and/or firewall) must be able to reach the following URLs using the HTTPS protocol:
ipagave.azurewebsites.netoutlook.office.com
Admin instructions
Install and configure the Report Message or Report Phishing add-ins for the organization.
Note
It could take up to 12 hours for the add-in to appear in your organization.
When you follow these instructions to centrally deploy the add-ins, a corresponding app registration is also deployed in Azure. If you delete the app registration for the add-in in Azure, the add-in is also deleted from the organization.
Get the Report Message or Report Phishing add-in for your organization
In the Microsoft 365 admin center at https://admin.microsoft.com, expand Show all if necessary, and then go to Settings > Integrated apps. Or, to go directly to the Integrated apps page, use https://admin.microsoft.com/Adminportal/Home#/Settings/IntegratedApps.
On the Integrated apps page, select
 Get apps.
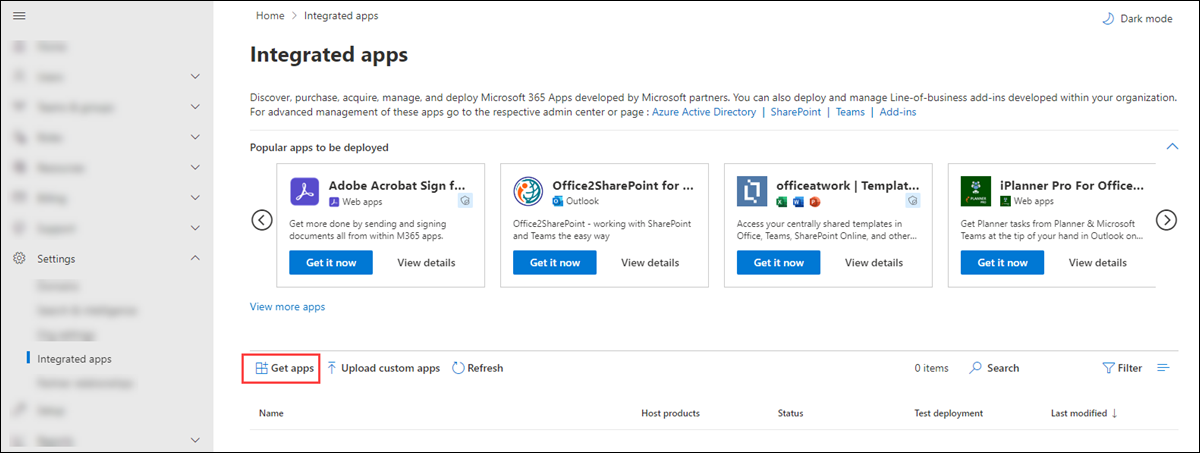
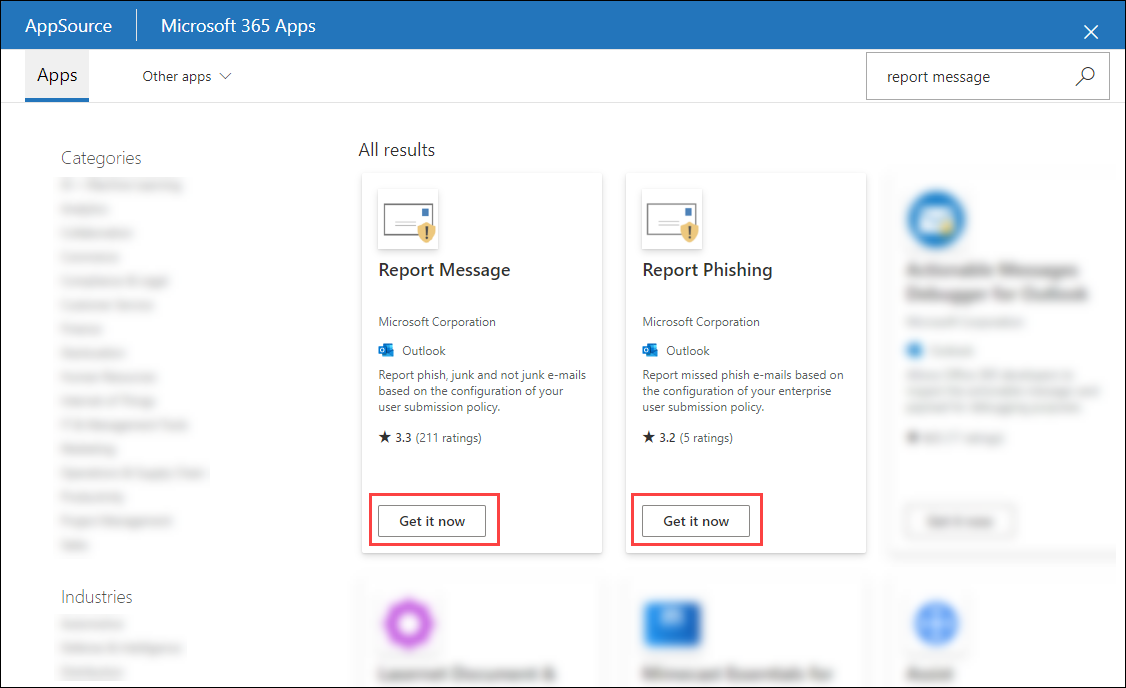
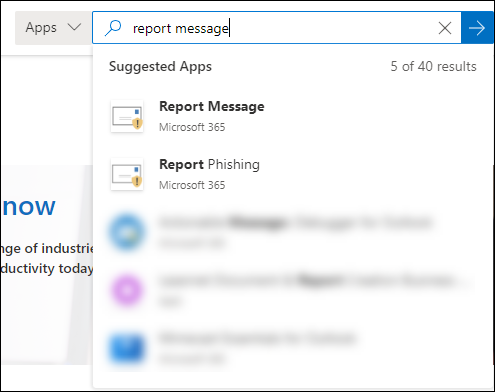
In the Microsoft 365 Apps page that opens, enter Report Message in the
 Search box.
In the search results, select Get it now in the Report Message entry or the Report Phishing entry to start the Deploy New App wizard.
Note
Although the screenshots in the remaining steps show the Report Message add-in, the steps are identical for the Report Phishing add-in.
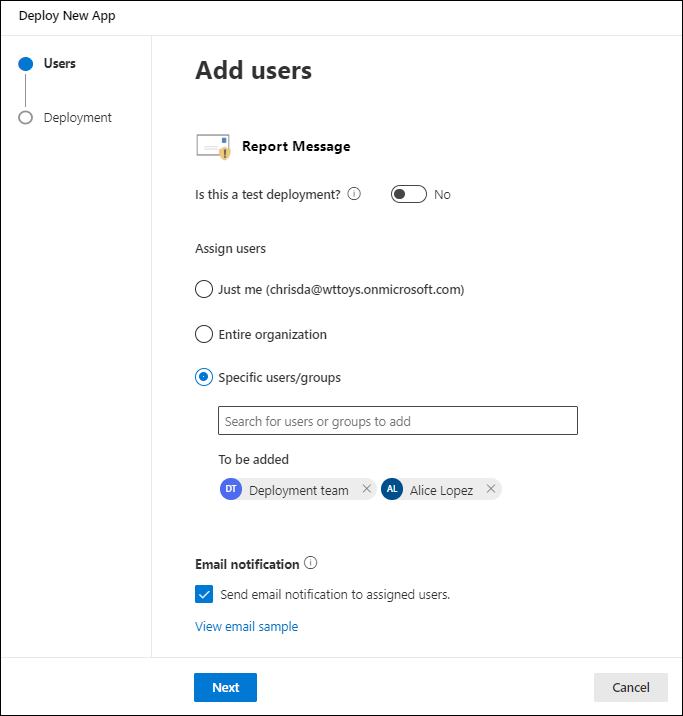
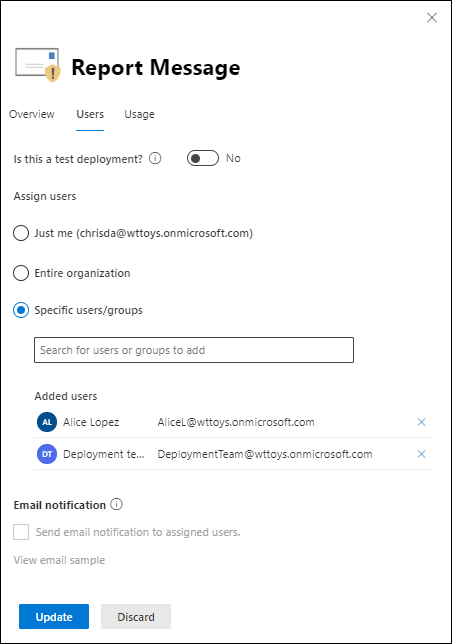
On the Add users page, configure the following settings:
Is this a test deployment?: Leave the toggle at
 No, or set the toggle to
  Yes.
Yes.Assign users: Select one of the following values:
- Just me
- Entire organization
- Specific users/groups: Find and select users and groups in the search box. After each selection, the user or group appears in the To be added section that appears below the search box. To remove a selection, select
 on the entry.
Email notification: By default, Send email notification to assigned users is selected. Select View email sample to open Add-in deployment email alerts.
When you're finished on the Add users page, select Next.
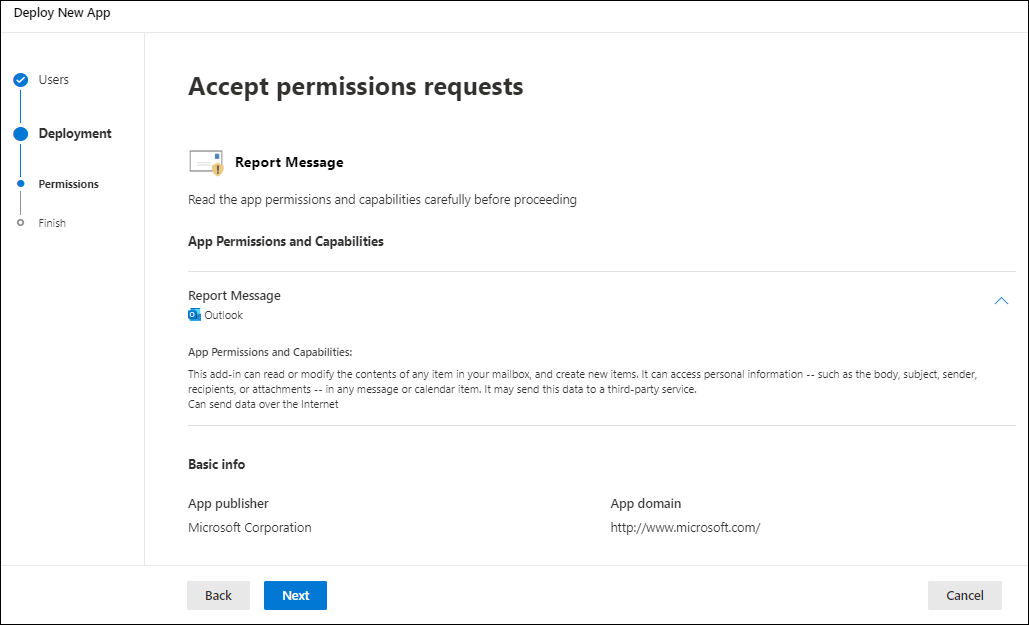
On the Accept permissions requests page, read the app permissions and capabilities information carefully before you select Next.
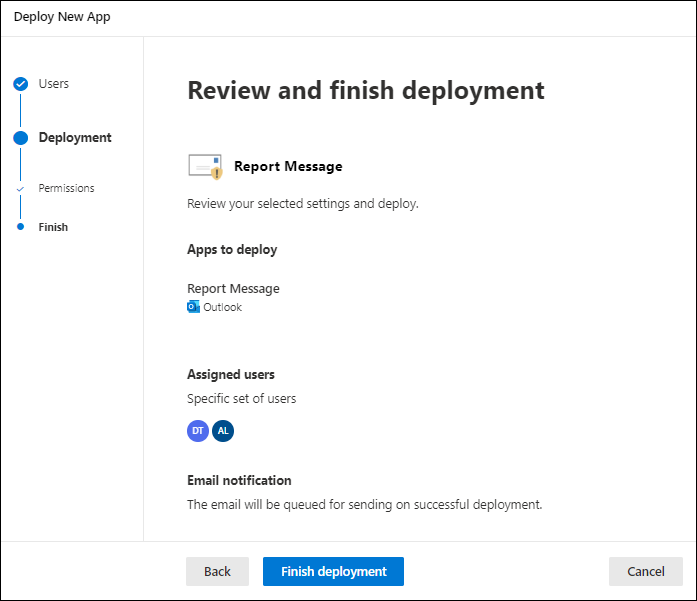
On the Review and finish deployment page, review your settings. Select Back to make changes.
When you're finished on the Review and finish deployment page, select Finish deployment.
A progress indicator appears on the Review and finish deployment page.
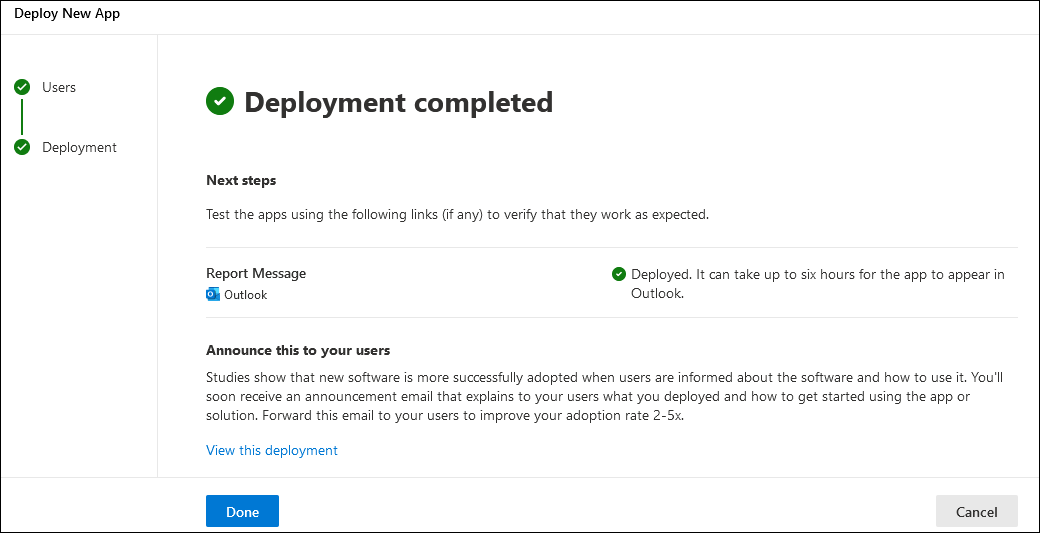
On the Deployment completed page, you can select view this deployment to close the page and go to the details of the add-in. Or, select Done to close the page.


Get the Report Message or the Report Phishing add-ins for your Microsoft 365 GCC or GCC High organization
Admins in Microsoft 365 Government Community Cloud (GCC) or GCC High need to use the steps in this section to get the Report Message or Report Phishing add-ins for their organizations. These steps apply to Outlook and Outlook on the web (formerly known as Outlook Web App or OWA) and don't apply to Outlook for iOS and Android.
Note
It could take up to 24 hours for the add-in to appear in your organization.
In U.S. Government organizations (Microsoft 365 GCC, GCC High, and DoD), reported messages aren't sent to Microsoft for analysis. They're sent only to the reporting mailbox that you identify for compliance reasons (data isn't allowed to leave the organization boundary). For more information, see User reported settings.
In the Microsoft 365 admin center at https://portal.office365.us/adminportal/home#/Settings/AddIns, select Settings > Add-ins > Deploy Add-in > Upload custom apps.
In the Upload custom apps flyout that opens, select I have a URL for the manifest file.
In the Add from URL dialog that opens, enter one of the following URLs:
- Report Message: https://ipagave.azurewebsites.net/ReportMessageManifest/ReportMessageAzure.xml
- Report Phishing: https://ipagave.azurewebsites.net/ReportPhishingManifest/ReportPhishingAzure.xml
When you're finished, select Install. In the success dialog, select OK.
Back on the Add-ins page, select the add-in you installed, and then select
 Edit.
Edit.In the add-in properties dialog that opens, confirm or modify the following settings:
- Make this add-in available to users in your organization.
- Specify user defaults: Select one of the following settings:
- Optional, enabled by default.
- Optional, disabled by default.
- Mandatory, always enabled. Users can't disable this add-in.
When you're finished, select Save.
To fully configure user reported message settings, see User reported settings.
View and edit settings for the Report Message or Report Phishing add-ins
In the Microsoft 365 admin center at https://admin.microsoft.com, expand Show all if necessary, and then go to Settings > Integrated apps. Or, to go directly to the Integrated apps page, use https://admin.microsoft.com/Adminportal/Home#/Settings/IntegratedApps.
Note
Although the screenshots in the remaining steps show the Report Message add-in, the steps are identical for the Report Phishing add-in.
On the Deployed apps tab of the Integrated apps page, select the Report Message add-in or the Report Phishing add-in by doing one of the following steps:
- In the Name column, select the icon or text for the add-in. This selection takes you to the Overview tab in the details flyout as described in the next steps.
- In the Name column, select ⋮ Edit row, and then select
 Edit users to go to the Users tab in the details flyout as described in the next step.
 - In the Name column, select ⋮ Edit row, and then select
 Check usage data to go to the Usage tab in the details flyout as described in the next step.

The details flyout that opens contains the following tabs:
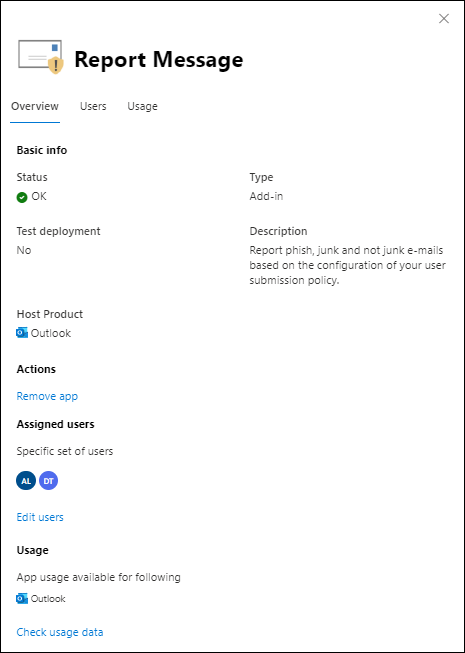
Overview tab:
- Basic info section:
- Status
- Type: Add-in
- Test deployment: Yes or No, depending on the option you selected when you deployed the add-in or the selection you change on the Users tab.
- Description
- Host product: Outlook
- Actions section: Select Remove app to remove the app.
- Assigned users section: Select Edit users to go to the Users tab.
- Usage section: Select Check usage data to got to the Usage tab.
- Basic info section:
Users tab:
Is this a test deployment?: Leave the toggle at
No, or set the toggle to
Yes.Assign users section: Select one of the following values:
- Just me
- Entire organization
- Specific users/groups: Find and select users and groups in the search box. After each selection, the user or group appears in the Added users section that appears below the search box. To remove a selection, select
 on the entry.
Email notification section: Send email notification to assigned users and View email sample aren't selectable.
If you made any updates on this tab, select Update to save your changes.
Usage tab: The chart and details table shows the number of active users over time.
- Filter the Date range to 7 days, 30 days (default), or 90 days.
- In the Report column, select
 Download to download the information filtered by Date range to the file named UsageData.csv.
When you're finished viewing the information on the tabs, select
 Close to close the details flyout.


User instructions
Get the Report Message or Report Phishing add-ins for yourself
Do either of the following steps:
- Open the Microsoft commercial marketplace at https://appsource.microsoft.com/marketplace/apps. On the AppSource page, enter Report message in the
Search box, and then select the Report Message or Report Phishing in the results.
- Use one of the following URLs to go directly to the download page for the add-in:
- Report Message: https://appsource.microsoft.com/product/office/WA104381180
- Report Phishing: https://appsource.microsoft.com/product/office/WA200002469
Note
Although the screenshots in the remaining steps show the Report Message add-in, the steps are identical for the Report Phishing add-in.
- Open the Microsoft commercial marketplace at https://appsource.microsoft.com/marketplace/apps. On the AppSource page, enter Report message in the
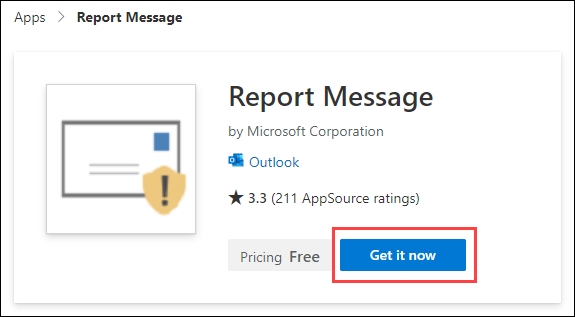
On the details page of the add-in, select Get it now.
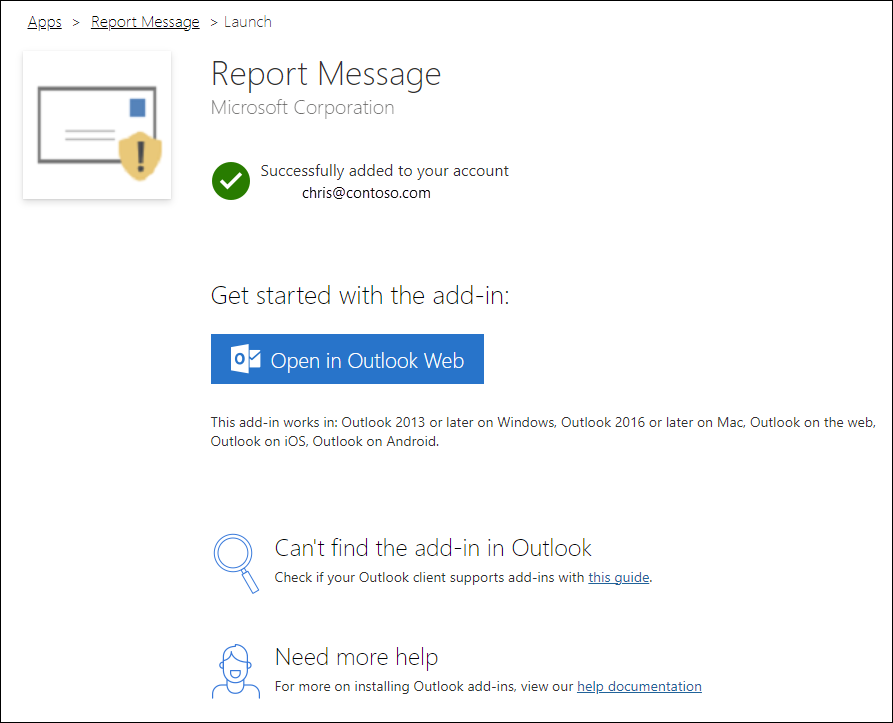
If prompted, sign in with your Microsoft account credentials.
When the installation is finished, you get the following Launch page:


Get the Report Message or the Report Phishing add-ins for yourself in Microsoft 365 GCC or GCC High
Individual users in Microsoft 365 GCC or GCC High can't get the Report Message or Report Phishing add-ins using the Microsoft commercial marketplace.
Use the Report Message or the Report Phishing add-ins
In supported versions of Outlook, use the Report Message or the Report Phishing add-ins to submit false positives and false negatives. For more information, see Report false positives and false negatives in Outlook.
Feedback
Coming soon: Throughout 2024 we will be phasing out GitHub Issues as the feedback mechanism for content and replacing it with a new feedback system. For more information see: https://aka.ms/ContentUserFeedback.
Submit and view feedback for