Set up Microsoft Graph connectors in the Microsoft 365 admin center
This article shows the basic process required to set up Microsoft Graph connectors in the Microsoft 365 admin center. The basic process includes the following steps:
- Add a Microsoft Graph connector in the Microsoft 365 admin center
- Name the connection
- Configure the connection settings
- Select properties
- Manage search permissions
- Assign property labels
- Manage schema
- Refresh settings
- Review connection
- Manage connection results
- Customize the search results page
This article also includes the following information:
Note
The setup process is similar for all the Microsoft Graph connectors but is not exactly the same. In addition to reading this article, be sure to read the connector-specific information for your data source.
Step 1: Add a Microsoft Graph connector in the Microsoft 365 admin center
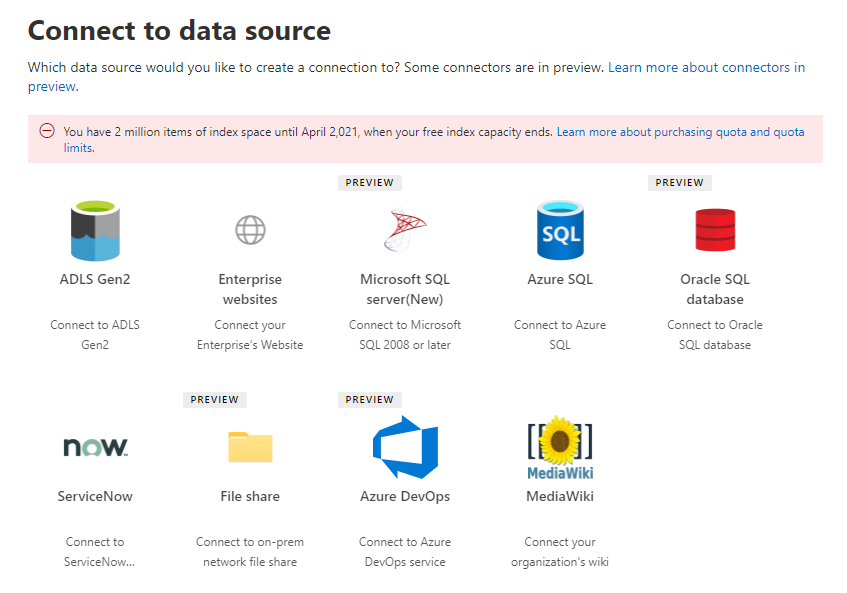
Complete the following steps to configure any of the Microsoft Graph connectors (or click here to directly access the Connector Catalog):
Sign into your admin account in the Microsoft 365 admin center.
In the navigation pane, select Settings, and then select Search & intelligence. Select the Data sources tab.
Select +Add, and then select the data source of your choice from the menu of available options.
Note
You can add a maximum of thirty(30) Microsoft Graph connections to each tenant.
Step 2: Name the connection
Specify these attributes:
- Name (required)
- Connection ID (required)
- Description (optional)
- Select check box (required)
The connection ID creates implicit properties for your connector. It must contain only alphanumeric characters and be a maximum of 32 characters.
Step 3: Configure the connection settings
The process to configure the connection settings varies based on the type of data source. For the type of data source to add to your tenant to complete this step in the setup process, see the Connector-specific information.
To learn more about connecting to an on-premises data source, see Set up the Microsoft Graph Connector Agent.
Step 4: Select properties
You can choose the properties that are indexed by Microsoft Search.
Note
To update the crawled properties after creating a connection, refer manage search schema article.
Step 5: Manage search permissions
Access control lists (ACLs) determine which users in your organization can access each item.
Some connectors such as Microsoft SQL and Azure Data Lake Storage Gen2 natively support Microsoft Entra ID ACLs.
Other connectors such as ServiceNow Knowledge, ServiceNow Catalog, Azure DevOps Work Items, and Salesforce support syncing of non-Azure AD users and groups.
Selecting everyone allows everyone in your organization to see search results from this data source.
Step 6: Assign property labels
You can assign semantic labels to your source properties on the "Assign property labels" page. Labels are well-known tags provided by Microsoft that provide semantic meaning. They allow Microsoft to integrate your connector data into Microsoft 365 experiences such as enhanced search, people cards, intelligent discovery, and more.
The following table lists the currently supported labels and their descriptions.
| Label | Description |
|---|---|
| title | The title for the item that you want shown in search and other experiences |
| url | The target URL of the item in the source system |
| Created By | Name of the person who created the item |
| Last modified by | Name of the person who most recently edited the item |
| Authors | Name of the people who participated/collaborated on the item |
| Created date time | Time when the item was created |
| Last modified date time | Time when the item was most recently edited |
| File name | Name of the file item |
| File extension | Type of file item such as .pdf or .word |
The properties on this page are pre-selected based on your data source, but you can change this selection if there's a different property that is better suited for a particular label.
The label title is the most important label. We strongly recommend that you have a property assigned to this label for your connection to participate in the result cluster experience.
Incorrectly mapping labels causes a deteriorated search experience. It's okay for some labels to not have a property assigned to it.
Step 7: Manage schema
Content property
We recommend that you select a Content Property from the drop-down menu of options, or keep the default if one is present. This property is used for full-text indexing of content, search results page snippet generation, result cluster participation, language detection, HTML/text support, ranking and relevance, and query formulation.
If you select a content property, you have the option of using the system-generated property ResultSnippet when you create your result type. This property serves as a placeholder for the dynamic snippets that are generated from the content property at query time. If you use this property in your result type, snippets are generated in your search results.
Aliases for source properties
You can add aliases to your properties under the "Alias" column on the "Manage schema" page. Aliases are friendly names for your properties. They're used in queries and in the creation of filters. They're also used to normalize source properties from multiple connections such that they have the same name. That way you can create a single filter for a vertical with multiple connections. For more information, see Customize the search results page.
Search schema attributes
You can set the search schema attributes to control the search functionality of each source property. A search schema helps determine what results display on the search results page and what information end users can view and access.
Search schema attributes include options to Query, Search, Retrieve, and Refine. The following table lists each of the attributes that Microsoft Graph connectors support and explains their functions.
| Search schema attribute | Function | Example |
|---|---|---|
| SEARCH | Makes the text content of a property searchable. Property contents are included in the full-text index. | If the property is title, a query for Enterprise returns answers that contain the word Enterprise in any text or title. |
| QUERY | Searches by query for a match for a particular property. The property name can then be specified in the query either programmatically or verbatim. | If the Title property can be queried, then the query Title: Enterprise is supported. |
| RETRIEVE | Only retrievable properties can be used in the result type and displayed in the search result. | |
| REFINE | The refine option can be used as on the Microsoft Search results page. | Users in your organization can filter by URL on the search results page if the refine property is marked during connection setup. |
For all connectors except the File share connector, custom types must be set manually. To activate search capabilities for each field, you need a search schema mapped to a list of properties. The connection configuration assistant automatically selects a search schema based on the set of source properties you choose. You can modify this schema by selecting the check boxes for each property and attribute on the search schema page.

Restrictions and recommendations for search schema settings
The content property is searchable only. After you select it in the dropdown, this property can't be used with the options retrieve or query.
Significant performance issues occur when search results render with the content property. An example is the Text content field for a ServiceNow knowledge-base article.
Only properties marked as retrievable render in the search results and can be used to create modern result types (MRTs).
Only string properties can be marked searchable.
Note
To update the schema after creating a connection, refer manage search schema article.
Step 8: Refresh settings
The refresh interval determines how often your data is synced between the data source and Microsoft Search. Each type of data source has a different set of optimal refresh schedules based on how often data is modified and the type of modifications.
There are two types of refresh intervals, Full refresh and Incremental refresh, but incremental refreshes aren't available for some data sources.
With a full refresh, the search engine processes and indexes the items that have changed in the content source, regardless of previous crawls. A full refresh works best for these situations:
- Detecting deletions of data.
- The incremental refresh found errors, and failed.
- ACLs were modified.
- Crawl rules were modified.
- The schema for the connection has been updated.
With an Incremental refresh, the search engine can process and index only the items that were created or modified since the last successful crawl. As a result, not all the data in the content source is reindexed. Incremental refreshes work best to detect content, metadata, and other updates.
Note
Incremental crawls do not currently support processing of updates to permissions.
Incremental refreshes are much faster than full refreshes because unchanged items aren't processed. However, if you choose to run incremental refreshes, you still need to run full refreshes periodically to maintain correct data sync between the content source and the search index.
Crawl Scheduling
You can configure full and incremental crawls based on the advanced scheduling options present on the Refresh Settings page. Some connectors do not support incremental crawls and the option to configure incremental crawls will not be available for those connectors. For others, the incremental crawl is an optional crawl and enabled by default. A crawl schedule is selected by default for you based on the connector type. This default setting can be changed during connection creation or edited after a connection is published from the "Edit" flow of a connection. You can choose from these fields:
- Recurrence: You can choose to run the crawls every day, week, 2nd week or 4th week.
- Day(s): This option is enabled when you choose to run crawls only on specific days of the week.
- Run once a day check box lets you choose the start time of the crawl in a day. If not selected, the crawls will be repeated in a day by default. You can choose the repeat interval from the dropdown.
- Frequency: Select this option if you want to repeat crawls in a day after certain time intervals. The smallest repeat frequency is 15 minutes, and the largest is 12 hours.
- Starting Time: Select the time when you want the crawl to start.
- Reset: This will reset the schedule to the connector's default schedule.
Here are certain points to note while configuring the crawl schedule:
- If you leave any of the fields empty, or unselected, Graph connectors will pick the best time to start a crawl. For example if you choose a crawl Recurrence as "Day" and do not select the start time, Graph connectors will choose the time based on your last crawl to start the new crawl. If you do not want to specify a start time of the crawl, it is a good practice to let the connector decide when to start the crawl.
- Even if the start time is mentioned, the crawl start may delay by an hour. This can be because of reasons such as network load etc.
- If the previous crawl overruns to the time of the next crawl, we do not stop the ongoing crawl and queue the next crawl. After the ongoing crawl is complete, we run the queued crawl only if it is of a different type (full/incremental) than the previous crawl. For example, if an incremental crawl overruns the next full crawl, we will not suspend the incremental crawl and queue the full crawl. After the completion of the incremental crawl, since the queued crawl is of different type (full), we will start the full crawl immediately.
These are some of the scenarios:
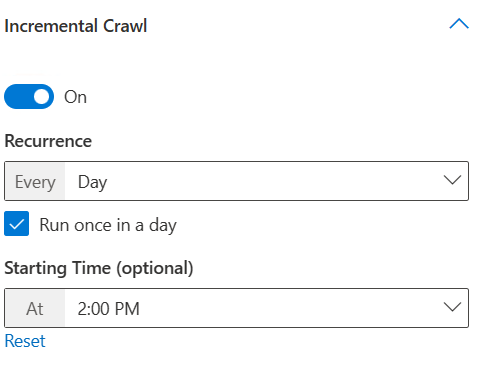
- Run incremental crawl daily after every 15 minutes
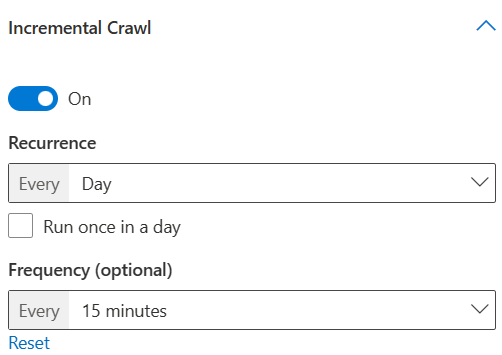
Here selecting the "Run once in a day" checkbox will let you choose the "Start time" to run incremental crawl only once in a day starting at the specified time. However, unselecting it will let you choose the frequency of crawl repetitions in a day. If you want your data to be continuously refreshed, you can choose to run incremental crawls frequently in a day. But if the number of items in data source is large and the crawls tend to be longer, or if frequent updates are not needed for the content, you can choose the incremental crawl to run once in a day.
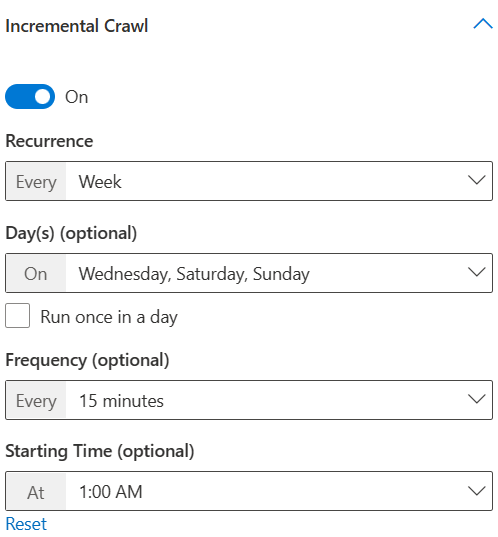
- Run incremental crawl every week on Wednesday, Saturday and Sunday repeating every 15 minutes and starting at 1:00 AM
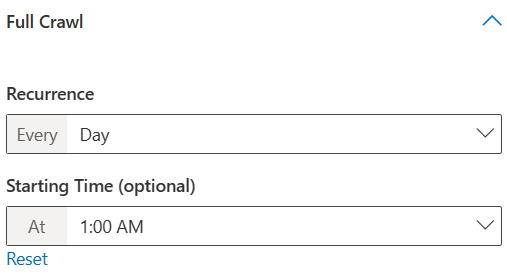
- Run full crawl every day at 1:00 AM
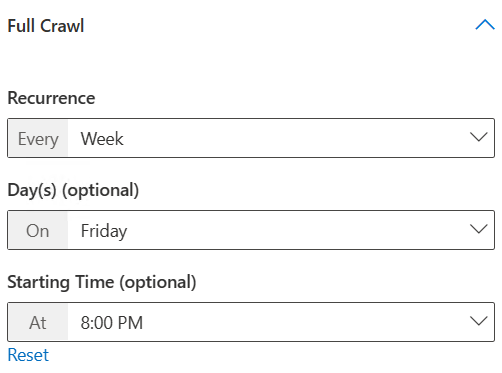
- Run full crawl every week on Friday at 8:00 PM
Step 9: Review connection
You can review your entire configuration and edit settings as needed before completing the connection. Be sure to read the connector-specific information for your data source if you haven't already done so. When you're ready to complete the connection, select Publish.
Staged Rollout
Staged rollout is a feature that allows you to gradually introduce Microsoft Graph connectors to a select group of users in your production environment. Select Publish to limited users to deploy the connector to a limited audience. For more information, see Staged rollout for Microsoft Graph connectors.
Step 10: Manage connection results
Results from your connection will be included in the All vertical by default after it’s published. If you do not want the connection results to be immediately available in All after it has been published, you can opt it out in this step.
Step 11: Customize the search results page
After publishing the connection, you may want to customize the search results page with verticals and result types. To learn about customizing search results, review how to manage verticals and result types.
Step 12: Confirm if the connection setup worked
Go to the list of your published connections under the Connectors tab in the admin center. To learn how to make updates and deletions, see Monitor your connections.
Troubleshooting
Read the connector-specific information for your data source.
Note
Currently, not all connector-specific articles include troubleshooting recommendations.
Limitations
To learn about limitations that apply to all data sources, see the Overview of Microsoft Graph connectors article.
See the connector-specific information for your data source to find out if other limitations apply to that particular Microsoft Graph connector.
Feedback
Coming soon: Throughout 2024 we will be phasing out GitHub Issues as the feedback mechanism for content and replacing it with a new feedback system. For more information see: https://aka.ms/ContentUserFeedback.
Submit and view feedback for