Sideload Office Add-ins to Office on the web
When you sideload an add-in, you're able to install the add-in without first putting it in an add-in catalog. This is useful when testing and developing your add-in because you can see how your add-in will appear and function.
When you sideload an add-in on the web, the add-in's manifest is stored in the browser's local storage, so if you clear the browser's cache, or switch to a different browser, you have to sideload the add-in again.
The steps to sideload an add-in on the web vary based on the following factors.
- The host application (for example, Excel, Word, Outlook)
- What tool created the add-in project (for example, Visual Studio, Yeoman generator for Office Add-ins, or neither)
- Whether you are sideloading to Office on the web with a Microsoft account or with an account in a Microsoft 365 tenant
In the following list, go to the section or article that matches your scenario. Note the first scenario in the list applies to Outlook add-ins. The remaining scenarios apply to non-Outlook add-ins.
If you're sideloading an Outlook add-in, see the article Sideload Outlook add-ins for testing.
If you created the add-in using the Yeoman generator for Office Add-ins, see Sideload a Yeoman-created add-in to Office on the web.
If you created the add-in using Visual Studio, see Sideload an add-in on the web when using Visual Studio.
For all other cases, see one of the following sections.
- If you're sideloading to Office on the web with a Microsoft account, see Manually sideload an add-in to Office on the web.
- If you're sideloading to Office on the web with an account in a Microsoft 365 tenant, see Sideload an add-in to Microsoft 365.
Sideload a Yeoman-created add-in to Office on the web
This process is supported for Excel, OneNote, PowerPoint, and Word only. This example project assumes you're using a project created with the Yeoman generator for Office Add-ins.
Open Office on the web or OneDrive. Using the Create option, make a document in Excel, OneNote, PowerPoint, or Word. In this new document, select Share, select Copy Link, and copy the URL.
Open a Command Prompt as an administrator. In the command line starting at the root directory of your project, run the following command. Replace "{url}" with the URL that you copied.
Note
If you are developing on a Mac, enclose the
{url}in single quotation marks. Do not do this on Windows.npm run start:web -- --document {url}The following are examples.
npm run start:web -- --document https://contoso.sharepoint.com/:t:/g/EZGxP7ksiE5DuxvY638G798BpuhwluxCMfF1WZQj3VYhYQ?e=F4QM1Rnpm run start:web -- --document https://1drv.ms/x/s!jkcH7spkM4EGgcZUgqthk4IK3NOypVw?e=Z6G1qpnpm run start:web -- --document https://contoso-my.sharepoint-df.com/:t:/p/user/EQda453DNTpFnl1bFPhOVR0BwlrzetbXvnaRYii2lDr_oQ?e=RSccmNP
If your add-in doesn't sideload in the document, manually sideload it by following the instructions in Manually sideload add-ins to Office on the web.
The first time you use this method to sideload an add-in on the web, you'll see a dialog asking you to enable developer mode. Select the checkbox for Enable Developer Mode now and select OK.
You'll see a second dialog box, asking if you wish to register an Office Add-in manifest from your computer. Select Yes.
Your add-in is installed. If it has an add-in command, it should appear on either the ribbon or the context menu. If it's a task pane add-in without any add-in commands, the task pane should appear.
Sideload an add-in on the web when using Visual Studio
If you're using Visual Studio to develop your add-in, press F5 to open an Office document in desktop Office, create a blank document, and sideload the add-in. When you want to sideload to Office on the web, the process to sideload is similar to manual sideloading to the web. The only difference is that you must update the value of the SourceURL element, and possibly other elements, in your manifest to include the full URL where the add-in is deployed.
In Visual Studio, choose View > Properties Window.
In the Solution Explorer, select the web project. This displays properties for the project in the Properties window.
In the Properties window, copy the SSL URL.
In the add-in project, open the manifest XML file. Be sure you're editing the source XML. For some project types, Visual Studio will open a visual view of the XML which won't work for the next step.
Search and replace all instances of ~remoteAppUrl/ with the SSL URL you just copied. You'll see several replacements depending on the project type, and the new URLs will appear similar to
https://localhost:44300/Home.html.Save the XML file.
In the Solution Explorer, open the context menu of the web project (for example, by right clicking on it) then choose Debug > Start new instance. This runs the web project without launching Office.
From Office on the web, sideload the add-in using steps described in Manually sideload an add-in to Office on the web.
Manually sideload an add-in to Office on the web
This method doesn't use the command line and can be accomplished using commands only within the host application (such as Excel).
Open Office on the web. Open a document in Excel, OneNote, PowerPoint, or Word.
Select Home > Add-ins, then select More Add-ins.
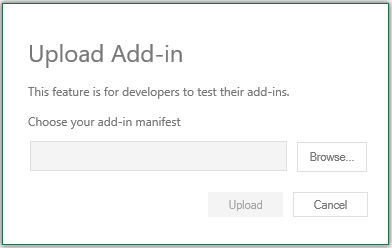
On the Office Add-ins dialog, select the MY ADD-INS tab, choose Manage My Add-ins, and then Upload My Add-in.

Browse to the add-in manifest file, and then select Upload.
Verify that your add-in is installed. For example, if it has an add-in command, it should appear on either the ribbon or the context menu. If it's a task pane add-in that has no add-in commands, the task pane should appear.
Note
To test your Office Add-in with EdgeHTML (Microsoft Edge Legacy), an additional configuration step is required. In a Windows Command Prompt, run the following line: npx office-addin-dev-settings appcontainer EdgeWebView --loopback --yes. This isn't required when Office is using the Chromium-based Edge WebView2. For more information, see Browsers and webview controls used by Office Add-ins.
Important
The office-addin-dev-settings tool is not supported on Mac.
Sideload an add-in to Microsoft 365
Sign in to your Microsoft 365 account.
Open the App Launcher on the left end of the toolbar and select Excel, OneNote, PowerPoint, or Word, and then create a new document.
Follow steps 2 - 5 of the section Manually sideload an add-in to Office on the web.
Remove a sideloaded add-in
To remove an add-in sideloaded to Office on the web, simply clear your browser's cache. If you make changes to your add-in's manifest (for example, update file names of icons or text of add-in commands), you may need to clear your browser's cache and then re-sideload the add-in using the updated manifest. Doing so allows Office on the web to render the add-in as it's described by the updated manifest.
See also
Office Add-ins
Feedback
Coming soon: Throughout 2024 we will be phasing out GitHub Issues as the feedback mechanism for content and replacing it with a new feedback system. For more information see: https://aka.ms/ContentUserFeedback.
Submit and view feedback for