Events
Power BI DataViz World Championships
Feb 14, 4 PM - Mar 31, 4 PM
With 4 chances to enter, you could win a conference package and make it to the LIVE Grand Finale in Las Vegas
Learn moreThis browser is no longer supported.
Upgrade to Microsoft Edge to take advantage of the latest features, security updates, and technical support.
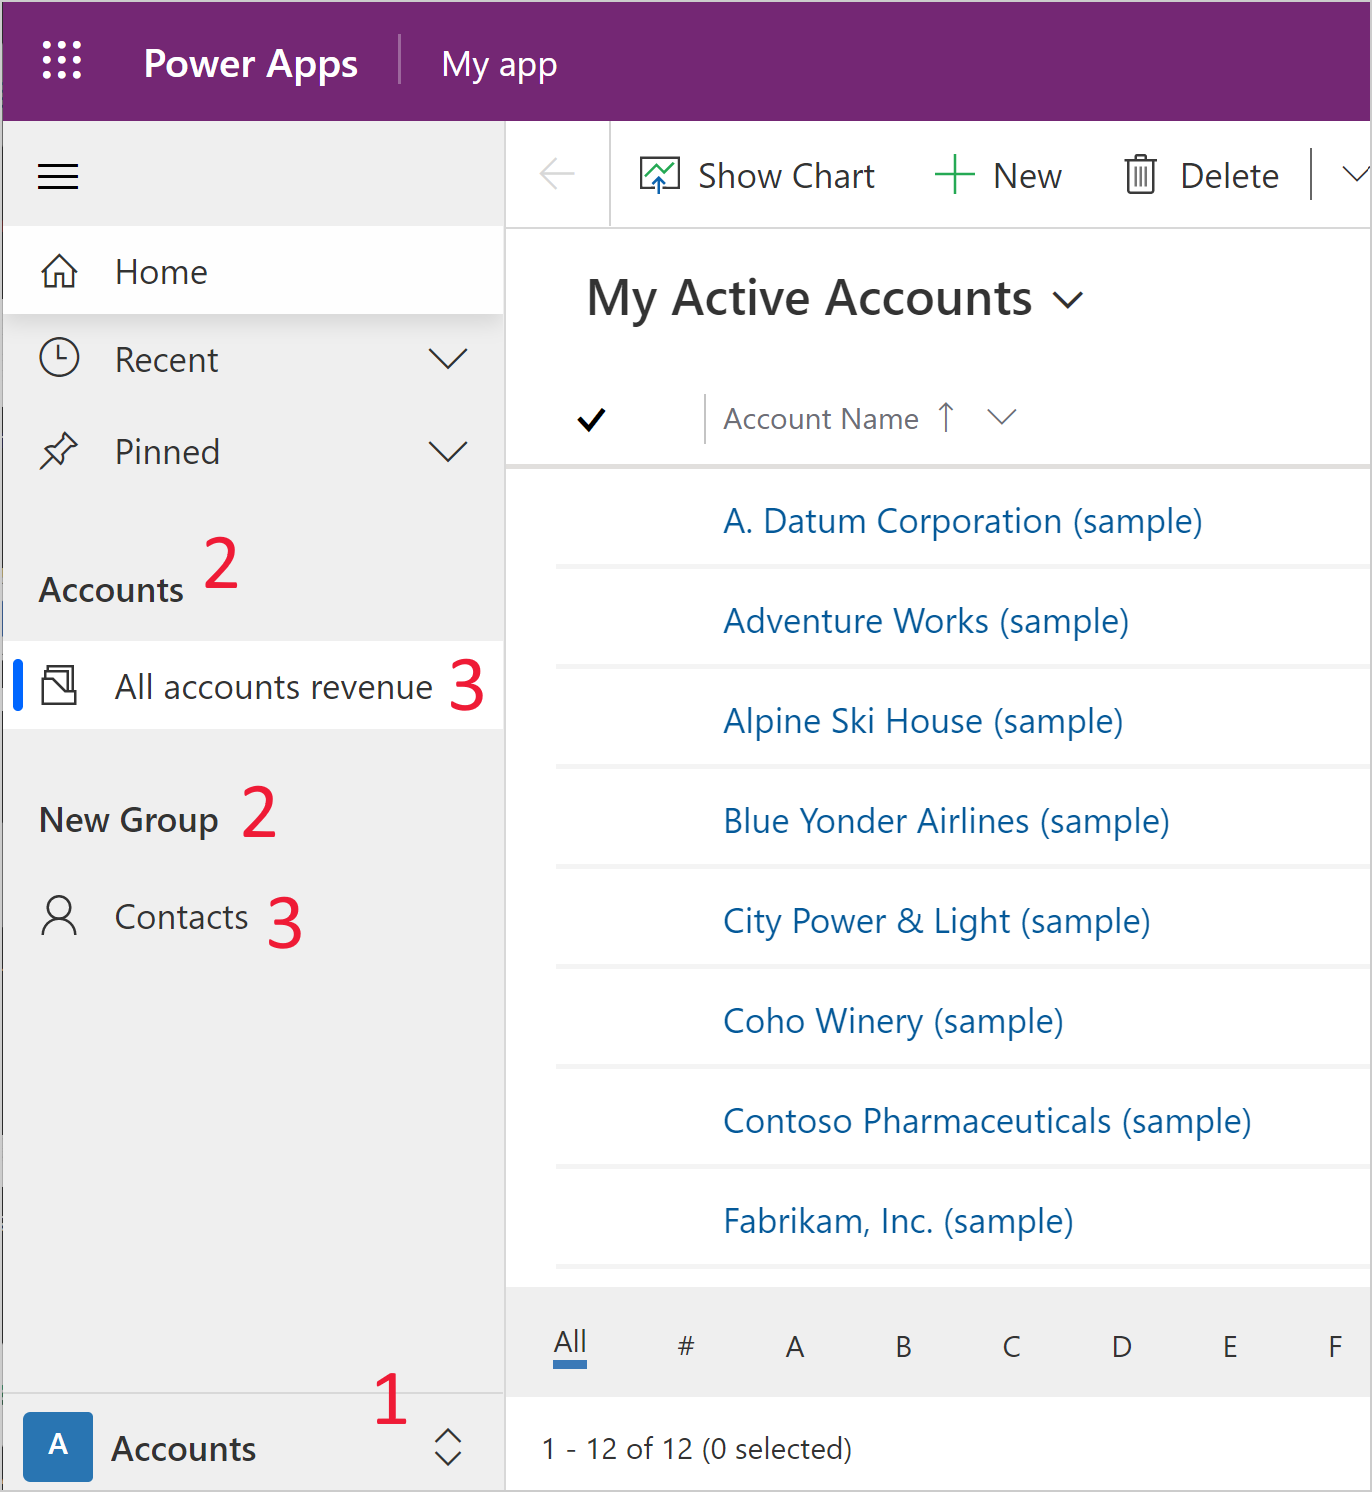
In a model-driven app, there are the three main app runtime navigation components.
Areas - For apps with more than one area, a switch control is displayed in the lower left navigation pane. In the screenshot below, the current area is named Accounts.
Groups - Group names appear as a navigation element in an app with the subarea names within the group listed beneath it. In the screenshot below, one group is named Accounts and one is named New Group.
Pages - Pages appear under the group that they're configured within in the app designer. In the screenshot below, one page is named All accounts revenue and another page is named Contacts.
By default, the ability to create additional areas is disabled. Areas are enabled by default for apps with existing multiple areas.
On the left navigation pane, select Pages.
Select the area switcher under Pages, and then select New area. If the area switcher is missing, you need to enable areas.

Complete the properties pane for the area:
To save your app navigation changes select Save.
To publish the changes and make them available to other users, select Publish.
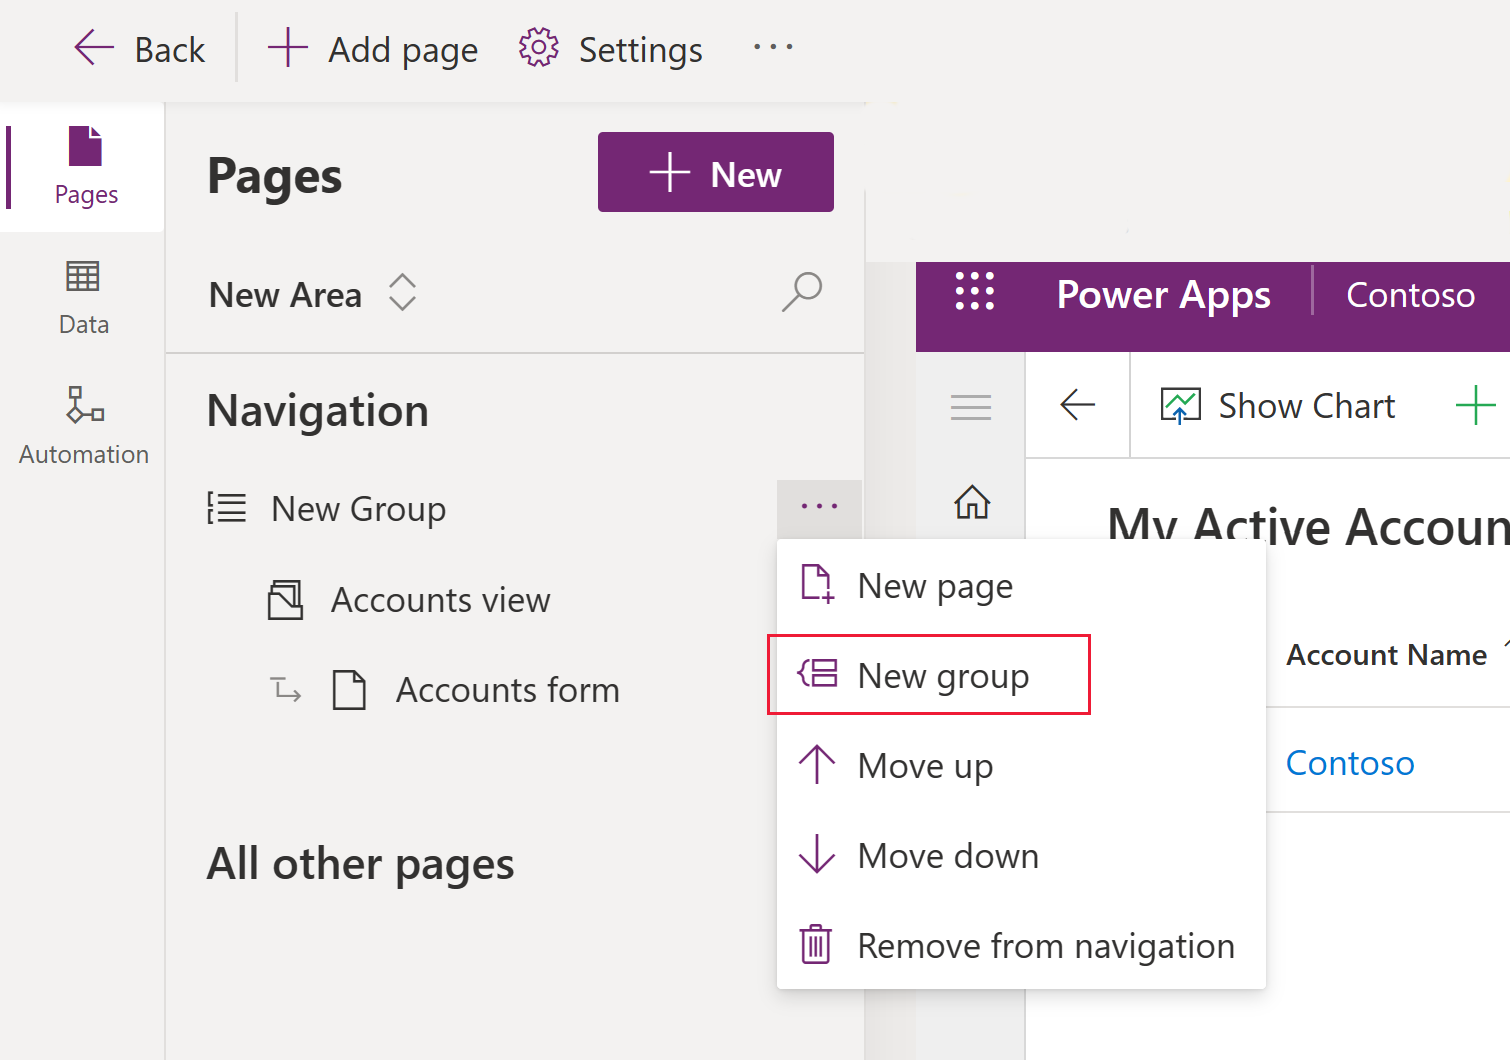
To create a new group, complete the following steps:
On the left navigation pane, select Pages.
Select ... next to Navigation.
Select New group.
Complete the properties pane for the group:
To save your app navigation changes select Save.
To publish the changes and make them available to other users, select Publish.
Pages were formerly called subareas in the app designer. To create a new page, complete the following steps:
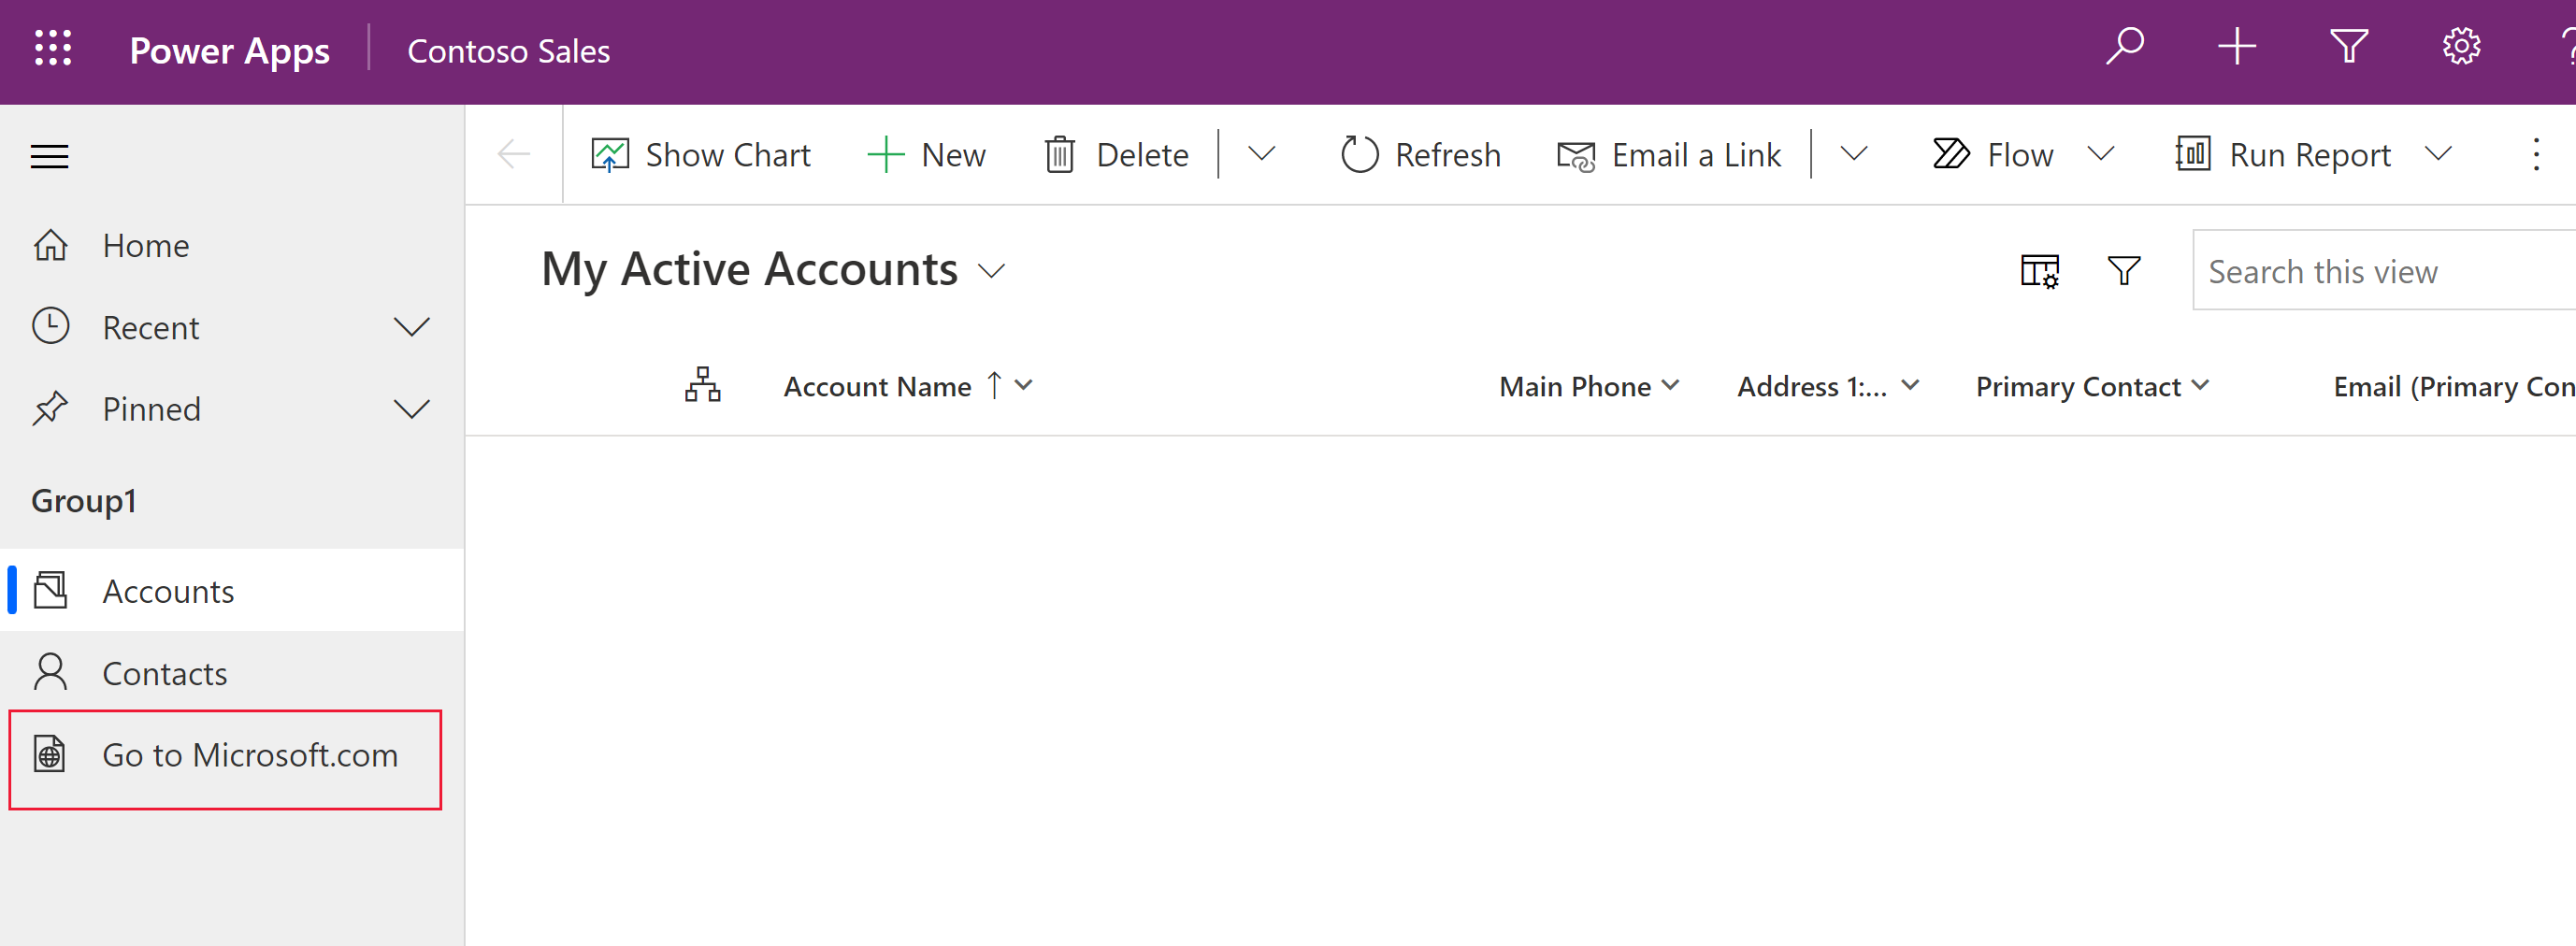
A URL is a type of page in the app navigation. When the user selects the page, the URL opens in a new tab in the web browser.
In the model-driven app designer, select Add page on the command bar.
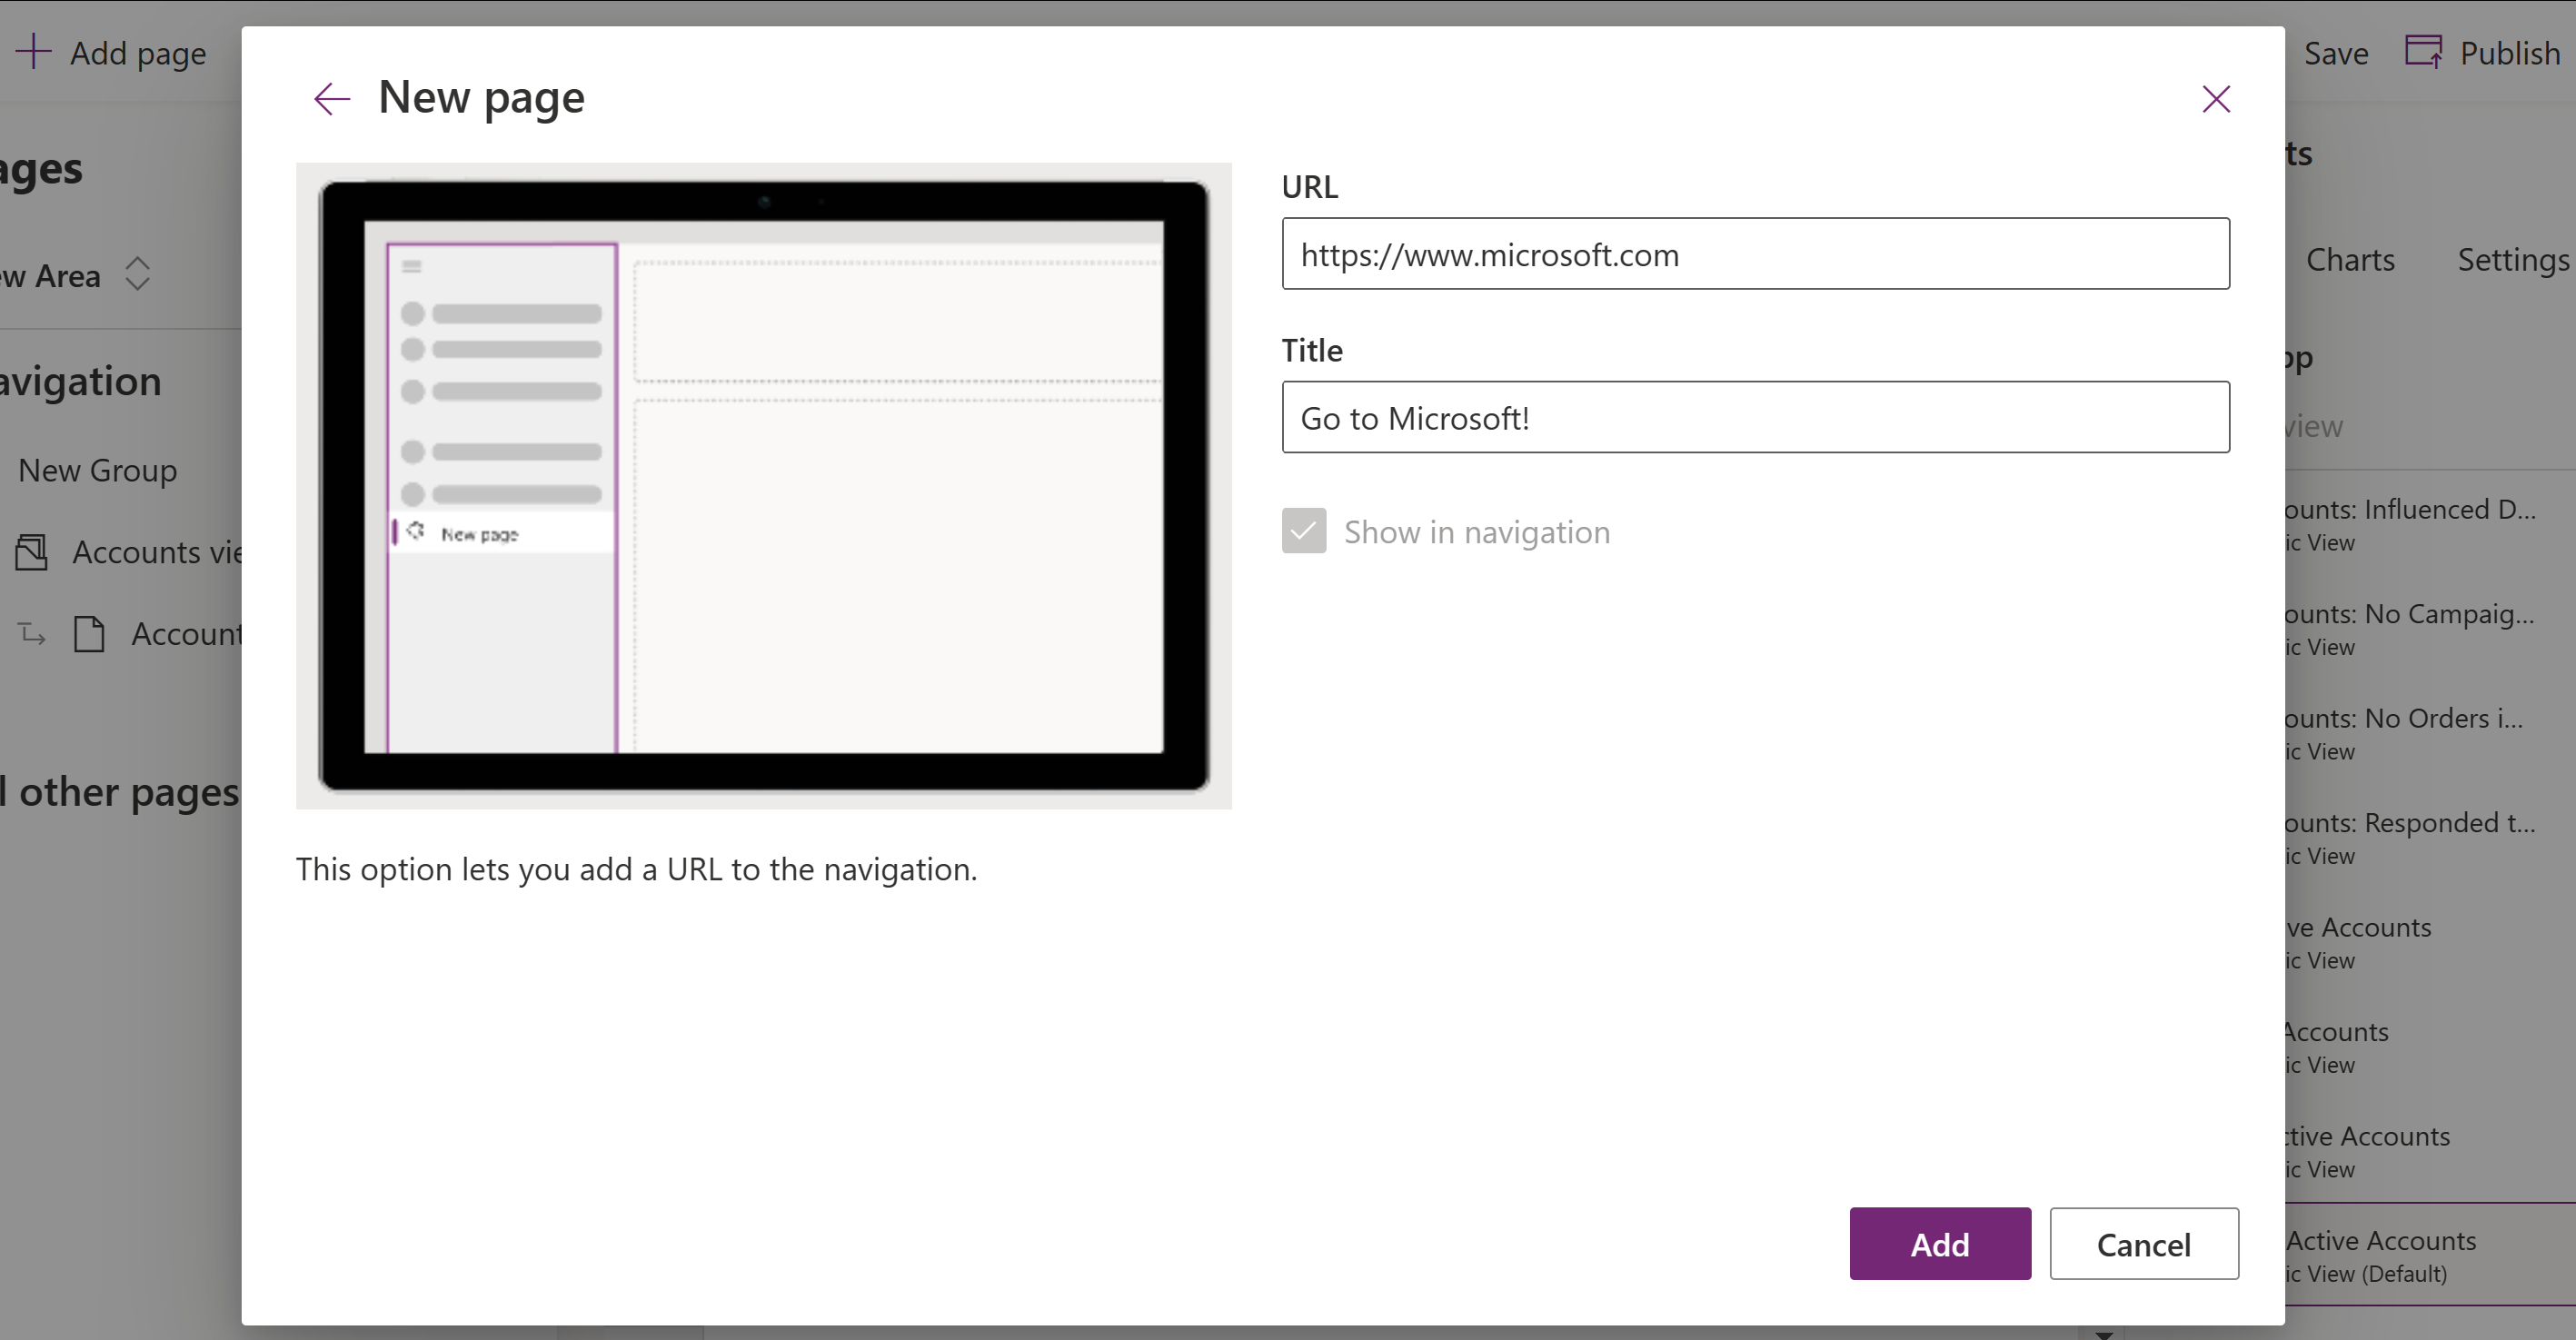
On the New page screen, select URL, and then select Next.
In the properties pane for the URL, enter the following information, and then select Add:
URL: Enter the full URL, such as https://www.microsoft.com.
Title: Enter a title for the URL component.
To save your app navigation changes select Save.
To publish the changes and make them available to other users, select Publish.
Events
Power BI DataViz World Championships
Feb 14, 4 PM - Mar 31, 4 PM
With 4 chances to enter, you could win a conference package and make it to the LIVE Grand Finale in Las Vegas
Learn moreTraining
Learning path
Create a model-driven application in Power Apps - Training
This learning path introduces you to creating a model-driven app in Power Apps that uses Microsoft Dataverse.
Certification
Microsoft Certified: Power Platform Functional Consultant Associate - Certifications
Demonstrate the use of Microsoft Power Platform solutions to simplify, automate, and empower business processes for organizations in the role of a Functional Consultant.