Get started with a Microsoft account
Power Automate enables regular and power users to automate processes on their desktops, saving time and eliminating human error.
Focus on other activities by automating routine and repetitive tasks like organizing or backing up your files and folders. Create flows to extract product prices from websites, save them in Excel spreadsheets, and then email them as attachments. Fill in web forms by supplying information dynamically from your files.
Create automated workflows with step-by-step guidance and an intuitive, no-code interface anyone can use, regardless of their technical expertise. Build flows from a wide variety of premade actions, or record your interactions as steps to be played back anytime.
Using Power Automate with a Microsoft account is available at no extra cost.
Note
Desktop flows built with Power Automate using a Microsoft account are stored automatically on your OneDrive.
Build your first flow
The following example demonstrates the creation of a short flow. The completed flow will prompt you to select a folder. Then, it will copy the folder to another folder named backup on your desktop.
To create the desktop flow:
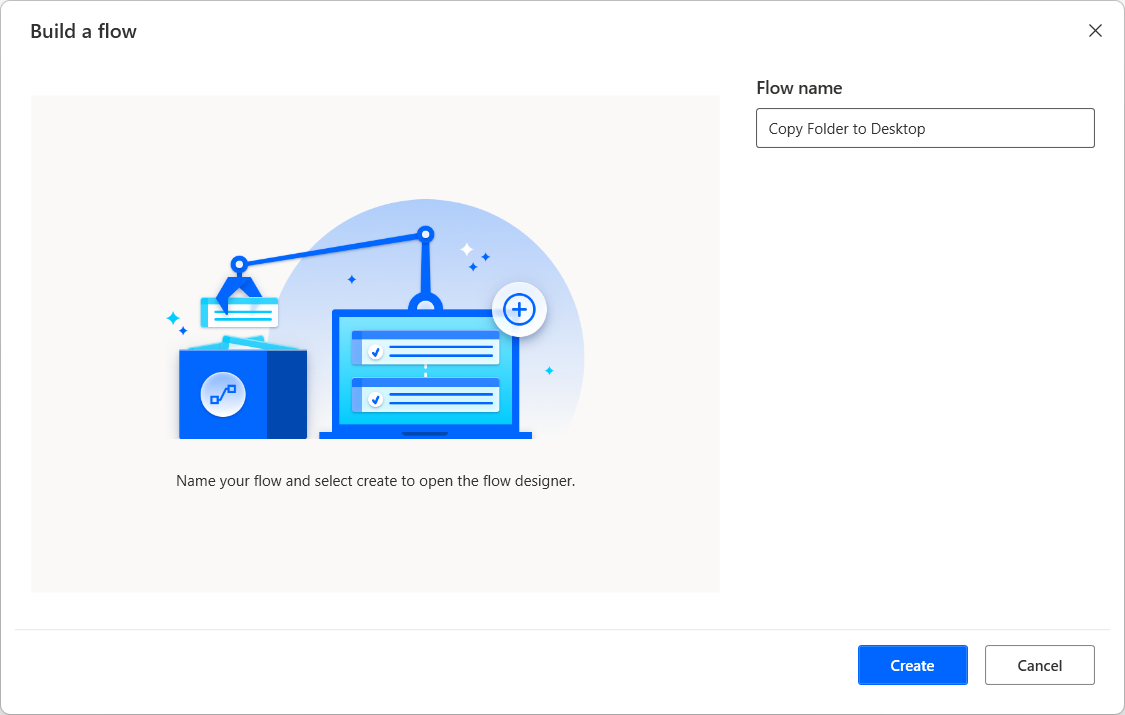
Launch Power Automate and select the New flow button in the console.

Enter a name for the flow and then select Create. In this example, the name of the flow is Copy Folder to Desktop.
When the flow designer opens, go to the actions pane, open the Folders group of actions, and drag the Get special folder action into the workspace.
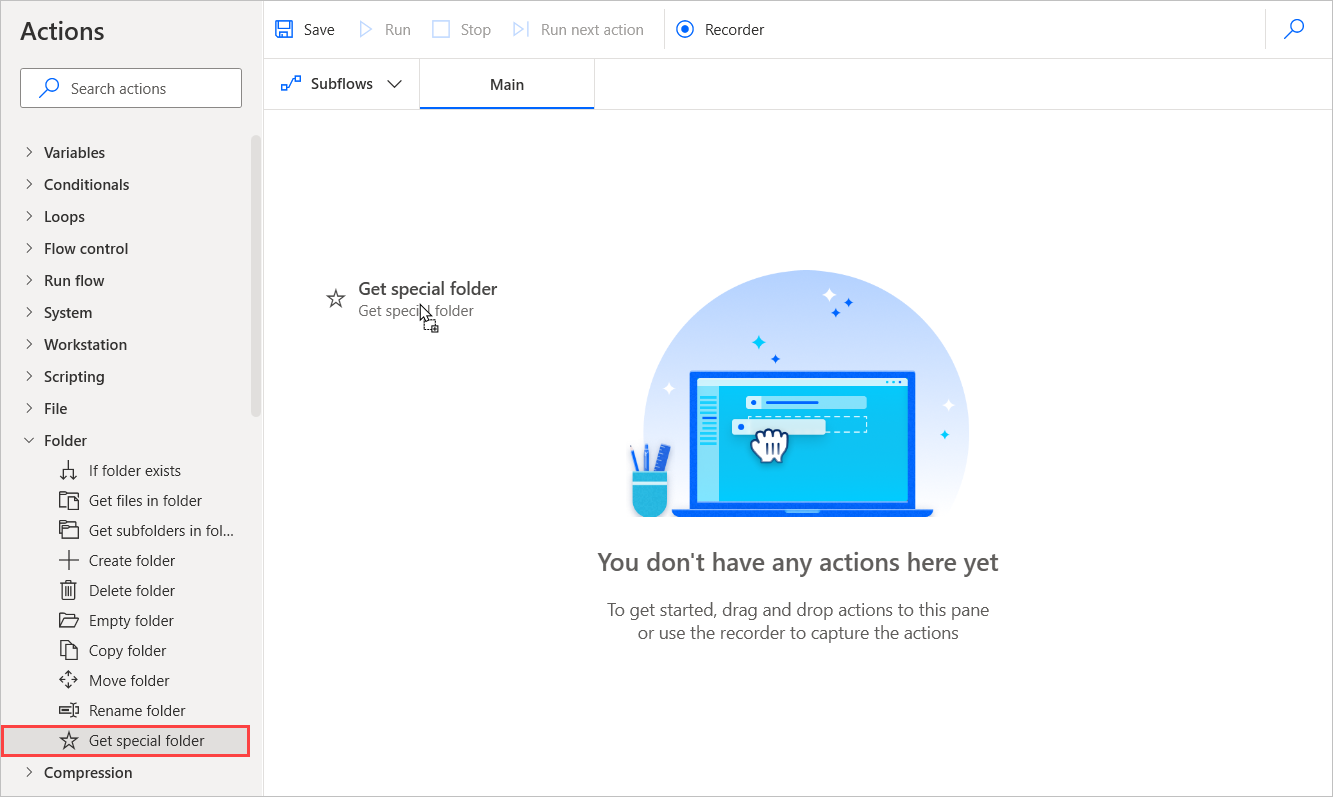
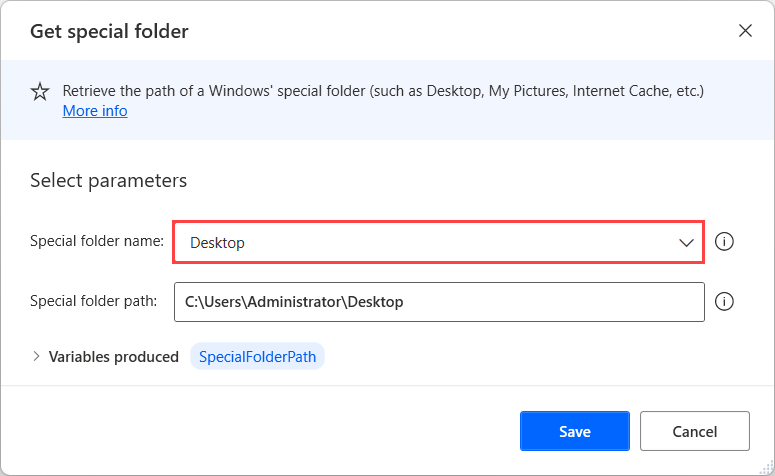
In the modal of action, the desktop folder is selected by default as a parameter. Select Save to add the action to the flow.
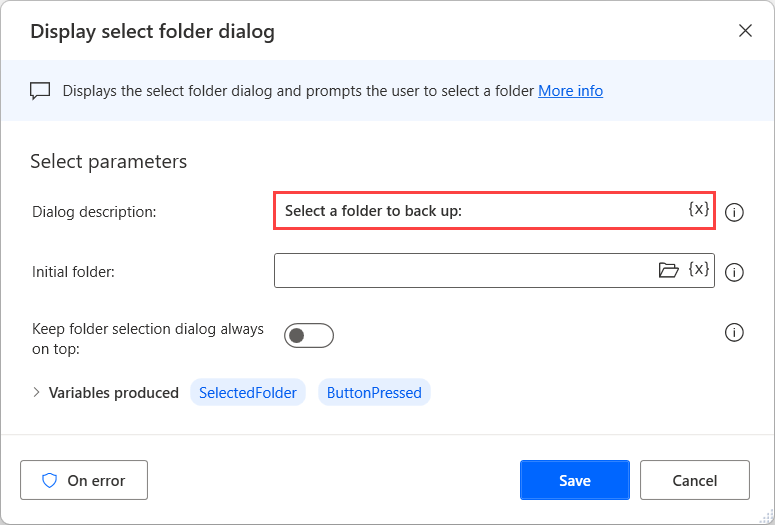
Similarly to step 3, go to the Message boxes group of actions, and add the Display select folder dialog action to the flow. Set Dialog description to Select a folder to back up:.
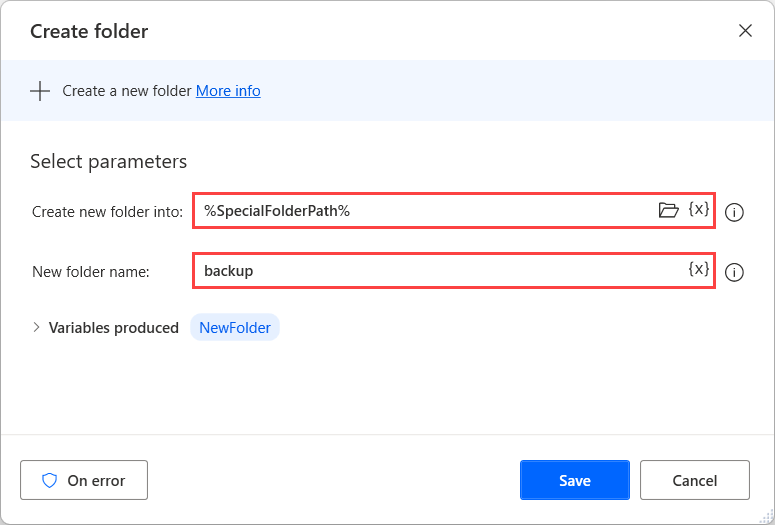
Next, add the Create folder action to the flow. Set the Create new folder into field to %SpecialFolderPath% and New folder name to backup.
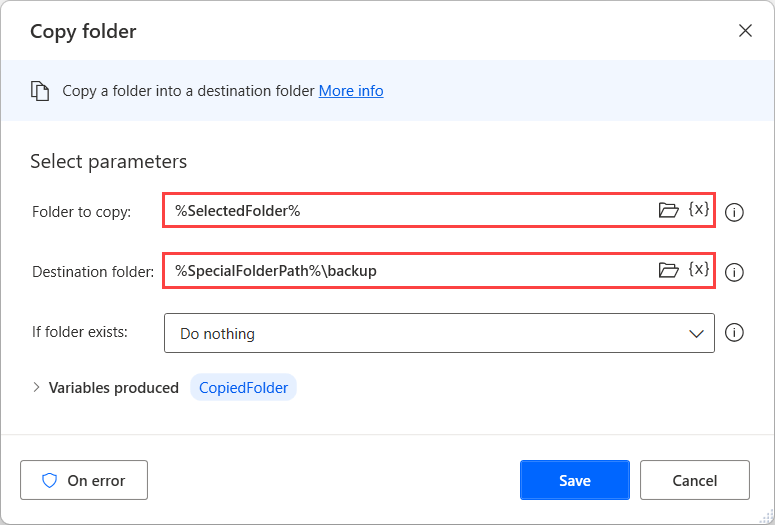
Using the same group of actions, select the Copy folder action. Set Folder to copy to %SelectedFolder%, Destination folder to %SpecialFolderPath%\backup, and add the action to the flow.
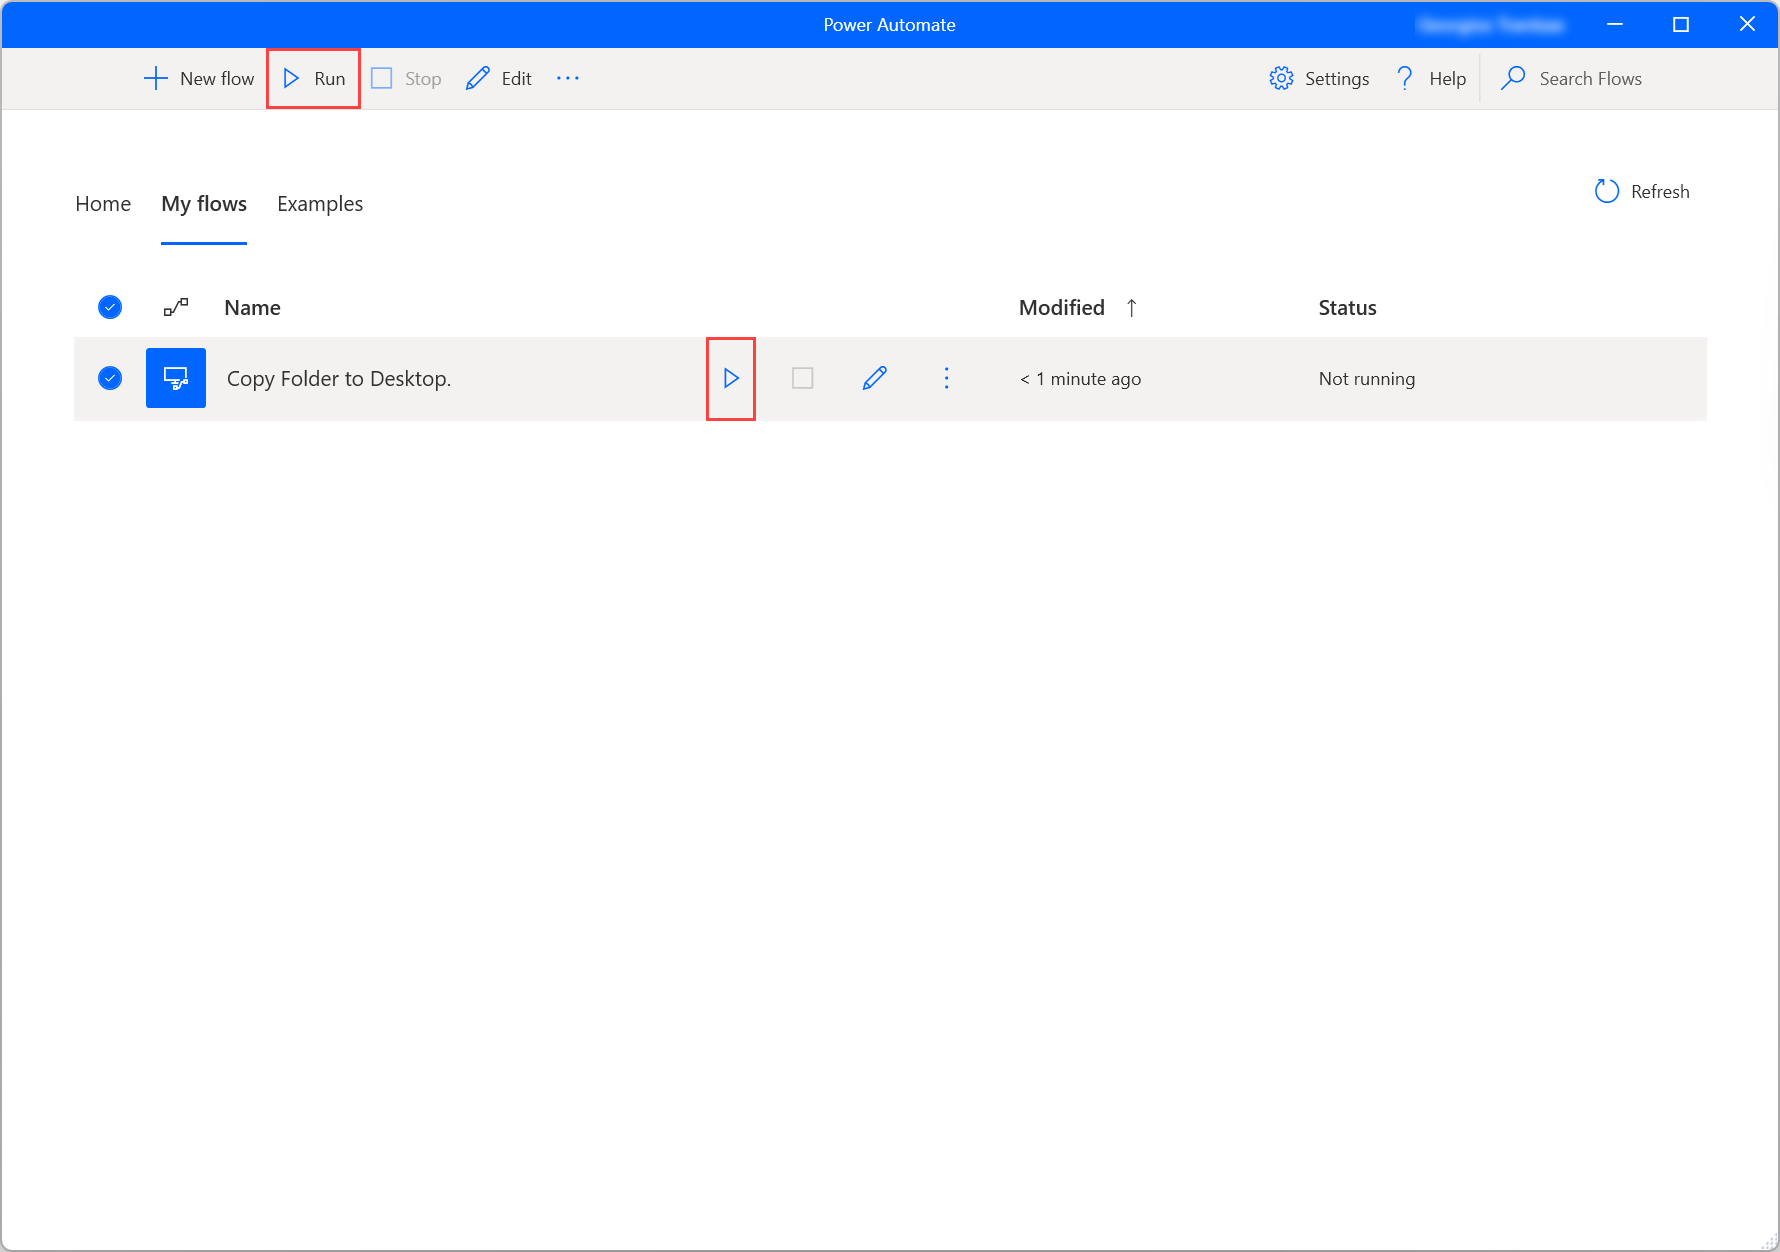
Select Run to run the flow and test that it works as expected.

Close the flow designer and save the flow. Now, you can run the flow from the console.
When prompted for a folder, select any folder you want to copy. The flow will create a new folder on your desktop called backup with the selected folder inside.
Following this example, it's possible to imagine a wide range of scenarios where these actions could be combined with other actions. Among the many possibilities, you could:
- Select a folder on a flash drive to back up to.
- Back up files based on specific criteria.
- Create a file structure for the backup.
- Iterate through a list of folders and only back up selected folders.
Next steps
Learn how to set up Power Automate.
Begin your journey in Power Automate by creating a Power Automate desktop flow.
Get familiar with the console and the flow designer.
Find the list of actions available in the Actions reference.
Feedback
Coming soon: Throughout 2024 we will be phasing out GitHub Issues as the feedback mechanism for content and replacing it with a new feedback system. For more information see: https://aka.ms/ContentUserFeedback.
Submit and view feedback for