Create packages for the Package Deployer tool
Package Deployer lets administrators deploy packages on Microsoft Dataverse instances. A Package Deployer package can consist of any or all of the following:
- One or more Dataverse solution files.
- Flat files or exported configuration data file from the Configuration Migration tool. For more information about the tool, see Move configuration data across instances and organizations with the Configuration Migration tool.
- Custom code that can run before, while, or after the package is deployed to the Dataverse instance.
- HTML content specific to the package that can display at the beginning and end of the deployment process. This content can be useful to provide a description of the solutions and files that are deployed in the package.
Note
There is another package type called a plug-in package. That kind of package is for plug-in dependent assemblies and has no relationship with Package Deployer packages.
Prerequisites
- Ensure that you have all the solution and other files ready that you want to include in the package.
- Visual Studio 2019 or later, or Visual Studio Code.
Process overview
To create a Package Deployer package, perform the following steps.
- Create a Visual Studio or MSBuild project
- Add solutions and other files to the project
- Update provided HTML files (optional)
- Specify configuration values for the package
- Define custom code for the package
- Build and deploy the package
These steps are described in detail in this article.
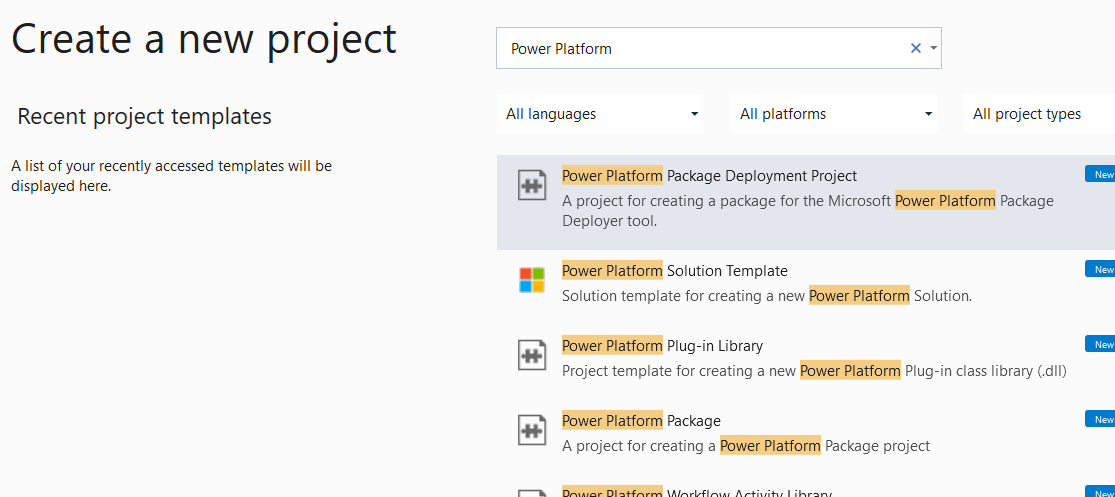
Create a package project
The first step is to create a Visual Studio or MSBuild project for the package. To do that, you must have one of two available tool extensions installed on your development computer. If using Visual Studio Code, install Microsoft Power Platform CLI. Otherwise, if using Visual Studio 2019, install Power Platform tools for Visual Studio. The Power Platform tools extension is currently only available for Visual Studio 2019. However, the created project can be built using Visual Studio 2019 or later.
Select the appropriate tab below to find out how to create a project using the desired tool extension. Both tools output the project in a similar format.
Run the pac package init command to create the initial package. More information: pac package
pac package init help
pac package init --outputDirectory DeploymentPackage
The resulting CLI output contains the folders and files shown below. The "DeploymentPackage" folder name was used here as an example.
C:.
└───DeploymentPackage
    │   DeploymentPackage.csproj
    │   PackageImportExtension.cs
    │
    └───PkgAssets
            ImportConfig.xml
            manifest.ppkg.json
In the created project, find the ImportConfig.xml configuration file in the PkgAssets folder and the PackageImportExtension.cs file. You'll modify these files as described later in this article.
Add package files
After you have created a package project, you can begin adding solutions and other files to that project.
When using the CLI, you can add external packages, solutions, and references to your package project using one of the add subcommands. Enter pac package help to see the list of subcommands. Let's add a solution to our package.
> pac package add-solution help

Commands:
Usage: pac package add-solution --path [--import-order] [--skip-validation] [--publish-workflows-activate-plugins] [--overwrite-unmanaged-customizations] [--import-mode] [--missing-dependency-behavior] [--dependency-overrides]

> cd .\DeploymentPackage\
> pac package add-solution --path ..\TestSolution_1_0_0_1_managed.zip

The item was added successfully.
Configure the package
Define the package configuration by adding information about your package in the ImportConfig.xml file in the project. Open the file for editing. The following list provides information about each parameter and node in the config file.
installsampledata
Trueorfalse. Iftrue, installs sample data to Dataverse instance. This data is the same sample data that you can install from Settings > Data Management area in Dataverse.waitforsampledatatoinstall
True or false. If true, and if installsampledata is also set to true, waits for sample data to install before deploying the package.Note
Ensure that you set installsampledata to true if you are setting
waitforsampledatatoinstallto true.agentdesktopzipfile
File name of the zip file to unpack. If you specify a .zip file name here, it adds a screen during the package deployment process that prompts you to select a location where you want to unpack the contents of the file.This attribute is commonly used for creating packages for Unified Service Desk for Dynamics 365. For information about Unified Service Desk, see Administration Guide for Unified Service Desk 3.0.
agentdesktopexename
Name of the .exe or .msi file in the zip file or a URL to be invoked at the end of the deployment process.This attribute is commonly used for creating packages for Unified Service Desk.
crmmigdataimportfile
File name of the default configuration data file (.zip) exported using the Configuration Migration tool.You can also import a localized version of the configuration data file based on the locale ID (LCID) specified using new runtime settings while running the package deployer. Use the
<cmtdatafile>node (explained later) to specify the localized versions of the configuration data file in a package and then use theOverrideConfigurationDataFileLanguagemethod (explained later) to specify the logic for importing the configuration data file based on the locale ID specified using the runtime settings. You can't import more than one configuration data file using a package at a time.For Dataverse (on-premises), if your configuration data file contains user information, and both the source and target Dataverse instances are on the same Active Directory Domain, user information is imported to the target Dataverse instance. To import user information to a Dataverse (on-premises) instance on a different domain, you must include the user map file (.xml) generated using the Configuration Migration tool in your project, and specify it along with the configuration data file using the
usermapfilenameattribute in the<cmtdatafile>node explained later. User information can't be imported to Dataverse instances.
<solutions>node
Contains an array of<configsolutionfile>nodes that describe the solutions to import. The order of the solutions under this node indicates the order in which the solutions will be imported on the target Dataverse instance.<configsolutionfile>node
Use this node under the<solutions>node to specify the individual solutions and the following information for each solution to be imported:solutionpackagefilename: Specify the .zip file name of your solution. Required.overwriteunmanagedcustomizations: Specify whether to overwrite any unmanaged customizations when importing a solution that already exists in the target Dynamics 365 instance. This attribute is optional, and if you don't specify this attribute, by default the unmanaged customizations in the existing solution are maintained on the target Dynamics 365 instance.publishworkflowsandactivateplugins: Specify whether to publish workflows and activate plug-ins in the target Dynamics 365 instance after the solution is imported. This attribute is optional, and if you don't specify not specify this attribute, by default the workflows are published and plug-ins are activated after the solution is imported on the target Dynamics 365 instance.You can add multiple solution file names in a package by adding as many
<configsolutionfile>nodes. For example, if you want three solution files to be imported, add them as shown below:
<solutions> <configsolutionfile solutionpackagefilename="SampleSolutionOne_1_0_managed.zip" overwriteunmanagedcustomizations="false" publishworkflowsandactivateplugins="true"/> <configsolutionfile solutionpackagefilename="SampleSolutionTwo_1_0_managed.zip" overwriteunmanagedcustomizations="false" publishworkflowsandactivateplugins="true"/> <configsolutionfile solutionpackagefilename="SampleSolutionThree_1_0_managed.zip" /> </solutions><filestoimport>node
Contains an array of<configimportfile>and<zipimportdetails>nodes that are used to describe individual files and zip files respectively to be imported.<configimportfile>node
Use this node under the<configimportfile>node to describe a file to be imported to Dataverse. You can add multiple files in a package by adding as many<configimportfile>nodes.<filestoimport> <configimportfile filename="File.csv" filetype="CSV" associatedmap="FileMap" importtoentity="FileEntity" datadelimiter="" fielddelimiter="comma" enableduplicatedetection="true" isfirstrowheader="true" isrecordownerateam="false" owneruser="" waitforimporttocomplete="true" /> <configimportfile filename="File.zip" filetype="ZIP" associatedmap="FileMapName" importtoentity="FileEntity" datadelimiter="" fielddelimiter="comma" enableduplicatedetection="true" isfirstrowheader="true" isrecordownerateam="false" owneruser="" waitforimporttocomplete="true"/> </filestoimport>Below is a list of supported attributes:
Attribute Description filenameName of the file that contains the import data. If the file is a .zip file, a <zipimportdetails>node must be present with a<zipimportdetail>node for each file in the .zip file.filetypeThis value can be csv, xml, or zip. associatedmapName of the Dataverse import data map to use with this file. If blank, attempts to use the system determined import data map name for this file. importtoentityCan be the name of the exe in the zip file, a URL, or an .msi file to provide a link to invoke at the end of the process. datadelimiterName of the data delimiter used in the import file. Valid values are single quote or double quotes. fielddelimiterName of the field delimiter used in the import file. Valid values are comma or colon, or single quote. enableduplicatedetectionIndicates whether to enable duplicate detections rules on data import. Valid values are true or false. isfirstrowheaderUsed to denote that the first row of the import file contains the field names. Valid values are trueorfalse.isrecordownerateamIndicates whether the owner of the record on import should be a team. Valid values are trueorfalse.owneruserIndicates the user ID that should own the records. The default value is the currently logged in user. waitforimporttocompleteIf true, the system waits for the import to complete before proceeding. Iffalse, it queues the jobs and moves on.<zipimportdetails>node
This node contains an array of<zipimportdetail>nodes that describe the files included in a zip file that is used to import to Dynamics 365.<zipimportdetail>node
Use this node under the<zipimportdetails>node to provide information about an individual file in a .zip file that is specified in the<configimportfile>node.<filestoimport> ... ... <zipimportdetails> <zipimportdetail filename="subfile1.csv" filetype="csv" importtoentity="account" /> <zipimportdetail filename="subfile2.csv" filetype="csv" importtoentity="contact" /> </zipimportdetails> </filestoimport>Supported attributes are listed below:
Attribute Description filenameName of the file that contains the import data. filetypeThis value can be csv or xml. importtoentityCan be the name of the exe in the zip file, a url, or an .msi file to provide a link to invoke at the end of the process. <filesmapstoimport>node
This node contains an array of<configmapimportfile>nodes to import. The order of the map files in this node indicates the order in which they're imported. For information about data maps, see Create data maps for import.<configimportmapfile>node
Use this node under the<filesmapstoimport>node to provide information about an individual map file to import in Dataverse.<filesmapstoimport> <configimportmapfile filename="FileMap.xml" /> </filesmapstoimport><cmtdatafiles>node
This node contains an array of<cmtdatafile>nodes that contains localized version of the configuration data file to be imported.<cmtdatafile>node
Use this node under the<cmtdatafiles>node to specify the localized configuration data files along with locale ID (required) and user information map file (optional). For example:<cmtdatafiles> <cmtdatafile filename="data_1033.zip" lcid="1033" usermapfilename="UserMap.xml" /> <cmtdatafile filename="data_1041.zip" lcid="1041" usermapfilename="" /> </cmtdatafiles>You can define your custom logic in the
OverrideConfigurationDataFileLanguagemethod (explained later) to import a localized configuration data file instead of the default one (specified in crmmigdataimportfile) based on the locale ID (LCID) value specified using the runtime settings (explained later).Select Save All.
The following xml represents the contents of a sample
ImportConfig.xmlfile.<?xml version="1.0" encoding="utf-16"?> <configdatastorage xmlns:xsi="https://www.w3.org/2001/XMLSchema-instance" xmlns:xsd="https://www.w3.org/2001/XMLSchema" installsampledata="true" waitforsampledatatoinstall="true" agentdesktopzipfile="" agentdesktopexename="" crmmigdataimportfile="data_1033.zip"> <solutions> <configsolutionfile solutionpackagefilename="SampleSolutionOne_1_0_managed.zip" overwriteunmanagedcustomizations="false" publishworkflowsandactivateplugins="true"/> <configsolutionfile solutionpackagefilename="SampleSolutionTwo_1_0_managed.zip" overwriteunmanagedcustomizations="false" publishworkflowsandactivateplugins="true"/> <configsolutionfile solutionpackagefilename="SampleSolutionThree_1_0_managed.zip" /> </solutions> <filestoimport> <configimportfile filename="SampleOption.csv" filetype="CSV" associatedmap="SampleOption" importtoentity="sample_option" datadelimiter="" fielddelimiter="comma" enableduplicatedetection="true" isfirstrowheader="true" isrecordownerateam="false" owneruser="" waitforimporttocomplete="false"/> <configimportfile filename="File.zip" filetype="ZIP" associatedmap="FileMapName" importtoentity="FileEntity" datadelimiter="" fielddelimiter="comma" enableduplicatedetection="true" isfirstrowheader="true" isrecordownerateam="false" owneruser="" waitforimporttocomplete="true"/> <zipimportdetails> <zipimportdetail filename="subfile1.csv" filetype="csv" importtoentity="account" /> <zipimportdetail filename="subfile2.csv" filetype="csv" importtoentity="contact" /> </zipimportdetails> </filestoimport> <filesmapstoimport> <configimportmapfile filename="SampleOption.xml" /> </filesmapstoimport> <cmtdatafiles> <cmtdatafile filename="data_1033.zip" lcid="1033" usermapfilename="UserMap.xml" /> <cmtdatafile filename="data_1041.zip" lcid="1041" usermapfilename="" /> </cmtdatafiles> </configdatastorage>
Add custom code
You can add custom code that executes before, during, and after the package is imported into an environment. To do so, follow these instructions.
Edit the PackageTemplate.cs (or PackageImportExtension.cs) file in the project's root folder.
In the C# file, you can:
Enter custom code to execute when the package is initialized in the override method definition of
InitializeCustomExtension.This method can be used to let users use the runtime parameters while running a package. As a developer, you can add support for any runtime parameter to your package by using the RuntimeSettings property as long as you have code to process it based on the user input.
For example, the following sample code enables a runtime parameter called
SkipChecksfor the package that has two possible values: true or false. The sample code checks if the user has specified any runtime parameters while running Package Deployer (either by using the command line or PowerShell), and then accordingly processes the information. If no runtime parameter is specified by the user while running the package, the value of the RuntimeSettings property will be null.public override void InitializeCustomExtension() { // Do nothing. // Validate the state of the runtime settings object. if (RuntimeSettings != null) { PackageLog.Log(string.Format("Runtime Settings populated. Count = {0}", RuntimeSettings.Count)); foreach (var setting in RuntimeSettings) { PackageLog.Log(string.Format("Key={0} | Value={1}", setting.Key, setting.Value.ToString())); } // Check to see if skip checks is present. if ( RuntimeSettings.ContainsKey("SkipChecks") ) { bool bSkipChecks = false; if (bool.TryParse((string)RuntimeSettings["SkipChecks"], out bSkipChecks)) OverrideDataImportSafetyChecks = bSkipChecks; } } else PackageLog.Log("Runtime Settings not populated"); }This code enables the administrator use the command line or the Import-CrmPackage cmdlet to specify whether to skip the safety checks while running the Package Deployer tool to import the package. More information: Deploy packages using Package Deployer and Windows PowerShell
Enter custom code to execute before the solutions are imported in the override method definition of
PreSolutionImportto specify whether to maintain or overwrite customizations while updating the specified solution in a target Dataverse instance, and whether to automatically activate plug-ins and workflows.Use the override method definition of
RunSolutionUpgradeMigrationStepto perform data transformation or upgrade between two versions of a solution This method is called only if the solution you're importing is already present in the target Dataverse instance.This function expects the following parameters:
Parameter Description solutionNameName of the solution oldVersionVersion number of the old solution newVersionVersion number of the new solution oldSolutionIdGUID of the old solution. newSolutionIdGUID of the new solution. Enter custom code to execute before the solution import completes in the override definition of the
BeforeImportStagemethod. The sample data and some flat files for solutions specified in theImportConfig.xmlfile are imported before the solution import completes.Override the currently selected language for configuration data import using the override method definition of
OverrideConfigurationDataFileLanguage. If the specified locale ID (LCID) of the specified language isn't found in the list of available languages in the package, the default data file is imported.You specify the available languages for the configuration data in the
<cmtdatafiles>node in theImportConfig.xmlfile. The default configuration data import file is specified in thecrmmigdataimportfileattribute in theImportConfig.xmlfile.Skipping data checks (OverrideDataImportSafetyChecks = true) can be effective here if you're sure that the target Dataverse instance doesn't contain any data.
Enter custom code to execute after the import completes in the override definition of
AfterPrimaryImport>method. The remaining flat files that weren't imported earlier, before the solution import started, are imported now.Change the default name of your package folder to the package name that you want. To do so, rename the
PkgFolder(or PkgAssets) folder in the Solution Explorer pane, and then edit the return value under theGetImportPackageDataFolderNameproperty.public override string GetImportPackageDataFolderName { get { // WARNING this value directly correlates to the folder name in the Solution Explorer where the ImportConfig.xml and sub content is located. // Changing this name requires that you also change the correlating name in the Solution Explorer return "PkgFolder"; } }Change the package name by editing the return value under the
GetNameOfImportproperty.public override string GetNameOfImport(bool plural) { return "Package Short Name"; }This returned value is the name of your package that appears on the package selection page in the Dynamics 365 Package Deployer wizard.
Change the package description by editing the return value under the
GetImportPackageDescriptionTextproperty.public override string GetImportPackageDescriptionText { get { return "Package Description"; } }This returned value is the package description that appears alongside the package name on the package selection page in the Package Deployer wizard.
Change the package long name by editing the return value under the
GetLongNameOfImportproperty.public override string GetLongNameOfImport { get { return "Package Long Name"; } }The package long name appears on the next page after you have selected the package to install.
Additionally, the following function and variables are available to the package:
Name Type Description CreateProgressItem(String) Function Used to create a new progress item in the user interface (UI). RaiseUpdateEvent(String, ProgressPanelItemStatus) Function Used to update the progress created by the call to CreateProgressItem(String).
ProgressPanelItemStatus is an enum with the following values:
Working = 0
Complete = 1
Failed = 2
Warning = 3
Unknown = 4RaiseFailEvent(String, Exception) Function Used to fail the current status import with an exception message. IsRoleAssoicatedWithTeam(Guid, Guid) Function Used to determine if a role is associated with a specified team. IsWorkflowActive(Guid) Function Used to determine if a specified workflow is active. PackageLog Class Pointer A pointer to the initialized logging interface for the package. This interface is used by a package to log messages and exceptions to the package log file. RootControlDispatcher Property A dispatcher interface used to allow your control to render its own UI during package deployment. Use this interface to wrap any UI elements or commands. It's important to check this variable for null values before using it as it might not be set to a value. CrmSvc Property A pointer to CrmServiceClient class that allows for a package to address Dynamics 365 from within the package. Use this pointer to execute SDK methods and other actions in the overridden methods. DataImportBypass Property Specify whether Dynamics 365 Package Deployer skips all data import operations such as importing Dataverse sample data, flat file data, and data exported from the Configuration Migration tool. Specify true or false. Default is false.OverrideDataImportSafetyChecks Property Specify whether Dynamics 365 Package Deployer bypasses some of its safety checks, which helps in improving the import performance. Specify trueorfalse. Default isfalse.
You should set this property totrueonly if the target Dataverse instance doesn't contain any data.Save your project. The next step is to build the package.
Build and deploy
The following sections describe how to build and deploy a package.
Build
Building your package is described below depending on which tool you're using.
To build a package created with the CLI, you could load the .csproj file into Visual Studio, but instead we're going to use the dotnet command and MSBuild. The example below assumes the working directory contains the *.csproj file.
> dotnet publish

DeploymentPackage -> C:\Users\peter\Downloads\DeploymentPackage\bin\Debug\DeploymentPackage.1.0.0.pdpkg.zip
You can optionally look at the details of the built package.
> pac package show --package .\bin\Debug\DeploymentPackage.1.0.0.pdpkg.zip
Your package is made of the following files under the <Project>\Bin\Debug folder.
- <PackageName> folder: The folder name is the same as the one you changed for your package folder name in step 2.g of this section Add custom code. This folder contains all solutions, configuration data, flat files, and the contents for your package.
Note
You may see a .NET folder (e.g, net472) containing a pdpublish folder. Your DLL and other project files are in that pdpublish folder.
- <PackageName>.dll: The assembly contains the custom code for your package. By default, the name of the assembly is the same as your project name.
Deploy
After you create a package, you can deploy it on the Dataverse instance by using the Package Deployer tool, Windows PowerShell, or a CLI command.
To deploy using the Package Deployer tool, first download the tool as described in Dataverse development tools. Next, follow the detailed information on package deployment in the article Deploy packages using Package Deployer or Windows PowerShell.
To deploy using the CLI, use the
pac package deploycommand.> pac package deploy --package .\bin\Debug\DeploymentPackage.1.0.0.pdpkg.zipNote
To deploy a package to a target environment using the CLI, you must first set up an authentication profile and select an organization. More information: pac auth create, pac org select
Best practices
Listed below are a few best practice tips to follow when working with Package Deployer packages.
Creating packages
When creating packages, developers must:
- Ensure that package assemblies are signed.
Deploying packages
When deploying packages, Dataverse administrators must:
- Insist on signed package assemblies so that you can track an assembly back to its source.
- Test the package on a preproduction instance, preferably a mirror image of the production instance, before running it on a production instance.
- Back up the production instance before deploying the package.
See also
Feedback
Coming soon: Throughout 2024 we will be phasing out GitHub Issues as the feedback mechanism for content and replacing it with a new feedback system. For more information see: https://aka.ms/ContentUserFeedback.
Submit and view feedback for