Deployment configuration guide
The ALM Accelerator for Power Platform uses configuration files in JSON format to automate the deployment of your solutions. They set connection references, environment variables, and permissions, share canvas apps, and update ownership of solution components such as Power Automate flows when solutions are deployed to downstream environments.
The configuration files in this article allow you to configure items that are specific to the environment to which a solution is being deployed. The configuration files you need, and thus the steps you need to follow in this article, depend on the components your solution pipelines deploy. For instance, if your solution contains only Dataverse tables and model-driven apps and no per-environment configuration or data is needed, you can skip some of these steps.
We've provided example configuration files in the ALMAcceleratorSampleSolution deployment settings and custom deployment settings.
Before you start
This article is a step-by-step guide to setting up deployment configuration files manually. It provides details about and context for actions that are performed by the ALM Accelerator app and pipelines as a reference for administrators who want to know the specifics of each step in the process.
We recommend that you configure deployment settings in the ALM Accelerator app, however.
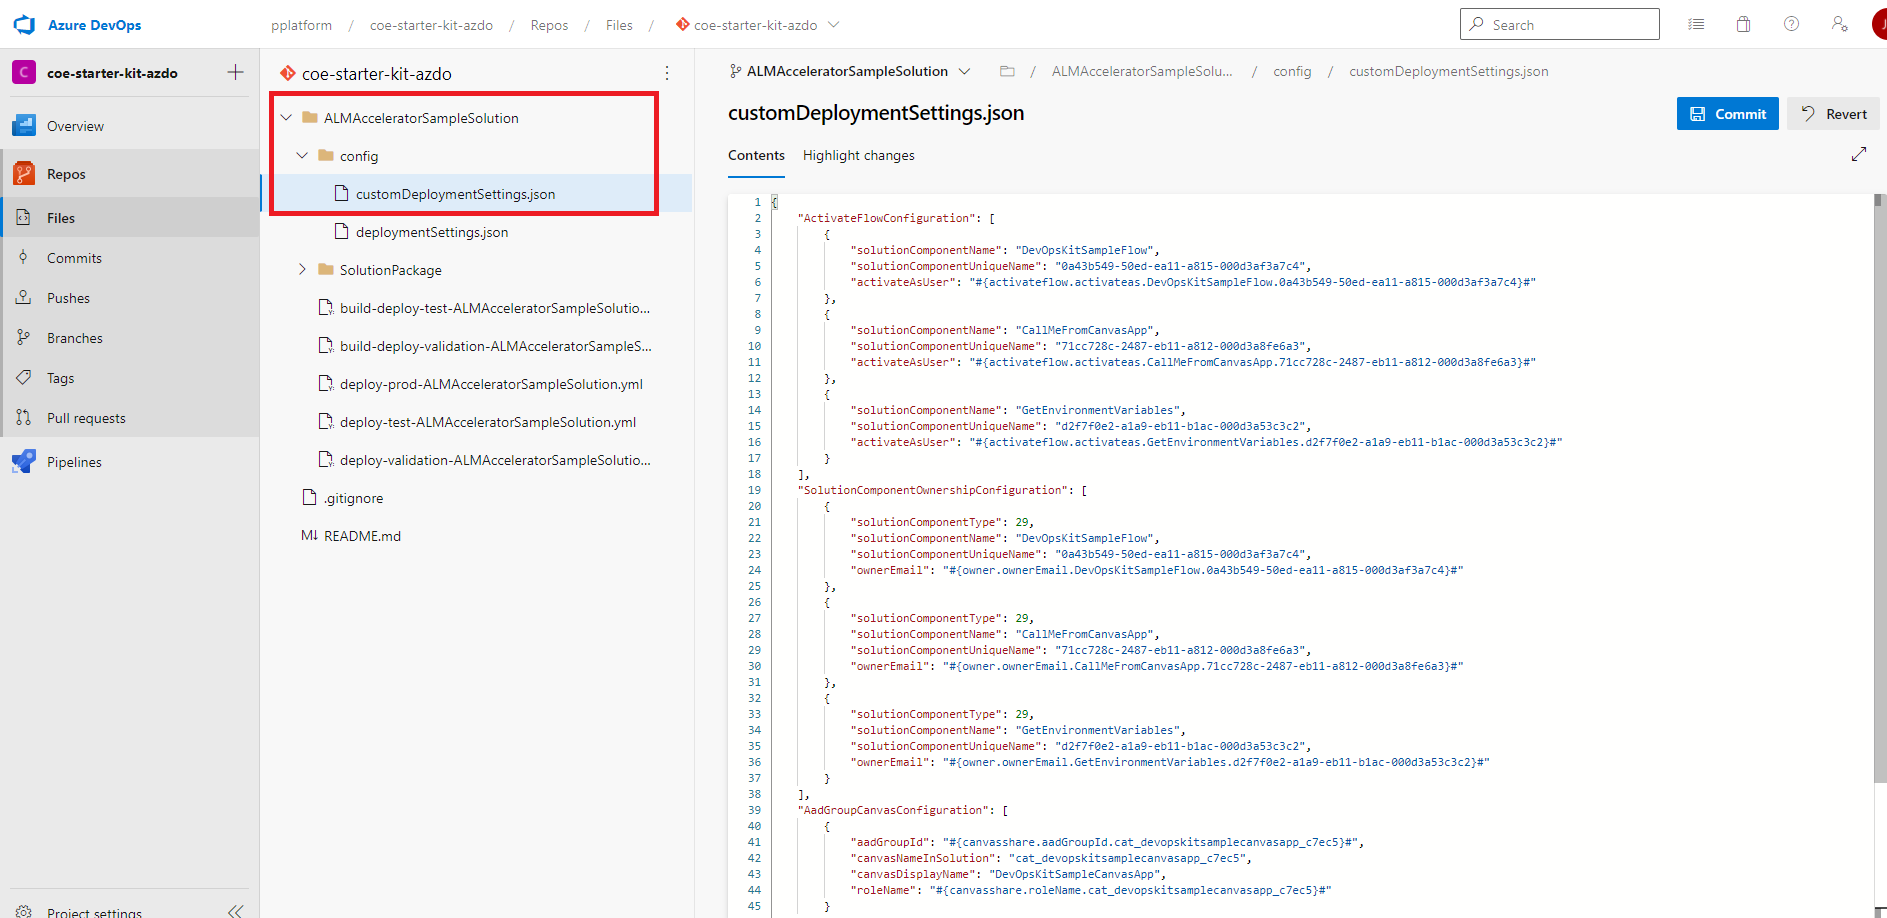
Create a deployment settings JSON file
When the customDeploymentSettings.json file is stored in the root of the config directory, the same configuration applies to all environments. Assuming you're using file transformation or token replacement pipeline tasks for information that's specific to particular environments, you can specify per-environment values in your pipeline variables.
However, you can also create environment-specific customDeploymentSettings.json files. Store them in subdirectories of the config directory, named for your environments. The directory name must match the EnvironmentName variable you created when you set up your pipeline for the validate, test, and production environments. If no environment-specific deployment settings JSON and directory exist, the pipelines revert to the configuration in the root of the config directory.
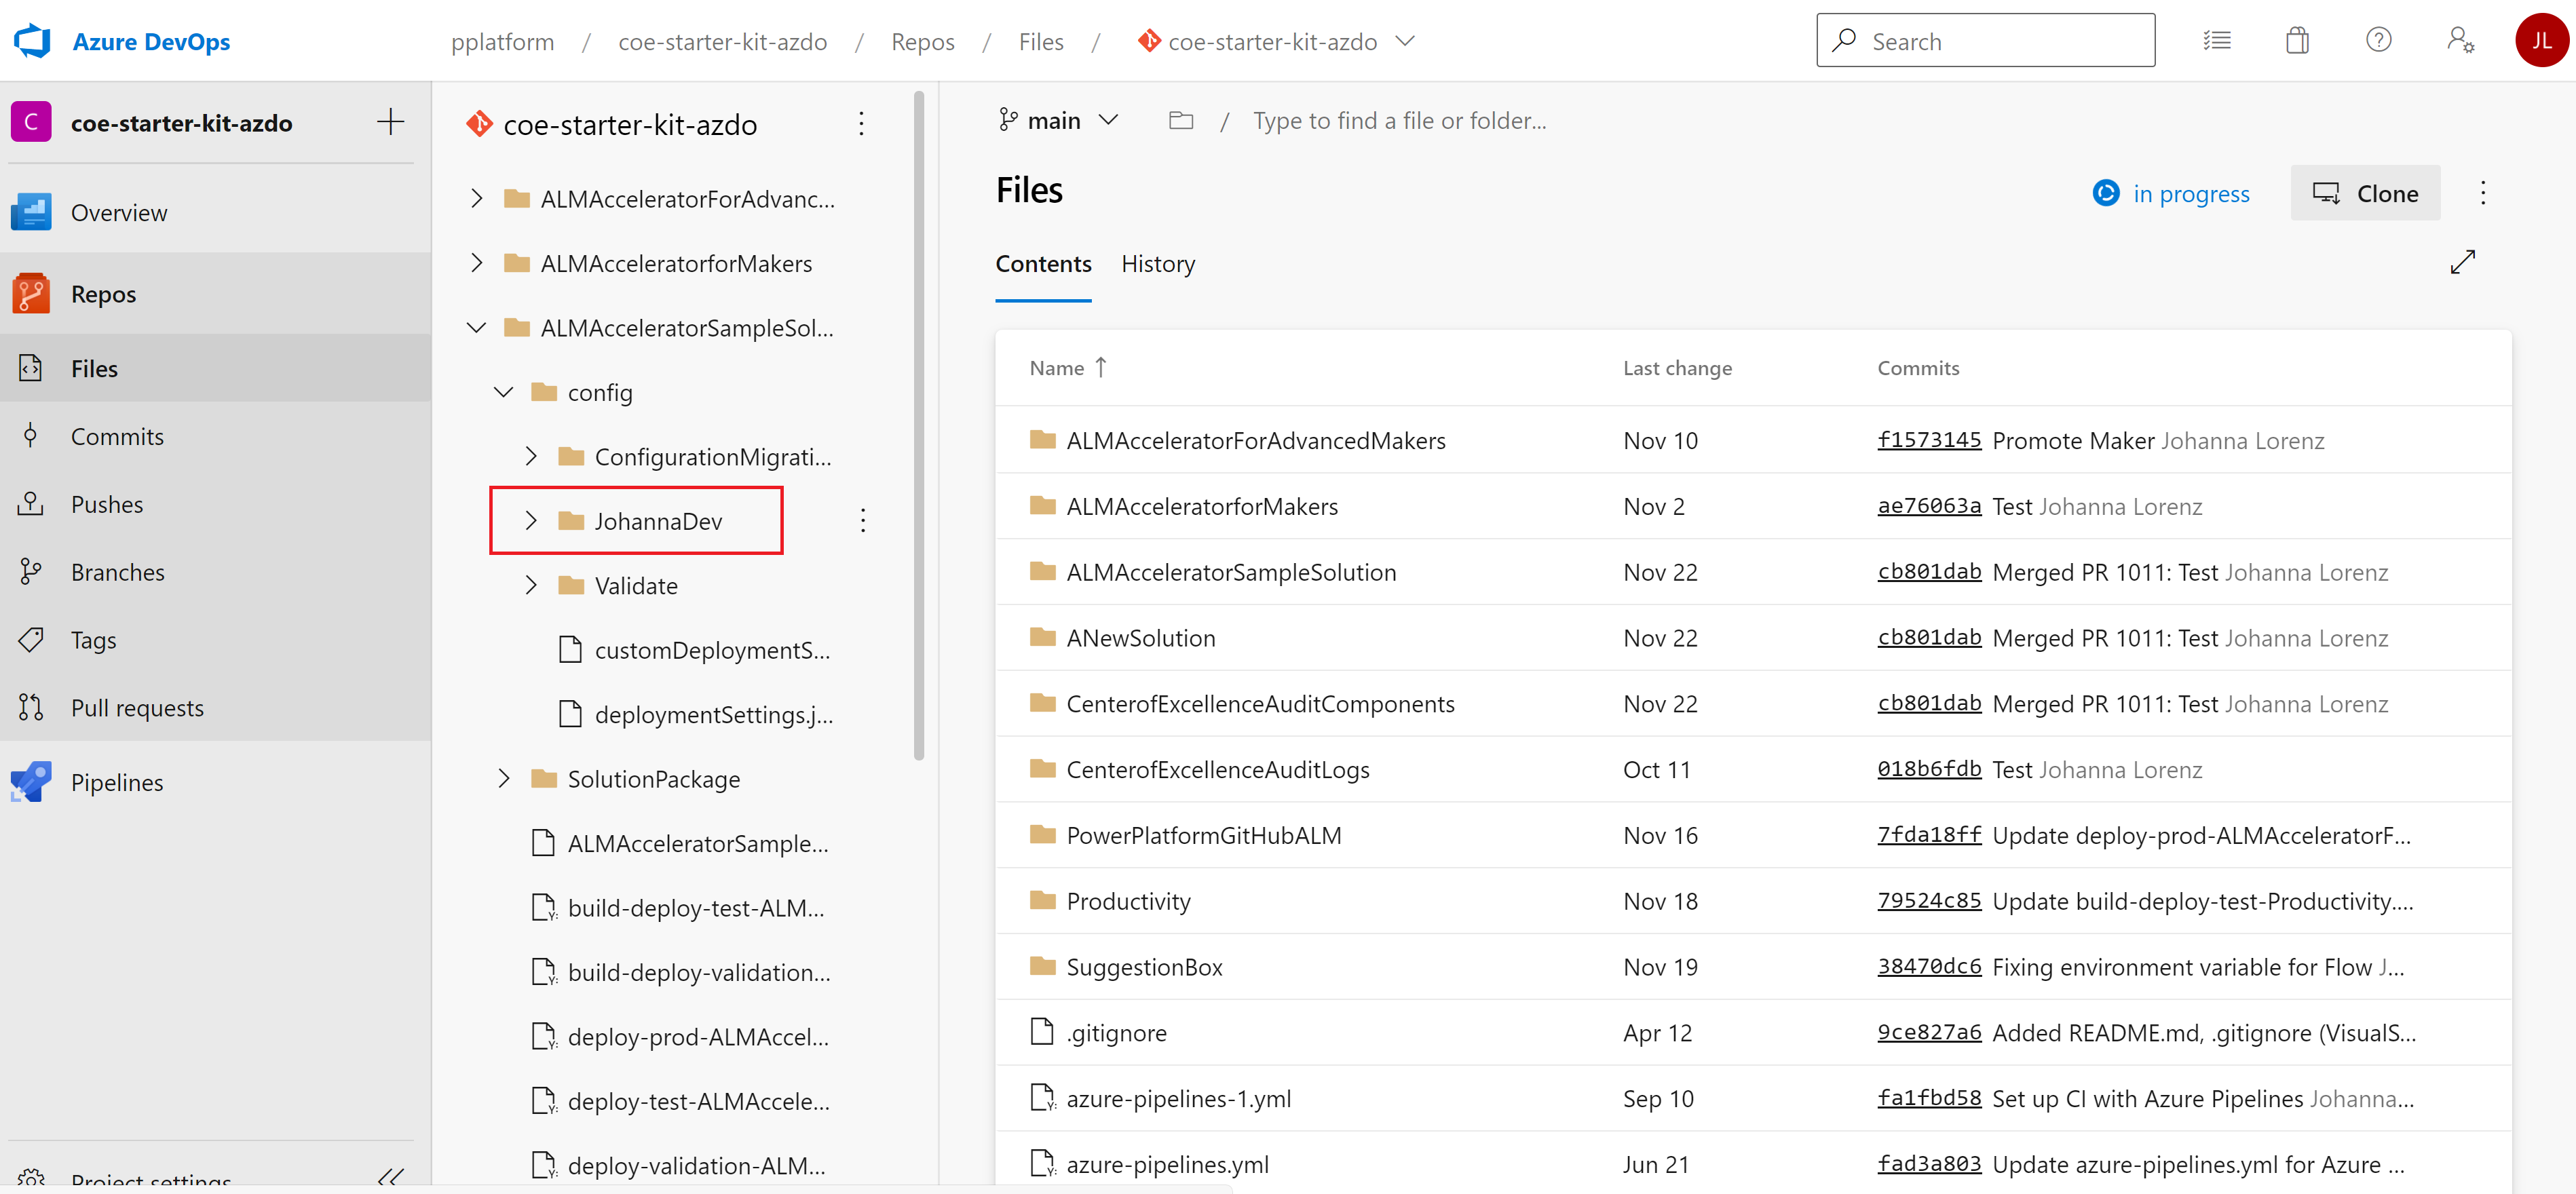
You can also create user-specific configuration files like the JohannaDev directory in the preceding image. Developers can use them to choose a specific configuration when they import unmanaged solutions from source control.
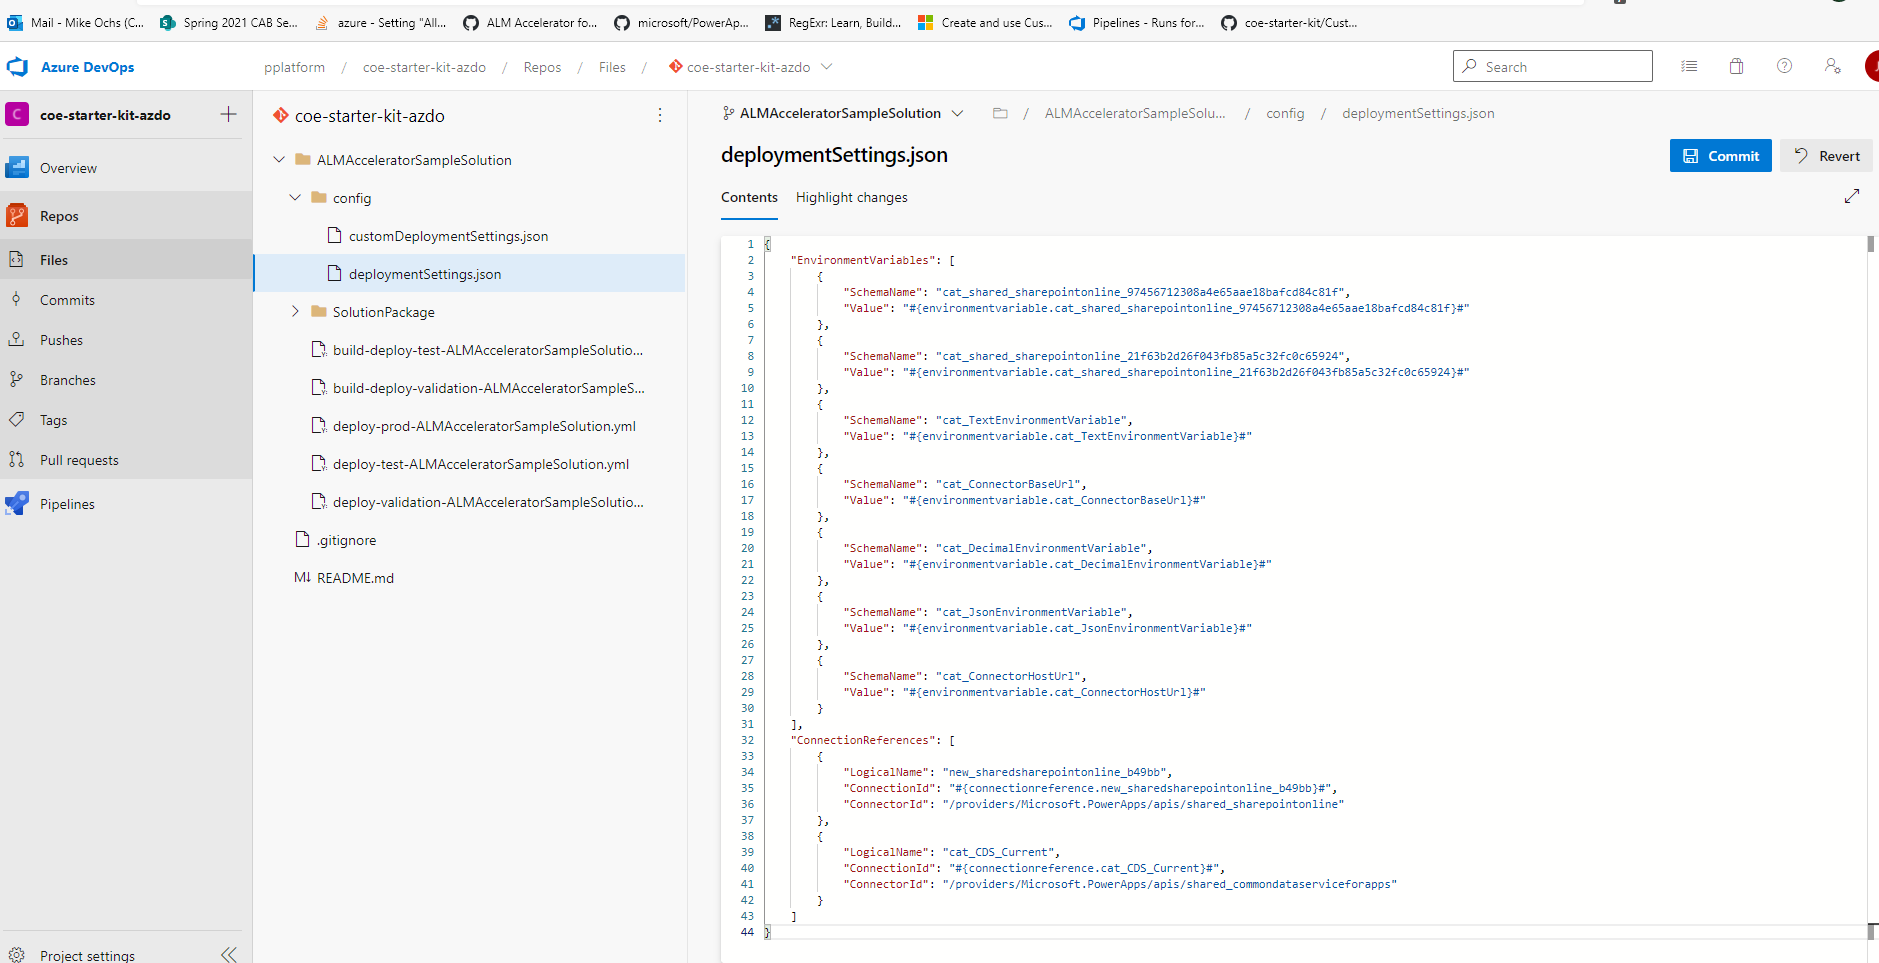
The deployment settings JSON file configures connection references and environment variables.
{
    "EnvironmentVariables": [
        {
            "SchemaName": "cat_shared_sharepointonline_97456712308a4e65aae18bafcd84c81f",
            "Value": "#{environmentvariable.cat_shared_sharepointonline_97456712308a4e65aae18bafcd84c81f}#"
        },
        {
            "SchemaName": "cat_shared_sharepointonline_21f63b2d26f043fb85a5c32fc0c65924",
            "Value": "#{environmentvariable.cat_shared_sharepointonline_21f63b2d26f043fb85a5c32fc0c65924}#"
        },
        {
            "SchemaName": "cat_TextEnvironmentVariable",
            "Value": "#{environmentvariable.cat_TextEnvironmentVariable}#"
        },
        {
            "SchemaName": "cat_ConnectorBaseUrl",
            "Value": "#{environmentvariable.cat_ConnectorBaseUrl}#"
        },
        {
            "SchemaName": "cat_DecimalEnvironmentVariable",
            "Value": "#{environmentvariable.cat_DecimalEnvironmentVariable}#"
        },
        {
            "SchemaName": "cat_JsonEnvironmentVariable",
            "Value": "#{environmentvariable.cat_JsonEnvironmentVariable}#"
        },
        {
            "SchemaName": "cat_ConnectorHostUrl",
            "Value": "#{environmentvariable.cat_ConnectorHostUrl}#"
        }
    ],
    "ConnectionReferences": [
        {
            "LogicalName": "new_sharedsharepointonline_b49bb",
            "ConnectionId": "#{connectionreference.new_sharedsharepointonline_b49bb}#",
            "ConnectorId": "/providers/Microsoft.PowerApps/apis/shared_sharepointonline"
        },
        {
            "LogicalName": "cat_CDS_Current",
            "ConnectionId": "#{connectionreference.cat_CDS_Current}#",
            "ConnectorId": "/providers/Microsoft.PowerApps/apis/shared_commondataserviceforapps"
        }
    ]
}
Copy the preceding JSON code sample to a new file named deploymentSettings.json.
Save the file in the config folder in Git.
Create connection reference JSON
The property ConnectionReferences in the customDeploymentConfiguration.json file sets connection references in your solution after the solution is imported into an environment. ConnectionReferences also enable flows after the solution is imported, based on the owner of the connection that's specified in the variable.
Create the connections manually in your target environments.
Copy the IDs for the connections.
Get the logical name for the connection reference from the connection reference component in your solution.
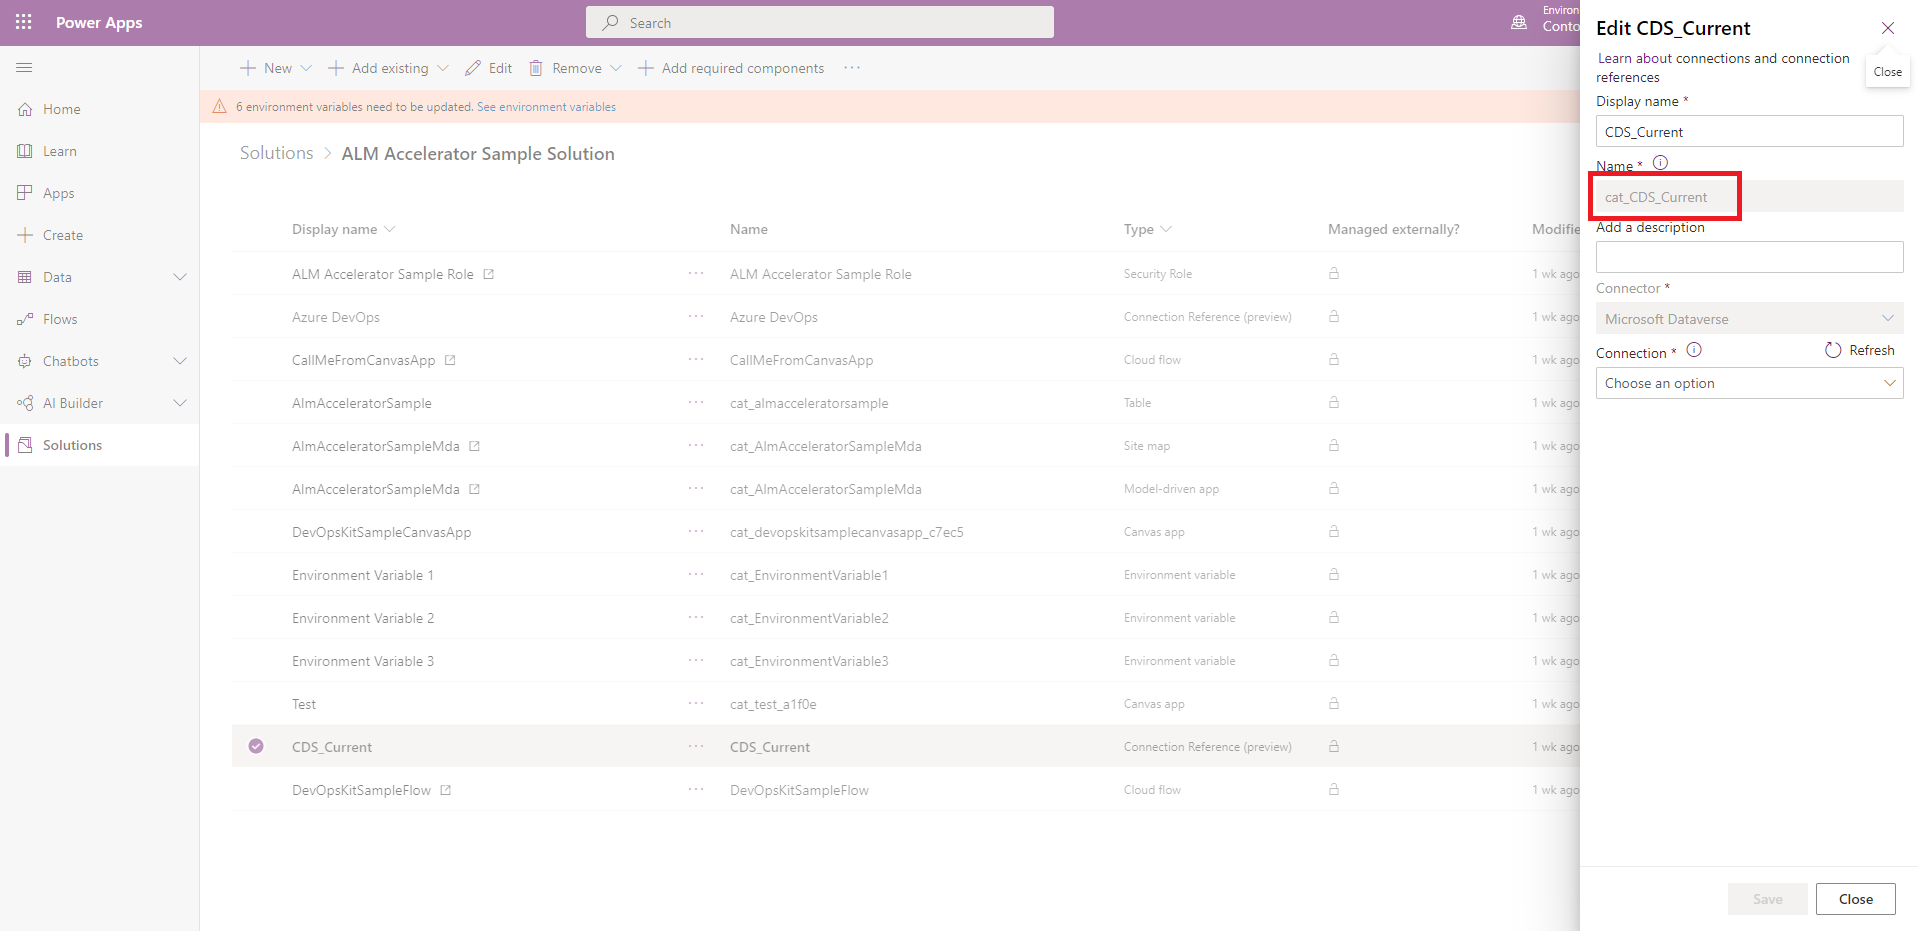
Get the connection ID from the URL of the connection after you create it. For example, if the URL is 'https://.../connections/shared_commondataservice/9f66d1d455f3474ebf24e4fa2c04cea2/details', the connection ID is 9f66d1d455f3474ebf24e4fa2c04cea2.
Edit the customDeploymentSettings.json file and paste the IDs in the
ConnectionReferencesproperty, as in the following example code:"ConnectionReferences": [ { "LogicalName": "new_sharedsharepointonline_b49bb", "ConnectionId": "#{connectionreference.new_sharedsharepointonline_b49bb}#", "ConnectorId": "/providers/Microsoft.PowerApps/apis/shared_sharepointonline" }, { "LogicalName": "cat_CDS_Current", "ConnectionId": "#{connectionreference.cat_CDS_Current}#", "ConnectorId": "/providers/Microsoft.PowerApps/apis/shared_commondataserviceforapps" } ]If you use the Replace Tokens extension and add tokens in your configuration as in the preceding example, open the pipeline for your solution, and then select Edit > Variables.
On the Pipeline Variables screen, create the connection <connection_reference_logicalname>. In this example, the pipeline variable is named
connection.cat_CDS_Current.Set the value to the connection ID you found earlier.
To make sure the value isn't saved as plain text, select Keep this value secret.
Where applicable, repeat these steps for each solution and pipeline you create.
Create environment variable JSON in the deployment configuration file
The property EnvironmentVariables in the customDeploymentConfiguration.json file sets Dataverse environment variables in your solution after the solution is imported into an environment.
Important
When source-controlled solutions are exported, environment variable values are exported with the solution. This can present a security risk if the environment variables contain sensitive information. We recommend that you not store sensitive information in environment variables. One way to make sure that your environment variable values aren't source-controlled is to create a solution specifically for environment variable values in your development environments, and set their value in that solution. This prevents the values from being exported with the solution and stored in source control.
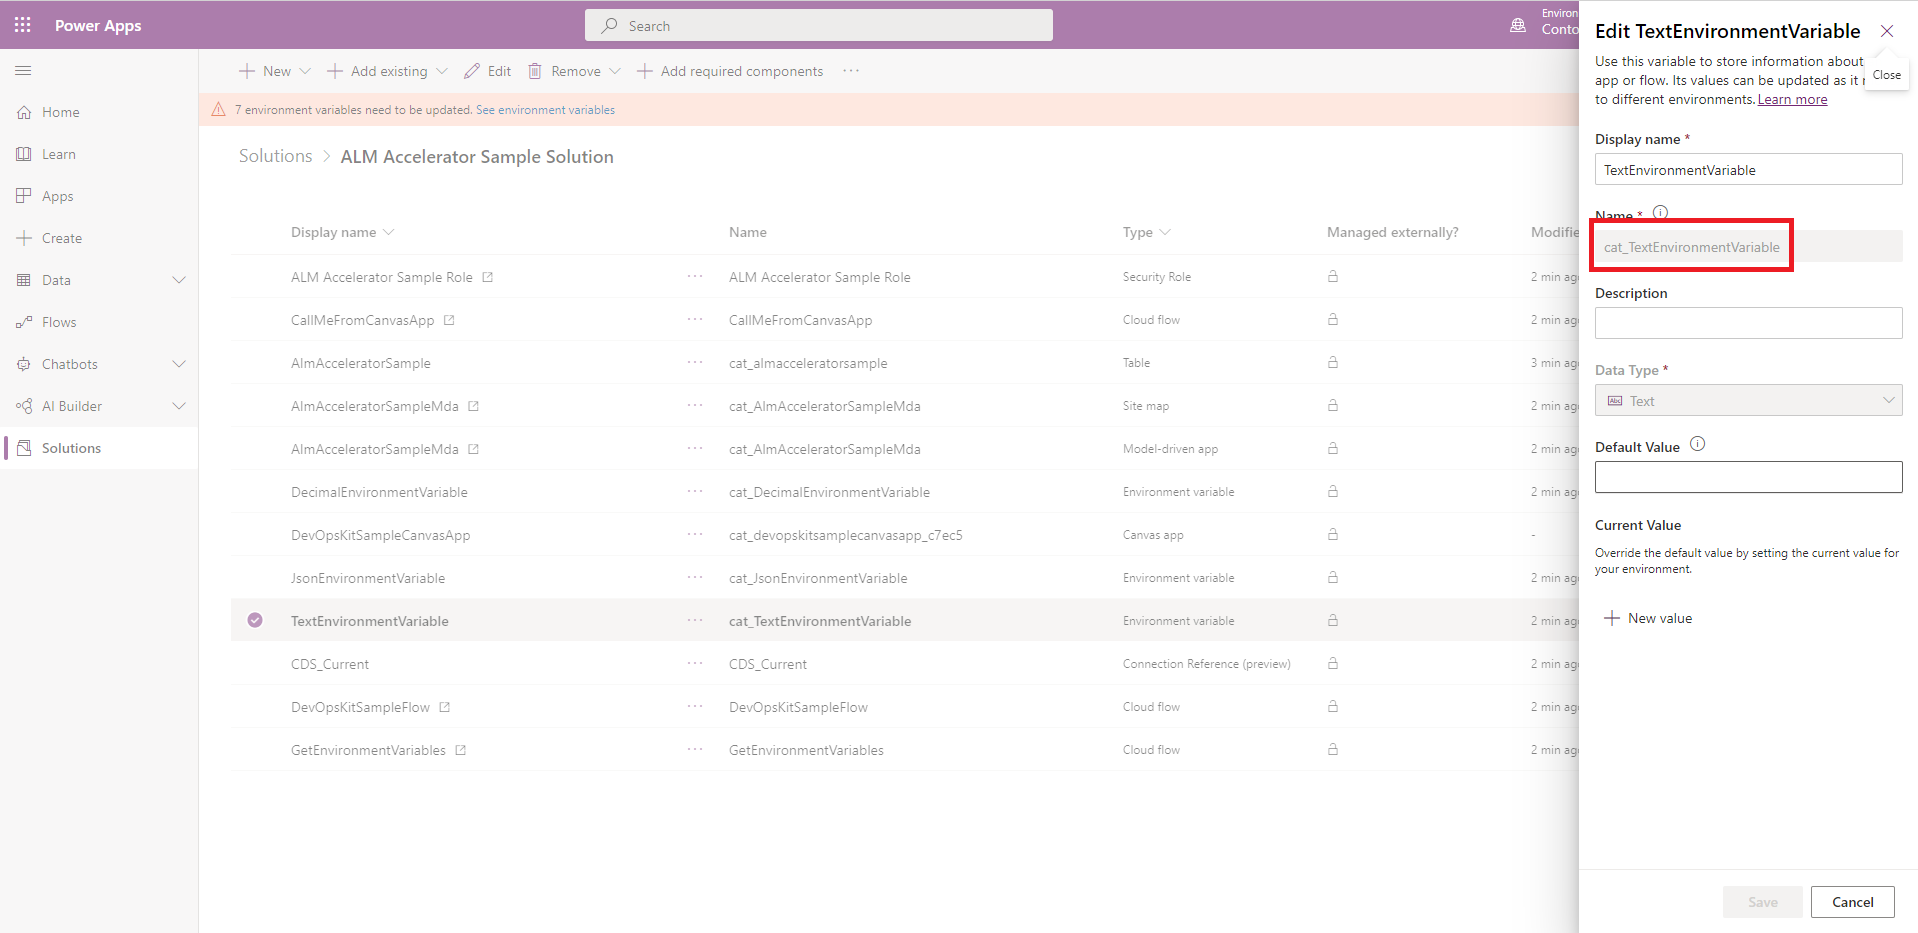
Copy the schema name for the environment variable from the environment variable component in your solution.
Edit the customDeploymentSettings.json file and paste the name in the
EnvironmentVariablesproperty, as in the following example code:{ "EnvironmentVariables": [ { "SchemaName": "cat_TextEnvironmentVariable", "Value": "#{variable.cat_TextEnvironmentVariable}#" }, { "SchemaName": "cat_DecimalEnvironmentVariable", "Value": "#{variable.cat_DecimalEnvironmentVariable}#" }, { "SchemaName": "cat_JsonEnvironmentVariable", "Value": "{\"name\":\"#{variable.cat_JsonEnvironmentVariable.name}#\"}" } ] }If you use the Replace Tokens extension and add tokens in your configuration as in the preceding example, open the pipeline for your solution, and then select Edit > Variables.
On the Pipeline Variables screen, create a pipeline variable for each token in your configuration; for example, variable.cat_TextEnvironmentVariable.
Set the value to the environment variable value for that environment.
To make sure the value isn't saved as plain text, select Keep this value secret.
Where applicable, repeat these steps for each solution and pipeline you create.
Create a custom deployment settings JSON file
The custom deployment settings JSON file contains settings that activate flows on behalf of a user, specify ownership of flows, share canvas apps with Microsoft Entra groups, and create Dataverse group teams after deployment.
{
  "ActivateFlowConfiguration": [
    {
      "solutionComponentName": "DevOpsKitSampleFlow",
      "solutionComponentUniqueName": "0a43b549-50ed-ea11-a815-000d3af3a7c4",
      "activateAsUser": "#{activateflow.activateas.DevOpsKitSampleFlow}#"
    },
    {
      "solutionComponentName": "CallMeFromCanvasApp",
      "solutionComponentUniqueName": "71cc728c-2487-eb11-a812-000d3a8fe6a3",
      "activateAsUser": "#{activateflow.activateas.CallMeFromCanvasApp}#"
    },
    {
      "solutionComponentName": "GetEnvironmentVariables",
      "solutionComponentUniqueName": "d2f7f0e2-a1a9-eb11-b1ac-000d3a53c3c2",
      "activateAsUser": "#{activateflow.activateas.GetEnvironmentVariables}#"
    }
  ],
  "SolutionComponentOwnershipConfiguration": [
    {
      "solutionComponentType": 29,
      "solutionComponentName": "DevOpsKitSampleFlow",
      "solutionComponentUniqueName": "0a43b549-50ed-ea11-a815-000d3af3a7c4",
      "ownerEmail": "#{owner.ownerEmail.DevOpsKitSampleFlow}#"
    },
    {
      "solutionComponentType": 29,
      "solutionComponentName": "CallMeFromCanvasApp",
      "solutionComponentUniqueName": "71cc728c-2487-eb11-a812-000d3a8fe6a3",
      "ownerEmail": "#{owner.ownerEmail.CallMeFromCanvasApp}#"
    },
    {
      "solutionComponentType": 29,
      "solutionComponentName": "GetEnvironmentVariables",
      "solutionComponentUniqueName": "d2f7f0e2-a1a9-eb11-b1ac-000d3a53c3c2",
      "ownerEmail": "#{owner.ownerEmail.GetEnvironmentVariables}#"
    }
  ],
  "AadGroupCanvasConfiguration": [
    {
      "aadGroupId": "#{canvasshare.aadGroupId.DevOpsKitSampleCanvasApp}#",
      "canvasNameInSolution": "cat_devopskitsamplecanvasapp_c7ec5",
      "canvasDisplayName": "DevOpsKitSampleCanvasApp",
      "roleName": "#{canvasshare.roleName.DevOpsKitSampleCanvasApp}#"
    }
  ],
  "AadGroupTeamConfiguration": [
    {
      "aadGroupTeamName": "Sample Group Team Name",
      "aadSecurityGroupId": "#{team.samplegroupteamname.aadSecurityGroupId}#",
      "dataverseSecurityRoleNames": [
        "#{team.samplegroupteamname.role}#"
      ]
    }
  ]
}
Copy the preceding JSON code sample to a new file named customDeploymentSettings.json.
Save the file in the config folder in Git.
Create default environment variable JSON in the custom deployment configuration file
The property DefaultEnvironmentVariables in the customDeploymentConfiguration.json is used in the export pipeline to set Dataverse default environment variables in your solution when the solution is exported and stored in source control.
Note
The default environment variables settings only apply if the export pipeline is configured with the pipeline variable VerifyDefaultEnvironmentVariableValues = True.
Copy the schema name for the environment variable from the environment variable component in your solution.
Edit the customDeploymentSettings.json file and paste the name in the
DefaultEnvironmentVariablesproperty, as in the following example code:{ "DefaultEnvironmentVariables": [ [ "cat_TextEnvironmentVariable", "#{defaultvariable.cat_TextEnvironmentVariable}#" ], [ "cat_DecimalEnvironmentVariable", "#{defaultvariable.cat_DecimalEnvironmentVariable}#" ], [ "cat_jsonEnvironmentVariable", "{\"name\":\"#{defaultvariable.cat_jsonEnvironmentVariable.name}#\"}" ] ] }If you use the Replace Tokens extension and add tokens in your configuration as in the preceding example, open the pipeline for your solution, and then select Edit > Variables.
On the Pipeline Variables screen, create a pipeline variable for each token in your configuration; for example, defaultvariable.cat_TextEnvironmentVariable.
Where applicable, repeat these steps for each solution and pipeline you create.
Create Microsoft Entra group canvas configuration JSON
The property AadGroupCanvasConfiguration in the customDeploymentConfiguration.json file shares canvas apps in your solution with specific Microsoft Entra groups after the solution is imported into an environment.
Copy the IDs for the canvas app and Microsoft Entra group.
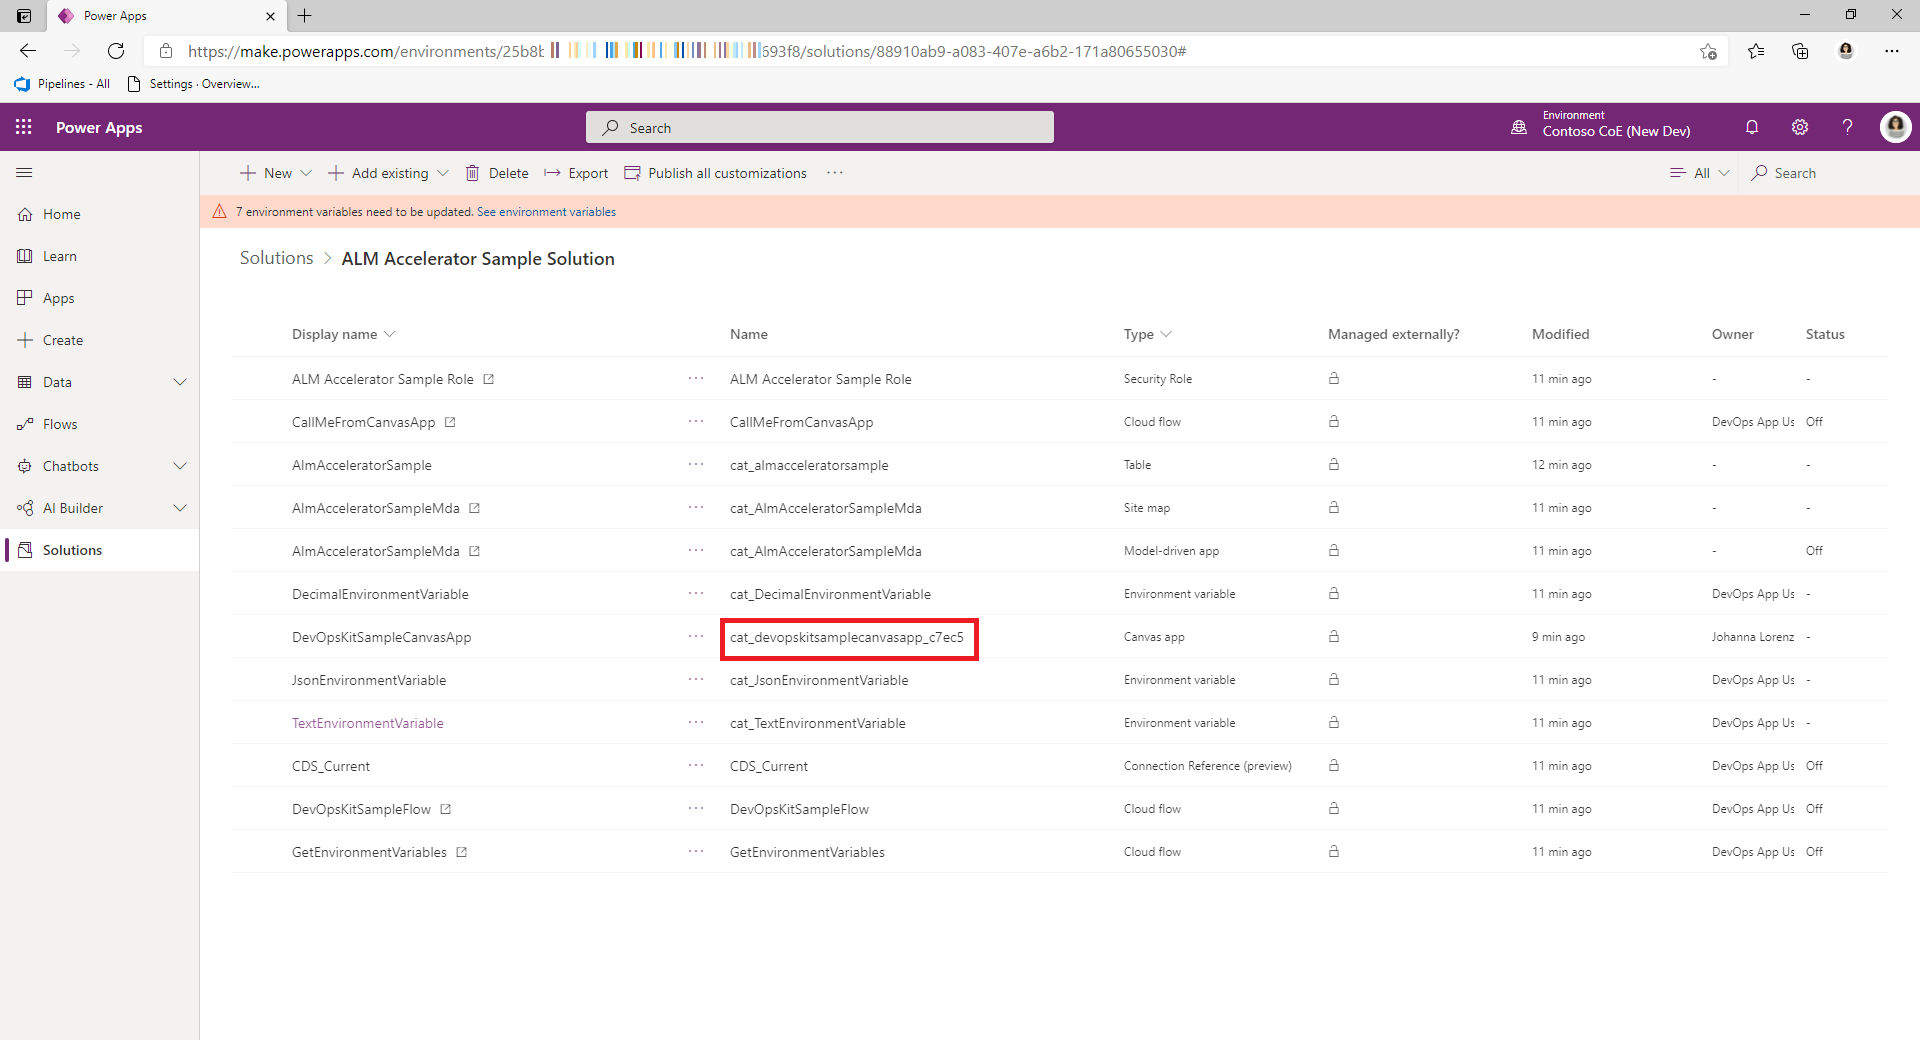
Get the schema name for the canvas app from the canvas app component in your solution.
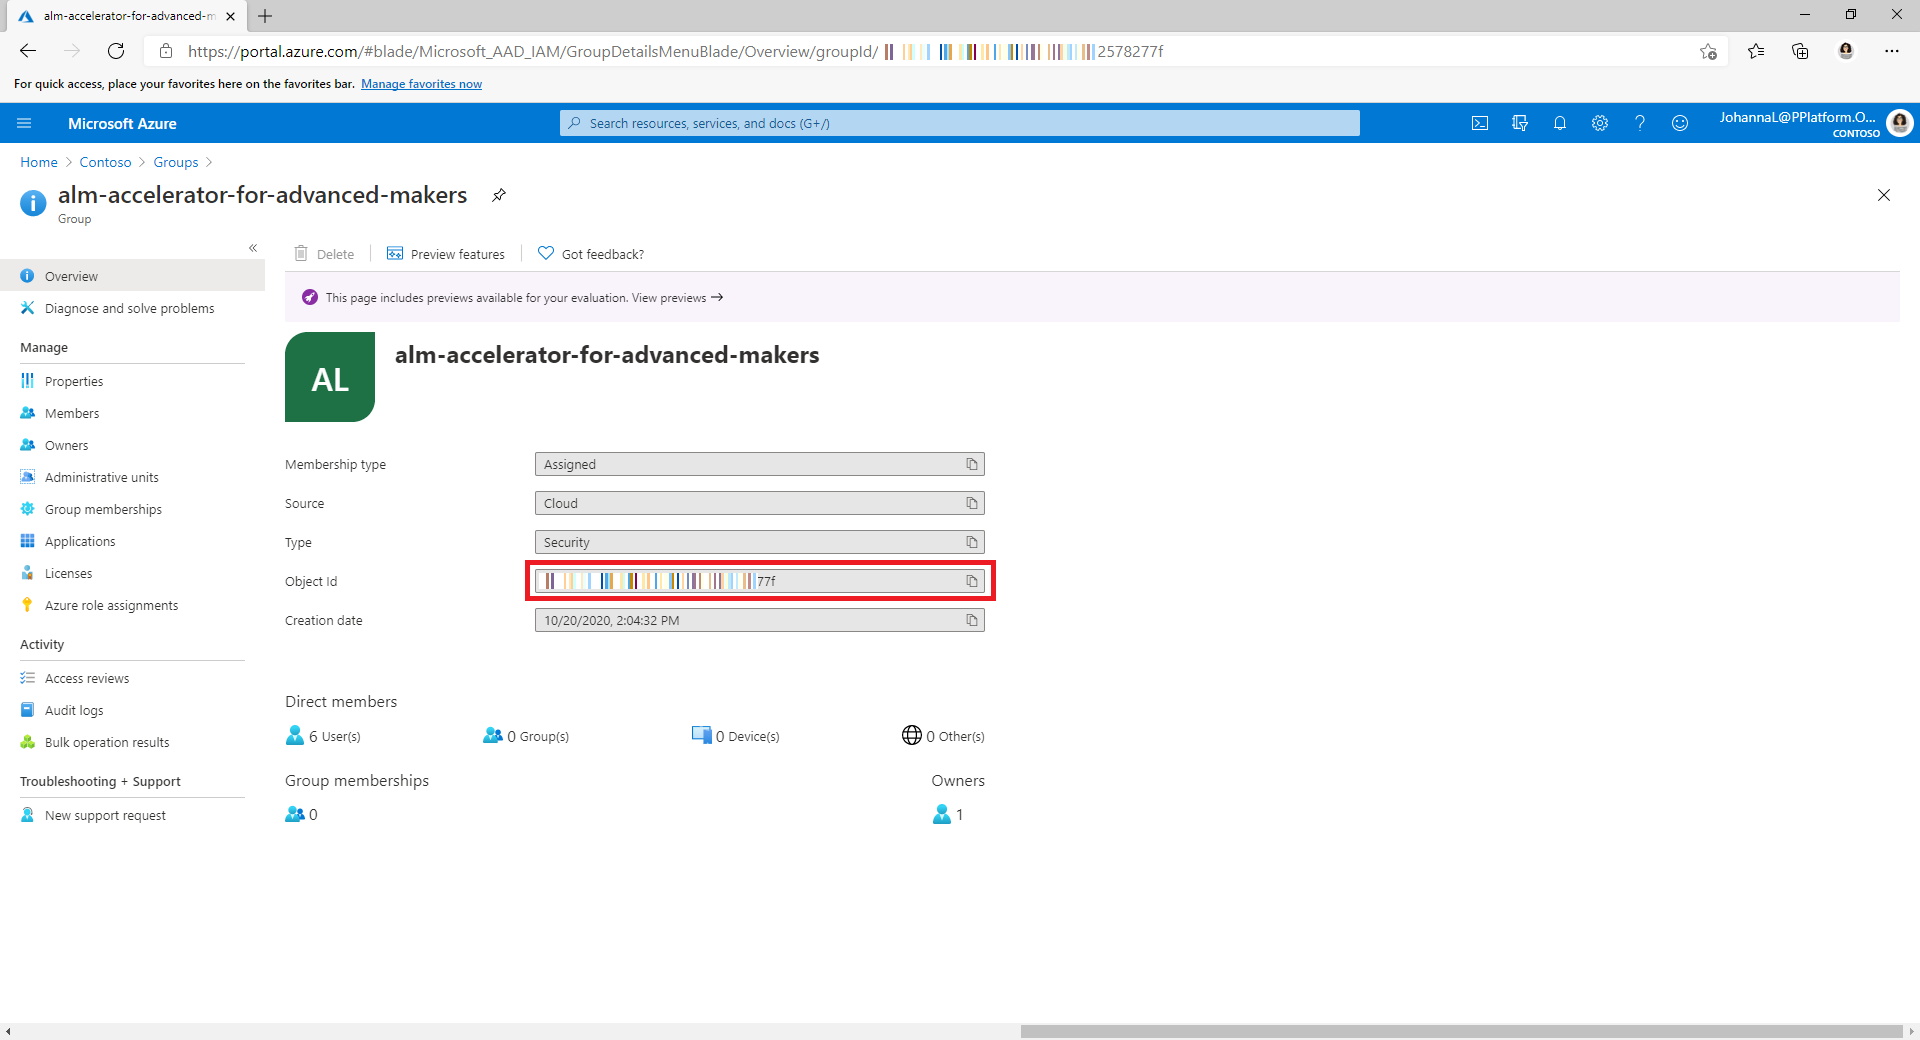
Get the Microsoft Entra group ID from the Group page in the Azure portal.
Edit the customDeploymentSettings.json file and paste the IDs in the
AadGroupCanvasConfigurationproperty, as in the following example code:{ "AadGroupCanvasConfiguration": [ { "aadGroupId": "#{canvasshare.aadGroupId}#", "canvasNameInSolution": "cat_devopskitsamplecanvasapp_c7ec5", "roleName": "#{canvasshare.roleName}#" } ] }The
roleNamecan beCanView,CanViewWithShare, andCanEdit.If you use the Replace Tokens extension and add tokens in your configuration as in the preceding example, open the pipeline for your solution, and then select Edit > Variables.
On the Pipeline Variables screen, create a pipeline variable for each token in your configuration; for example,
canvasshare.aadGroupId.Set the value to the Microsoft Entra group ID to which the app must be shared for that specific environment.
To make sure the value isn't saved as plain text, select Keep this value secret.
Where applicable, repeat these steps for each solution and pipeline you create.
Create Microsoft Entra group and team configuration JSON
The property AadGroupTeamConfiguration in the customDeploymentConfiguration.json file maps Dataverse teams and roles to Microsoft Entra groups in your solution after the solution is imported into an environment.
Security roles must be added to your solution if they aren't manually created in the target environment. One or more roles can be applied to a team. The roles provide permissions to solution components required by the users in the group.
The Dataverse team name can be of an existing team or a new team to be created in Dataverse and mapped to a Microsoft Entra group after the solution is imported.
The Dataverse roles can be any security role in Dataverse that would be applied to the team after the solution is imported. The roles must have privileges to the resources the solution requires, such as tables and processes.
Get the Microsoft Entra group ID from the Group page in the Azure portal as in the previous section.
Edit the customDeploymentSettings.json file and paste the JSON in the
AadGroupTeamConfigurationproperty, as in the following example code:{ "AadGroupTeamConfiguration": [ { "aadGroupTeamName": "alm-accelerator-sample-solution", "aadSecurityGroupId": "#{team.aadSecurityGroupId}#", "dataverseSecurityRoleNames": [ "ALM Accelerator Sample Role" ] } ] }If you use the Replace Tokens extension and add tokens in your configuration as in the preceding example, open the pipeline for your solution, and then select Edit > Variables.
On the Pipeline Variables screen, create a pipeline variable for each token in your configuration; for example,
team.aadSecurityGroupId.Set the value to the Microsoft Entra group ID to associate with the team in Dataverse.
To make sure the value isn't saved as plain text, select Keep this value secret.
Where applicable, repeat these steps for each solution and pipeline you create.
Create solution component ownership JSON
The property SolutionComponentOwnershipConfiguration in the customDeploymentConfiguration.json file assigns ownership of solution components to Dataverse users after the solution is imported into an environment. Assigning ownership is useful for components such as flows that by default are owned by the service principal user after the solution is imported by the pipeline, and organizations want to reassign them after they're imported.
The SolutionComponentOwnershipConfiguration property also enables flows that don't have any connection references. The flow is enabled by the specified user when no connection references exist to enable the flow.
Note
The current pipeline only implements the ability to set ownership of flows.
The solution component type code is based on the component types specified in the solutioncomponent EntityType Web API reference. For example, a Power Automate flow is component type 29. The component type must be specified as an integer value, with no quotation marks.
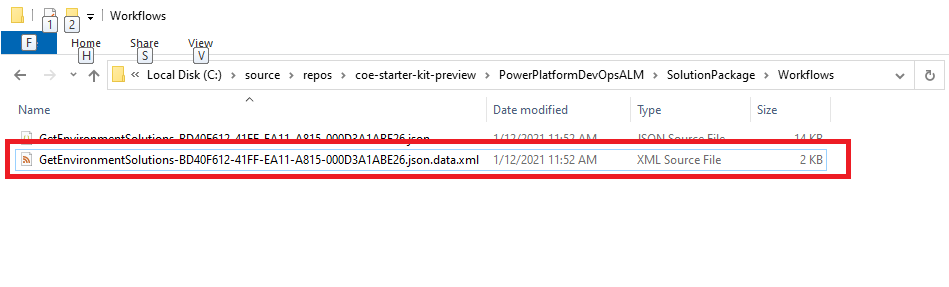
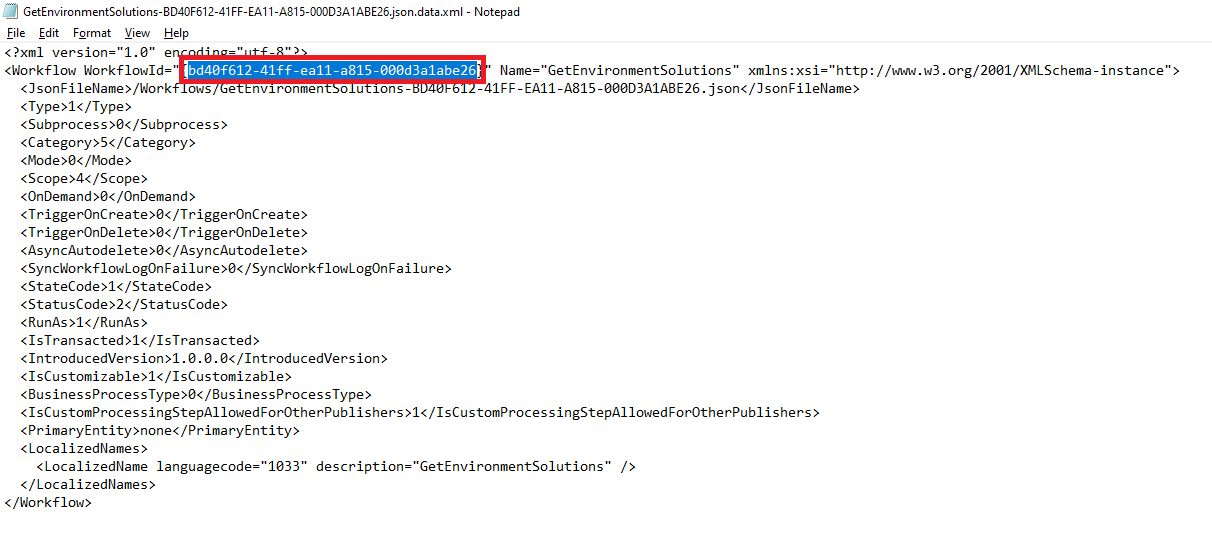
Get the unique name of a Power Automate flow component from the unpacked solution.
Flows don't require unique names when they're created. The only true unique identifier for a flow is the internal ID the system assigns it in a solution.
Get the owner's email address from the user's record in Dataverse or Microsoft 365.
Edit the customDeploymentSettings.json file and paste the JSON in the
AadGroupTeamConfigurationproperty, as in the following example code:{ "SolutionComponentOwnershipConfiguration": [ { "solutionComponentType": 29, "solutionComponentUniqueName": "00000000-0000-0000-0000-00000000000", "ownerEmail": "#{owner.ownerEmail}#" }, { "solutionComponentType": 29, "solutionComponentUniqueName": "00000000-0000-0000-0000-00000000000", "ownerEmail": "#{owner.ownerEmail}#" } ] }If you use the Replace Tokens extension and add tokens in your configuration as in the preceding example, open the pipeline for your solution, and then select Edit > Variables.
On the Pipeline Variables screen, create a pipeline variable for each token in your configuration; for example,
owner.ownerEmail.Set the value to the email address of the component's owner.
To make sure the value isn't saved as plain text, select Keep this value secret.
Where applicable, repeat these steps for each solution and pipeline you create.
Import data from your pipeline
You may want to import configuration or seed data into your Dataverse environment after you deploy your solution to the target environment. The pipelines are configured to import data using the Configuration Migration tool, available through NuGet. Learn more about managing configuration data.
When configuration data is stored in the root of the config directory, the same configuration data is deployed to all environments. You can create environment-specific configuration data files. Store them in subdirectories of the config directory, named for your environments. The directory name must match the EnvironmentName variable you created when you set up your pipeline for the validate, test, and production environments. If no environment-specific configuration data and directory exist, the pipelines revert to the configuration data in the root of the config directory.
Clone the Azure DevOps repo where your solution is to be source-controlled and where you created your solution pipeline YAML to your local machine.
If you haven't already, create a directory named config in the config folder in your solution folder.

Install the Configuration Migration tool. Follow the instructions in Download tools from NuGet.
Open the Configuration Migration tool, select Create schema, and then select Continue.
Sign in to the tenant from which you want to export your configuration data.
Select your environment.
Select the tables and columns you want to export.
Select Save and Export. Save the data to the directory path config\ConfigurationMigrationData in your local Azure DevOps repo, in the folder for the solution for which the data is to be imported.
Note
The pipeline looks for this specific folder to import the data after your solution is imported. Make sure the name of the folder and its location are exactly as given here.
When prompted to export the data, select Yes.
Choose the same location for your exported data, select Save, and then select Export Data.
When the export is complete, unzip the files from the data.zip file to the ConfigurationMigrationData directory. Delete the data.zip and SampleData.xml files.

Commit the changes with your data to Azure DevOps.
Next steps
Feedback
Coming soon: Throughout 2024 we will be phasing out GitHub Issues as the feedback mechanism for content and replacing it with a new feedback system. For more information see: https://aka.ms/ContentUserFeedback.
Submit and view feedback for