Use Azure to automatically generate a CI/CD pipeline to deploy an ASP.NET app
Azure Pipelines | Azure DevOps Server 2020 | Azure DevOps Server 2019 | TFS 2018 - TFS 2015
This tutorial shows how to configure a continuous delivery (CD) workflow for Azure App Service by using Azure Pipelines. CD is a great option for projects that require multiple and frequent contributions to be integrated.
CD in Azure Pipelines simplifies setting up a robust deployment pipeline for your app to publish the most recent updates to Azure App Service. The pipeline can be configured to build, runs tests, and deploy to a staging slot and then to production.
Code
You must store your app's source code in a Azure Repos Git, GitHub, or any other Git repository to use Azure Continuous Delivery. Team Foundation Version Control (TFVC) repositories are not supported at present.
Carry out the following steps to create a simple .NET MVC app to deploy.
Create a new ASP.NET Web Application project in Visual Studio, targeting .NET Framework 4.5.
Choose the MVC project type and leave the other settings at their defaults.
Wait until the sample application has been created, then save the solution.
Commit the solution to your chosen repository.
Configure
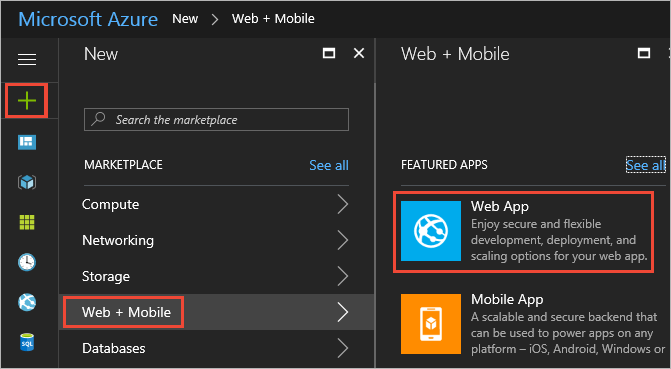
In the Azure portal, select your web app. If you haven't yet created a web app, do this now by choosing the "+" icon, selecting Web App from the Web + Mobile category, and providing a name and a resource group.
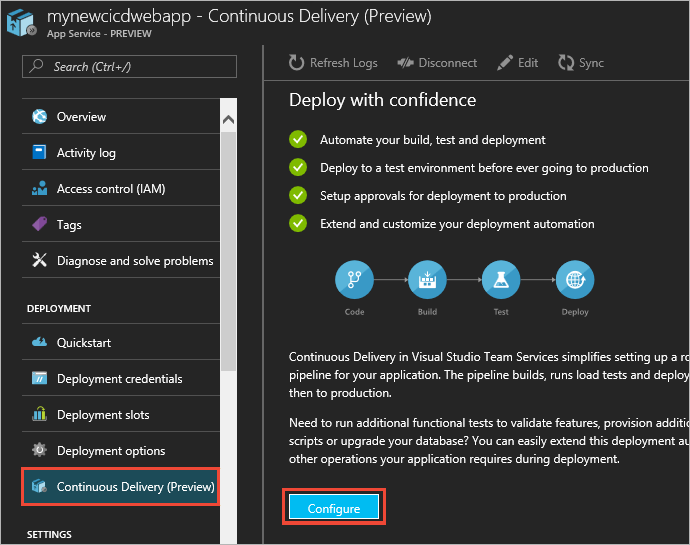
In your app's menu blade, choose Continuous Delivery (Preview) and then choose Configure.
Select Choose repository and select the type of repository where you stored your app's source code. You have a choice of Azure Pipelines, GitHub or External Git (a Git type repository not hosted in Azure Pipelines or GitHub).

Select the project, repository, and branch to deploy from. When you're done, choose OK.
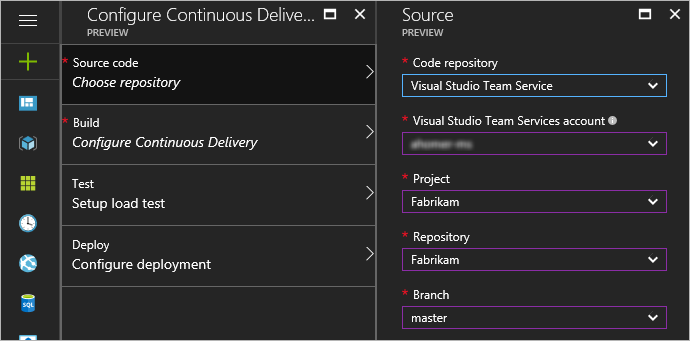
If you chose to use GitHub, complete the authorization steps. If you chose to use an external Git repository, enter the repository name, branch, and (if required) your credentials.
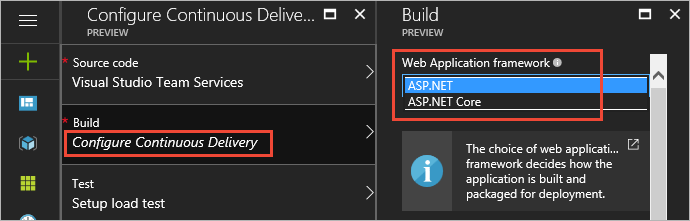
Select Configure Continuous Delivery and choose the web application framework you used to develop your app. This choice influences the way that Azure Continuous Delivery builds and packages the app for deployment. At present, ASP.NET, ASP.NET Core, PHP, Python, and Node.js are supported. When you're done, choose OK.
Select Set up load test and decide if you want to run a load test on your app before deploying the latest changes to production. The default is NO. If you want to set up a load test (25 virtual users concurrently accessing the app for 60 seconds), choose YES then specify whether to use an existing Azure App Service instance, or create a new one in a new App Service plan. When you're done, choose OK.
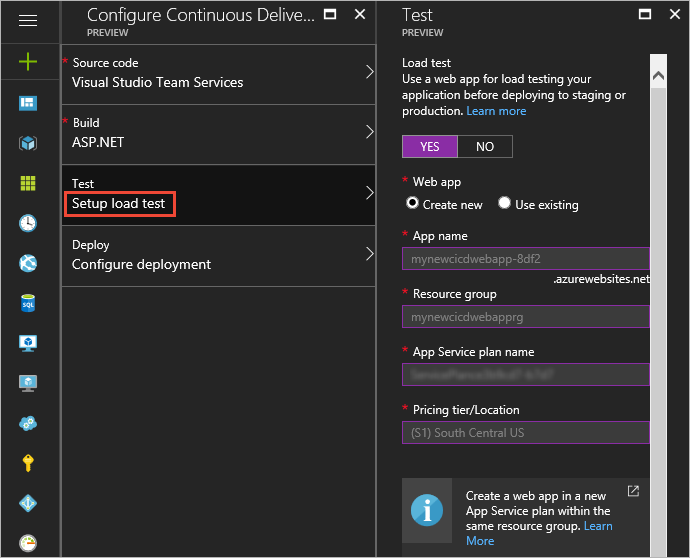
The new Azure App Service instance is created at the lowest pricing tier possible. For example, if your current App Service is in the S2 Standard pricing tier, the new App Service Plan for the load test will use the S1 Standard pricing tier. Pricing details.
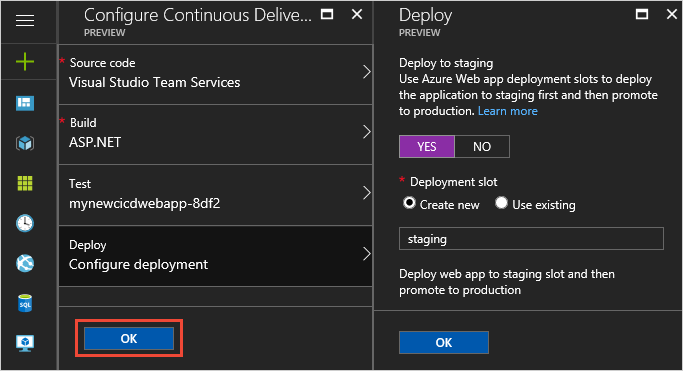
Select Configure deployment and decide if you want to deploy your latest changes first to staging, and then promote to production. The default is NO. If you want to set this up, choose YES then specify whether you want to use an existing Azure App Service slot, or create a new one. When you're done, choose OK.
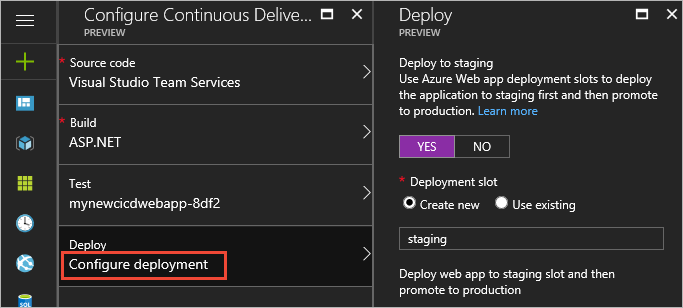
See this topic for information about Azure App Service staging environments.
Build and deploy
Choose OK to create and execute the Continuous Delivery workflow.
The following sequence of events occurs:
Azure Continuous Delivery creates a build and a release pipeline in the Azure Pipelines subscription you specified, together with a service endpoint to connect to Azure.
If you chose to create a new Azure App Service instance for load tests, and/or a new slot for staging, these are created in your Azure subscription.
After setup has completed successfully, a build is triggered that builds and packages the application for deployment.
After the build has completed successfully, a new release is created and the deployment triggered.
If you chose to include a load test, the latest changes are first deployed to the Azure App Service you selected, and then the load test is executed after the deployment succeeds.
If you chose to use a staging slot, the latest changes are deployed to the staging slot and then a slot swap is performed to complete the continuous delivery workflow.
After all these actions have completed, the Azure portal shows the results in the Activity Log.
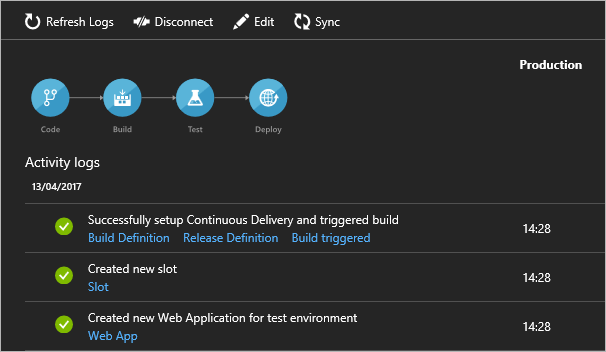
In the "Successfully set up Continuous Delivery..." item, choose the Build pipeline link to open the project containing your app in Azure Pipelines, and see the summary for the build pipeline. Choose Edit to see the tasks that have been added and configured.
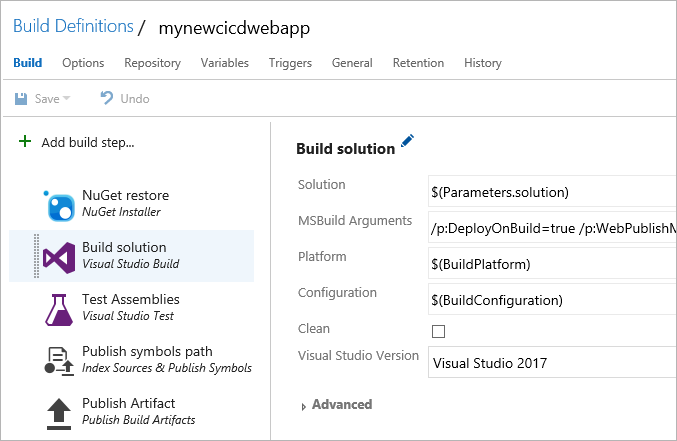
Different tasks are added to the build pipeline depending on the app framework you selected. For example, a Visual Studio Build task is added for ASP.NET apps, while a .NET Core task is used for ASP.NET Core apps.
In the "Successfully set up Continuous Delivery..." item, choose the Release pipeline link to open the project containing your app in Azure Pipelines, and see the list of releases for this pipeline. Choose Edit to see the tasks that have been added and configured.
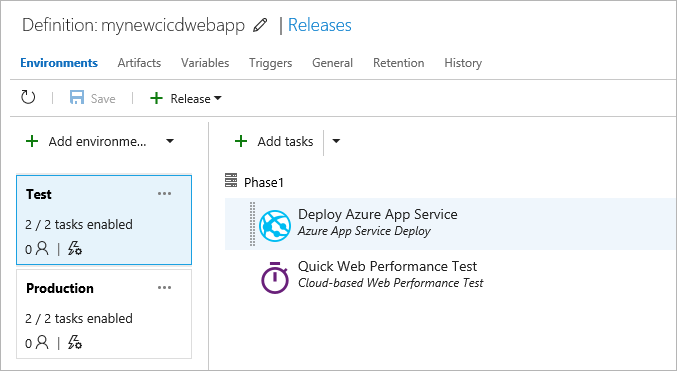
The release pipeline that is created depends on whether you chose to include a load test and/or a staging deployment. If you chose either or both, your release pipeline will have two environments named Test and Production. As shown above, the Test environment has two tasks: Azure App Service Deploy deploys the app to the Azure App Service you selected for load testing, and Cloud-based Web Performance task execute the load test.
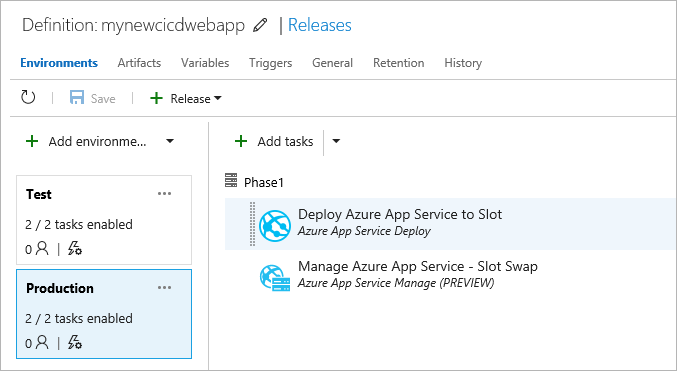
The Production environment, shown below, has an Azure App Service Deploy task. If you chose to use a staging deployment, the latest changes are deployed to the staging slot and then an Azure App Service Manage task performs a slot swap between staging and production slots.
If you opted out of both load test and a staging deployment, your release pipeline will have a single environment with just one Azure App Service Deploy task to deploy the latest changes to your Azure App Service.
There are also links in other items in the Activity Log that open commits, builds, build reports, releases, deployment slots, and the deployed app itself, in relevant windows or apps.
Verify that continuous deployment is occurring from the repository containing your app by pushing a change to the repository. Your app should update to reflect the changes shortly after the push to the repository completes.
You can stop a deployment to your Azure App Service by choosing Disconnect at the top of the Continuous Deployment blade. This deletes the Azure Continuous Delivery configuration in the Azure portal and turns off the build triggers in Azure Pipelines for this configuration.
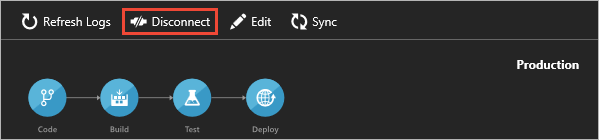
To ensure the build and release history is preserved, the build and release definitions are not deleted from Azure Pipelines when you disconnect.
Next steps
You can easily add another Azure App Service to the pipeline to validate your changes before they reach production. This validation can be by running load or functional tests at each step. Further customization can be through provisioning additional Azure resources, running custom scripts, or upgrading a database. In addition, you can extend this deployment automation to handle any other operations your app needs to execute during deployment. You can even choose to deploy automatically, or set up manual approval for any deployment to production.
FAQ
How do I create an ASP.NET 4 web app?
In Visual Studio, connect to your project.
On the Team Explorer home page (Keyboard: Ctrl + 0, H), under Solutions, click New.
Select the Web category under Visual C#.
Select ASP.NET Web Application and click OK.
Select MVC from the template list.
Click Change Authentication, select No Authentication, and click OK.
Optionally, set Add unit tests to create a unit test project for the application. Unit tests can be run automatically with every build as part of a release pipeline.
Clear Host in the cloud and click OK.
Commit and push (Git) or check in TFVC your code.