Implement a CI/CD pipeline to build and deploy your ASP.NET Core app to Azure
TFS 2018 - TFS 2015
Azure Pipelines provides a highly customizable continuous integration (CI) and deployment (CD) automation system for your ASP.NET Core apps. This quickstart shows how to set up CI and CD to deploy an ASP.NET Core app to an Azure Web App. You create the web app using the Azure CLI, then set up CI/CD using Azure Pipelines.

Get ready to go
Before you begin, make sure that you are:
A co-administrator of the Azure subscription. If you don't have an Azure subscription, you can get one free through Visual Studio Dev Essentials.
An administrator in Azure DevOps. If you don't yet have an organization, you can create one for free.
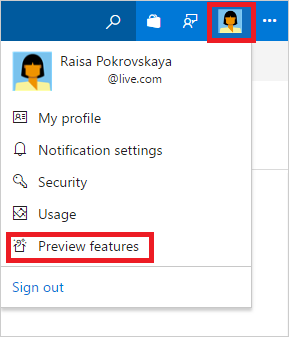
Using the New Release pipeline Editor that is currently in preview.

Create an Azure Web App using the CLI
Note
If you already have a web app that you want to use, you can skip this and move to the next section.
The Azure Cloud Shell is a free Bash shell that you can run directly within the Azure portal. It has the Azure CLI preinstalled and configured to use with your Azure subscription. Click the Cloud Shell button on the menu in the upper-right of the Azure portal.

The button launches an interactive shell that you can use to run all of the following steps:
Create a resource group with the az group create command. The following example creates a resource group named myResourceGroup in the eastus location.
az group create --name myResourceGroup --location eastus
Create an App Service plan with the az appservice plan create command. The following example creates an App Service plan named myAppServicePlan in the Free pricing tier:
az appservice plan create --name myAppServicePlan --resource-group myResourceGroup --sku FREE
Create a web app in the myAppServicePlan App Service plan with the az webapp create command. In the following command, replace <app_name> with a unique name (valid characters are a-z, 0-9, and -). If <app_name> is not unique, you get the error message "Website with given name <app_name> already exists." The default URL of the web app is https://<app_name>.azurewebsites.net.
az webapp create --name <app_name> --resource-group myResourceGroup --plan myAppServicePlan
Import sample code into your Azure Repos Git repo
In the Azure Repos portal, navigate to the Code hub for your new project. Click the default repository and then click Import repository.
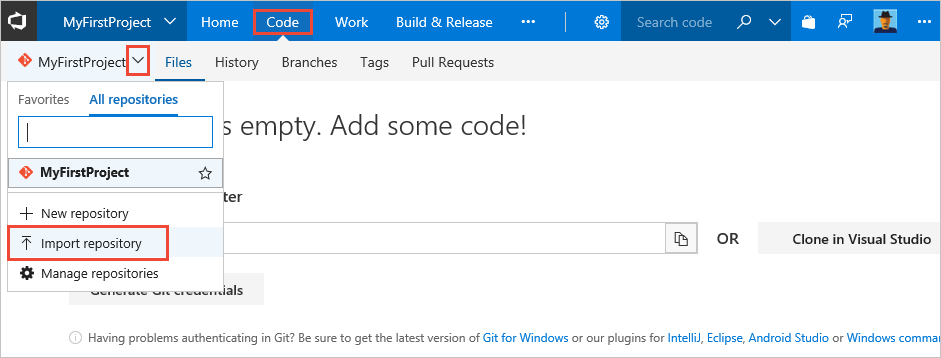
On the Import a Git repository dialog box, paste the following for Clone URL.
https://github.com/MicrosoftDocs/pipelines-dotnet-core
Click Import to copy the sample app code into your Azure Repos Git repository.
Set up continuous integration
Under the Build and Release menu, select Builds then New to create a new build definition.

Select a source and chose your team project, repository, and default branch then select Continue.
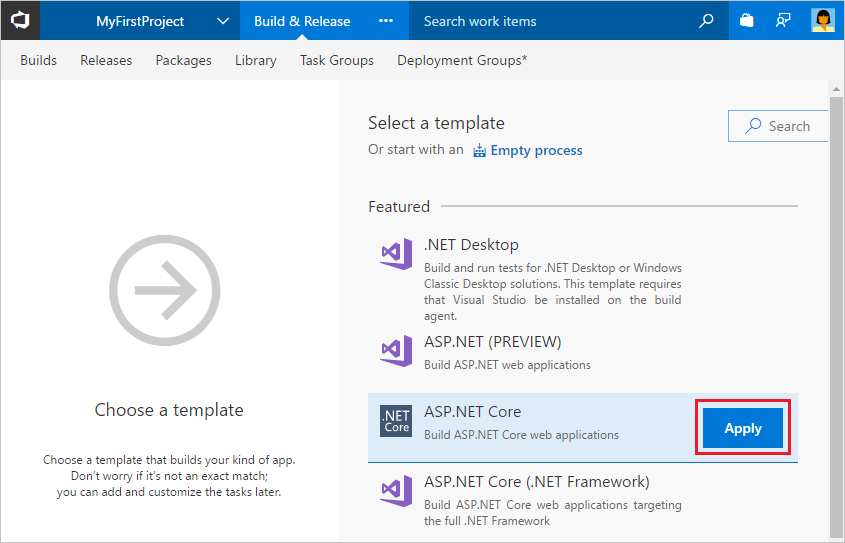
Select a template or start with an Empty process to create your build pipeline.
In the right panel, select ASP.NET Core, and then click Apply.
You now see all the tasks that were automatically added to the build pipeline by the template. These are the tasks that will automatically run every time you push code changes.
For the Agent queue, select Hosted VS2017.
Click the Triggers tab in the build pipeline. Enable the Continuous Integration trigger. This will ensure that the build pipeline is automatically triggered every time you commit a change to your repository.
Select Save & queue to kick off your first build. On the Save build pipeline and queue dialog, select Save & queue.
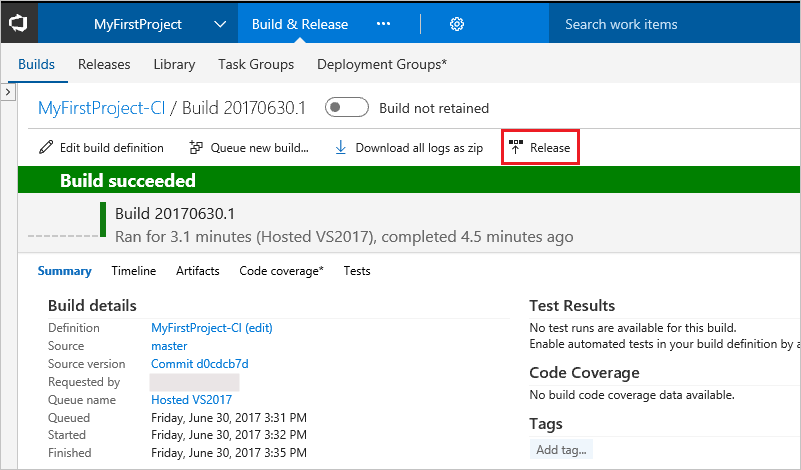
A new build is started. You'll see a link to the new build on the top of the page. Click the link to watch the new build as it happens. Wait for the build to complete and succeed before proceeding to the next section.
Set up continuous deployment
Once the build succeeds, click the Release action on the build summary page.
On the Create release pipeline dialog box, click Yes.
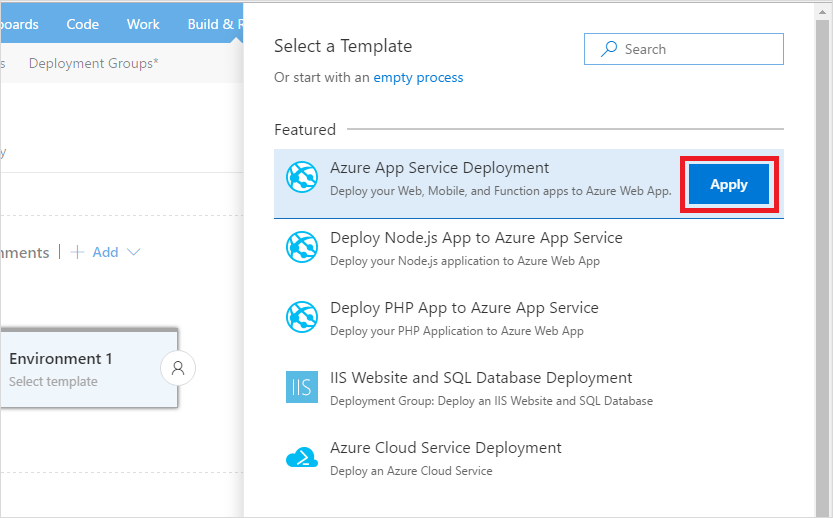
In the Select a Template panel, click the Azure App Service Deployment template, and then click Apply.
Click Tasks, and then the Deploy Azure App Service task.
Configure the inputs for the Deploy Azure App Service task in the release pipeline. First, select the name of the Azure subscription to which you would like to deploy the application. If there is an Authorize button next to the input, click on it to authorize Azure Pipelines to connect to your Azure subscription.

Note
If you don't see the Azure subscription in the menu, make sure you are a co-administrator of the Azure subscription you want to use. You can create your own Azure subscription for free.
Next, select the name of the Azure Web App you created for the App service name.
Select the artifact trigger and make sure the Continuous deployment trigger is enabled.

Click Save. In the Save dialog box, click OK.
To test the release pipeline, click Release and then Create Release.
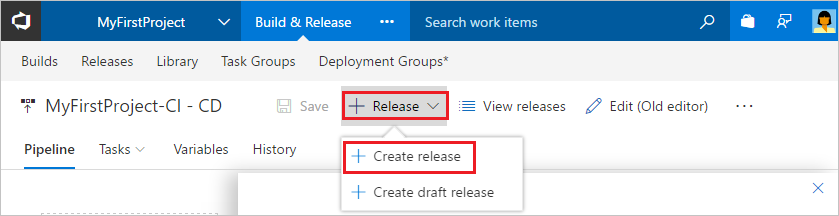
On the Create new release dialog box, click Queue.
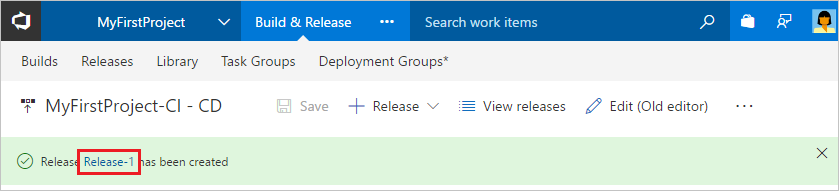
You will notice a new release being created. Select the link to navigate to the release.
You can watch the live logs for the deployment as it happens. Wait for the release to be deployed to the Azure Web App.
Update to redeploy the code
Navigate to the Code hub in the Azure Repos portal. Navigate to Views/Home/Index.cshtml file. Make the following simple change to that file by selecting the edit action.
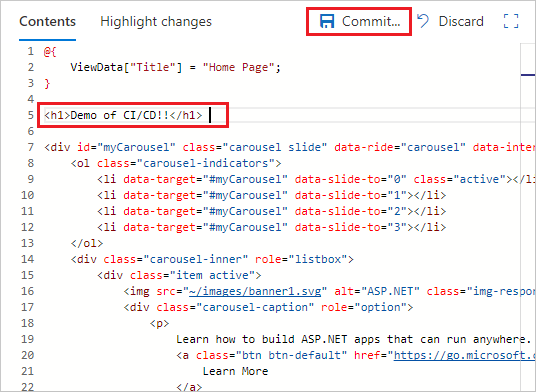
Add the following line of text above the carousel display in the page:
<h1>Demo of ASP.NET Core CI/CD!!</h1>
Commit your changes in Git. This change triggers a CI build, and when the build completes, it triggers an automatic deployment to Azure Web App.
Browse to the app
Once deployment has completed, open the browser and test your web app.
http://<app_name>.azurewebsites.net
Congratulations! You've deployed changes to your application using CI/CD.
Clean up resources
When no longer needed, you can use the az group delete command to remove the resource group and all related resources.
az group delete --name myResourceGroup