Configure your app for ADAL authentication
Important
Versions of the Microsoft Rights Management Service SDK released prior to March 2020 are deprecated; applications using earlier versions must be updated to use the March 2020 release. For full details, see the deprecation notice.
No further enhancements are planned for the Microsoft Rights Management Service SDK. We strongly recommend adoption of the Microsoft Information Protection SDK for classification, labeling, and protection services.
This topic describes the steps for configuring your app for Azure Active Directory Authentication Library (ADAL) based authentication.
Azure authentication setup
You will need the following:
- A subscription for Microsoft Azure (a free trial is sufficient). For more information, see How users sign up for RMS for individuals
- A subscription for Microsoft Azure Rights Management (a free RMS for Individuals account is sufficient).
Note
Ask your IT Admin whether or not you have a subscription for Microsoft Azure Rights Management and, have your IT Admin perform the steps below. If your organization does not have a subscription, you should have your IT admin create one. Also, your IT Admin should subscribe with a Work or school account, rather than a Microsoft account (i.e. Hotmail).
After signing up for Microsoft Azure:
- Login to the Azure Management Portal for your organization using an account with administrative privileges.
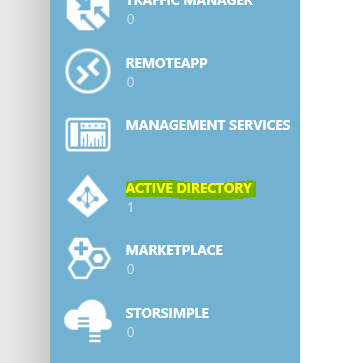
- Browse down to the Active Directory application on the left side of the portal.
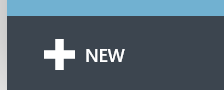
- If you haven’t created a directory already, choose the New button located in the bottom left corner of the portal.
- Select the Rights Management tab and ensure that the Rights Management Status is either Active, Unknown or Unauthorized. If the status is Inactive, choose the Activate button at the bottom, center portion of the portal and confirm your selection.

- Now, create a new Native Application in your directory by selecting your directory, choosing Applications.

- Then choose the Add button located in the bottom, center portion of the portal.

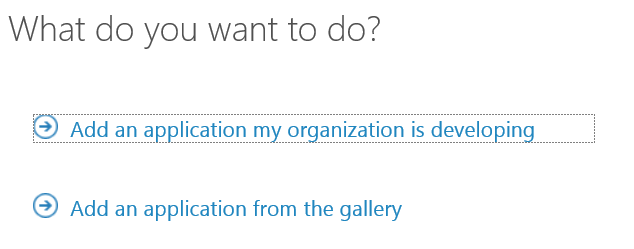
- At the prompt choose Add an application my organization is developing.
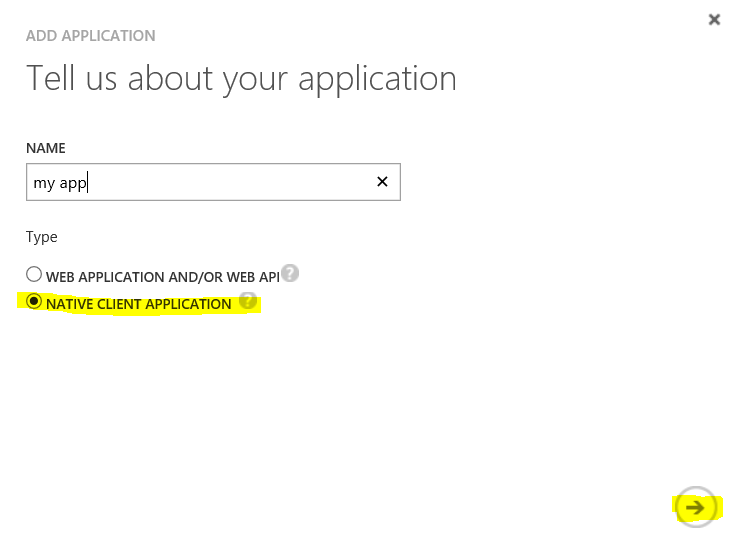
- Name your application by selecting NATIVE CLIENT APPLICATION and choosing the Next button.
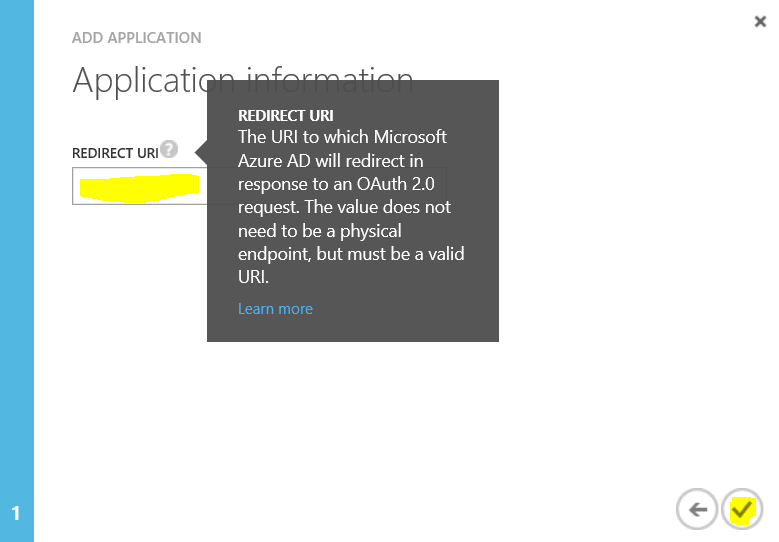
- Add a redirection URI and choose next.
The redirection URI needs to be a valid URI and unique to your directory. For example, you could use something like
https://contoso.azurewebsites.net/.auth/login/done.
- Select your application in the directory and choose CONFIGURE.

Note
Copy the CLIENT ID and REDIRECT URI and store them for future use when configuring the RMS client.
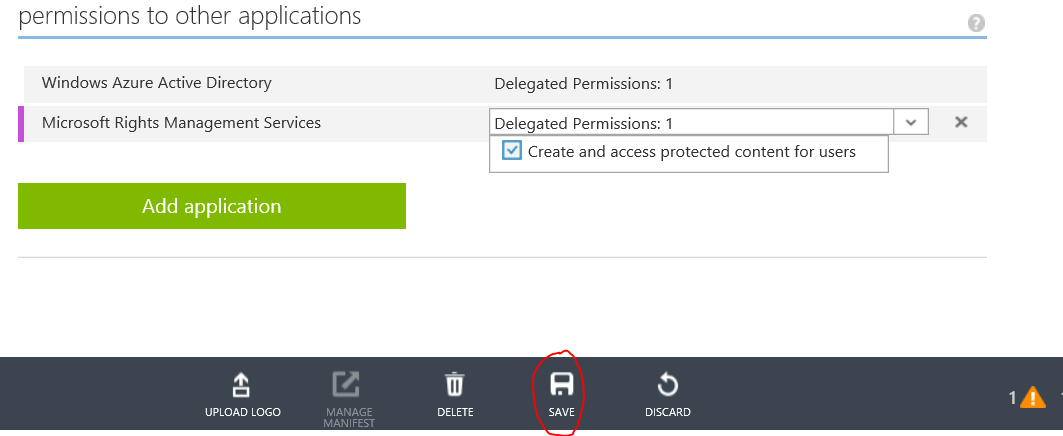
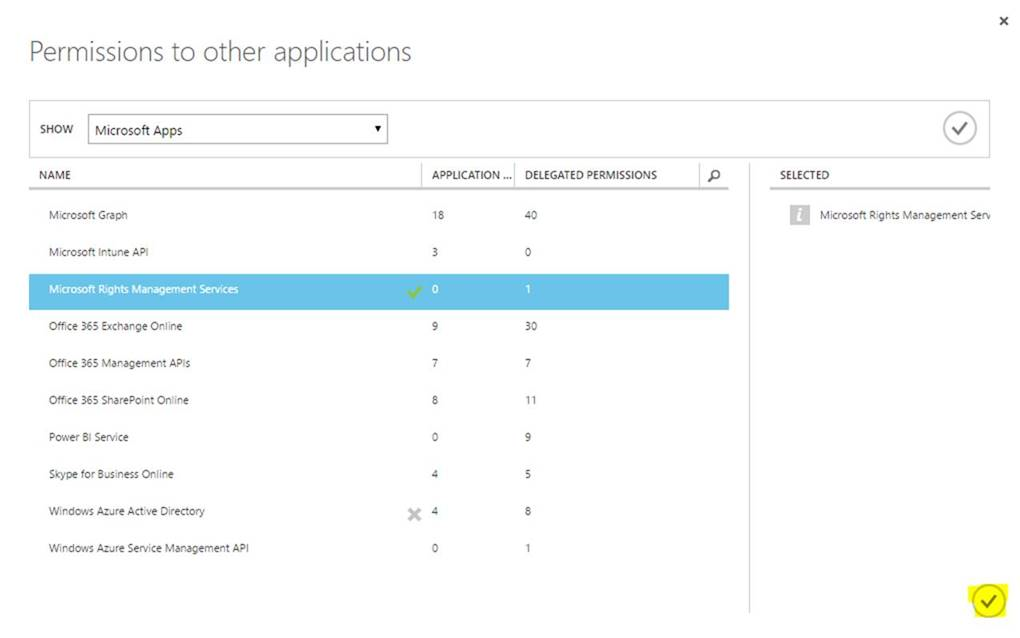
- Browse to the bottom of your application settings and choose the Add application button under permissions to other applications.
Note
The Delegated Permissions that are shown for Windows Azure Active Directory are correct by default – only one option should be selected and that option is Sign in and read user profile.

- Choose the plus button next to Microsoft Rights Management.
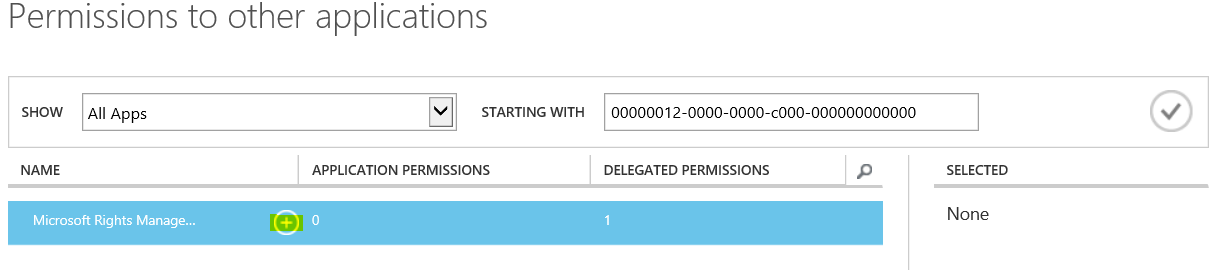
- Now, choose the check mark located on the bottom left corner of the dialog.
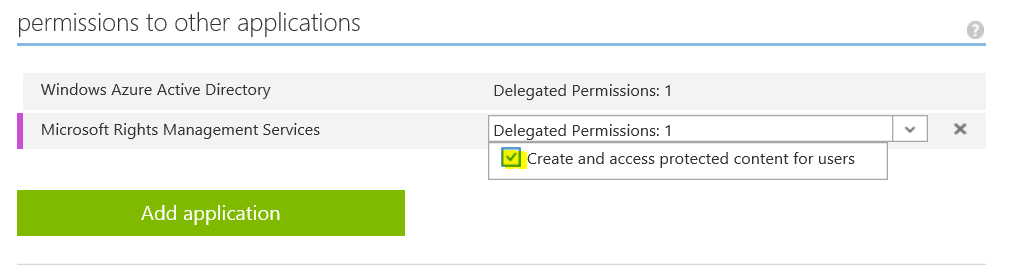
- You’re now ready to add a dependency to your application for Azure RMS. To add the dependency, select the new Microsoft Rights Management Services entry under permissions to other applications and choose the Create and access protected content for users checkbox under the Delegated Permissions: drop box.
- Save your application to persist the changes by choosing the Save icon located on the bottom, center of the portal.