Note
Access to this page requires authorization. You can try signing in or changing directories.
Access to this page requires authorization. You can try changing directories.
Note
This is a Sandbox project. The content in this article is unsupported, and therefore may be out of date or not in a working state. That said, we still think it was awesome enough to include here. Enjoy!
NotBacon is a web application that detects the presence of bacon in a photograph. This project is written in C# and JavaScript, and uses Azure's Custom Vision Service, part of the Cognitive Services collection, to perform the image recognition using a customized image classifier.

Tip
If you'd like to use the Computer Vision API to analyze your images and return known tags, check out the NotHotdog article.
Requirements
- An Azure account
Links
What's It Do?
The application consists of two components:
- A Custom Vision Service project that allows you to build a custom image classifier to detect bacon in a photo.
- An Azure Web App to display a web interface for users to submit photos.
Configuration
Create a Custom Vision Service account
- Navigate to customvision.ai.
- Click Sign in and log in with your Microsoft Account.
Create and train a Custom Vision project
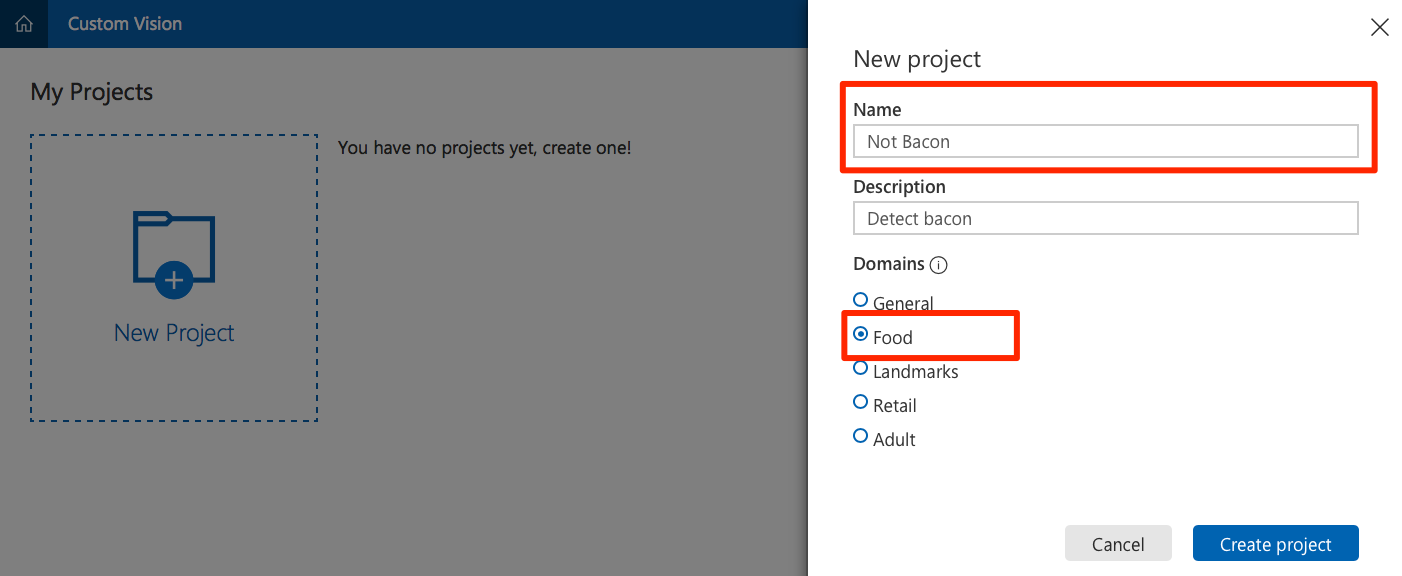
Click on New Project.
- Provide a name for the project.
- Select Food as the domain to optimize the model to work with plates of food.
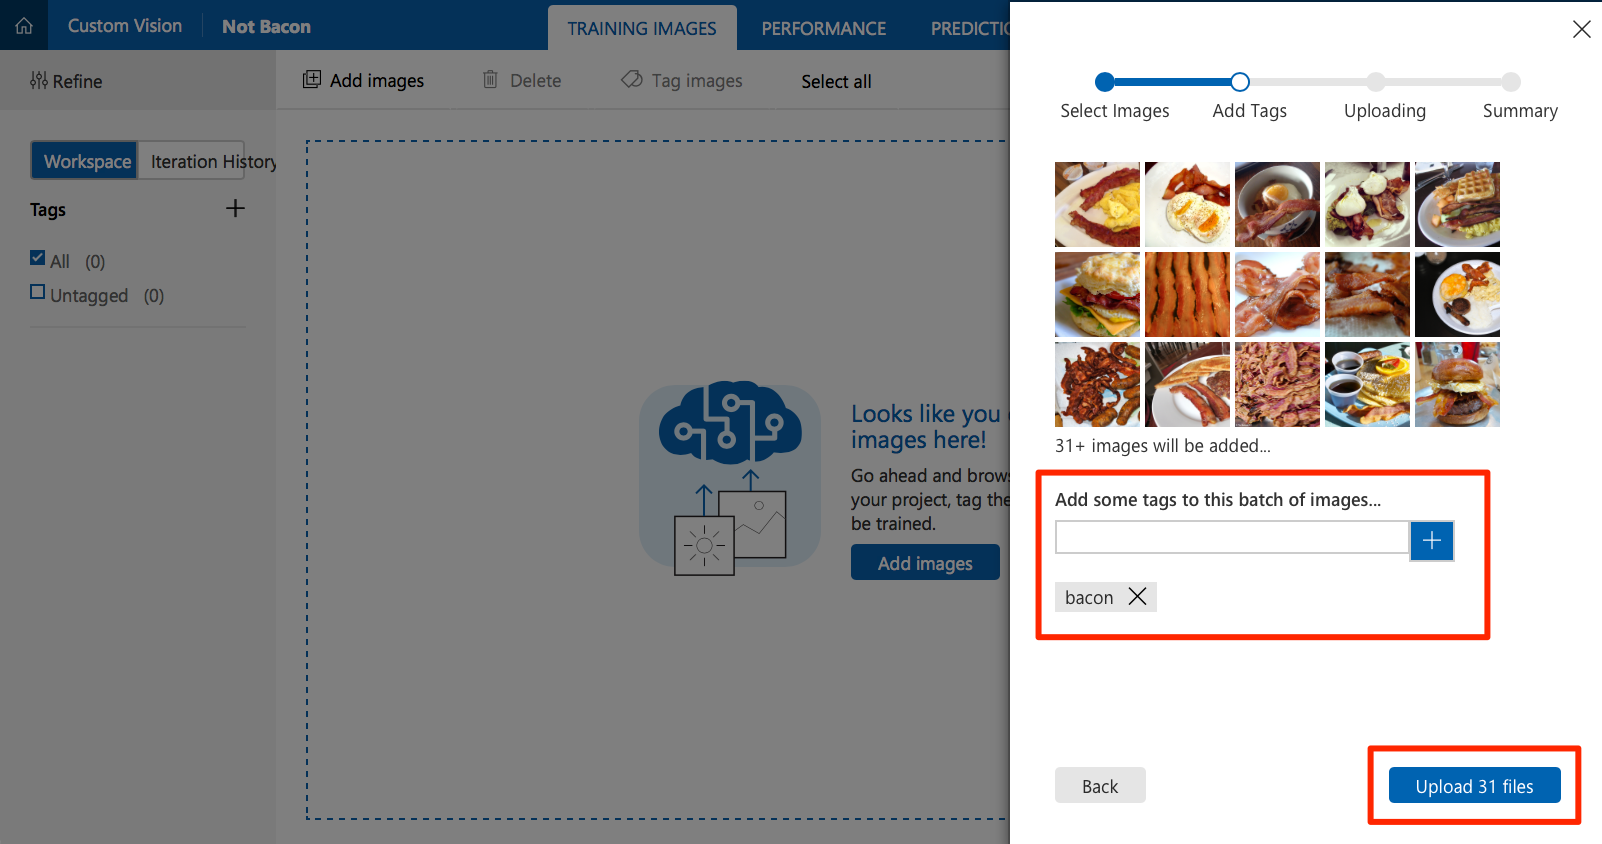
Obtain a variety of photos. To properly train your model, you need at least 30 photos that contain bacon, and 30 that do not. Download and separate the photos into two folders:
baconandnot-bacon.Tip
A good place to find photos is by doing an internet image search for
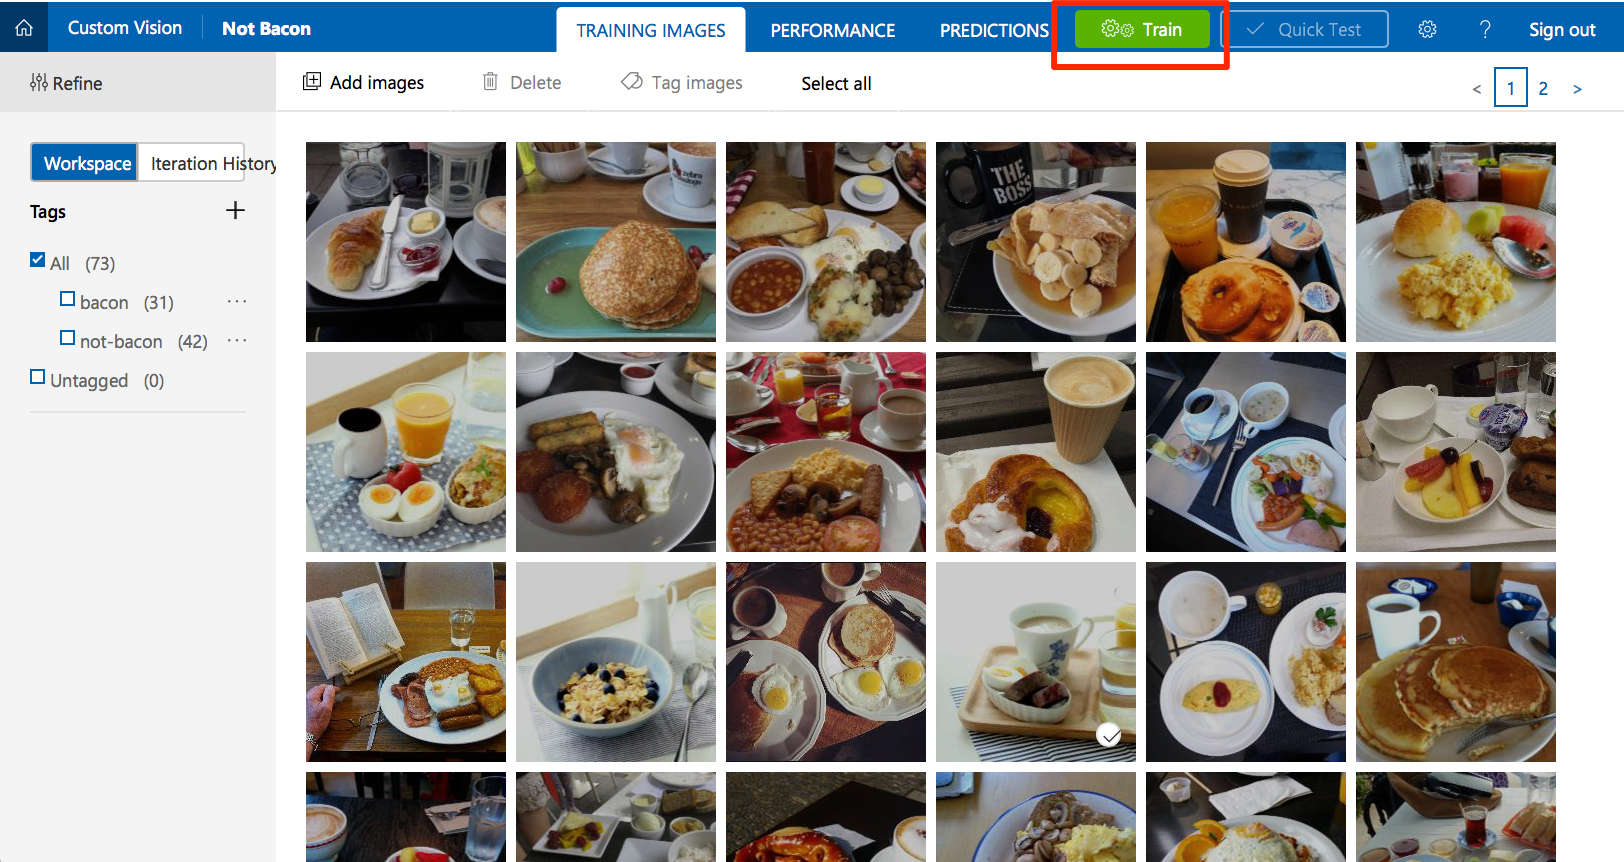
breakfast. The list of images used in the training set for this article is here.Click on Add Images and select all the photos you previously downloaded in the
baconfolder.- Create a tag named
baconand click + to add it. - Click Upload to upload the photos and tag them as
bacon.
- Create a tag named
Click on Add Images again to add images from the
not-baconfolder. This time, tag them asnot-bacon.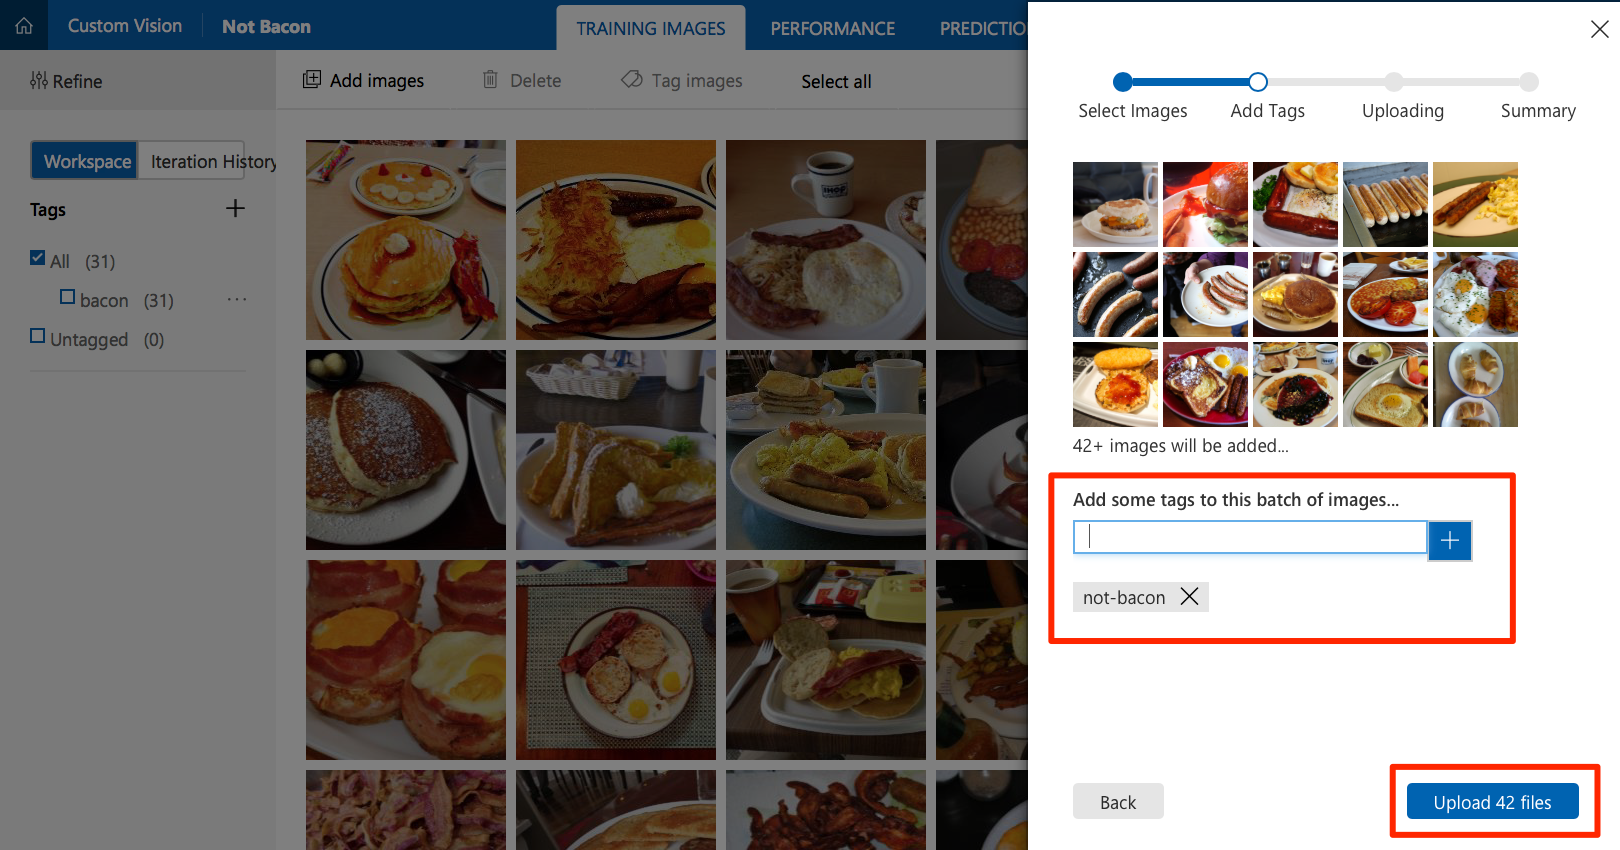
Click Train to train the image classifier. When training is complete, your model is ready to use.
Click Quick Test to test your classifier. Find a photo that was not in your training set. Browse local files to upload it or enter its URL. Check that the model correctly predicted the tags for the photo.

Obtain Custom Vision Service API information
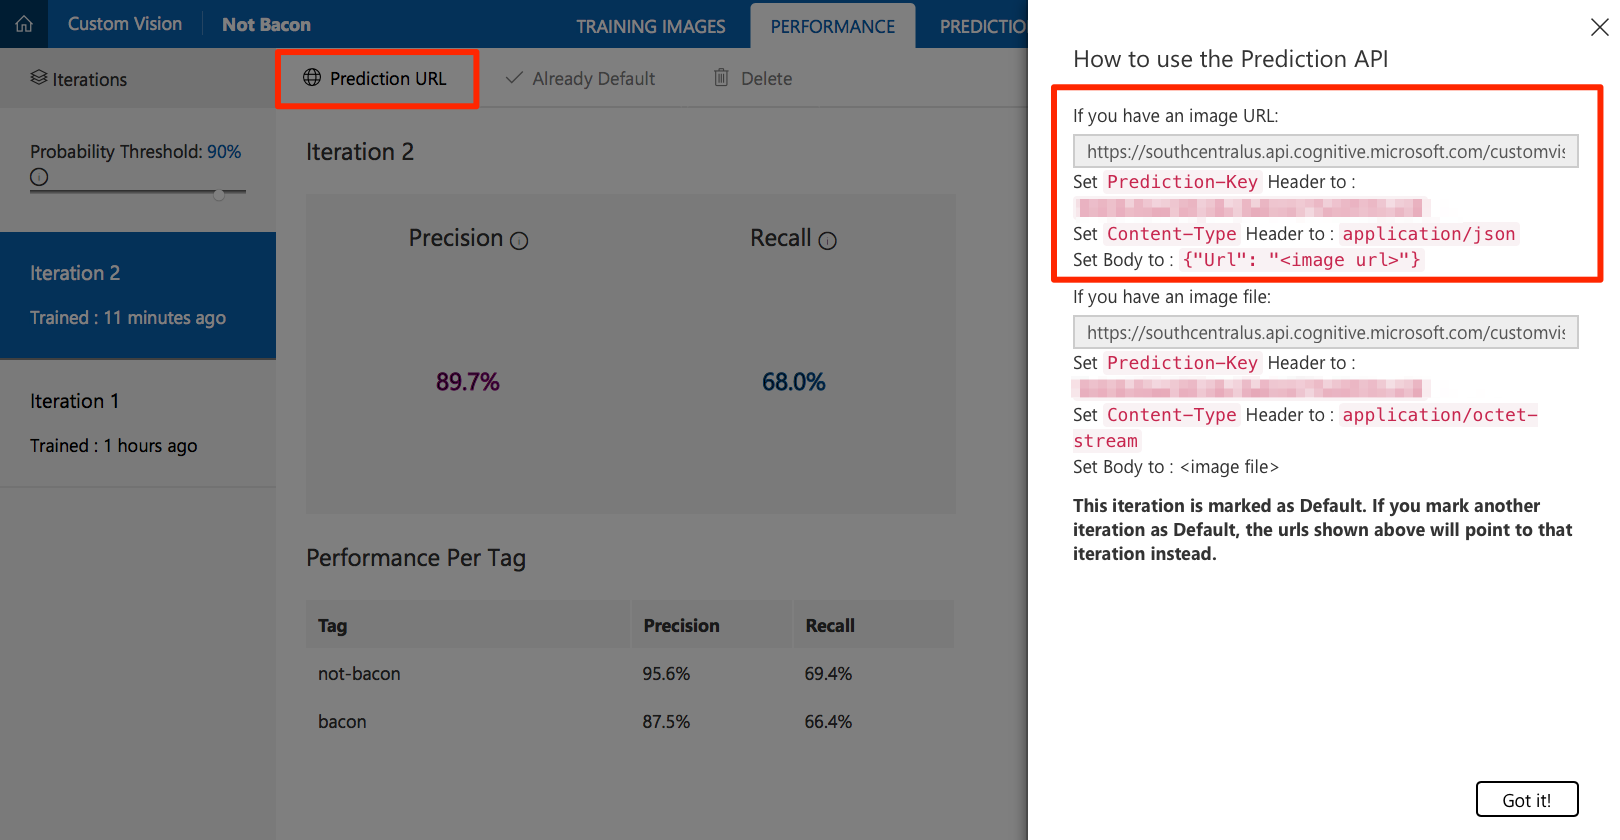
In order to configure the web application, you need some information about the Custom Vision Service project you created.
Select the Performance tab in your project.
If you have trained your model more than once, select the latest iteration and click Make Default. The default REST API endpoint of your project is set to use this iteration of the model.

Click on Prediction URL. Under the "If you have an image URL" section, copy the API endpoint URL and the prediction key value for use in the next step.
Deploy to a Web App
- Click the Deploy to Azure link here or the button at the top of this page.
- If prompted, sign in to your Azure account.
- Enter the information for your new application, such as the resource group name, site name, etc.
- Fill in the Custom Vision API Key and Custom Vision API URL with the values that you previously copied.

- Click Next and then Deploy.
Test the web application
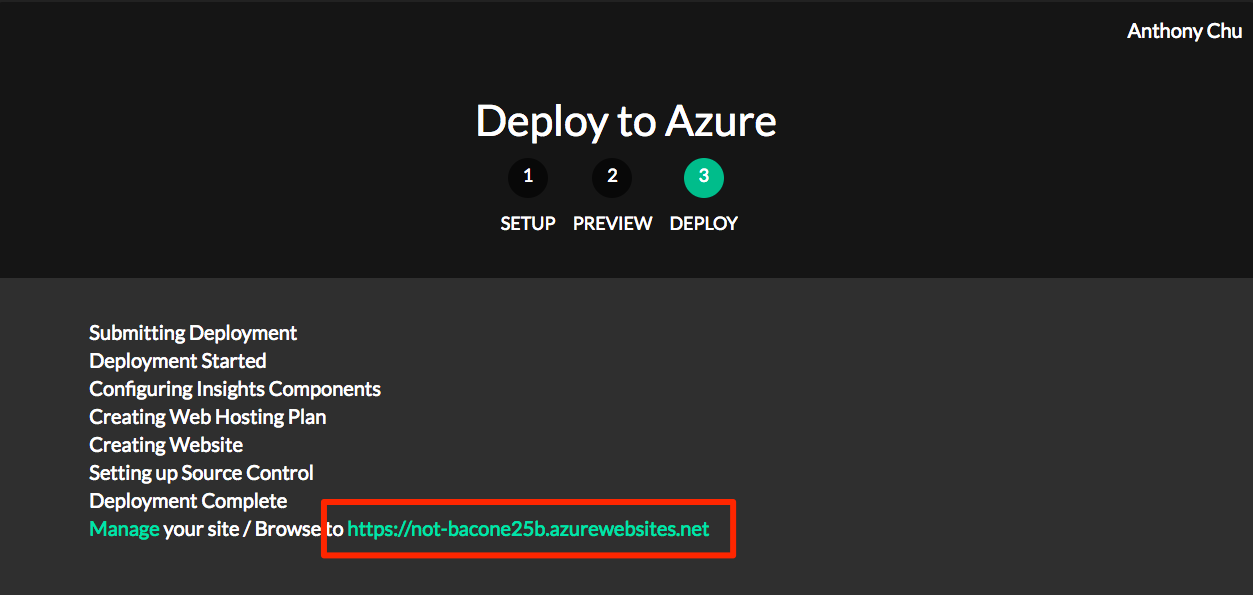
- If the application is successfully deployed, the Deploy to Azure tool displays a URL. Open the application by clicking on the link.
- Find a photo on the internet, paste its URL in the URL text box, and click Submit.
- The application should display whether or not bacon was detected in the photo.
How it works
The web application calls the Custom Vision Service REST API with the URL of the image to be analyzed in the body. Here is an example of the JSON response:
{
    "Id": "38d1249f-7153-4c2b-aa11-292bf9bd7085",
    "Project": "736b29fa-0c84-4f3e-87ee-201012399fd7",
    "Iteration": "d27e017e-c162-4c10-9610-19772d5e5049",
    "Created": "2017-08-21T17:48:26.2785384Z",
    "Predictions": [
        {
            "TagId": "017dab76-8630-4ef4-9cd0-46cec6b01655",
            "Tag": "bacon",
            "Probability": 0.845978856
        },
        {
            "TagId": "bf9f817a-ed74-4bb3-8e9d-49f1b3b7a4bb",
            "Tag": "no-bacon",
            "Probability": 0.041467078
        }
    ]
}
The application reads the bacon probability and considers a score greater than 0.7 as a successful match.
Next Steps
Here are links to the docs for the items discussed above. Play around with the project and feel free to leave comments on the article, open issues in the repo, or submit pull requests with fixes and new features. Enjoy!
- Custom Vision Service documentation
- How to Improve your classifier
- Check out NotHotdog for a variant of this using the Computer Vision API without any training.