Create and run a Python notebook
Applies to: ![]() SQL Server 2019 (15.x)
SQL Server 2019 (15.x)
This tutorial demonstrates how to create and run a notebook in Azure Data Studio using the Python kernel.
Prerequisites
Create a notebook
The following steps show how to create a notebook file in Azure Data Studio:
Open Azure Data Studio. If you're prompted to connect to a SQL Server, you may connect or click Cancel.
Select New Notebook in the File menu.
Select Python 3 for the Kernel. Attach to is set to "localhost".

You can save the notebook using the Save or Save as... command from the File menu.
To open a notebook, you can use the Open file... command in the File menu, select Open file on the Welcome page, or use the File: Open command from the command palette.
Change the Python kernel
The first time you connect to the Python kernel in a notebook, the Configure Python for Notebooks page is displayed. You can select either:
- New Python installation to install a new copy of Python for Azure Data Studio, or
- Use existing Python installation to specify the path to an existing Python installation for Azure Data Studio to use
To view the location and version of the active Python kernel, create a code cell and run the following Python commands:
import os
import sys
print(sys.version_info)
print(os.path.dirname(sys.executable))
To connect to a different installation of Python:
- From the File menu, select Preferences and then Settings.
- Scroll to Notebook configuration under Extensions.
- Under Use Existing Python, uncheck the option "Local path to a preexisting python installation used by Notebooks."
- Restart Azure Data Studio.
When Azure Data Studio starts and you connect to the Python kernel, the Configure Python for Notebooks page is displayed, You can choose to create a new Python installation or specify a path to an existing installation.
Run a code cell
You can create cells containing SQL code that you can run in place by clicking the Run cell button (the round black arrow) to the left of the cell. The results are shown in the notebook after the cell finishes running.
For example:
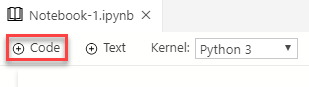
Add a new Python code cell by selecting the +Code command in the toolbar.
Copy and paste the following example into the cell and click Run cell. This example does simple math and the result appears below.
a = 1
b = 2
c = a/b
print(c)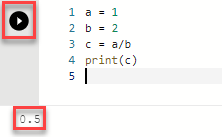
Next steps
Learn more about notebooks:
Feedback
Coming soon: Throughout 2024 we will be phasing out GitHub Issues as the feedback mechanism for content and replacing it with a new feedback system. For more information see: https://aka.ms/ContentUserFeedback.
Submit and view feedback for