Get started with Integration Services (SSIS) Scale Out on a single computer
Applies to: ![]() SQL Server
SQL Server ![]() SSIS Integration Runtime in Azure Data Factory
SSIS Integration Runtime in Azure Data Factory
This section provides guidance for setting up Integration Services Scale Out in a single-computer environment with the default settings.
1. Install SQL Server features
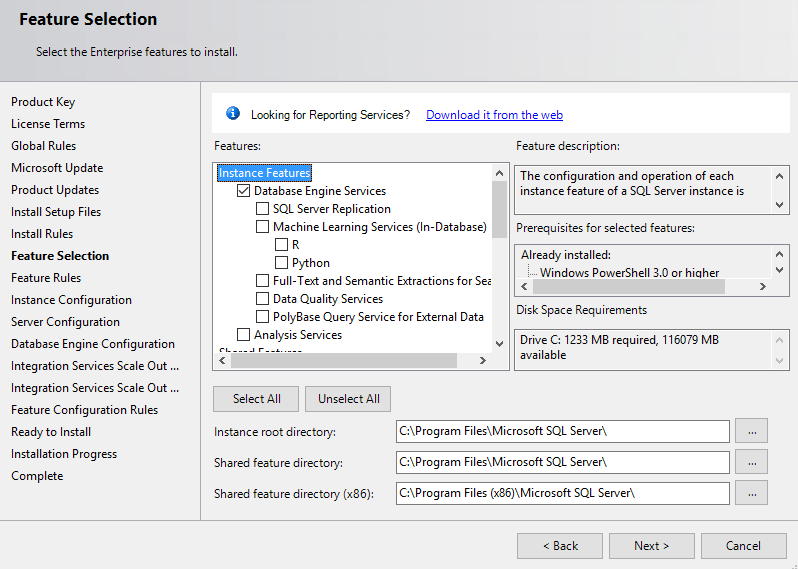
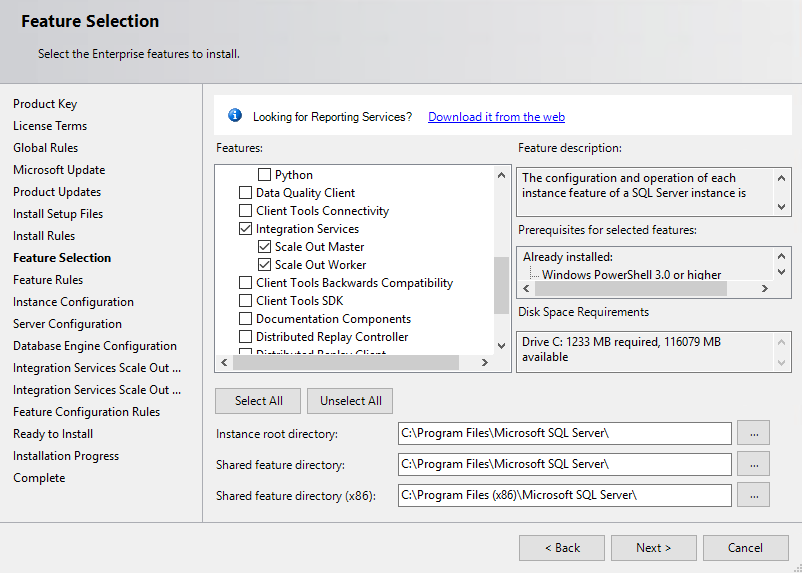
In the SQL Server installation wizard, on the Feature Selection page, select the following items:
- Database Engine Services
- Integration Services
- Scale Out Master
- Scale Out Worker
On the Server Configuration page, click Next to accept the default service accounts and startup types.
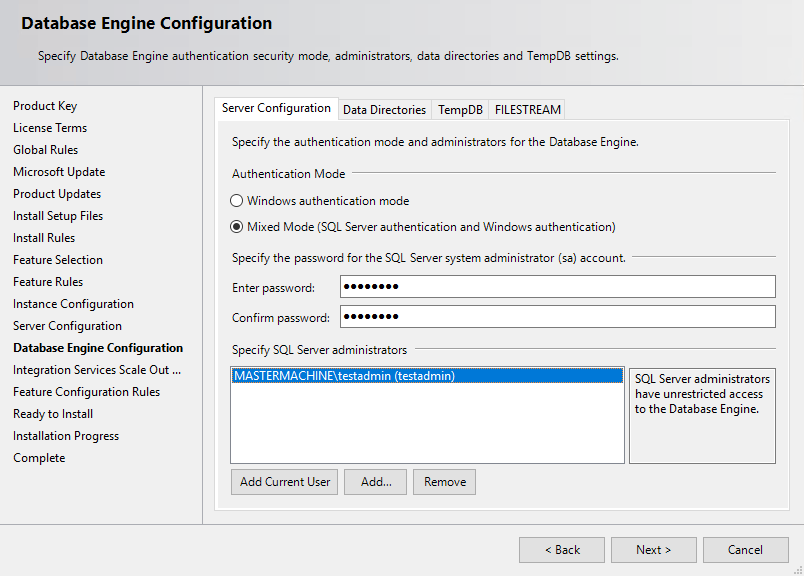
On the Database Engine Configuration page, select Mixed Mode and click Add Current User.
On the Integration Services Scale Out Configuration - Master Node and Integration Services Scale Out Configuration - Worker Node pages, click Next to accept the default settings for the port and certificates.
Finish the SQL Server installation Wizard.
2. Install SQL Server Management Studio
Download and install SQL Server Management Studio (SSMS).
3. Enable Scale Out
Open SSMS and connect to the local Sql Server instance. In Object Explorer, right-click Integration Services Catalogs and select Create Catalog.
In the Create Catalog dialog, the option Enable this server as SSIS scale out master is selected by default.
4. Enable a Scale Out Worker
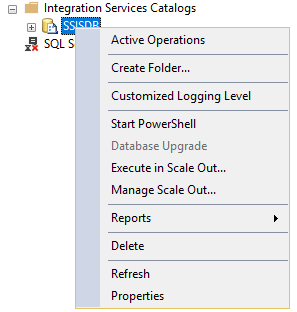
In SSMS, right-click SSISDB and select Manage Scale Out.
The Integration Services Scale Out Manager app opens. For more info, see Scale Out Manager.
To enable a Scale Out Worker, switch to Worker Manager and select the worker you want to enable. The workers are disabled by default. Click Enable Worker to enable the selected worker.
5. Run packages in Scale Out
Now you're ready to run SSIS packages in Scale Out. For more info, see Run Packages in Integration Services (SSIS) Scale Out.
Next steps
Feedback
Coming soon: Throughout 2024 we will be phasing out GitHub Issues as the feedback mechanism for content and replacing it with a new feedback system. For more information see: https://aka.ms/ContentUserFeedback.
Submit and view feedback for