Events
Mar 31, 11 PM - Apr 2, 11 PM
The biggest SQL, Fabric and Power BI learning event. March 31 – April 2. Use code FABINSIDER to save $400.
Register todayThis browser is no longer supported.
Upgrade to Microsoft Edge to take advantage of the latest features, security updates, and technical support.
Applies to: ![]() SQL Server 2016 (13.x) and later
SQL Server 2016 (13.x) and later ![]() Azure SQL Managed Instance
Azure SQL Managed Instance
This quickstart helps you understand how to write backups to and restore from the Azure Blob Storage. The article explains how to create an Azure Blob Storage container, write a backup to Azure Blob Storage, and then perform a restore.
Note
SQL Server 2012 SP1 CU2 introduced support for back up to Azure Blob storage. SQL Server 2014 and prior does not support the Shared Access Signature (SAS) that is described in this quickstart article.
For SQL Server 2014 and prior, use Tutorial: SQL Server 2014 Backup and Restore to Microsoft Azure Blob storage.
To complete this quickstart, you must be familiar with SQL Server backup and restore concepts and T-SQL syntax. You need an Azure storage account, SQL Server Management Studio (SSMS), and access to either a server that's running SQL Server or Azure SQL Managed Instance. Additionally, the account used to issue the BACKUP and RESTORE commands should be in the db_backupoperator database role with alter any credential permissions.
A container provides a grouping of a set of blobs. All blobs must be in a container. A storage account can contain an unlimited number of containers, but must have at least one container. A container can store an unlimited number of blobs.
To create a Container, follow these steps:
Open the Azure portal.
Navigate to your Storage Account.
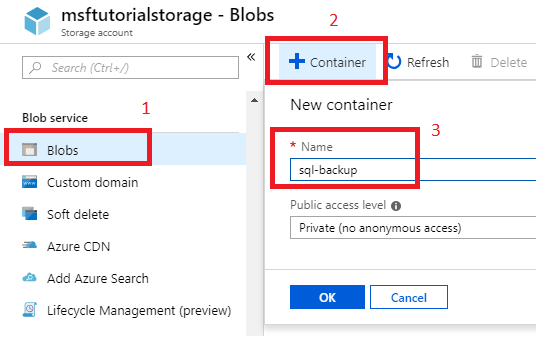
Select the storage account, scroll down to Blob Services.
Select Blobs and then select + Container to add a new container.
Enter the name for the container and make note of the container name you specified. This information is used in the URL (path to backup file) in the T-SQL statements later in this quickstart.
Select OK.
Note
Authentication to the storage account is required for SQL Server backup and restore even if you choose to create a public container. You can also create a container programmatically using REST APIs. For more information, see Create container
In this step, create a test database using SQL Server Management Studio (SSMS).
USE [master]
GO

-- Create database
CREATE DATABASE [SQLTestDB]
GO

-- Create table in database
USE [SQLTestDB]
GO
CREATE TABLE SQLTest (
    ID INT NOT NULL PRIMARY KEY,
    c1 VARCHAR(100) NOT NULL,
    dt1 DATETIME NOT NULL DEFAULT getdate()
)
GO

-- Populate table
USE [SQLTestDB]
GO

INSERT INTO SQLTest (ID, c1) VALUES (1, 'test1')
INSERT INTO SQLTest (ID, c1) VALUES (2, 'test2')
INSERT INTO SQLTest (ID, c1) VALUES (3, 'test3')
INSERT INTO SQLTest (ID, c1) VALUES (4, 'test4')
INSERT INTO SQLTest (ID, c1) VALUES (5, 'test5')
GO

SELECT * FROM SQLTest
GO

-- Disable TDE for newly-created databases on SQL Managed Instance
USE [SQLTestDB];
GO
ALTER DATABASE [SQLTestDB] SET ENCRYPTION OFF;
GO
DROP DATABASE ENCRYPTION KEY
GO
Use the GUI in SQL Server Management Studio to create the credential by following the steps below. Alternatively, you can create the credential programmatically as well.
Expand the Databases node within Object Explorer of SQL Server Management Studio(SSMS).
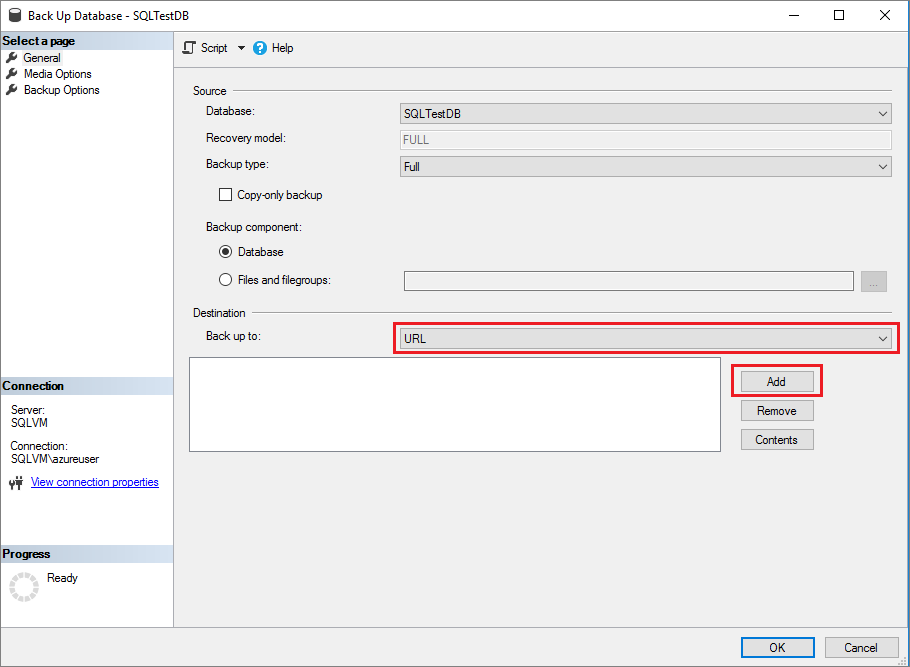
Right-click your new SQLTestDB database, hover over Tasks and then select Back up... to launch the Back Up Database wizard.
Select URL from the Back up to destination drop-down, and then select Add to launch the Select Backup Destination dialog box.
Select New container on the Select Backup Destination dialog box to launch the Connect to a Microsoft Subscription window.

Sign in to the Azure portal by selecting Sign In... and then proceed through the sign-in process.
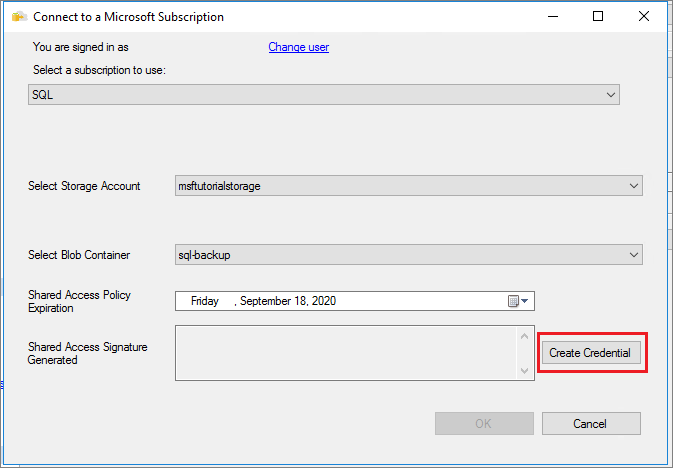
Select your subscription from the drop-drown.
Select your storage account from the drop-down.
Select the container you created previously from the drop-down.
Select Create Credential to generate your Shared Access Signature (SAS). Save this value as you'll need it for the restore.
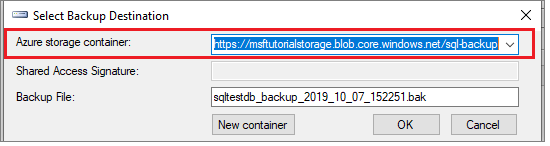
Select OK to close the Connect to a Microsoft Subscription window. This populates the Azure storage container value on the Select Backup Destination dialog box. Select OK to choose the selected storage container, and close the dialog box.
At this point, you can either skip ahead to step 4 in the next section to take the backup of the database, or close the Back up Database wizard if you want to proceed with using Transact-SQL to back up the database instead.
In this step, back up the database SQLTestDB to your Azure Blob storage account using either the GUI within SQL Server Management Studio, or Transact-SQL (T-SQL).
If the Back Up Database wizard is not already open, expand the Databases node within Object Explorer of SQL Server Management Studio(SSMS).
Right-click your new SQLTestDB database, hover over Tasks and then select Back up... to launch the Back Up Database wizard.
Select URL from the Back up to drop down, and then select Add to launch the Select Backup Destination dialog box.
Select the container you created in the previous step in the Azure storage container drop-down.
Select OK on the Back Up Database wizard to back up your database.
Select OK once your database is backed up successfully to close all backup-related windows.
Tip
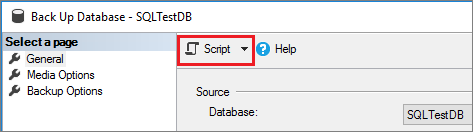
You can script out the Transact-SQL behind this command by selecting Script at the top of the Back Up Database wizard:
In this step, delete the database before performing the restore. This step is only necessary for the purpose of this tutorial, but is unlikely to be used in normal database management procedures. You can skip this step, but then you'll either need to change the name of the database during the restore on a managed instance, or run the restore command WITH REPLACE to restore the database successfully on-premises.
SQLTestDB database, and select delete to launch the Delete object wizard.In this step, restore the database using either the GUI in SQL Server Management Studio, or with Transact-SQL.
Right-click the Databases node in Object Explorer within SQL Server Management Studio and select Restore Database.
Select Device and then select the ellipses (...) to choose the device.
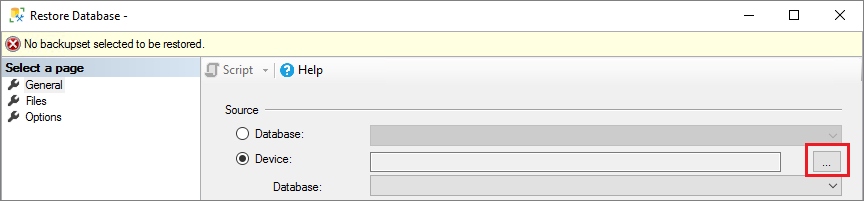
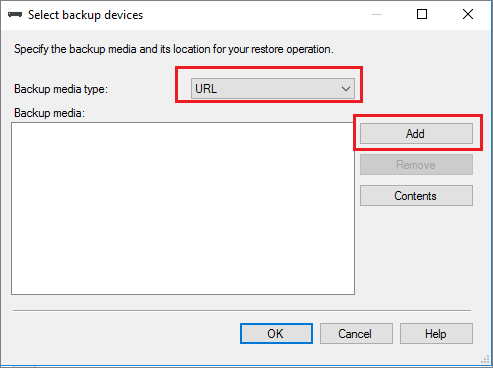
Select URL from the Backup media type drop-down and select Add to add your device.
Select the container from the drop-down and then paste in the Shared Access Signature (SAS) you saved when creating the credential.
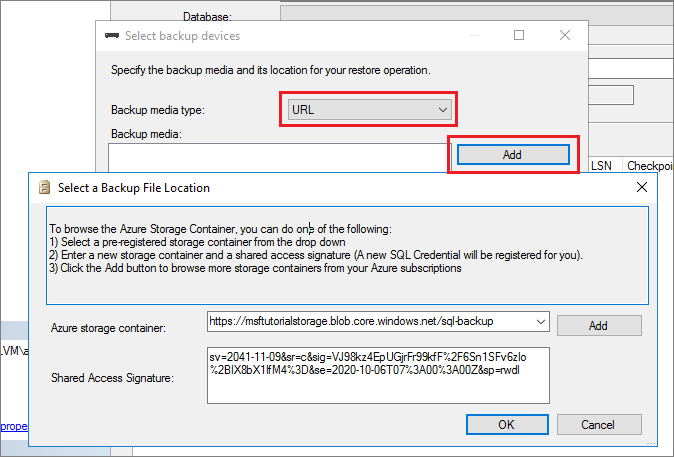
Select OK to select the backup file location.
Expand Containers and select the container where your backup file exists.
Select the backup file you want to restore and then select OK. If no files are visible, then you may be using the wrong SAS key. You can regenerate the SAS key again by following the same steps as before to add the container.

Select OK to close the Select backup devices dialog box.
Select OK to restore your database.
Following is some recommended reading to understand the concepts and best practices when using Azure Blob Storage for SQL Server backups.
Events
Mar 31, 11 PM - Apr 2, 11 PM
The biggest SQL, Fabric and Power BI learning event. March 31 – April 2. Use code FABINSIDER to save $400.
Register todayTraining
Certification
Microsoft Certified: Azure Database Administrator Associate - Certifications
Administer an SQL Server database infrastructure for cloud, on-premises and hybrid relational databases using the Microsoft PaaS relational database offerings.
Documentation
SQL Server Backup to URL for Microsoft Azure Blob Storage - SQL Server
Learn about the concepts, requirements, and components necessary for SQL Server to use the Microsoft Azure Blob Storage as a backup destination.
Backup & restore with Azure Blob Storage - SQL Server
SQL Server Backup and Restore with Microsoft Azure Blob Storage
Restoring From Backups Stored in Microsoft Azure - SQL Server
Understand considerations for restoring a SQL Server database using a backup stored in Azure Blob storage.