Deploy and manage Azure Stack HCI clusters in VMM
This article provides information about how to set up an Azure Stack HCI cluster in System Center - Virtual Machine Manager (VMM). You can deploy an Azure Stack HCI cluster by provisioning from bare-metal servers or by adding existing hosts. Learn more about the new Azure Stack HCI.
VMM 2019 Update Rollup 3 (UR3) supports Azure Stack HCI, version 20H2. The current product is Azure Stack HCI, version 21H2. Starting with System Center 2022, VMM supports Azure Stack HCI, version 20H2; Azure Stack HCI, version 21H2; and Azure Stack HCI, version 22H2 (supported from VMM 2022 UR1).
Important
Azure Stack HCI clusters that are managed by Virtual Machine Manager shouldn’t join the preview channel yet. System Center (including Virtual Machine Manager, Operations Manager, and other components) does not currently support Azure Stack preview versions. For the latest updates, see the System Center blog.
Before you start
Ensure that you're running VMM 2019 UR3 or later.
What’s supported?
Addition, creation, and management of Azure Stack HCI clusters. See detailed steps to create and manage HCI clusters.
Ability to provision & deploy VMs on the Azure Stack HCI clusters and perform VM life cycle operations. VMs can be provisioned using VHD(x) files, templates, or from an existing VM. Learn more.
Deployment and management of SDN network controller on Azure Stack HCI clusters.
Management of storage pool settings, creation of virtual disks, creation of cluster shared volumes (CSVs), and application of QoS settings.
Moving VMs between Windows Server and Azure Stack HCI clusters works via Network Migration and migrating an offline (shut down) VM. In this scenario, VMM does export and import under the hood, even though it's performed as a single operation.
The PowerShell cmdlets used to manage Windows Server clusters can be used to manage Azure Stack HCI clusters as well.
Register and unregister Azure Stack HCI clusters
With VMM 2022, we're introducing VMM PowerShell cmdlets to register and unregister Azure Stack HCI clusters.
Use the following cmdlets to register an HCI cluster:
Register-SCAzStackHCI -VMHostCluster <HostCluster> -SubscriptionID <string>
Use the following command to unregister a cluster:
Unregister-SCAzStackHCI -VMHostCluster <HostCluster> -SubscriptionID <string>
For detailed information on the supported parameter, see Register-SCAzStackHCI and Unregister-SCAzStackHCI.
What’s not supported?
Management of Azure Stack HCI stretched clusters is currently not supported in VMM.
Azure Stack HCI is intended as a virtualization host where you run all your workloads in virtual machines. The Azure Stack HCI terms allow you to run only what's necessary for hosting virtual machines. Azure Stack HCI clusters shouldn't be used for other purposes like WSUS servers, WDS servers, or library servers. Refer to Use cases for Azure Stack HCI, When to use Azure Stack HCI, and Roles you can run without virtualizing.
Live migration between any version of Windows Server and Azure Stack HCI clusters isn't supported.
Note
Live migration between Azure Stack HCI clusters works, as well as between Windows Server clusters.
- The only storage type available for Azure Stack HCI is Storage Spaces Direct (S2D). Creation or management of non-S2D cluster with Azure Stack HCI nodes isn't supported. If you need to use any other type of storage, for example SANs, use Windows Server as the virtualization host.
Note
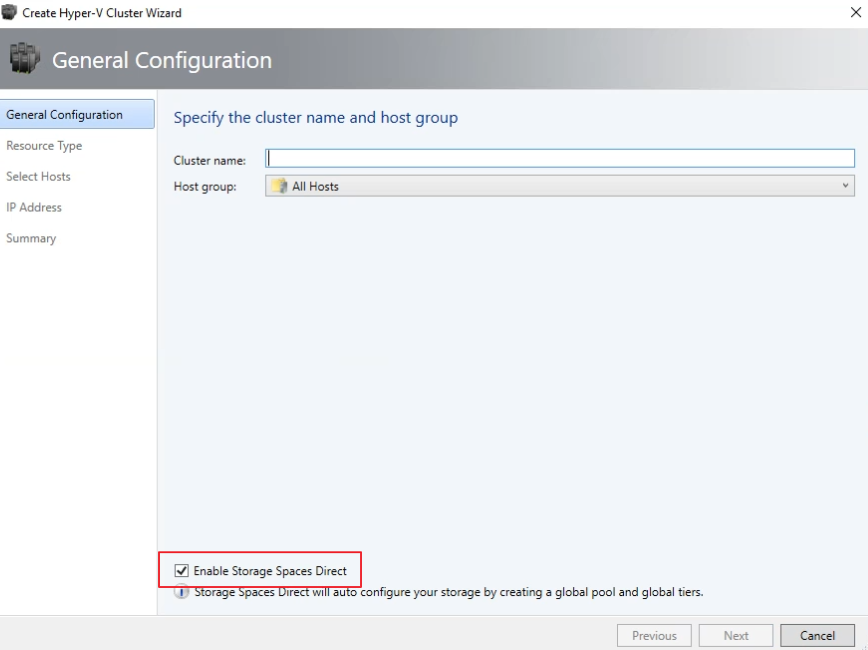
You must enable S2D when creating an Azure Stack HCI cluster. To enable S2D, in the cluster creation wizard, go to General Configuration. Under Specify the cluster name and host group, select Enable Storage Spaces Direct as shown below:
After you enable a cluster with S2D, VMM does the following:
- The Failover Clustering feature is enabled.
- Storage replica and data deduplication are enabled.
- The cluster is optionally validated and created.
- S2D is enabled, and a storage array object is created in VMM with the same name as you provided in the wizard.
When you use VMM to create a hyper-converged cluster, the pool and the storage tiers are automatically created by running Enable-ClusterStorageSpacesDirect -Autoconfig $True.
After these prerequisites are in place, you provision a cluster, and set up storage resources on it. You can then deploy VMs on the cluster.
Follow these steps:
Step 1: Provision the cluster
You can provision a cluster by Hyper-V hosts and bare-metal machines:
Provision a cluster from Hyper-V hosts
If you need to add the Azure Stack HCI hosts to the VMM fabric, follow these steps. If they’re already in the VMM fabric, skip to the next step.
Note
- When you set up the cluster, select the Enable Storage Spaces Direct option on the General Configuration page of the Create Hyper-V Cluster wizard.
- In Resource Type, select Existing servers running a Windows Server operating system, and select the Hyper-V hosts to add to the cluster.
- All the selected hosts should have Azure Stack HCI installed.
- Since S2D is enabled, the cluster must be validated.
Provision a cluster from bare metal machines
Note
Typically, S2D node requires RDMA, QoS, and SET settings. To configure these settings for a node using bare metal computers, you can use the post deployment script capability in PCP. Here's the sample PCP post deployment script. You can also use this script to configure RDMA, QoS, and SET while adding a new node to an existing S2D deployment from bare metal computers.
- Read the prerequisites for bare-metal cluster deployment.
Note
- The generalized VHD or VHDX in the VMM library should be running Azure Stack HCI with the latest updates. The Operating system and Virtualization platform values for the hard disk should be set.
- For bare-metal deployment, you need to add a pre-boot execution environment (PXE) server to the VMM fabric. The PXE server is provided through Windows Deployment Services. VMM uses its own WinPE image, and you need to ensure that it’s the latest. To do this, select Fabric > Infrastructure > Update WinPE image, and ensure that the job finishes.
- Follow the instructions for provisioning a cluster from bare-metal computers.
Step 2: Set up networking for the cluster
After the cluster is provisioned and managed in the VMM fabric, you need to set up networking for cluster nodes.
- Start by creating a logical network to mirror your physical management network.
- You need to set up a logical switch with Switch Embedded Teaming (SET) enabled so that the switch is aware of virtualization. This switch is connected to the management logical network and has all of the host virtual adapters, which are required to provide access to the management network or configure storage networking. S2D relies on a network to communicate between hosts. RDMA-capable adapters are recommended.
- Create VM networks.
Step 3: Configure DCB settings on the Azure Stack HCI cluster
Note
Configuration of DCB settings is an optional step to achieve high performance during S2D cluster creation workflow. Skip to step 4 if you do not wish to configure DCB settings.
Recommendations
If you've vNICs deployed, for optimal performance, we recommend you to map all your vNICs with the corresponding pNICs. Affinities between vNIC and pNIC are set randomly by the operating system, and there could be scenarios where multiple vNICs are mapped to the same pNIC. To avoid such scenarios, we recommend you to manually set affinity between vNIC and pNIC by following the steps listed here.
When you create a network adapter port profile, we recommend you to allow IEEE priority. Learn more.
You can also set the IEEE Priority by using the following PowerShell commands:
Set-VMNetworkAdapterVlan -VMNetworkAdapterName 'SMB2' -VlanId '101' -Access -ManagementOS
Set-VMNetworkAdapter -ManagementOS -Name 'SMB2' -IeeePriorityTag on
Use the following steps to configure DCB settings:
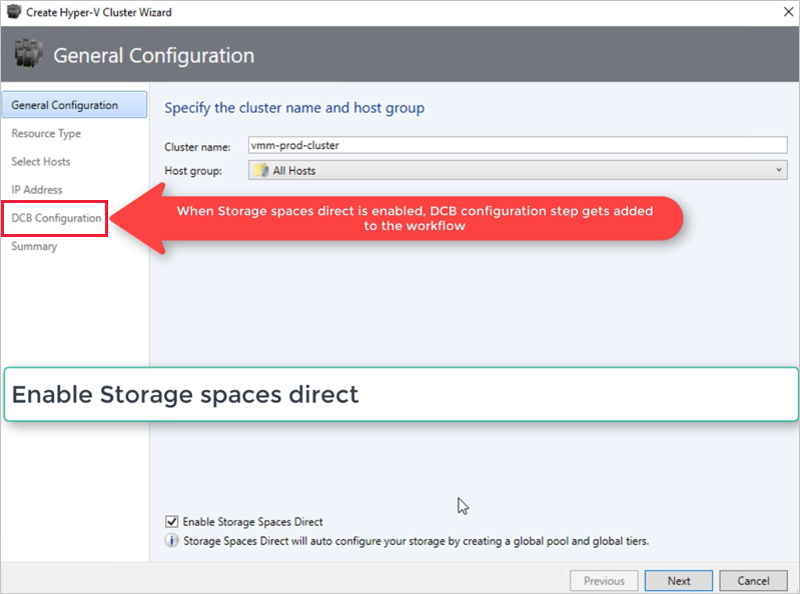
Create a new Hyper-V cluster, select Enable Storage Spaces Direct. DCB Configuration option gets added to the Hyper-V cluster creation workflow.
In DCB configuration, select Configure Data Center Bridging.
Provide Priority and Bandwidth values for SMB-Direct and Cluster Heartbeat traffic.
Note
Default values are assigned to Priority and Bandwidth. Customize these values based on your organization's environment needs.
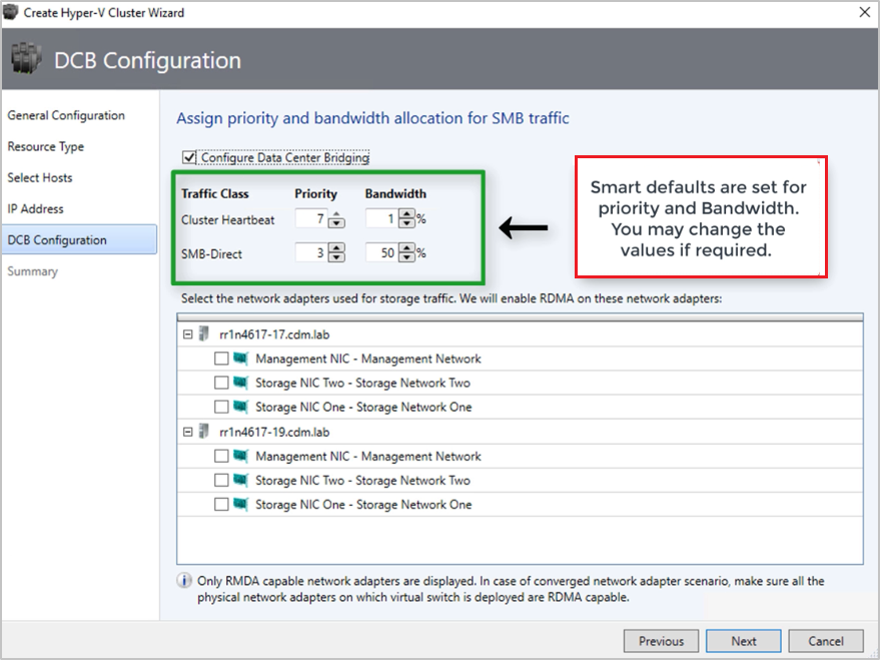
Default values:
| Traffic Class | Priority | Bandwidth (%) |
|---|---|---|
| Cluster Heartbeat | 7 | 1 |
| SMB-Direct | 3 | 50 |
Select the network adapters used for storage traffic. RDMA is enabled on these network adapters.
Note
In a converged NIC scenario, select the storage vNICs. The underlying pNICs should be RDMA capable for vNICs to be displayed and available for selection.

Review the summary and select Finish.
An Azure Stack HCI cluster will be created and the DCB parameters are configured on all the S2D nodes.
Note
- DCB settings can be configured on the existing Hyper-V S2D clusters by visiting the Cluster Properties page and navigating to the DCB configuration page.
- Any out-of-band changes to DCB settings on any of the nodes will cause the S2D cluster to be non-compliant in VMM. A Remediate option will be provided in the DCB configuration page of cluster properties, which you can use to enforce the DCB settings configured in VMM on the cluster nodes.
Step 4: Register Azure Stack HCI cluster with Azure
After creating an Azure Stack HCI cluster, it must be registered with Azure within 30 days of installation per Azure Online Service terms. If you're using System Center 2022, use Register-SCAzStackHCI cmdlet in VMM to register the Azure Stack HCI cluster with Azure. Alternatively, follow these steps to register the Azure Stack HCI cluster with Azure.
The registration status will reflect in VMM after a successful cluster refresh.
Step 5: View the registration status of Azure Stack HCI clusters
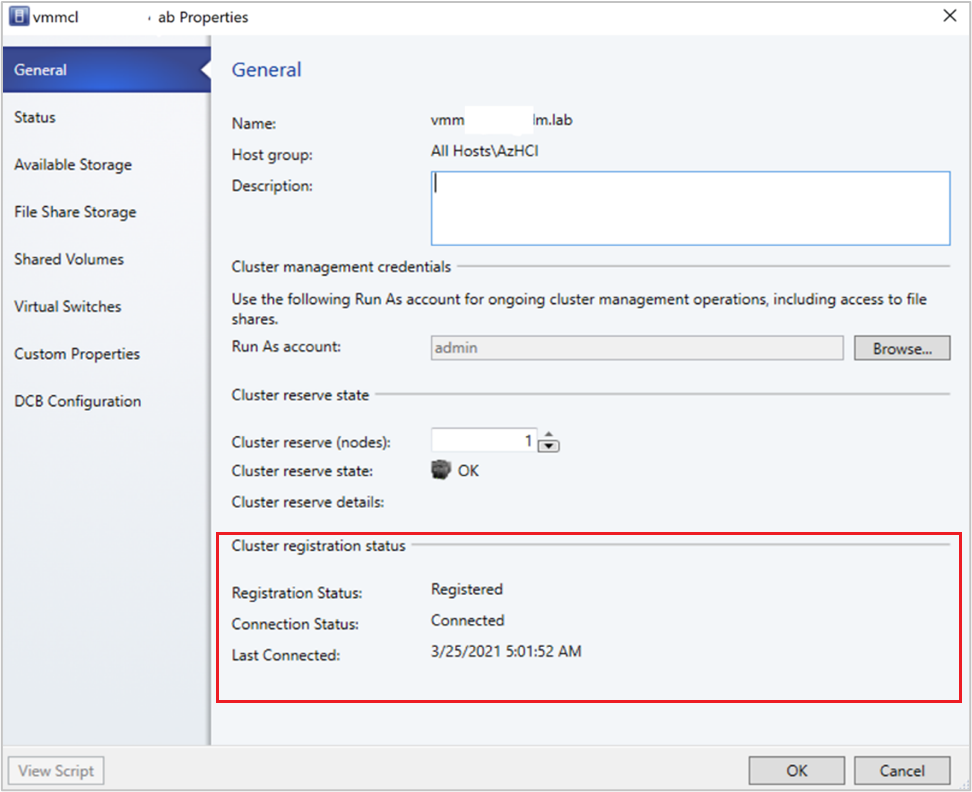
In the VMM console, you can view the registration status and last connected date of Azure Stack HCI clusters.
Select Fabric, right-click the Azure Stack HCI cluster, and select Properties.
Alternatively, run
Get-SCVMHostand observe the properties of returned object to check the registration status.
Step 6: Manage the pool and create CSVs
You can now modify the storage pool settings and create virtual disks and CSVs.
Select Fabric > Storage > Arrays.
Right-click the cluster > Manage Pool, and select the storage pool that was created by default. You can change the default name and add a classification.
To create a CSV, right-click the cluster > Properties > Shared Volumes.
In the Create Volume Wizard > Storage Type, specify the volume name and select the storage pool.
In Capacity, you can specify the volume size, file system, and resiliency (Failures to tolerate) settings.
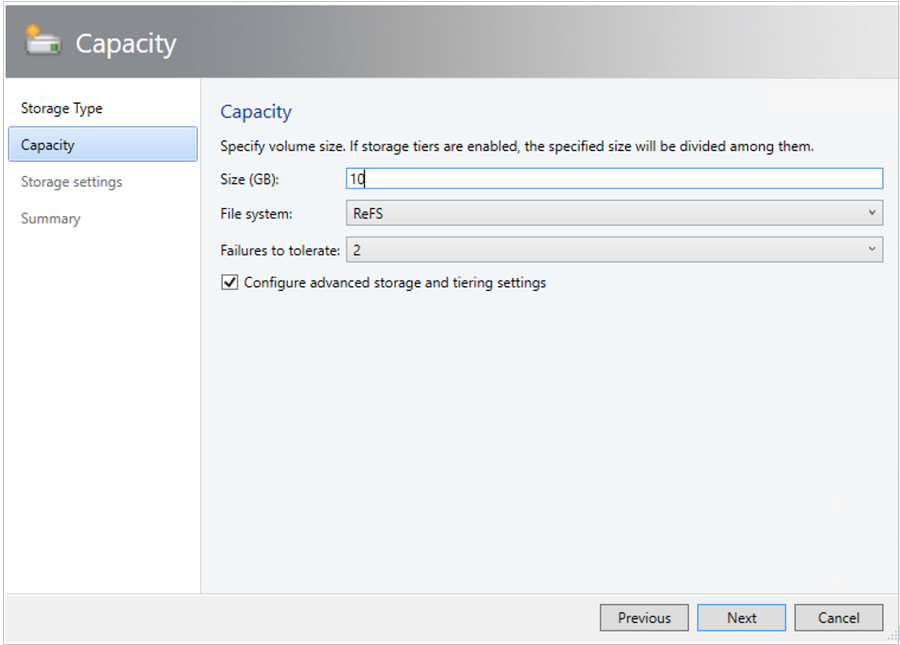
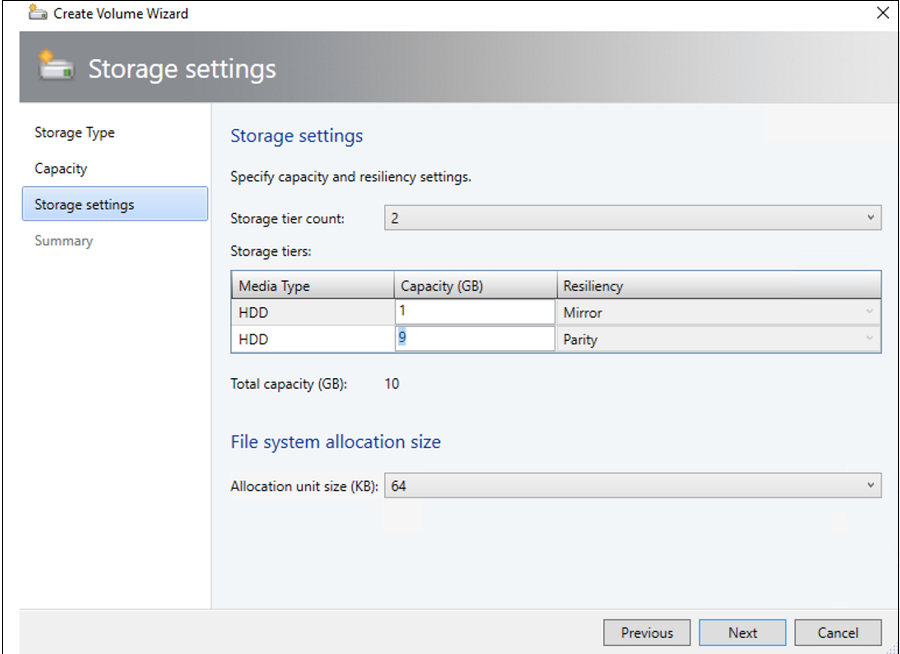
Select Configure advanced storage and tiering settings to set up these options.
In Summary, verify settings and finish the wizard. A virtual disk will be created automatically when you create the volume.
Step 7: Deploy VMs on the cluster
In a hyper-converged topology, VMs can be directly deployed on the cluster. Their virtual hard disks are placed on the volumes you created using S2D. You create and deploy these VMs just as you would create any other VM.
Important
If the Azure Stack HCI cluster isn't registered with Azure or not connected to Azure for more than 30 days post registration, high availability virtual machine (HAVM) creation will be blocked on the cluster. Refer to step 4 & 5 for cluster registration.
Step 8: Migrate VMs from Windows Server to Azure Stack HCI cluster
Use Network migration functionality in VMM to migrate workloads from Hyper-V (Windows Server 2019 & later) to Azure Stack HCI.
Note
Live migration between Windows Server and Azure Stack HCI isn’t supported. Network migration from Azure Stack HCI to Windows Server isn’t supported.
- Temporarily disable the live migration at the destination Azure Stack HCI host.
- Select VMs and Services > All Hosts, and then select the source Hyper-V host from which you want to migrate.
- Select the VM that you want to migrate. The VM must be in a turned off state.
- Select Migrate Virtual Machine.
- In Select Host, review and select the destination Azure Stack HCI host.
- Select Next to initiate network migration. VMM will perform imports and exports at the back end.
- To verify that the virtual machine is successfully migrated, check the VMs list on the destination host. Turn on the VM and re-enable live migration on the Azure Stack HCI host.
Step 9: Migrate VMware workloads to Azure Stack HCI cluster using SCVMM
VMM offers a simple wizard-based experience for V2V (Virtual to Virtual) conversion. You can use the conversion tool to migrate workloads at scale from VMware infrastructure to Hyper-V infrastructure. For the list of supported VMware servers, see System requirements.
For prerequisites and limitations for the conversion, see Convert a VMware VM to Hyper-V in the VMM fabric.
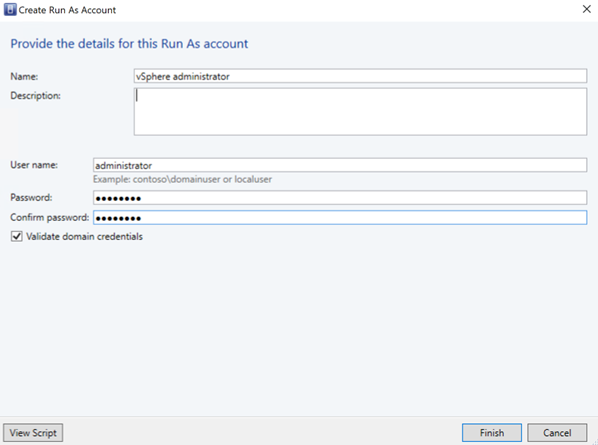
Create Run as account for vCenter Server Administrator role in VMM. These administrator credentials are used to manage vCenter server and ESXi hosts.
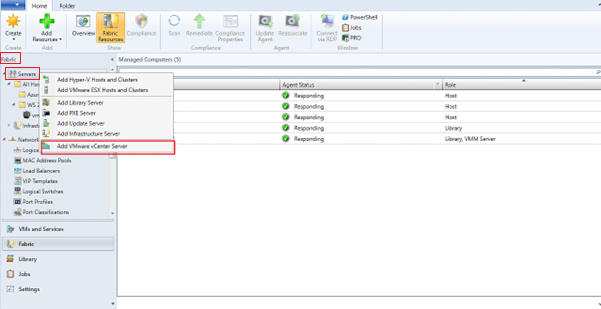
In the VMM console, under Fabric, select Servers > Add VMware vCenter Server.
In the Add VMware vCenter Server page, do the following:
- Computer name: Specify the vCenter server name.
- Run As account: Select the Run As account created for vSphere administrator.
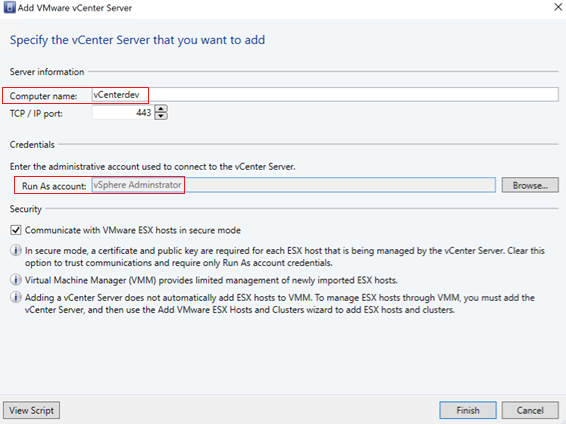
Select Finish.
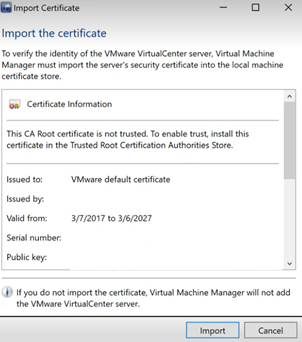
In the Import Certificate page, select Import.
After the successful addition of the vCenter server, all the ESXi hosts under the vCenter are migrated to VMM.


Add Hosts
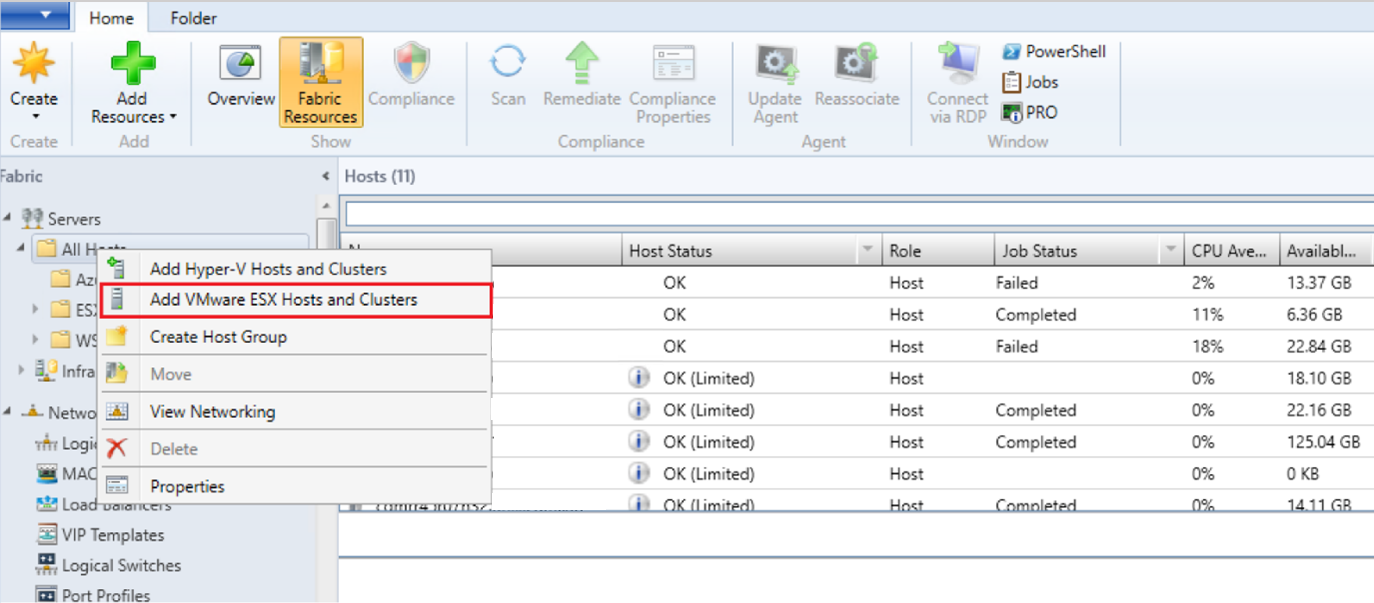
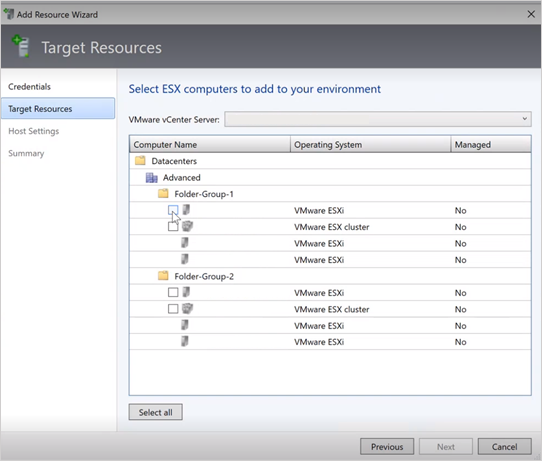
- In the VMM console, under Fabric, select Servers > Add VMware ESX Hosts and Clusters.
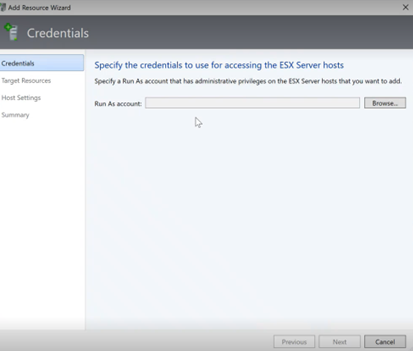
- In the Add Resource Wizard,
Under Credentials, select the Run as account that is used for the port and select Next.
Under Target Resources, select all the ESX clusters that need to be added to VMM and select Next.
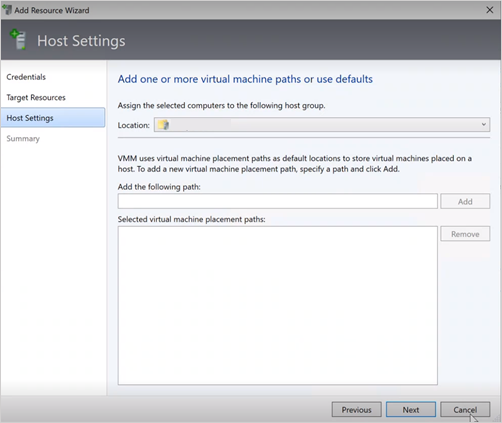
Under Host Settings, select the location where you want to add the VMs and select Next.
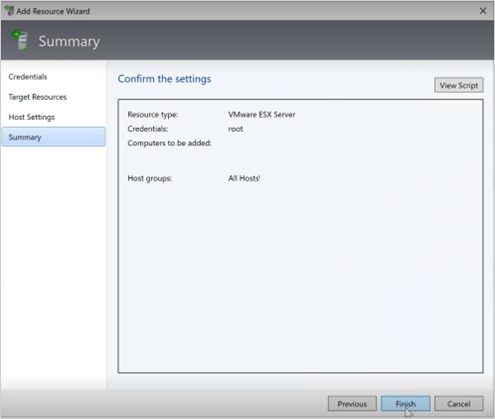
Under Summary, review the settings and select Finish. Along with the hosts, associated VMs will also get added.


Verify the status of ESXi host
- If the ESXi host status reflects as OK (Limited), right-click Properties > Management, select Run as account that is used for the port and import the certificates for the host.
Repeat the same process for all the ESXi hosts.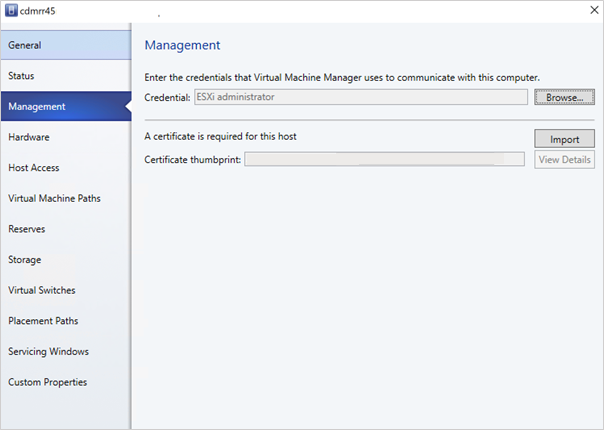 After you add the ESXi clusters, all the virtual machines running on the ESXi clusters are auto discovered in VMM.
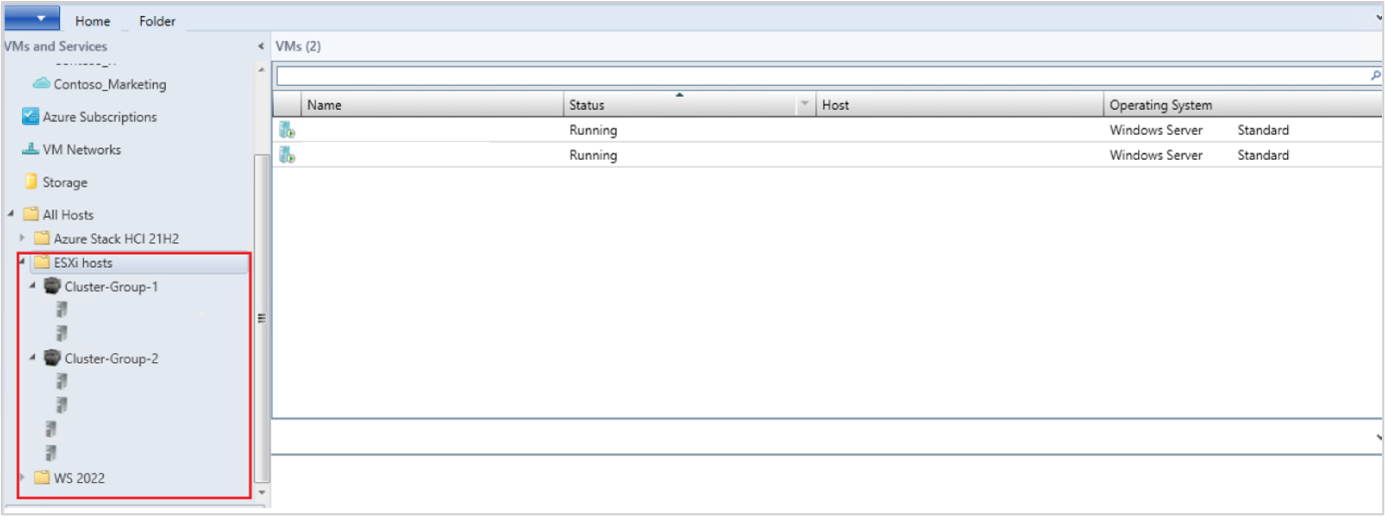
View VMs
Go to VMs and Services to view the virtual machines. You can also manage the primary lifecycle operations of these virtual machines from VMM.
Right-click the VM and select Power Off (online migrations are not supported) that need to be migrated and uninstall VMware tools from the guest operating system.
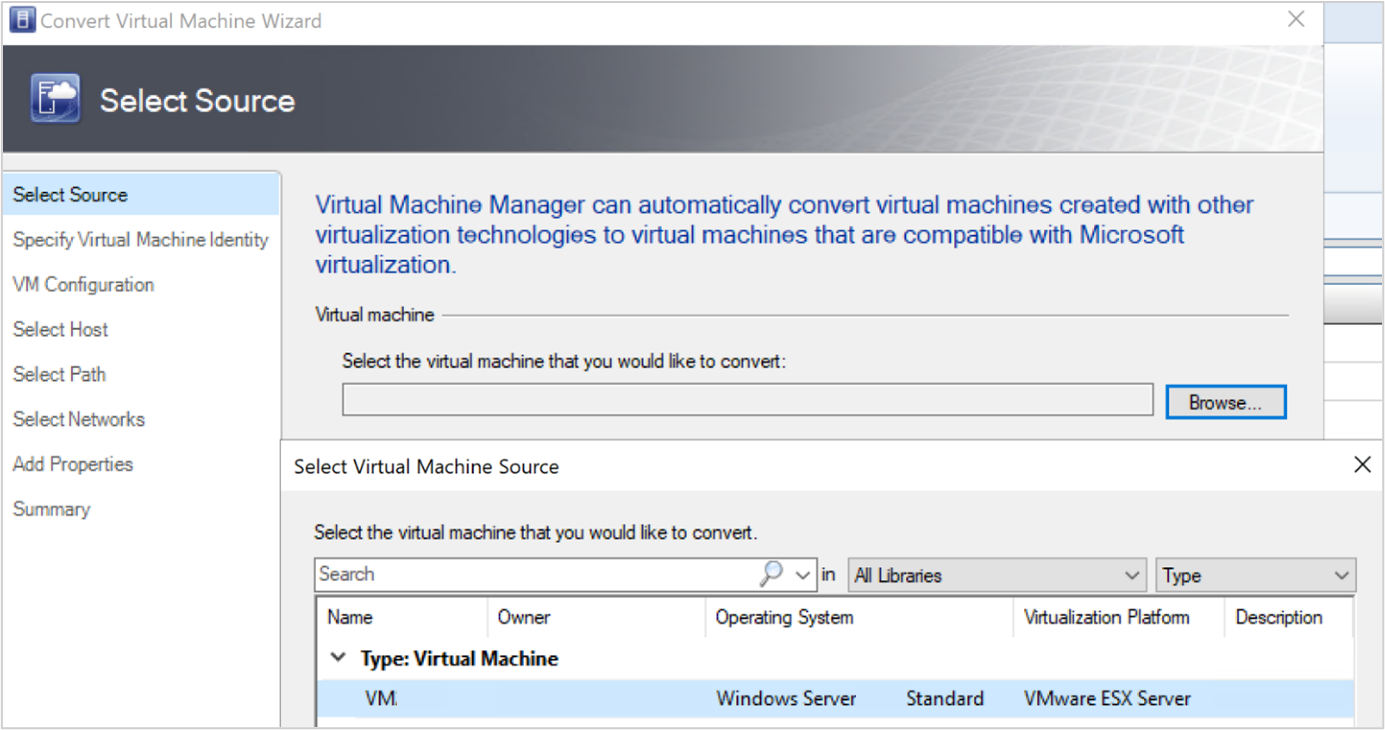
Select Home > Create Virtual Machines > Convert Virtual Machine.
In the Convert Virtual Machine Wizard,
- Under Select Source, select the VM running in ESXi server and select Next.
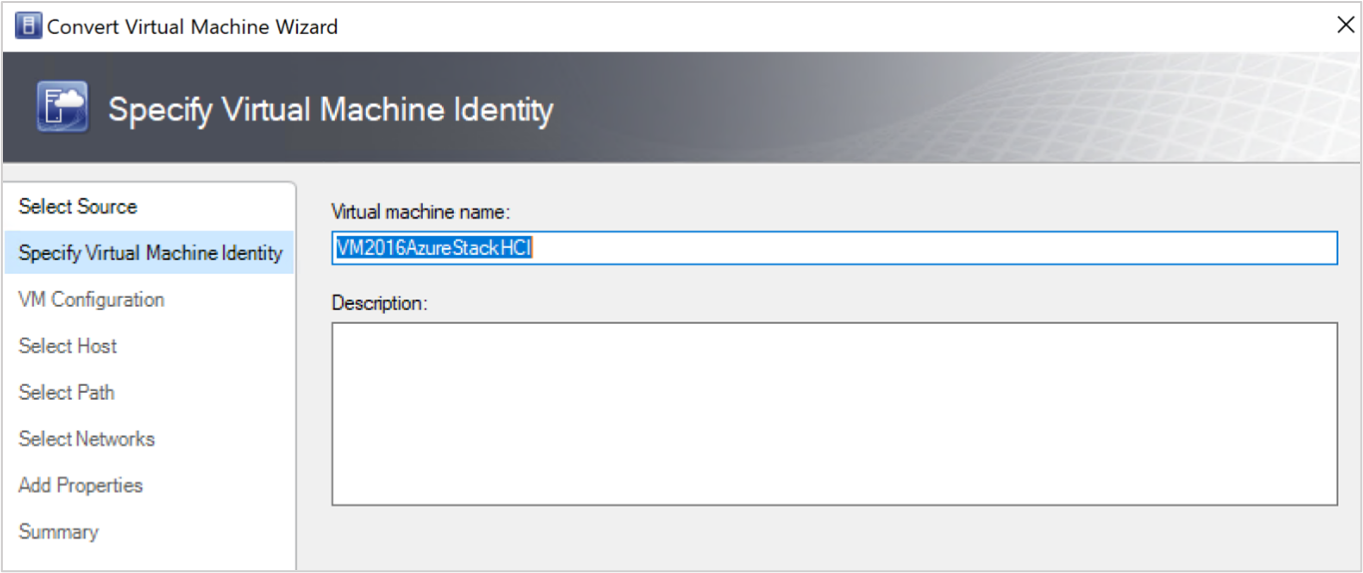
- Under Specify Virtual Machine Identity, enter the new name for the virtual machine if you wish to and select Next.
- Under Select Source, select the VM running in ESXi server and select Next.
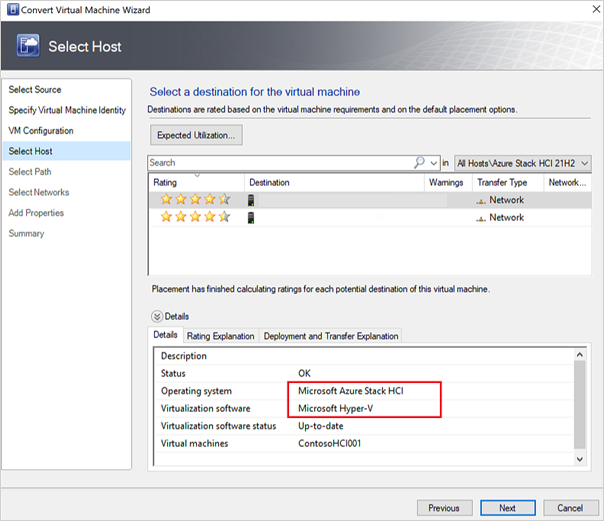
Under Select Host, select the target Azure Stack HCI node and specify the location on the host for VM storage files and select Next.
Select a virtual network for the virtual machine and select Create to complete the migration.
The virtual machine running on the ESXi cluster is successfully migrated to Azure Stack HCI cluster. For automation, use PowerShell commands for conversion.
Next steps
Feedback
Coming soon: Throughout 2024 we will be phasing out GitHub Issues as the feedback mechanism for content and replacing it with a new feedback system. For more information see: https://aka.ms/ContentUserFeedback.
Submit and view feedback for