Configure SLB VIPs through VMM service templates
Important
This version of Virtual Machine Manager (VMM) has reached the end of support. We recommend you to upgrade to VMM 2022.
Software Defined Networking (SDN) can use Software Load Balancing (SLB) to evenly distribute network traffic among workloads managed by service provider and tenants. VMM 2016 only supports deploying SLB Virtual IPs (VIPs) using PowerShell.
System Center - Virtual Machine Manager (VMM) 1801 and later support configuration of SLB VIPs while deploying multi-tier application by using service templates and also support both public and internal load balancing.
System Center - Virtual Machine Manager (VMM) supports configuration of SLB VIPs while deploying multi-tier application by using service templates and also supports both public and internal load balancing.
Before you begin
Ensure the following prerequisites are met:
Procedure to create SLB VIPs
Use the following steps:
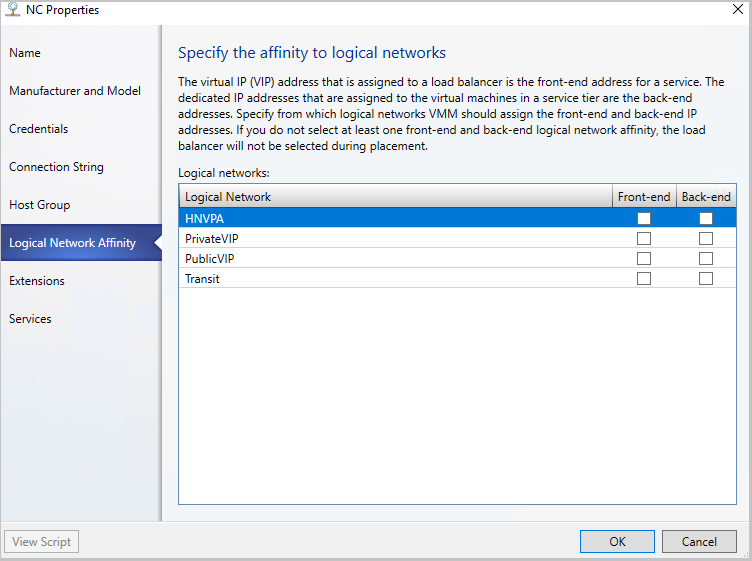
Specify the affinity to logical networks.
In the VMM console, select Fabric > Network Service > Network Controller > Properties > Logical Network Affinity page.
Specify the Front-end and Back-end networks available for load balancing and select OK.
Create a VIP template.
In the VMM console, select Fabric > Create VIP Template.
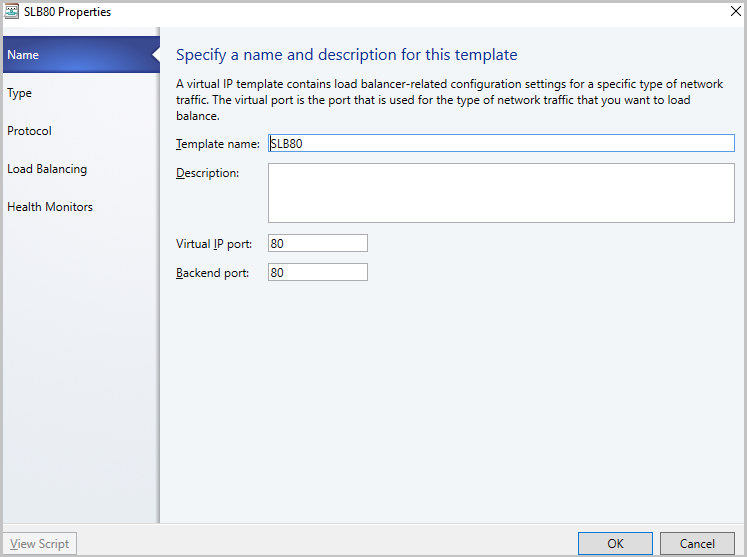
In the Load Balancer VIP Template Wizard > Name, specify the template name and description.
In the Virtual IP port, specify the port that will be used for the type of network traffic you want to balance.
In the Backend port, specify the port on which the backend server is listening for requests.
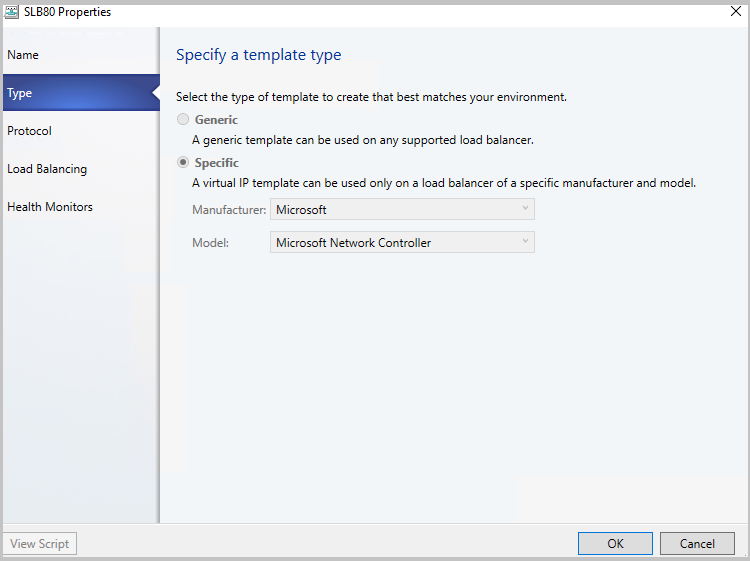
In Type, specify a template type, select Specific. Select Microsoft for Manufacturer. Select Microsoft network controller for Model. Select Next.
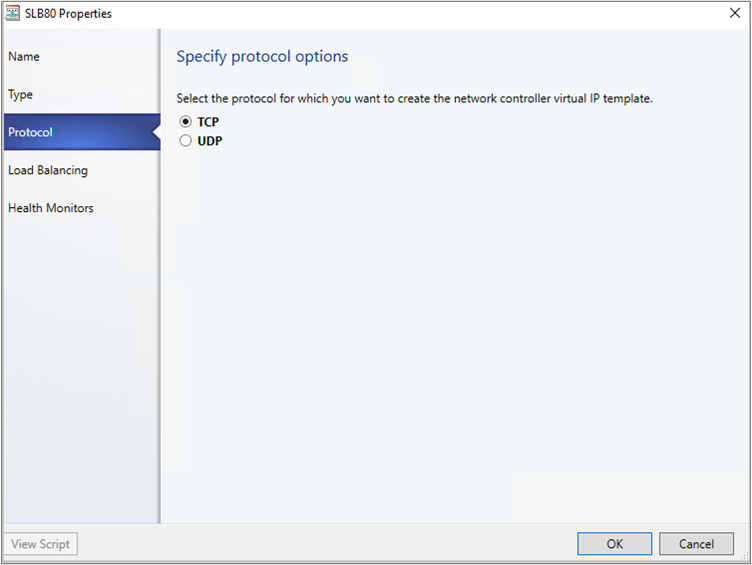
In Protocol, specify protocol options. Select Next.
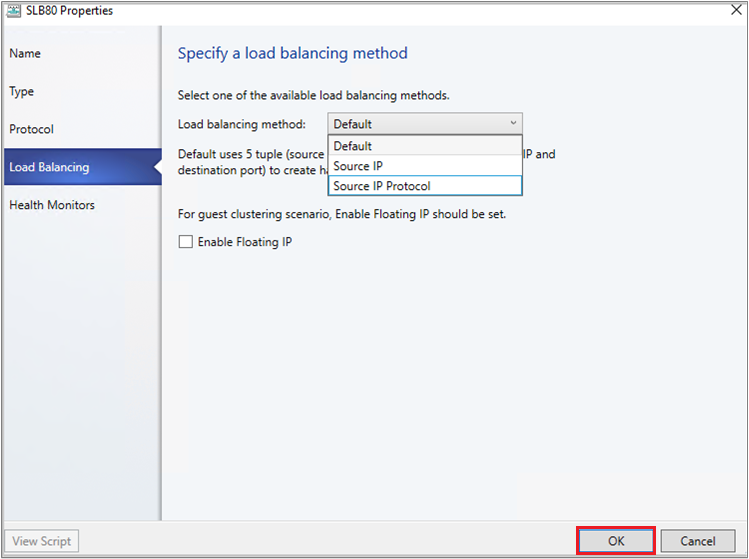
In Load Balancing method, select the method and select Next.
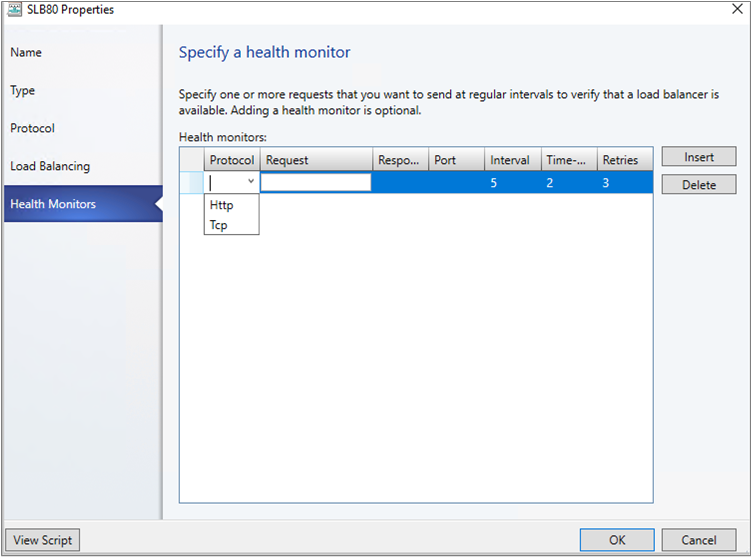
In Health Monitors, you can optionally specify that a verification should run against the load balancer at regular intervals. To add a health monitor, specify the protocol and the request. For example, entering the command GET makes an HTTP GET request for the home page of the load balancer and checks for a header response. You can also modify the response type, monitoring interval, timeout, and retries.
Note
The timeout should be less than the interval.
- In Summary, confirm the Settings and select Finish to create the VIP template.
Configure SLB VIP while deploying Service
- If the service template isn't open, select Library > Templates > Service Templates and open it.
- Select Actions > Open Designer.
- In the Service Template Designer, select the Service Template Components group > Add Load Balancer.
- Select the load balancer object. You'll identify it with the VIP template name.
- Select Tool > Connector. Select the Server connection associated with the template and then select a NIC object to connect the load balancer to the adapter. In the NIC properties, check the address types and ensure that the MAC address is static.
Note
The server connection must be connected to the back-end network interface of the service. The back-end network interface can be connected to either a One Connected VM Network or a network virtualized VM Network.
With the Connector enabled, select the client connection associated with the load balancer and then select a logical network object.
Note
Client connection must be connected to a front-end network of the load balancer. This can be a Public VM network or a network virtualized VM network. A network virtualized VM Network is used for internal load balancing scenarios.
Save the service template in Service Template > Save and Validate.
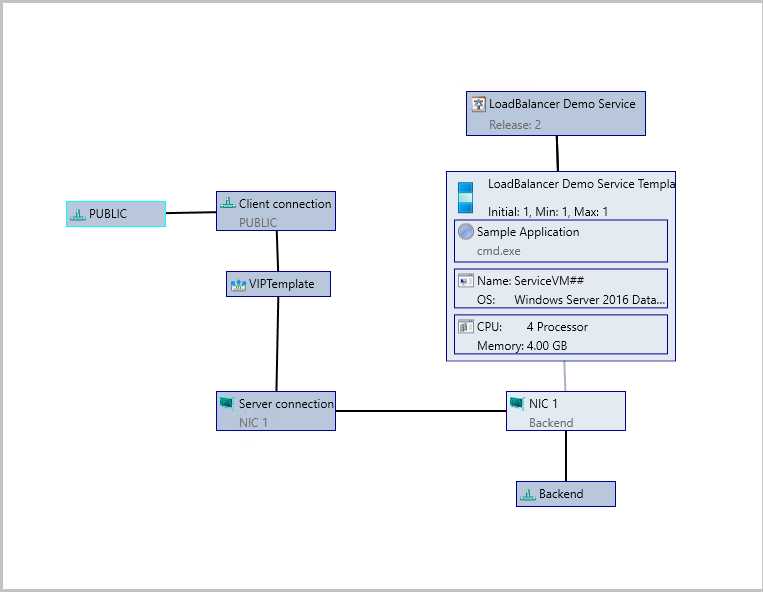
Example 1: Configuring Service with ‘Public’ VM Network as front-end. Here the ‘Backend’ network can be One connected or network virtualized VM network.
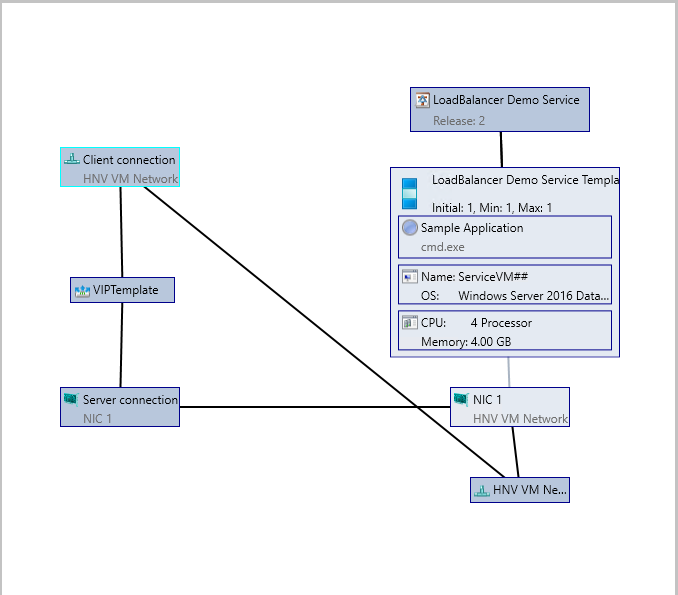
Example 2: Configuring Service with front-end and back-end connected to network virtualized VM Network ‘HNV VM Network’. This scenario is used for internal load balancing.
Set up the VIP for user access
When the service is deployed, VMM automatically selects a VIP from the reserved range in the static IP address pool and assigns it to the load-balanced service tier. To enable users to connect to the service, after the service is deployed, you need to determine the VIP and configure a DNS entry for it.
- After the service is deployed, select Fabric > Networking > Load Balancers.
- Select Show > Service > Load Balancer Information for Services and expand the service to see which VIP is assigned.
- If users use the DNS name to access the service, request the DNS administrator to manually create a DNS entry for the VIP. The entry should be the name that users will specify to connect to the service. For example, servicename.contosol.com.
Feedback
Coming soon: Throughout 2024 we will be phasing out GitHub Issues as the feedback mechanism for content and replacing it with a new feedback system. For more information see: https://aka.ms/ContentUserFeedback.
Submit and view feedback for