Exercise - Configure Azure Policy for Kubernetes on an AKS cluster
Azure Policy for Kubernetes helps organizations meet governance and legal requirements, implement best practices, and establish organizational conventions for cloud environments.
Development teams in your company are embracing Azure Kubernetes Service (AKS) as a development platform. You realize that the best way to manage costs is by enforcing business rules that define workload-resource limits. You want to make sure developers can deploy workloads only within specific limits for CPU and memory allocation. The system must prevent workloads that exceed those limits.
In this exercise, you'll enable Azure Policy for AKS on your cluster and add the Kubernetes cluster containers CPU and memory resource limits should not exceed the specified limits policy. Then, you'll test if the policy denies scheduling workloads that exceed the policy's resource parameters.
Enable the ContainerService and PolicyInsights resource providers
Sign in to Azure Cloud Shell by using your Azure account. Select the Bash version of Cloud Shell.
Azure Policy for AKS requires the cluster version to be 1.14 or later. Run the following script to validate your AKS cluster version:
Azure CLIaz aks listMake sure that the reported cluster version is 1.14 or later.
Register the Azure Kubernetes Service provider by running the
az provider registercommand:Azure CLIaz provider register --namespace Microsoft.ContainerServiceRegister the Azure Policy provider by running the
az provider registercommand:Azure CLIaz provider register --namespace Microsoft.PolicyInsightsEnable the add-on installation by running the
az feature registercommand:Azure CLIaz feature register --namespace Microsoft.ContainerService --name AKS-AzurePolicyAutoApproveCheck that the registration was successful by querying the feature-list table. Use the
az feature listcommand to run the query. The feature's registration can take several minutes to finish, so you have to check the result periodically.Azure CLIaz feature list -o table --query "[?contains(name, 'Microsoft.ContainerService/AKS-AzurePolicyAutoApprove')]. {Name:name,State:properties.state}"If the Cloud Shell session times out, you can track the registration process via the Azure portal by using the preview onboarding pane.
Run the
az provider registercommand to propagate the update after you confirm that the feature-list query command shows 'Registered':Azure CLIaz provider register -n Microsoft.ContainerService
Enable the Azure Policy on your cluster
Run the
az aks enable-addonscommand to enable theazure-policyadd-on for your cluster:Azure CLIaz aks enable-addons \ --addons azure-policy \ --name $AKS_CLUSTER_NAME \ --resource-group $RESOURCE_GROUPVerify that the azure-policy pod is installed in the
kube-systemnamespace and that the gatekeeper pod is installed in thegatekeeper-systemnamespace. To do so, run the followingkubectl get podscommands:Bashkubectl get pods -n kube-systemYour output should look similar to the following:
OutputNAME READY STATUS RESTARTS AGE azure-policy-78c8d74cd4-7fqn2 1/1 Running 0 12m azure-policy-webhook-545c898766-gsjrc 1/1 Running 0 12m ...Bashkubectl get pods -n gatekeeper-systemYour output should look similar to the following:
OutputNAME READY STATUS RESTARTS AGE gatekeeper-controller-manager-d5cd87796-5tmhq 1/1 Running 0 15m ...Finally, verify that the latest add-on is installed by running
az aks showcommand. This command retrieves the configuration information for your cluster.Azure CLIaz aks show \ --resource-group $RESOURCE_GROUP\ --name $AKS_CLUSTER_NAME \ -o table --query "addonProfiles.azurepolicy"Your output should look similar to the following:
Output{ "config": null, "enabled": true, "identity": null }You're now ready to switch to the Azure portal to configure the policy named Kubernetes cluster containers CPU and memory resource limits should not exceed the specified limits.
Assign a built-in policy definition
To configure the new Azure Policy, use the Policy service in the Azure portal.
Sign in to the Azure portal.
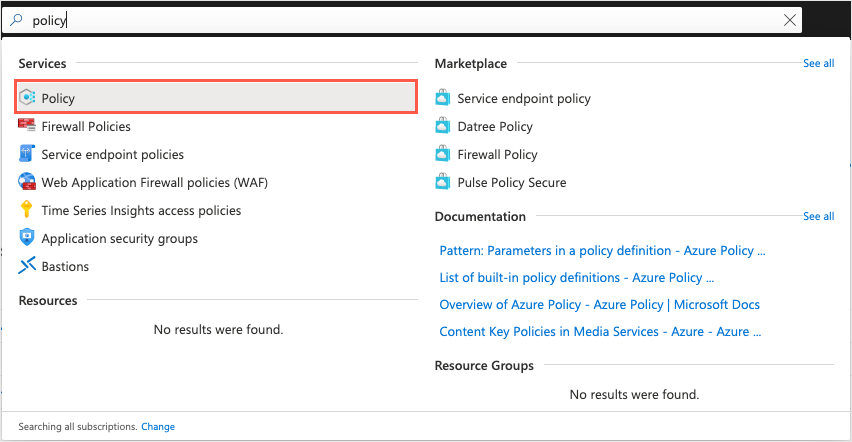
Locate the Policy service in the Azure portal. To do so, in the search bar at the top of the portal, search for and select Policy.
Select the Policy service from the list of services, as shown here:
The Policy dashboard opens with an overview that shows all your assigned policies, the status of resources, and how the policies affect them. If you haven't assigned any policies, the dashboard is empty.
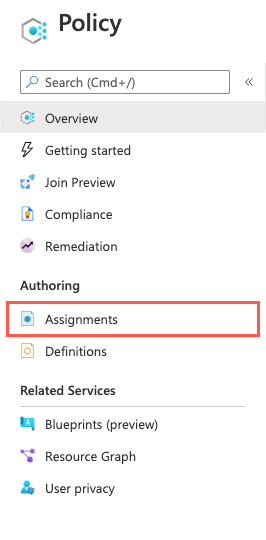
In the left menu pane, under Authoring, select Assignments:
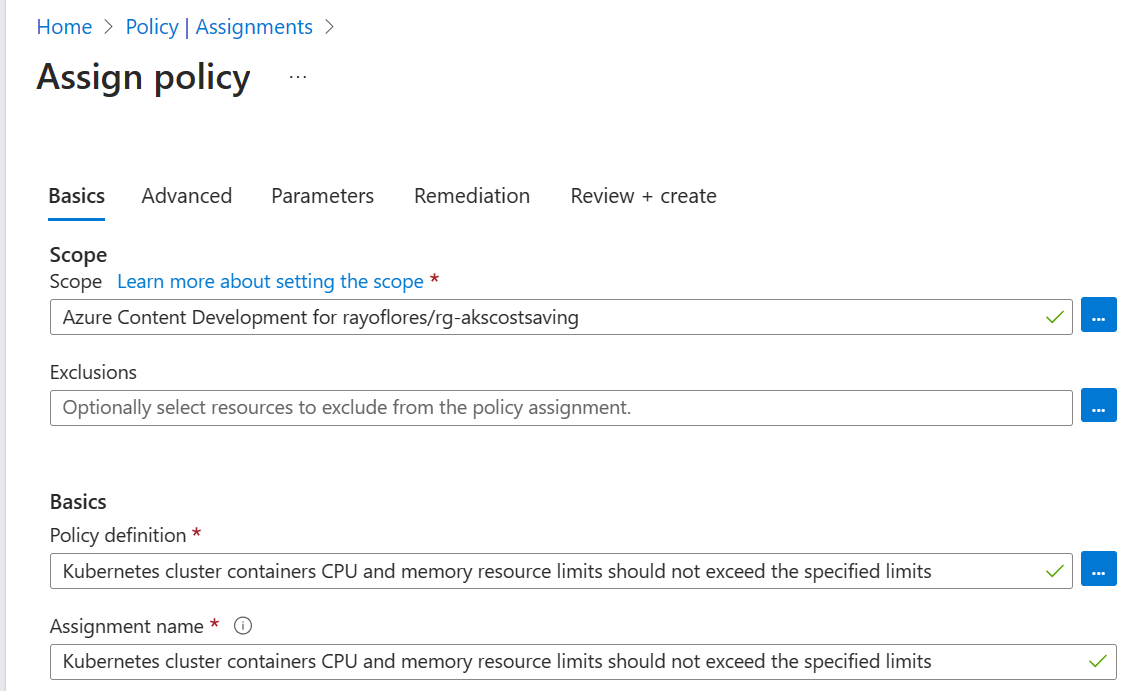
Recall from our previous description that you have two options to create a policy assignment: you assign either an initiative or a policy. In the top menu bar, select Assign policy:

The Assign policy pane appears.
On the Basics tab, enter the following values for each setting to create your policy.
Setting Value Scope Scope Select the ellipsis button. The Scope pane appears. Under subscription, select the subscription that holds your resource group. For Resource Group, select rg-akscostsaving, then select the Select button. Exclusions Leave empty. Basics Policy definition Select the ellipsis button. The Available Definitions pane appears. In the Search box, filter the selection by entering CPU. On the Policy Definitions tab, select the Kubernetes cluster containers CPU and memory resource limits should not exceed the specified limits, then select Add. Assignment name Accept default. Description Leave empty. Policy enforcement Make sure this option is set to Enabled. Assigned by Accept default. Here's an example of the completed Basics tab:
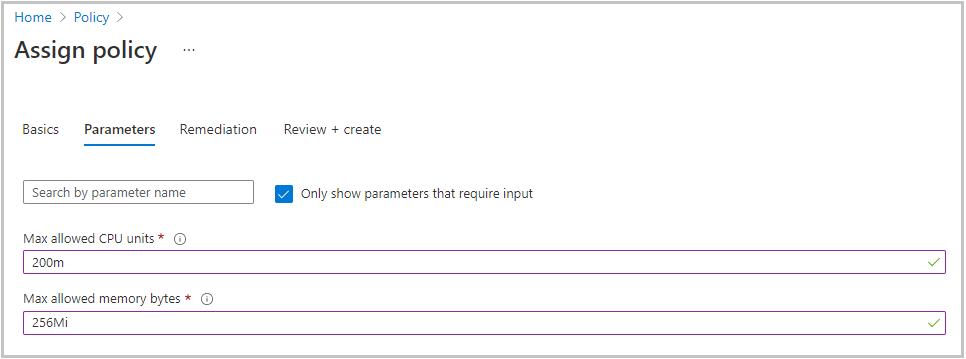
Select the Parameters tab to specify the parameters for the policy.
Set the following values for each of the parameter settings:
Setting Value Max allowed CPU units Set the value to 200m. The policy matches this value to both the workload resource-request value and the workload limit value specified in the workload's manifest file. Max allowed memory bytes Set the value to 256Mi. The policy matches this value to both the workload resource-request value and the workload limit value specified in the workload's manifest file. Here's an example of the completed Parameters tab:
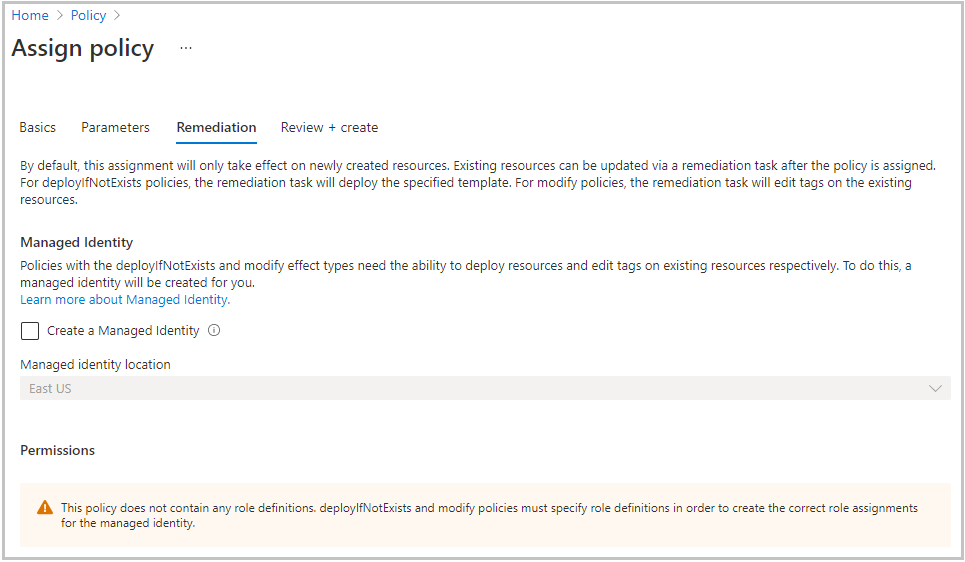
Select the Remediation tab. In this tab, you'll select how the new policy impacts resources that already exist. By default, the new policy only checks newly created resources. Keep the standard default configuration.
Here's an example of the completed Remediation tab:
Select the Review + create tab. Review the values you've chosen, then select Create.

Important
If you're using an existing AKS cluster, the policy assignment might take about 15 minutes to apply.
Test resource requests
The final step is to test the new policy. Deploy your test workload with resource requests and limits that violate the new policy. If all goes correctly, the server returns an error stating denied by policy.
Open Azure Cloud Shell and be sure to select the Bash version of Cloud Shell.
Create a manifest file for the Kubernetes deployment by using the integrated editor. Call the file
test-policy.yaml:Bashcode test-policy.yamlTip
Cloud Shell includes an integrated file editor. Cloud Shell editor supports features such as language highlighting, the command palette, and a file explorer. For simple file creation and editing, start the editor by running
code .in Cloud Shell terminal. This action opens the editor with your active working directory set in the terminal. To open your manifest file directly for quick editing, runcode test-policy.yaml. Ths command opens the editor without the file explorer.Paste the following text into the file:
ymlapiVersion: v1 kind: Pod metadata: name: nginx labels: env: test spec: containers: - name: nginx image: nginx imagePullPolicy: IfNotPresent resources: requests: cpu: 500m memory: 256Mi limits: cpu: 1000m memory: 500MiPress Ctrl+S to save the file, then press Ctrl+Q to close the editor.
Run the
kubectl applycommand to apply the configuration and deploy the application in thecostsavingsnamespace:Bashkubectl apply \ --namespace costsavings \ -f test-policy.yamlYour output should resemble the following:
OutputError from server ( [denied by azurepolicy-container-limits-52f2942767eda208f8ac3980dc04b548c4a18a2d1f7b0fd2cd1a7c9e50a92674] container <nginx> memory limit <500Mi> is higher than the maximum allowed of <256Mi> [denied by azurepolicy-container-limits-52f2942767eda208f8ac3980dc04b548c4a18a2d1f7b0fd2cd1a7c9e50a92674] container <nginx> cpu limit <1> is higher than the maximum allowed of <200m>) : error when creating "test-deploy.yml" : admission webhook "validation.gatekeeper.sh" denied the request: [denied by azurepolicy-container-limits-52f2942767eda208f8ac3980dc04b548c4a18a2d1f7b0fd2cd1a7c9e50a92674] container <nginx> memory limit <500Mi> is higher than the maximum allowed of <256Mi> [denied by azurepolicy-container-limits-52f2942767eda208f8ac3980dc04b548c4a18a2d1f7b0fd2cd1a7c9e50a92674] container <nginx> cpu limit <1> is higher than the maximum allowed of <200m>Notice how the admission webhook,
validation.gatekeeper.sh, denied the request to schedule the pod.Open the manifest file and fix the resource request:
Bashcode test-policy.yamlReplace the text with the following text:
ymlapiVersion: v1 kind: Pod metadata: name: nginx labels: env: test spec: containers: - name: nginx image: nginx imagePullPolicy: IfNotPresent resources: requests: cpu: 200m memory: 256Mi limits: cpu: 200m memory: 256MiPress Ctrl+S to save the file, then press Ctrl+Q to close the editor.
Run the
kubectl applycommand to apply the configuration and deploy the application in thecostsavingsnamespace:Bashkubectl apply \ --namespace costsavings \ -f test-policy.yamlYou'll get the following output:
Outputpod/nginx createdGet the pods of the newly created pods in your
costsavingsnamespace.Bashkubectl get pods --namespace costsavingsWithin a few seconds, the pods transition to the
Runningstate.OutputNAME READY STATUS RESTARTS AGE nginx 1/1 Running 0 50sPress Ctrl+C to stop watching once you see the pods running.
Next unit: Summary
Having an issue? We can help!
- For issues related to this module, explore existing questions using the #azure training tag or Ask a question on Microsoft Q&A.
- For issues related to Certifications and Exams, post on Certifications Support Forums or visit our Credentials Help.