Exercise - Register an application with Microsoft Entra ID
You're ready to set up your web application to authenticate using Microsoft Entra ID and secure access to employees in your company. The first step to enable authentication is to register your application with Microsoft Entra ID.
In this unit, you'll register your application with Microsoft Entra ID.
Register your application with Microsoft Entra ID
Registering your application establishes a trust relationship between your application and the Identity provider which is Microsoft Entra ID in this case.
Follow these steps to register your application on the Azure portal.
Sign in to the Azure portal.
If you have access to multiple tenants, in the top menu, use the Directory + subscription filter to select the tenant in which you want to register an application.
Search for and select Microsoft Entra ID.
Under Manage, select App registrations, then select the + New registration button.
In the Register an application page that appears, enter your application's registration information:
In the Name section, enter a meaningful application name that will be displayed to users of the app; for example,
java-servlet-webapp-authentication.Under Supported account types, select an option.
- For this exercise module, select Accounts in this organizational directory only because you are building an application for use only by users in the organizational tenant (single-tenant).
In the Redirect URI section, select Web in the combo-box and enter your web application's redirect URI. This is the URI where your application wants to handle the authentication response after the user signs in. For this exercise, enter the following redirect URI of the sample application:
http://localhost:8080/msal4j-servlet-graph/auth/redirect.
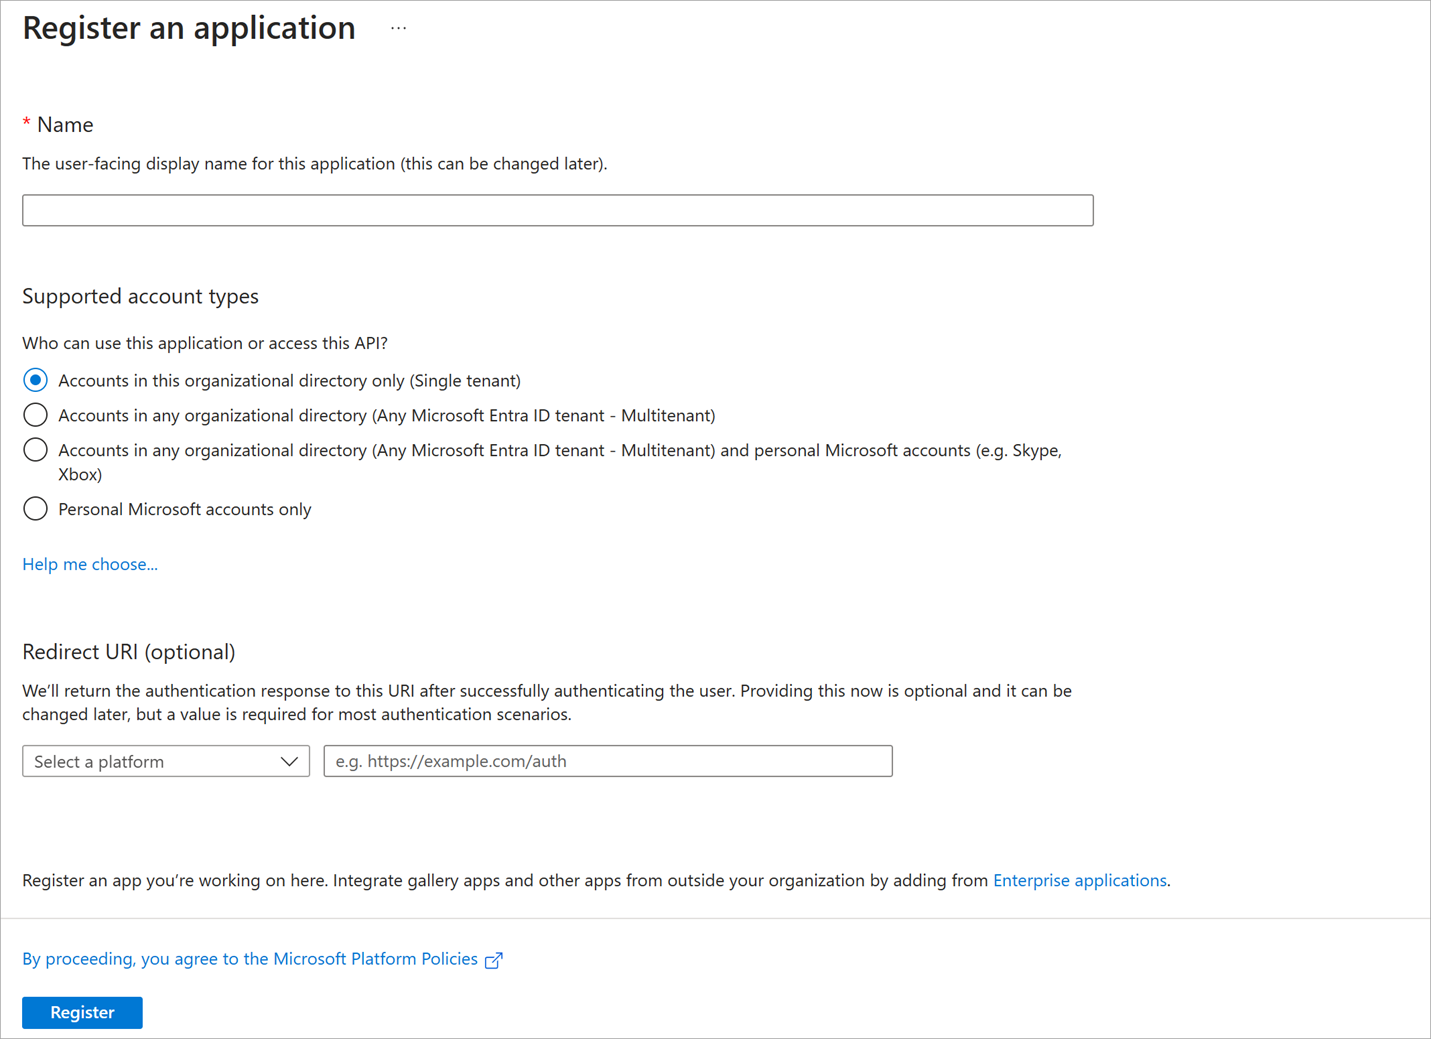
Select Register to create the application.
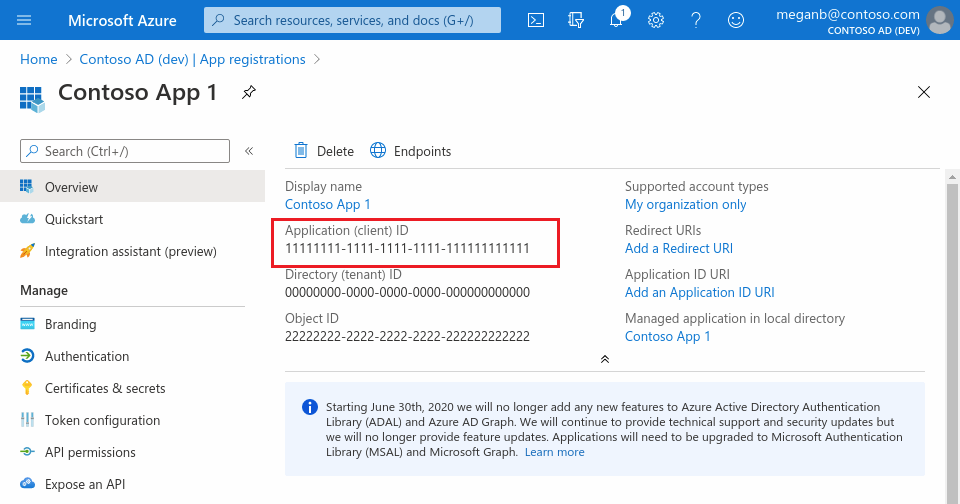
In the app's registration screen, find and note the Application (client) ID. You use this value in your app's configuration file(s) later in your code.
In the app's registration screen, select the Certificates & secrets blade in the left to open the page to generate secrets and upload certificates. In the Client secrets section, select the + New client secret button:
- Type a key description (for instance:
app secret), - Select one of the available key durations as per your security concerns.
- The generated key value will be displayed when you select the Add button. Copy the generated value for use in the steps later.
- You'll need this key later in your code's configuration files. This key value will not be displayed again, and is not retrievable by any other means, so make sure to note it from the Azure portal before navigating to any other screen or blade.
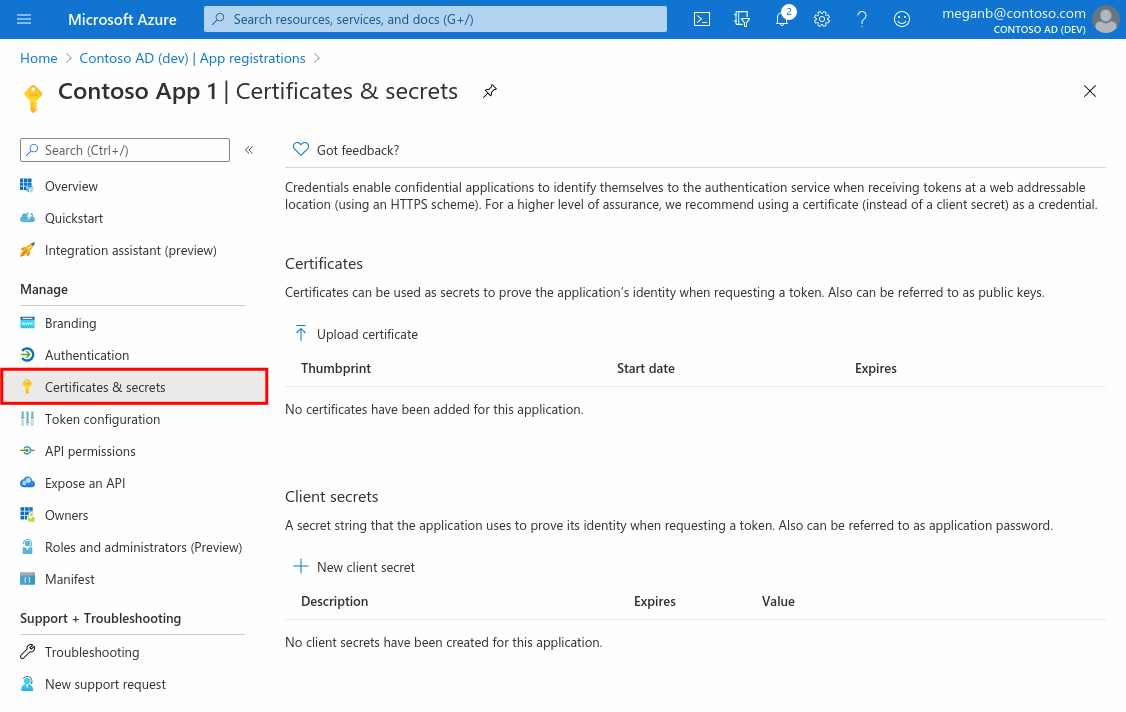
- Type a key description (for instance:
You've now successfully registered a web application with Microsoft Entra ID.