Exercise - Connect cloud-native components
Kubernetes gives Pods their own IP addresses and gives a single DNS name for a set of Pods. Service manifest files contain instructions to expose Pods in a reliable way using a policy that defines how to connect with them. If a container image is redeployed, you don't need to reconfigure the connection because of the instructions in the service manifest.
Ingress controllers define how your application can connect to the outside world. In the example scenario, smart fridges need to send messages to the Node.js container, and Ingress controllers determine the configuration of that connection.
In this unit, you will:
- Configure the ingress manifest so the container image can be accessed by outside applications.
- Deploy the ingress controller.
- Create a web app using a Docker image.
Configure the ingress manifest
Identify the fully qualified domain name (FQDN) of the host allowed access to the cluster using the
az aks showcommand and query theaddonProfiles.httpApplicationRouting.config.HTTPApplicationRoutingZoneNamevalue.az aks show --resource-group $RESOURCEGROUP --name $CLUSTERNAME -o tsv --query addonProfiles.httpApplicationRouting.config.HTTPApplicationRoutingZoneNameCopy the output and open the integrated editor in Cloud Shell using
code .Open the
ingress.yamlfile and replace theapiVersionvalue withnetworking.k8s.io/v1and thehostvalue with the FQDN you copied in the previous step.The file should look like the following example:
# ingress.yaml
apiVersion: networking.k8s.io/v1
kind: Ingress
metadata:
  name: cna-express
  annotations:
    kubernetes.io/ingress.class: addon-http-application-routing
spec:
  rules:
  - host: cna-express.<exampleURL.eastus.aksapp.io>
    http:
      paths:
      - path: / # Which path is this rule referring to
        pathType: Prefix
        backend: # How the ingress will handle the requests
          service:
            name: cna-express # Which service the request will be forwarded to
            port:
              name: http # Which port in that service
Save the manifest file using CTRL + S and close the editor using CTRL + Q.
Deploy the ingress
Submit the ingress manifest to your cluster using the
kubectl applycommand.kubectl apply -f ./ingress.yamlThe command should output a result similar to the following example:
ingress.networking.k8s.io/cna-express createdReturn the Cloud Shell to the source folder using
cd ...cd ..
There might be a small delay between the creation of the ingress and the creation of the zone record. While this happens, we can create the web app.
Use a Docker image to create the web app
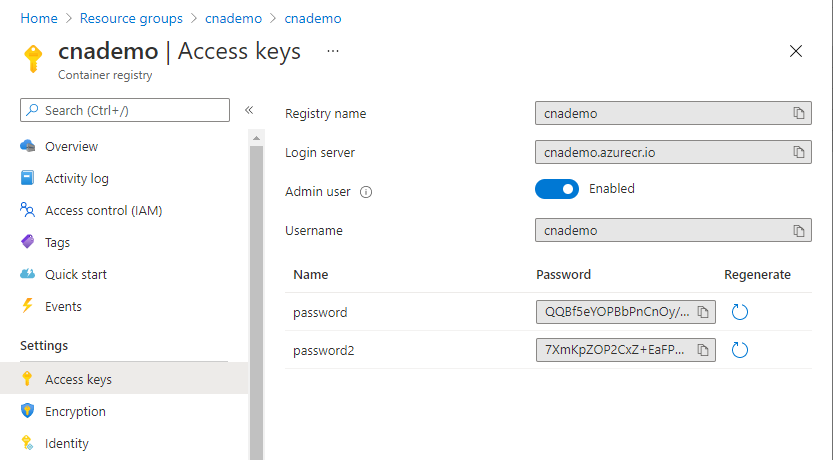
Navigate to the Azure portal and select your container registry.
Under Settings, select Access keys.
Select the Admin user option, which activates the admin user account for the registry.
Review the ingress
Navigate to the Azure Cloud Shell and check if the deployment was successful using the
kubectl get ingresscommand.kubectl get ingress cna-expressThe command should output a result similar to the following example:
NAME              HOSTS                                           ADDRESS        PORTS   AGE
cna-express       cna.5cd29ec927f24764b052.eastus.aksapp.io       52.226.96.30   80      4m44s
Make sure the
ADDRESScolumn of the output is filled with an IP address.List the DNS zones to find out if our DNS has been created using the
az network dns zone listcommand.`az network dns zone list --output tableThe command should output a result similar to the following example:
Name                               ResourceGroup                                 RecordSets    MaxRecordSets
-------------------------------------  --------------------------------------------  ------------  ---------------
5cd29ec927f24764b052.eastus.aksapp.io  mc_rg-contoso-video_aks-contoso-video_eastus  4             10000
Copy the values for
NameandResourceGroupto use in the next step.List the DNS records for the zone using the
az network dns record-set listcommand. Replace<name>and<resource-group>with the values you copied in the previous step.az network dns record-set list -g <resource-group> -z <name> --output tableThe command should output a result similar to the following example:
Fqdn                                            Name     ProvisioningState    ResourceGroup                                 Ttl
----------------------------------------------  -------  -------------------  --------------------------------------------  ------
5cd29ec927f24764b052.eastus.aksapp.io.          @        Succeeded            mc_learn-cna-rg_cna-demo-aks_eastus           172800
5cd29ec927f24764b052.eastus.aksapp.io.          @        Succeeded            mc_learn-cna-rg_cna-demo-aks_eastus           3600
cna.5cd29ec927f24764b052.eastus.aksapp.io.      cna      Succeeded            mc_learn-cna-rg_cna-demo-aks_eastus           300
cna.5cd29ec927f24764b052.eastus.aksapp.io.      cna      Succeeded            mc_learn-cna-rg_cna-demo-aks_eastus           300
Make sure there are two new records at the bottom of the list with the host we created in the
hostkey. TheProvisioningStatevalue isSucceeded. It can take several minutes for zone records to propagate.Open your browser and navigate to the full aksapp.io FQDN URL described in the output. You should see a "hello world" message. Remember to not include the
.from the end of the URL.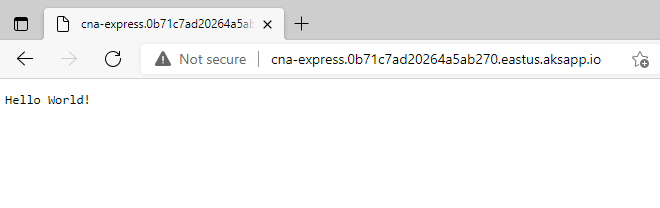
Create a web app
Return to the Azure portal and select Create a resource.
Select Web > Web App.
On the Basics tab, enter the following values for each setting:
Setting Value Project Details Subscription Select your default Azure subscription in which you're allowed to create and manage resources. Resource group From the dropdown list, select the existing resource group. Instance Details Name Enter a unique name and make a note of it for later. Publish Docker Container Operating System Linux Region Leave as default, or select a location close to you. Pricing plans Linux Plan Leave as default. Pricing plan Select Free F1 0.00 USD/Month. Select the Docker tab at the top of the screen.
On the Docker tab, enter the following values for each setting:
Setting Value Options Single Container Image Source Azure Container Registry Registry Select your registry. Image webimageTag latestStartup Command Leave this setting empty. Select Review and create > Create.
Configure the web app
When the deployment completes, select Go to resource.
Under Settings, select Configuration.
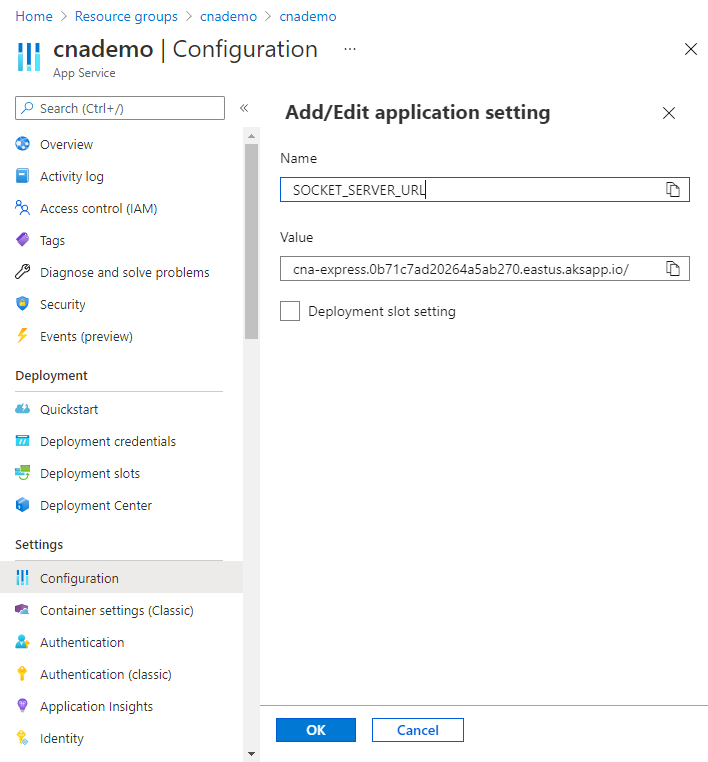
Under Application settings, select New application setting.
Copy the following value and paste it into the Name field.
SOCKET_SERVER_URLFor Value, use the same aksapp.io FQDN URL you used with your ingress controller and to access the hello world webpage.
Select OK > Save > Continue.
Return to the Cloud Shell, and create an environment variable for your web app name using the following command. Make sure you replace
<webapp-name>with your web app name.WEBAPPNAME=<webapp-name>
Test the solution
Run the following command and select the URL for your web app.
echo select the link below
echo http://$WEBAPPNAME.azurewebsites.net
That's it! You've now created a scalable, cloud-native solution. Feel free to play around with the resources and code you've created. When you're done, run the next step in the Azure Cloud Shell to delete the resource group and avoid any unnecessary charges to your account.
az group delete --name $RESOURCEGROUP