Exercise - Integrate Next.js web app with Azure AD
This exercise takes you through the process of configuring a simple Next.js-based application that integrates with Microsoft Entra ID.
In this exercise, you'll:
- Register a Microsoft Entra application.
- Implement a simple Microsoft Entra integrated Next.js-based application.
- Validate the Microsoft Entra integration of the Next.js-based application.
Prerequisites
To perform this exercise, you'll need:
- An Azure subscription.
- A Microsoft account or a Microsoft Entra account with the Global Administrator role in the Microsoft Entra tenant associated with the Azure subscription and with the Owner or Contributor role in the Azure subscription.
- To have completed the first and second exercises of this module.
- A computer on which you either have installed or can install Node.js and Git.
Note
For information about installing Node.js, refer to Node.js Downloads. For information about Git, refer to Git downloads. Install both before you start this exercise.
Register an application with Microsoft Entra ID
To implement a sample Next.js-based application that uses Microsoft Entra authentication to access an Azure Database for PostgreSQL database, you must first create a Microsoft Entra application object and the corresponding security principal. This will allow the Next.js-based application to impersonate Microsoft Entra users when accessing database objects.
If needed, start a web browser, navigate to the Azure portal, and sign in to access the Azure subscription you'll be using in this module.
Use the Search resources, services, and docs text box to search for Microsoft Entra ID, and in the list of results, select Microsoft Entra ID.
On the Microsoft Entra ID blade, in the vertical menu, in the Manage section, select App registrations.
On the App registrations blade, select + New registration.
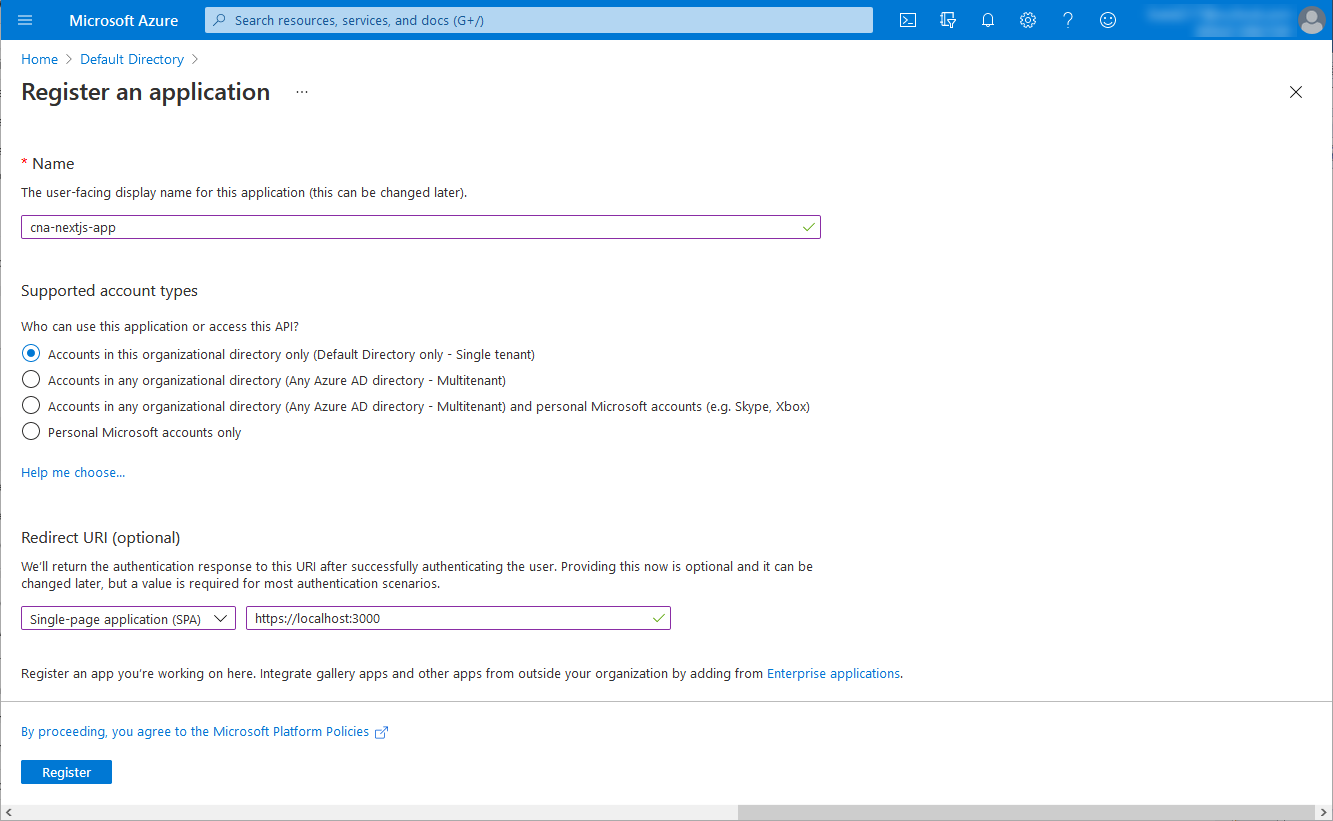
On the Register an application blade, in the Name text box, enter cna-nextjs-app.
In the Supported account types section, ensure that the option Accounts in this organizational directory only (Default Directory only - Single tenant) is selected. In the Redirect URI (optional) section, set the Single-page application (SPA) entry to http://localhost:3000, and then select Register.
Note
You have the option of configuring multitenant support for your Microsoft Entra registered applications at this point. However, detailed coverage of this approach is outside the scope of this module.
Note
After you deploy your application, you'll need to modify the Redirect URI (optional) value to reflect its actual URL.
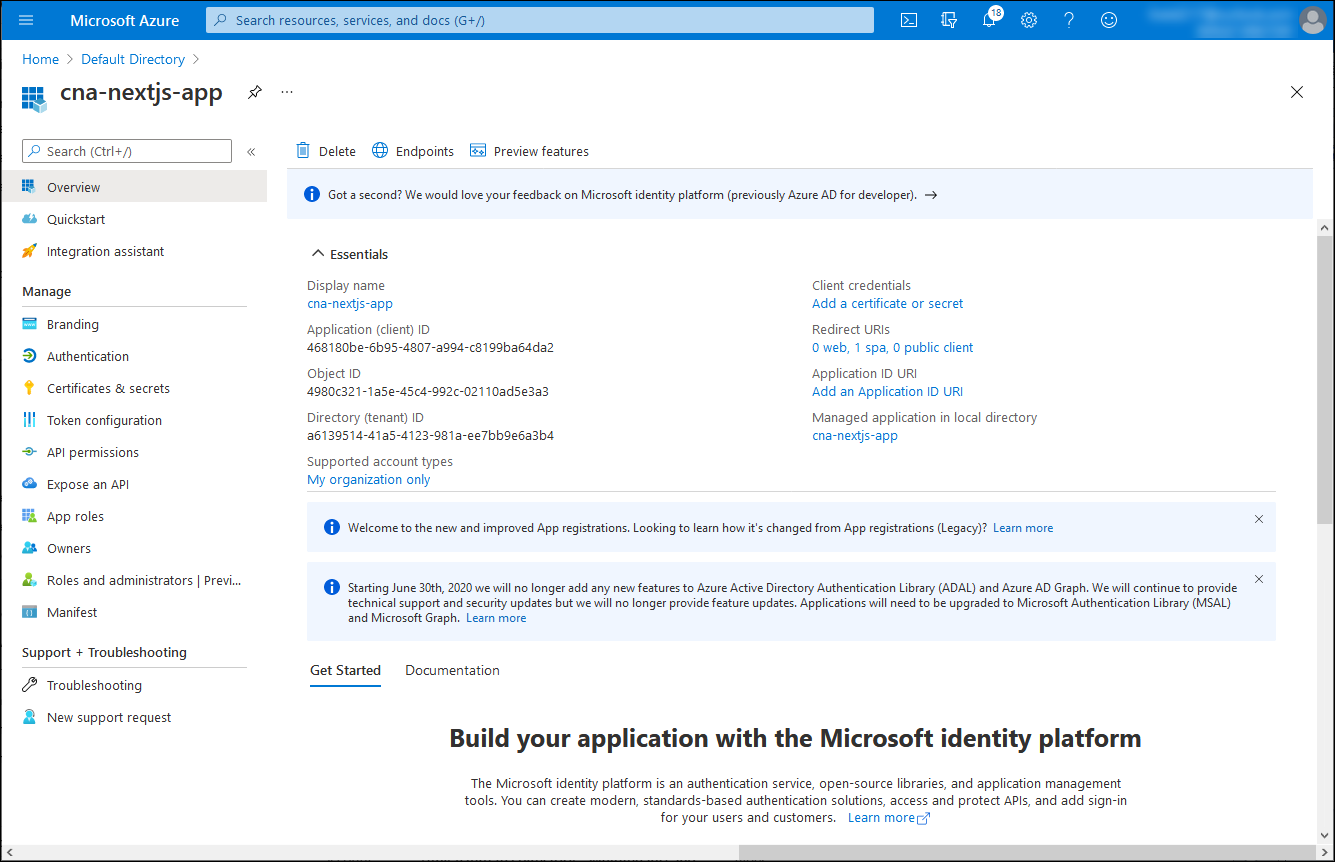
On the cna-nextjs-app blade, review the resulting settings and record the values of the Application (client) ID and the Directory (tenant) ID properties.
On the cna-nextjs-app blade, in the vertical menu, in the Manage section, select API permissions.

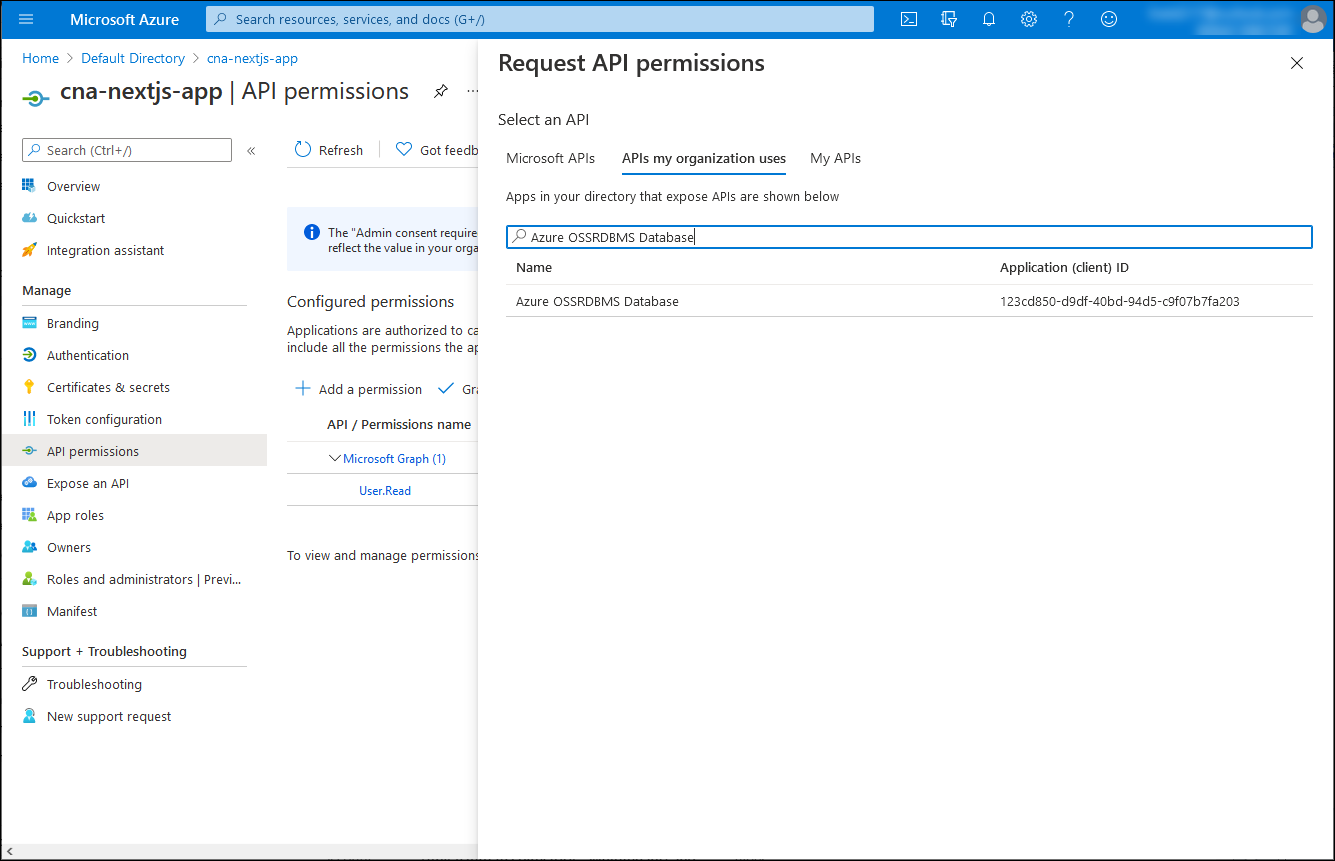
On the cna-nextjs-app | API permissions blade, select + Add a permission, on the Request API permission blade, select the APIs my organization uses tab, in the search text box, enter Azure OSSRDBMS Database, and then in the list of results, select Azure OSSRDBMS Database.
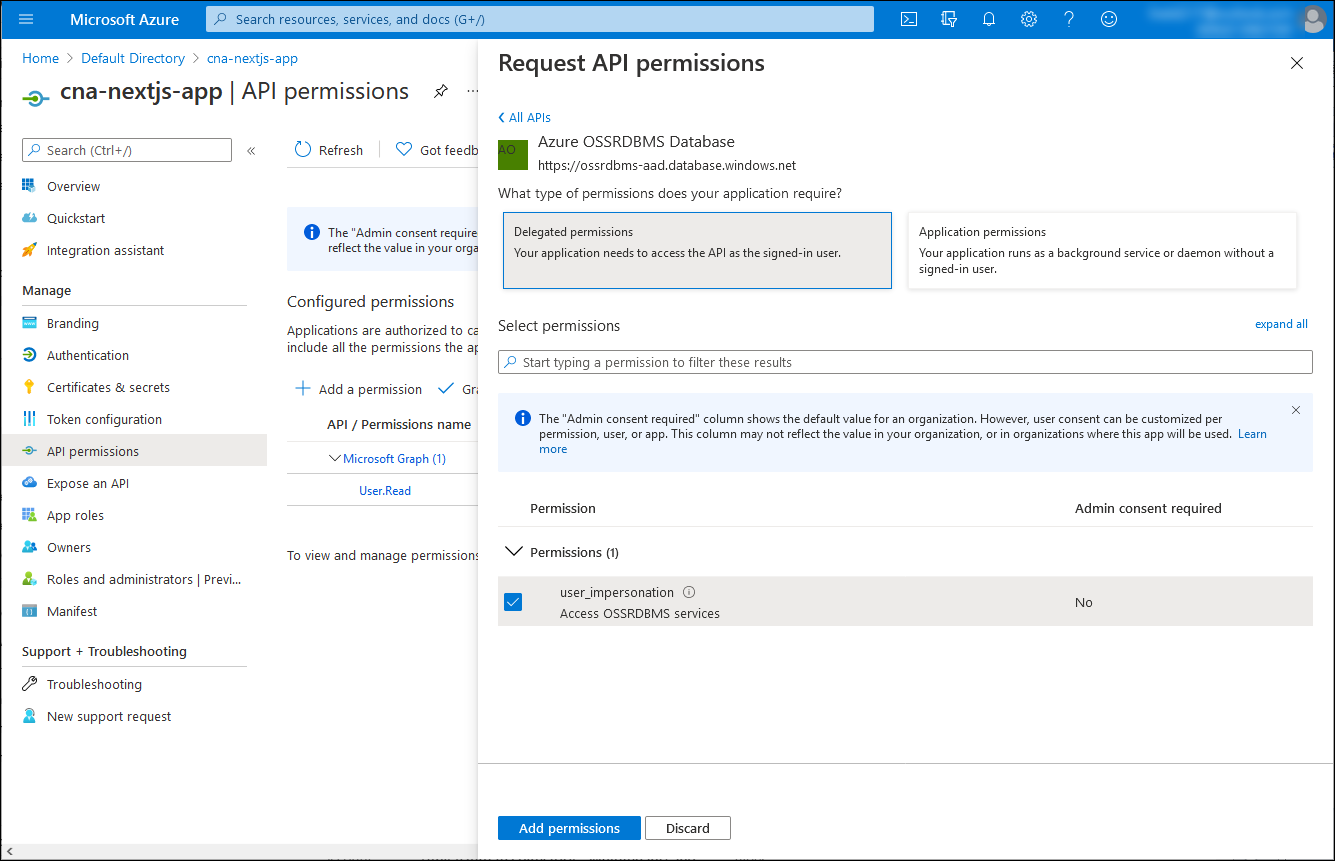
On the Request API permission blade, select Delegated permissions, select the user_impersonation checkbox, and then select Add permissions.
Back on the cna-nextjs-app | API permissions blade, select Grant admin consent for Default Directory, and when prompted for confirmation, select Yes.
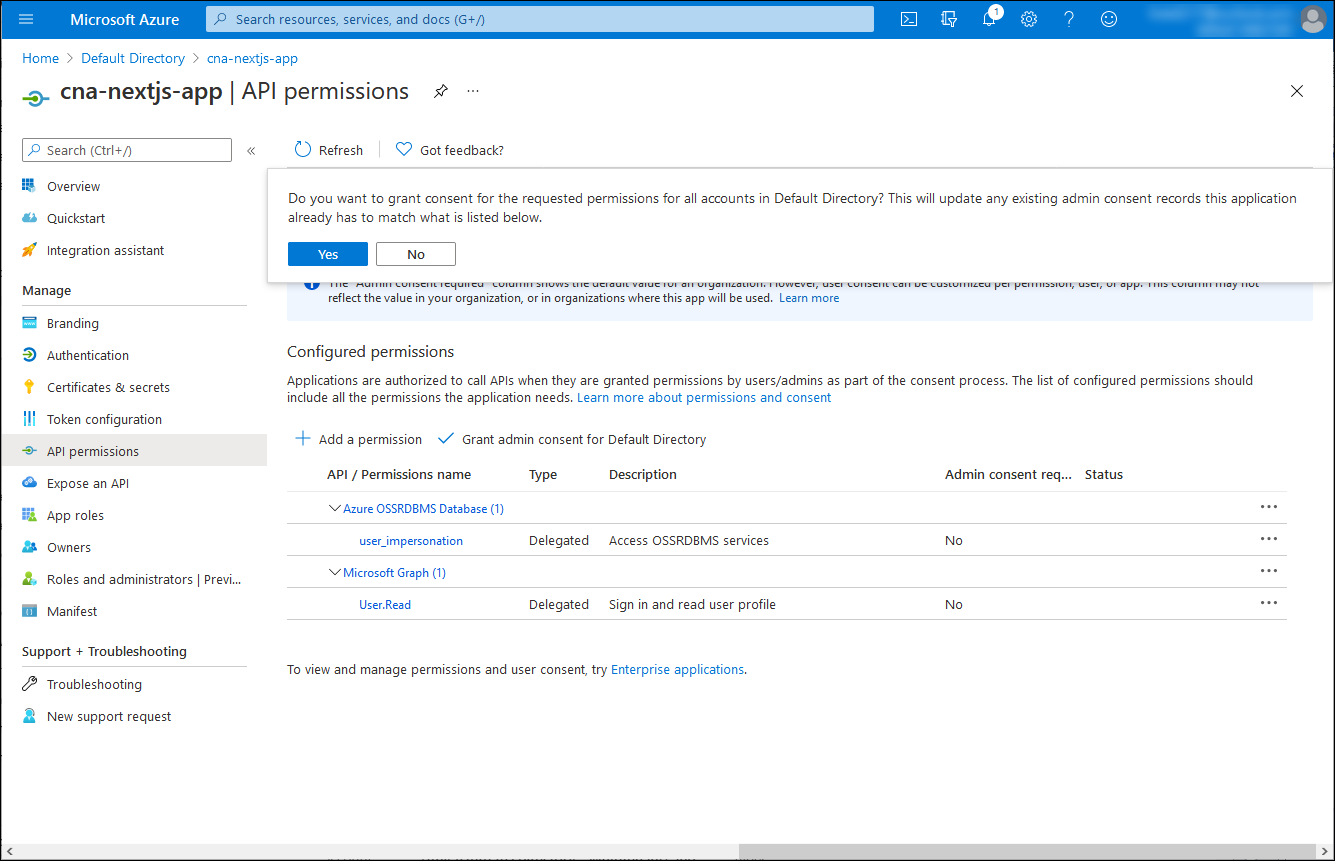
On the cna-nextjs-app | API permissions blade, verify that the permissions have been granted.

Implement a simple Microsoft Entra integrated Next.js-based application
With the application registered in the Microsoft Entra tenant, you can now proceed with its implementation. To simplify your task, you'll clone a GitHub repo containing a sample Next.js code and customize it to integrate with your Microsoft Entra tenant.
On your local computer, start the Node.js command prompt.
Note
Make sure to run this using the local installation of Node.js on your computer.
From the Node.js command prompt, run the following command to clone the GitHub repo containing the sample Next.js application code you'll use in this exercise:
git clone https://github.com/MicrosoftDocs/mslearn-cloud-native-apps.gitRun the following command to switch to the directory that hosts the clone of the GitHub repo:
cd ./mslearn-cloud-native-apps/m06u07Use your preferred text editor to review the content of the ./src/App.jsx file, which retrieves an access token from Microsoft Entra ID for a single-page application:
Note
The sample code is based on Tutorial: Sign in users and call the Microsoft Graph API from a React single-page app (SPA) using auth code flow.
The ./src/App.jsx file has the following content:
import React, { useState } from "react";
import { AuthenticatedTemplate, UnauthenticatedTemplate, useMsal } from "@azure/msal-react";
import { loginRequest } from "./authConfig";
import { PageLayout } from "./components/PageLayout";
import { ProfileData } from "./components/ProfileData";
import { callMsGraph } from "./graph";
import Button from "react-bootstrap/Button";
import "./styles/App.css";

var accessToken = '';

/**
 * Renders information about the signed-in user or a button to retrieve data about the user
 */
const ProfileContent = () => {
    const { instance, accounts } = useMsal();
    const [graphData, setGraphData] = useState(null);

    function RequestProfileData() {
        // Silently acquires an access token which is then attached to a request for MS Graph data
        instance.acquireTokenSilent({
            ...loginRequest,
            account: accounts[0]
        }).then((response) => {
            accessToken = response.accessToken;
            callMsGraph(response.accessToken).then(response => setGraphData(response));
        });
    }

    return (
        <>
            <h5 className="card-title">Welcome {accounts[0].name}</h5>
            {graphData ?
                <ProfileData graphData={graphData} />
                :
                <Button variant="secondary" onClick={RequestProfileData}>Request Profile Information</Button>
            }
            <p>{accessToken}</p>
        </>
    );
};

/**
 * If a user is authenticated the ProfileContent component above is rendered. Otherwise, a message indicating a user is not authenticated is rendered.
 */
const MainContent = () => {
    return (
        <div className="App">
            <AuthenticatedTemplate>
                <ProfileContent />
            </AuthenticatedTemplate>

            <UnauthenticatedTemplate>
                <h5 className="card-title">Please sign-in to review your profile information.</h5>
                </UnauthenticatedTemplate>
        </div>
    );
};

export default function App() {
    return (
        <PageLayout>
            <MainContent />
        </PageLayout>
    );
}
Use your preferred text editor to review the content of the ./src/authConfig.js file, which stores the information required to identify the target Microsoft Entra application that you registered in the previous task of this exercise.
The ./src/authConfig.js file has the following content:
/*
 * Copyright (c) Microsoft Corporation. All rights reserved.
 * Licensed under the MIT License.
 */

import { LogLevel } from "@azure/msal-browser";

/**
 * Configuration object to be passed to MSAL instance on creation.
 * For a full list of MSAL.js configuration parameters, visit:
 * https://github.com/AzureAD/microsoft-authentication-library-for-js/blob/dev/lib/msal-browser/docs/configuration.md
 */
export const msalConfig = {
    auth: {
        clientId: "<client_ID>",
        authority: "https://login.microsoftonline.com/<tenant_ID>",
        redirectUri: "http://localhost:3000"
    },
    cache: {
        cacheLocation: "sessionStorage", // This configures where your cache will be stored
        storeAuthStateInCookie: false, // Set this to "true" if you are having issues on IE11 or Edge
    },
    system: {
        loggerOptions: {
            loggerCallback: (level, message, containsPii) => {
                if (containsPii) {
                    return;
                }
                switch (level) {
                    case LogLevel.Error:
                        console.error(message);
                        return;
                    case LogLevel.Info:
                        console.info(message);
                        return;
                    case LogLevel.Verbose:
                        console.debug(message);
                        return;
                    case LogLevel.Warning:
                        console.warn(message);
                        return;
                }
            }
        }
    }
};

/**
 * Scopes you add here will be prompted for user consent during sign-in.
 * By default, MSAL.js will add OIDC scopes (openid, profile, email) to any login request.
 * For more information about OIDC scopes, visit:
 * https://learn.microsoft.com/azure/active-directory/develop/v2-permissions-and-consent#openid-connect-scopes
 */
export const loginRequest = {
    scopes: ["User.Read"]
};

/**
 * Add here the scopes to request when obtaining an access token for MS Graph API. For more information, review:
 * https://github.com/AzureAD/microsoft-authentication-library-for-js/blob/dev/lib/msal-browser/docs/resources-and-scopes.md
 */
export const graphConfig = {
    graphMeEndpoint: "https://graph.microsoft.com/v1.0/me"
};
Within the text editor displaying the content of the ./src/authConfig.js file, replace the
<client_ID>and<tenant_ID>placeholders with their respective values, which you identified in the previous task of this exercise.Within the text editor displaying the content of the ./src/authConfig.js file, replace the entry
scopes: ["User.Read"]withscopes: ["User.Read","https://ossrdbms-aad.database.windows.net/user_impersonation"].Save the changes and close the file.
Validate the Microsoft Entra integration of the Next.js-based application
You're ready to validate the Microsoft Entra integration of the app. You could containerize it, but for simplicity you'll run it locally on your computer first, within the Node.js development environment. This will provide a quick way to validate its functionality and ensure that containerizing it is a viable option.
From the Node.js command prompt, run the following command to install the dependency packages of the sample Next.js application:
npm installNote
Wait for the installation process to complete.
From the Node.js command prompt, run the following command to build the Next.js application:
npm run-script buildNote
Wait for the build process to complete.
From the Node.js command prompt, run the following command to start the Next.js application:
npm run-script startNote
This will automatically open a browser window displaying the Welcome to the Microsoft Authentication Library For JavaScript - React Quickstart page.
Close the web browser window displaying Welcome to the Microsoft Authentication Library For JavaScript - React Quickstart page, start another web browser window in the Incognito/InPrivate mode, and navigate to the http://localhost:3000 URL.
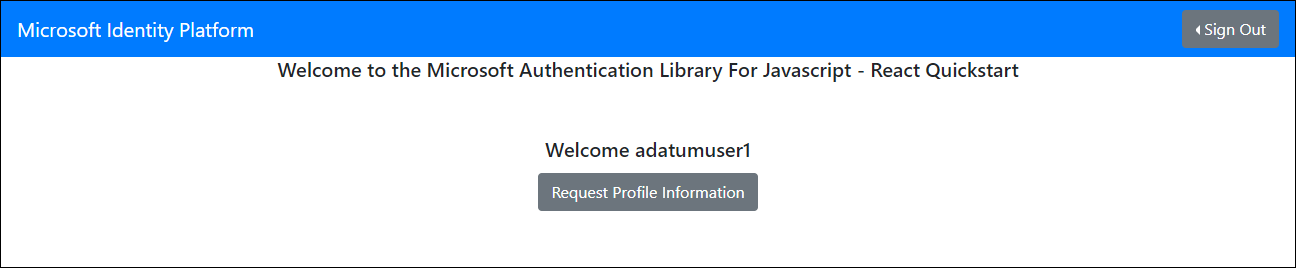
On the Welcome to the Microsoft Authentication Library For JavaScript - React Quickstart page, select Sign In, and then in the expanding menu, select Sign in using Popup.

When prompted to sign in, authenticate by using the adatumuser1 userPrincipalName and its password Pa55w.rd1234.
Note
You created this user account in the first exercise of this module.
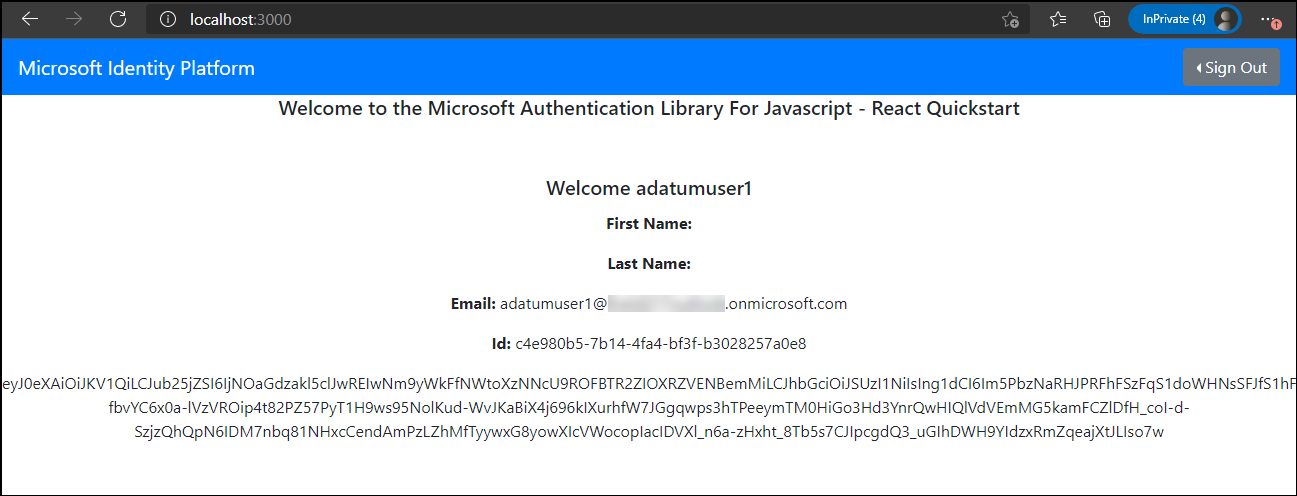
On the Welcome to the Microsoft Authentication Library For JavaScript - React Quickstart page, select Request Profile Information.
Note
Verify that the output includes the Email, Id, and the access token of the adatumuser1 Microsoft Entra user account.
Open another browser tab in the same web browser window and navigate to the web application you deployed in the previous exercise.
Note
The URL should have the following format:
https://<webapp_name>.azurewebsites.net/authNote
Verify that the resulting web page displays the inventory data for the first tenant.
Note
If the initial attempt fails, try again.

Close the web browser window in the Incognito/InPrivate mode.
Note
Now, you will repeat the same sequence of steps as the contosouser1 and verify that you also can access the inventory data and display set of records corresponding to the second tenant.
Start another web browser window in the Incognito/InPrivate mode, and navigate to the http://localhost:3000 URL.
On the Welcome to the Microsoft Authentication Library For JavaScript - React Quickstart page, select Sign In, and then in the expanding menu, select Sign in using Popup.
When prompted to sign in, authenticate by using the contosouser1 userPrincipalName and its password Pa55w.rd1234.
Note
You created this user account in the first exercise of this module.
Note
If prompted, accept an access request and change the password of the contosouser1 account.
On the Welcome to the Microsoft Authentication Library For JavaScript - React Quickstart page, select Request Profile Information.
Note
Verify that the output includes the Email, Id, and the access token of the contosouser1 Microsoft Entra user account.
Open another browser tab in the same web browser window and navigate to the web application you deployed in the previous exercise.
Note
Verify that the resulting web page displays the inventory data for the second tenant.

Results
Congratulations! You completed the third exercise of this module. In this exercise, you implemented a simple AD-integrated Next.js-based application and verified its functionality.
Clean up the resources
To avoid unnecessary charges from using Azure resources, you should delete the postgresql-db-RG and cna-aadexpress-RG resource groups you created in the previous exercise of this module. To do so, in the Azure portal, navigate to the blade of each of these resource groups, and select the Delete resource group entry in the toolbar. In the TYPE THE RESOURCE GROUP NAME textbox, enter the name of the resource group, and then select Delete.