Exercise - Promote to the Dev stage
The team has a plan and is ready to begin implementing their release pipeline. Your Azure DevOps project is set up, and your Azure App Service instances are ready to receive build artifacts.
At this point, remember that the team's pipeline has only two stages. The first stage produces the build artifact. The second stage deploys the Space Game web app to App Service. Here, you follow along with Andy and Mara as they modify the pipeline. They're going to deploy to the App Service environment that corresponds to the Dev stage.
The Dev stage resembles the deployment stage that you made in the Create a release pipeline in Azure Pipelines module. There, you used a CI trigger to start the build process. Here you do the same.
Fetch the branch from GitHub
Here, you fetch the release branch from GitHub. You also check out, or switch to, the branch.
This branch serves as your release branch. It contains the Space Game project used in previous modules. It also contains an Azure Pipelines configuration to start with.
To fetch and switch to the branch:
In Visual Studio Code, open the integrated terminal.
To fetch a branch named
releasefrom the Microsoft repository, and to switch to that branch, run the followinggitcommands.git fetch upstream release git checkout -B release upstream/releaseThe format of these commands enables you to get starter code from the Microsoft GitHub repository, known as
upstream. Shortly, you're going to push this branch up to your GitHub repository, known asorigin.As an optional step, from Visual Studio Code, open azure-pipelines.yml. Familiarize yourself with the initial configuration.
The configuration resembles the basic one that you created in the Create a release pipeline with Azure Pipelines module. It builds only the app's release configuration. For learning purposes, this configuration doesn't run the quality or security checks that you set up in previous modules.
Note
A more robust configuration might specify the branches that participate in the build process. For example, to help verify code quality, you might run unit tests each time you push up a change on any branch. You might also deploy the application to an environment that performs more exhaustive testing. But you do this deployment only when you have a pull request, when you have a release candidate, or when you merge code to main.
For more information, see Implement a code workflow in your build pipeline by using Git and GitHub and Build pipeline triggers.
Promote changes to the Dev stage
Here, you modify your pipeline configuration to promote the build to the Dev stage.
In Visual Studio Code, modify azure-pipelines.yml.
trigger:
- '*'

variables:
  buildConfiguration: 'Release'
  releaseBranchName: 'release'

stages:
- stage: 'Build'
  displayName: 'Build the web application'
  jobs:
  - job: 'Build'
    displayName: 'Build job'
    pool:
      vmImage: 'ubuntu-20.04'
      demands:
      - npm

    variables:
      wwwrootDir: 'Tailspin.SpaceGame.Web/wwwroot'
      dotnetSdkVersion: '6.x'

    steps:
    - task: UseDotNet@2
      displayName: 'Use .NET SDK $(dotnetSdkVersion)'
      inputs:
        version: '$(dotnetSdkVersion)'

    - task: Npm@1
      displayName: 'Run npm install'
      inputs:
        verbose: false

    - script: './node_modules/.bin/node-sass $(wwwrootDir) --output $(wwwrootDir)'
      displayName: 'Compile Sass assets'

    - task: gulp@1
      displayName: 'Run gulp tasks'

    - script: 'echo "$(Build.DefinitionName), $(Build.BuildId), $(Build.BuildNumber)" > buildinfo.txt'
      displayName: 'Write build info'
      workingDirectory: $(wwwrootDir)

    - task: DotNetCoreCLI@2
      displayName: 'Restore project dependencies'
      inputs:
        command: 'restore'
        projects: '**/*.csproj'

    - task: DotNetCoreCLI@2
      displayName: 'Build the project - $(buildConfiguration)'
      inputs:
        command: 'build'
        arguments: '--no-restore --configuration $(buildConfiguration)'
        projects: '**/*.csproj'

    - task: DotNetCoreCLI@2
      displayName: 'Publish the project - $(buildConfiguration)'
      inputs:
        command: 'publish'
        projects: '**/*.csproj'
        publishWebProjects: false
        arguments: '--no-build --configuration $(buildConfiguration) --output $(Build.ArtifactStagingDirectory)/$(buildConfiguration)'
        zipAfterPublish: true

    - publish: '$(Build.ArtifactStagingDirectory)'
      artifact: drop

- stage: 'Dev'
  displayName: 'Deploy to the dev environment'
  dependsOn: Build
  condition: |
    and
    (
      succeeded(),
      eq(variables['Build.SourceBranchName'], variables['releaseBranchName'])
    )
  jobs:
  - deployment: Deploy
    pool:
      vmImage: 'ubuntu-20.04'
    environment: dev
    variables:
    - group: Release
    strategy:
      runOnce:
        deploy:
          steps:
          - download: current
            artifact: drop
          - task: AzureWebApp@1
            displayName: 'Azure App Service Deploy: website'
            inputs:
              azureSubscription: 'Resource Manager - Tailspin - Space Game'
              appName: '$(WebAppNameDev)'
              package: '$(Pipeline.Workspace)/drop/$(buildConfiguration)/*.zip'
This configuration resembles the one that you built in the previous module. There, you and the team built a proof of concept for continuous deployment. But note these differences, which are highlighted in the preceding code example:
- This configuration defines variables at the beginning of the file. The variables are used throughout the pipeline. They define which configuration to build (
Release). They also define the name of your release branch (release). - The Deploy stage from the proof of concept is now named Dev.
- The Dev stage uses a condition that directs the system to run the stage only when the previous stage succeeds and the current branch is
release. This setup ensures that release features are deployed only to the Dev environment. - The deployment step uses the
WebAppNameDevvariable to deploy to the App Service instance associated with the Dev environment.
Note
In practice, you might deploy from some other branch, such as
main. You can include logic that allows changes to be promoted to the Dev stage from multiple branches, such asreleaseandmain.- This configuration defines variables at the beginning of the file. The variables are used throughout the pipeline. They define which configuration to build (
From the integrated terminal, add azure-pipelines.yml to the index. Commit the change, and push it up to GitHub.
Tip
Before you run these Git commands, save azure-pipelines.yml.
git add azure-pipelines.yml
git commit -m "Deploy to the Dev stage"
git push origin release
In Azure Pipelines, go to the build. As it runs, trace the build.
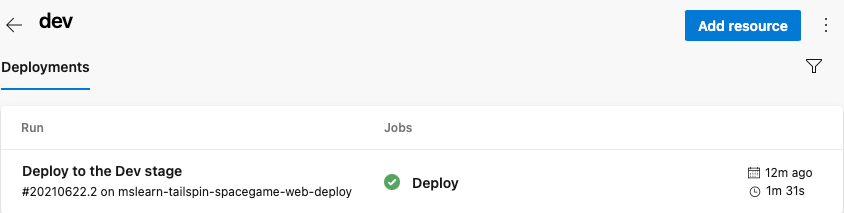
After the build finishes, to return to the summary page, select the back button.
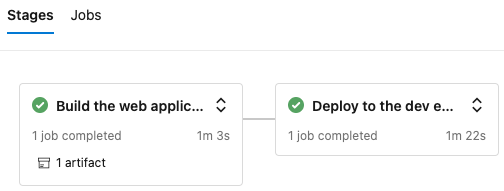
You see that the deployment finished successfully.
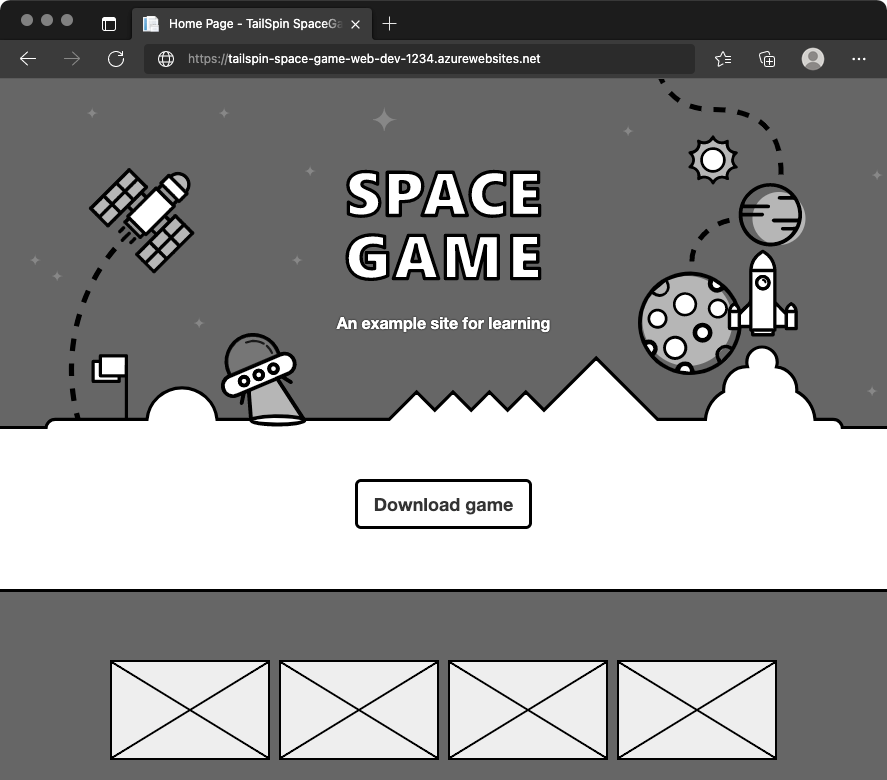
From a web browser, go to the URL associated with the App Service instance for your Dev environment.
If you still have the browser tab open, refresh the page. If you don't remember the URL, find it in the Azure portal, on the App Service details page.
You see that the Space Game website is deployed to App Service, and is running.
As an optional step, in Azure Pipelines, select Environments. Then, select the dev environment.
Azure Pipelines records your deployment history. In the history, you can trace the environment's changes back to code commits and work items.