Exercise - Deploy the web application to Azure App Service
In this module, you'll create a multistage pipeline to build and deploy your application to Azure App Service. You'll learn how to:
- Create an App Service instance to host your web application.
- Create a multistage pipeline.
- Deploy to Azure App Service.
Create the App Service instance
Sign in to the Azure portal.
Select App Services from the left pane.
Select Create > Web App to create a new Web App.
On the Basics tab, enter the following values.
Setting Value Project Details Subscription your subscription Resource Group Select Create new, and then enter tailspin-space-game-rg, and select OK. Instance Details Name Provide a unique name, such as tailspin-space-game-1234. This name must be unique across Azure. It becomes part of the domain name. In practice, choose a name that describes your service. Note the name for later. Publish Code Runtime stack .NET 6 (LTS) Operating System Linux Region Select a region, preferably one close to you. Pricing plans Linux Plan Accept the default. Pricing plan Select the Basic B1 pricing tier from the drop-down menu. Select Review + create, review the form and then select Create. The deployment takes a few moments to complete.
When deployment is complete, select Go to resource. The App Service Essentials displays details related to your deployment.

Select the URL to verify the status of your App Service.

Important
The Clean up your Azure DevOps environment page in this module explains how to tear down your App Service instance after you're done with it. Cleaning up helps ensure that you're not charged for Azure resources after you complete this module. Make sure you follow the cleanup steps even if you don't complete this module.
Create a service connection
Important
Make sure that you're signed in to Azure and Azure DevOps under the same Microsoft account.
In Azure DevOps, go to your Space Game - web - Release project.
From the lower-left corner of the page, select Project settings.
Under Pipelines, select Service connections.
Select New service connection, and then select Azure Resource Manager then select Next.
Select Service principal (automatic), and then select Next.
Fill out the required fields as follows: If prompted, sign in to your Microsoft account.
Field Value Scope level Subscription Subscription Your Azure subscription Resource Group tailspin-space-game-rg Service connection name Resource Manager - Tailspin - Space Game Ensure that Grant access permission to all pipelines is selected.
Select Save.
Add the Build stage to your pipeline
A multistage pipeline allows you to define distinct phases that your change passes through as it's promoted through the pipeline. Each stage defines the agent, variables, and steps required to carry out that phase of the pipeline. In this section, you'll define one stage to perform the build. You define a second stage to deploy the web application to App Service.
To convert your existing build configuration to a multistage pipeline, you add a stages section to your configuration, and then you add one or more stage sections for each phase of your pipeline. Stages break down into jobs, which are a series of steps that run sequentially as a unit.
From your project in Visual Studio Code, open azure-pipelines.yml and replace its contents with this code:
trigger:
- '*'

variables:
  buildConfiguration: 'Release'

stages:
- stage: 'Build'
  displayName: 'Build the web application'
  jobs:
  - job: 'Build'
    displayName: 'Build job'
    pool:
      vmImage: 'ubuntu-20.04'
      demands:
      - npm

    variables:
      wwwrootDir: 'Tailspin.SpaceGame.Web/wwwroot'
      dotnetSdkVersion: '6.x'

    steps:
    - task: UseDotNet@2
      displayName: 'Use .NET SDK $(dotnetSdkVersion)'
      inputs:
        version: '$(dotnetSdkVersion)'

    - task: Npm@1
      displayName: 'Run npm install'
      inputs:
        verbose: false

    - script: './node_modules/.bin/node-sass $(wwwrootDir) --output $(wwwrootDir)'
      displayName: 'Compile Sass assets'

    - task: gulp@1
      displayName: 'Run gulp tasks'

    - script: 'echo "$(Build.DefinitionName), $(Build.BuildId), $(Build.BuildNumber)" > buildinfo.txt'
      displayName: 'Write build info'
      workingDirectory: $(wwwrootDir)

    - task: DotNetCoreCLI@2
      displayName: 'Restore project dependencies'
      inputs:
        command: 'restore'
        projects: '**/*.csproj'

    - task: DotNetCoreCLI@2
      displayName: 'Build the project - $(buildConfiguration)'
      inputs:
        command: 'build'
        arguments: '--no-restore --configuration $(buildConfiguration)'
        projects: '**/*.csproj'

    - task: DotNetCoreCLI@2
      displayName: 'Publish the project - $(buildConfiguration)'
      inputs:
        command: 'publish'
        projects: '**/*.csproj'
        publishWebProjects: false
        arguments: '--no-build --configuration $(buildConfiguration) --output $(Build.ArtifactStagingDirectory)/$(buildConfiguration)'
        zipAfterPublish: true

    - publish: '$(Build.ArtifactStagingDirectory)'
      artifact: drop
From the integrated terminal, run the following commands to stage, commit, and then push your changes to your remote branch.
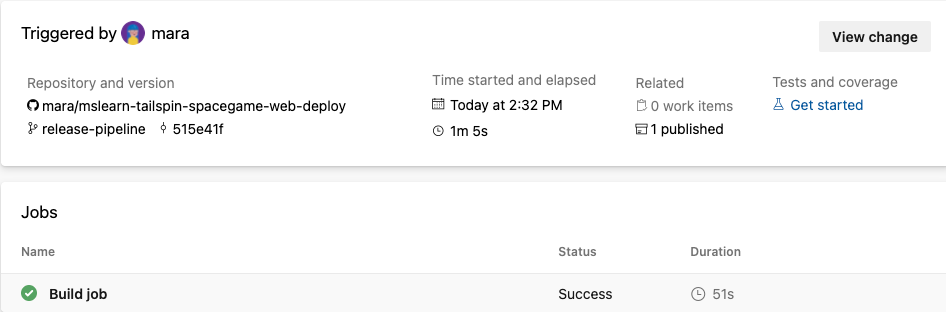
git add azure-pipelines.yml
git commit -m "Add a build stage"
git push origin release-pipeline
In Azure Pipelines, navigate to your pipeline to view the logs.
After the build finishes, select the back button to return to the summary page and check the status of your pipeline and published artifact.
Create the dev environment
An environment is an abstract representation of your deployment environment. Environments can be used to define specific criteria for your release such as which pipeline is authorized to deploy to the environment. Environments can also be used to set up manual approvals for specific user/group to approve before deployment is resumed.
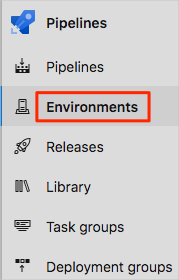
From Azure Pipelines, select Environments.
Select Create environment.
Under Name, enter dev.
Leave the remaining fields at their default values.
Select Create.
Store your web app name in a pipeline variable
The Deploy stage that we will be creating will use the name to identify which App Service instance to deploy to e.g: tailspin-space-game-web-1234.
Although you could hard-code this name in your pipeline configuration, defining it as a variable makes your configuration more reusable.
In Azure DevOps, select Pipelines and then select Library.

Select + Variable group to create a new variable group.
Enter Release for the variable group name.
Select Add under Variables to add a new variable.
Enter WebAppName for the variable name and your App Service instance's name for its value: e.g. tailspin-space-game-web-1234.
Select Save.
Add the deployment stage to your pipeline
We will extend our pipeline by adding a deployment stage to deploy the Space Game to App Service using the download and AzureWebApp@1 tasks to download the build artifact and then deploy it.
From Visual Studio Code, replace the contents of azure-pipelines.yml with the following yaml:
trigger:
- '*'

variables:
  buildConfiguration: 'Release'

stages:
- stage: 'Build'
  displayName: 'Build the web application'
  jobs:
  - job: 'Build'
    displayName: 'Build job'
    pool:
      vmImage: 'ubuntu-20.04'
      demands:
      - npm

    variables:
      wwwrootDir: 'Tailspin.SpaceGame.Web/wwwroot'
      dotnetSdkVersion: '6.x'

    steps:
    - task: UseDotNet@2
      displayName: 'Use .NET SDK $(dotnetSdkVersion)'
      inputs:
        version: '$(dotnetSdkVersion)'

    - task: Npm@1
      displayName: 'Run npm install'
      inputs:
        verbose: false

    - script: './node_modules/.bin/node-sass $(wwwrootDir) --output $(wwwrootDir)'
      displayName: 'Compile Sass assets'

    - task: gulp@1
      displayName: 'Run gulp tasks'

    - script: 'echo "$(Build.DefinitionName), $(Build.BuildId), $(Build.BuildNumber)" > buildinfo.txt'
      displayName: 'Write build info'
      workingDirectory: $(wwwrootDir)

    - task: DotNetCoreCLI@2
      displayName: 'Restore project dependencies'
      inputs:
        command: 'restore'
        projects: '**/*.csproj'

    - task: DotNetCoreCLI@2
      displayName: 'Build the project - $(buildConfiguration)'
      inputs:
        command: 'build'
        arguments: '--no-restore --configuration $(buildConfiguration)'
        projects: '**/*.csproj'

    - task: DotNetCoreCLI@2
      displayName: 'Publish the project - $(buildConfiguration)'
      inputs:
        command: 'publish'
        projects: '**/*.csproj'
        publishWebProjects: false
        arguments: '--no-build --configuration $(buildConfiguration) --output $(Build.ArtifactStagingDirectory)/$(buildConfiguration)'
        zipAfterPublish: true

    - publish: '$(Build.ArtifactStagingDirectory)'
      artifact: drop

- stage: 'Deploy'
  displayName: 'Deploy the web application'
  dependsOn: Build
  jobs:
  - deployment: Deploy
    pool:
      vmImage: 'ubuntu-20.04'
    environment: dev
    variables:
    - group: Release
    strategy:
      runOnce:
        deploy:
          steps:
          - download: current
            artifact: drop
          - task: AzureWebApp@1
            displayName: 'Azure App Service Deploy: website'
            inputs:
              azureSubscription: 'Resource Manager - Tailspin - Space Game'
              appName: '$(WebAppName)'
              package: '$(Pipeline.Workspace)/drop/$(buildConfiguration)/*.zip'
Notice the highlighted section and how we are using the
downloadandAzureWebApp@1tasks. The pipeline will fetch the$(WebAppName)from the variable group we created earlier.Also notice how we are using
environmentto deploy to the dev environment.From the integrated terminal, add azure-pipelines.yml to the index. Then commit the change and push it up to GitHub.
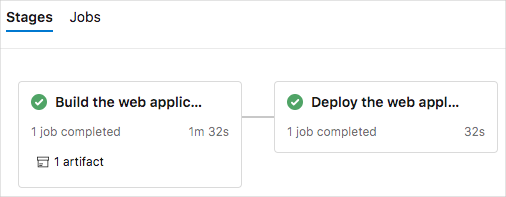
git add azure-pipelines.yml
git commit -m "Add a deployment stage"
git push origin release-pipeline
In Azure Pipelines, navigate to your pipeline to view the logs.
After the build finishes, select the back button to return to the summary page and check the status of your stages. Both stages finished successfully in our case.
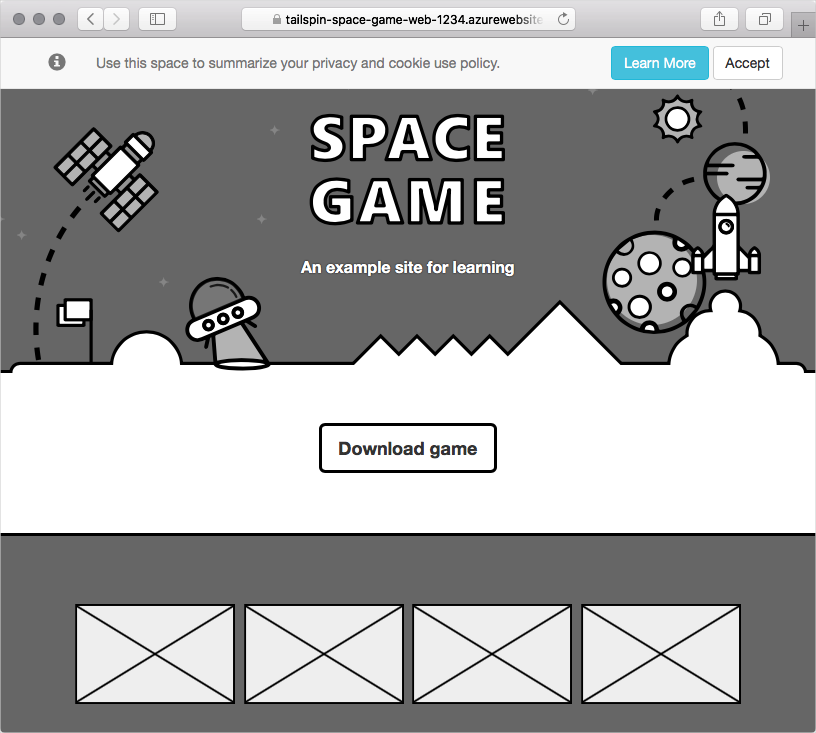
View the deployed website on App Service
If you still have your App Service tab open, simply refresh the page. Otherwise, navigate to your Azure App Service in the Azure portal and select the instance's URL: for example,
https://tailspin-space-game-web-1234.azurewebsites.net
The Space Game website has been successfully deployed to Azure App Service.
Congratulations! You've successfully deployed the Space Game website to Azure App Service by using Azure Pipelines.