Describe working with Git locally
Git and Continuous Delivery is one of those delicious chocolate and peanut butter combinations. We occasionally find two great tastes that taste great together in the software world!
Continuous Delivery of software demands a significant level of automation. It is hard to deliver continuously if you do not have a quality codebase.
Git provides you with the building blocks to take charge of quality in your codebase. It allows you to automate most of the checks in your codebase.
Also, it works before committing the code into your repository.
To fully appreciate the effectiveness of Git, you must first understand how to carry out basic operations on Git. For example, clone, commit, push, and pull.
The natural question is, how do we get started with Git?
One option is to go native with the command line or look for a code editor that supports Git natively.
Visual Studio Code is a cross-platform, open-source code editor that provides powerful developer tooling for hundreds of languages.
To work in open-source, you need to embrace open-source tools.
This recipe will start by:
- Setting up the development environment with Visual Studio Code.
- Creating a new Git repository.
- Committing code changes locally.
- Pushing changes to a remote repository on Azure DevOps.
Getting ready
This tutorial will teach us how to initialize a Git repository locally.
Then we will use the ASP.NET Core MVC project template to create a new project and version it in the local Git repository.
We will then use Visual Studio Code to interact with the Git repository to do basic commit, pull, and push operations.
You will need to set up your working environment with the following:
- .NET Core 3.1 SDK or later: Download .NET.
- Visual Studio Code: Download Visual Studio Code.
- C# Visual Studio Code extension: C# programming with Visual Studio Code.
- Git: Git - Downloads
- Git for Windows (if you are using Windows): Git for Windows
The Visual Studio Marketplace features several extensions for Visual Studio Code that you can install to enhance your experience of using Git:
- Git Lens: This extension brings visualization for code history by using Git blame annotations and code lens. The extension enables you to seamlessly navigate and explore the history of a file or branch. Also, the extension allows you to gain valuable insights via powerful comparison commands and much more.
- Git History: Brings visualization and interaction capabilities to view the Git log, file history and compare branches or commits.
How to do it
Open the Command Prompt and create a new-working folder:
mkdir myWebApp
cd myWebApp
In myWebApp, initialize a new Git repository:
git initConfigure global settings for the name and email address to be used when committing in this Git repository:
git config --global user.name "John Doe"
git config --global user.email "john.doe@contoso.com"
If you are working behind an enterprise proxy, you can make your Git repository proxy-aware by adding the proxy details in the Git global configuration file.
Different variations of this command will allow you to set up an HTTP/HTTPS proxy (with username/password) and optionally bypass SSL verification.
Run the below command to configure a proxy in your global git config.
git config --global http.proxy
http://proxyUsername:proxyPassword@proxy.server.com:port
Create a new ASP.NET core application. The new command offers a collection of switches that can be used for language, authentication, and framework selection. More details can be found on Microsoft docs.
dotnet new mvcLaunch Visual Studio Code in the context of the current-working folder:
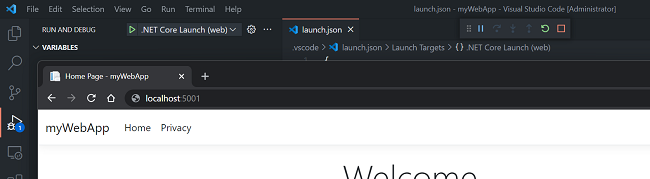
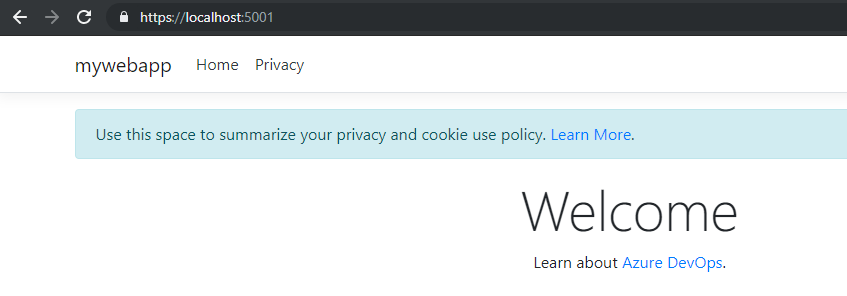
code .When the project opens in Visual Studio Code, select Yes for the Required assets to build and debug are missing from 'myWebApp.' Add them? Warning message. Select Restore for the There are unresolved dependencies info message. Hit F5 to debug the application, then myWebApp will load in the browser, as shown in the following screenshot:
If you prefer to use the command line, you can run the following commands in the context of the git repository to run the web application.
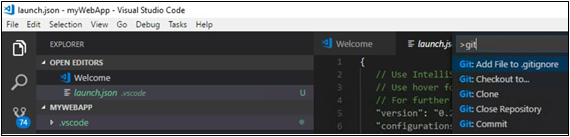
dotnet build
dotnet run
You will notice the ".vscode" folder is added to your working folder. To avoid committing this folder to your Git repository, you can include it in the .gitignore file. Select a file from the ".vscode" folder, hit F1 to launch the command window in Visual Studio Code, type gitIgnore, and accept the option to include the selected file in the new .gitIgnore file.
Note
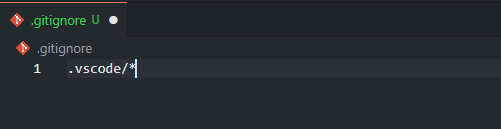
To ignore an entire directory, you need to include the name of the directory with the slash / at the end.
Open your .gitignore, remove the file name from the path, and leave the folder with a slash, for example, .vscode/*.
To stage and commit the newly created myWebApp project to your Git repository from Visual Studio Code, navigate the Git icon from the left panel. Add a commit comment and commit the changes by clicking the checkmark icon. It will stage and commit the changes in one operation:

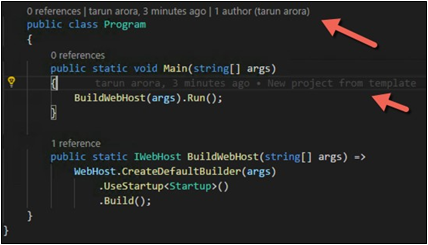
Open Program.cs, you will notice Git lens decorates the classes and functions with the commit history and brings this information in line to every line of code:
Now launch cmd in the context of the git repository and run
git branch --list. It will show you that only themainbranch currently exists in this repository. Now run the following command to create a new branch calledfeature-devops-home-page.git branch feature-devops-home-page git checkout feature-devops-home-page git branch --listYou have created a new branch with these commands and checked it out. The
--listkeyword shows you a list of all branches in your repository. The green color represents the branch that is currently checked out.Now navigate to the file
~\Views\Home\Index.cshtmland replace the contents with the text below.@{ ViewData["Title"] = "Home Page"; } <div class="text-center"> <h1 class="display-4">Welcome</h1> <p>Learn about <a href="https://azure.microsoft.com/services/devops/">Azure DevOps</a>.</p> </div>Refresh the web app in the browser to see the changes.
In the context of the git repository, execute the following commands. These commands will stage the changes in the branch and then commit them.
git status

git add .

git commit -m "updated welcome page."

git status
To merge the changes from the feature-devops-home-page into the main, run the following commands in the context of the git repository.
git checkout main

git merge feature-devops-home-page
Run the below command to delete the feature branch.
git branch --delete feature-devops-home-page
How it works
The easiest way to understand the outcome of the steps done earlier is to check the history of the operation. Let us have a look at how to do it.
In Git, committing changes to a repository is a two-step process. Running:
add .The changes are staged but not committed. Finally, running the commit promotes the staged changes in the repository.To see the history of changes in the main branch, run the command
git log -v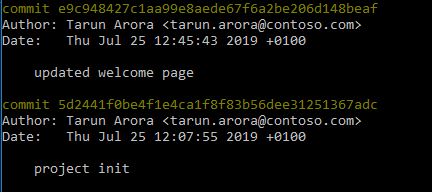
To investigate the actual changes in the commit, you can run the command
git log -p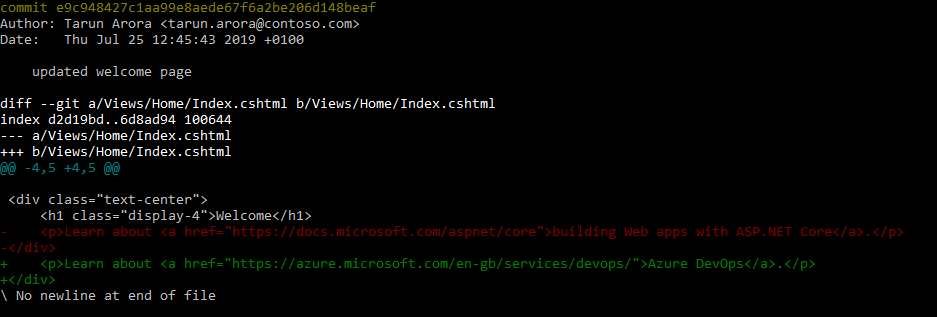
There is more
Git makes it easy to back out changes. Following our example, if you want to take out the changes made to the welcome page.
You can do It hard resetting the main branch to a previous version of the commit using the following command.
git reset --hard 5d2441f0be4f1e4ca1f8f83b56dee31251367adc
Running the above command would reset the branch to the project init change.
If you run git log -v, you will see that the changes done to the welcome page are removed from the repository.