Create and set up connections
This unit describes the steps that are required for creating and setting up connections in Dynamics 365 Intelligent Order Management.
Important
You must install Microsoft Dynamics 365 Intelligent Order Management in the power platform admin center.
To install Intelligent Order Management, follow these steps:
Go to https://admin.powerplatform.microsoft.com, and log in.
Go to Resources > Dynamics 365 Apps.
Select Install app.
In the list, find and select Dynamics 365 Intelligent Order Management.
Select Next, select to agree to the Terms of Service, and then select Install. Installation might take a few hours. You can use the Refresh button to see when it has been completed.
Create platform Power Automate connections
Go to https://powerautomate.microsoft.com/ and sign in. Ensure that you're in the correct environment you wish to install the Intelligent Order Management feature in. To learn about Power Platform environments, go to Environments overview. To confirm the environment, select the Environment icon in the upper-right corner of the Power Platform home page and then select the environment appropriate environment.
Create a Dataverse connection
To create the Microsoft Dataverse connection, follow these steps:
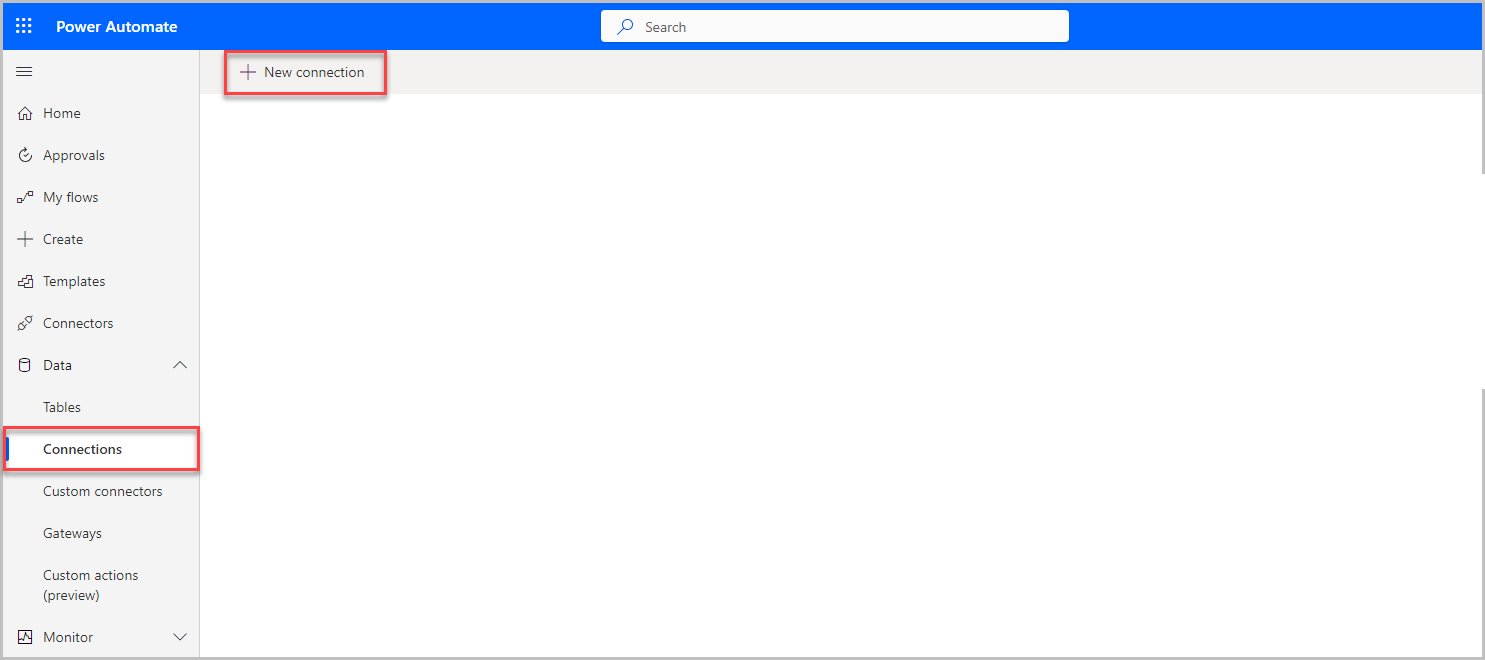
- From the Power Automate home page, select Connections in the left pane.
- Select New connection.
- In the search box in the upper-right corner, enter Dataverse.
- Select the plus (+) symbol to create the Dataverse connection. When prompted to sign in, use the same credentials that you used when signing in to Intelligent Order Management.
Create a Power Automate connection
To create the Power Automate connection, follow these steps:
- Go to Data > Connections.
- Select New connection.
- In the search box in the upper-right corner, enter Power Automate Management.
- Select the plus (+) symbol to create the Power Automate connection. When prompted to sign in, use the same credentials that you used when signing in to Intelligent Order Management.
Create an Intelligent Order Management Data Transformer connection
To create the Intelligent Order Management Data Transformer connection, follow these steps:
- Go to Data > Connections.
- Select New connection.
- In the search box in the upper-right corner, enter IOM Data Transformer.
Note
If the connector doesn't display, append
?addConnectorHideKey=iomtransformeto the URL. - Select the plus (+) symbol to create the Intelligent Order Management Data Transformer connection. When prompted to sign in, use the same credentials that you used when signing in to Intelligent Order Management.
Set up platform connection references
Note
You will need to set up three platform Dataverse connection references, but you can use the same Dataverse connection that you created previously for all three.
To set up platform connection references, follow these steps:
- On the Welcome and get started screen in Intelligent Order Management, select Configure settings > Manage.
- For each connection reference, complete the following steps:
- Select the connection reference.
- Go to the Power Automate portal.
- To retrieve the connection URL, select the corresponding connection to navigate to that specific connection page and then copy the URL. For example, if you're setting up the Intelligent Order Management Data Transformer, you need to select the IOM Data Transformer connection on the Power Automate connection page and then copy the Intelligent Order Management Data Transformer connection page URL from your browser's address bar.
- Return to the corresponding Intelligent Order Management platform connection reference page and then paste the copied URL into the Connection URL field.
- Select Activate System.
Set up FedEx connections
Follow these steps to set up the FedEx connection in Intelligent Order Management:
Go to Providers > Library.
Select FedEx > Activate Providers.
A Terms and Conditions wizard will appear, Select FedEx > Accept.
Navigate to the Connections section and confirm that the Microsoft Dataverse connection is connected.
Select Create next to the FedEx connection.
Enter a value in Connection name.
Select your environment.
Enter a Client ID value and a Client Secret value.
Select Create.
Repeat steps 5-9 for the FedEx Dataworks connection and FedEx Supply Chain Returns connection.
Note
For the FedEx Supply Chain Returns connection you must enter Client application name, Client application username, and Client application password.
- Select Next.
Note
Before selecting Next, all connections must show green.
Enter the EDD Webhook CallbackSignatureKey value if you're leveraging webhook from FedEx dataworks.
Enter the Retail Commerce ID.
Select Next and select Next again.
Select Activate.
Once you have established the FedEx connection, you can create an orchestration flow. The FedEx provider issues out-of-box capabilities to help streamline business processes. Some of the capabilities available are FedEx address validation, FedEx TSS plan, generating shipping labels, and cancel shipments. Self-service product returns powered by FedEx are available as the provider action will generate the FedEx return label when a customer initiates a return, and then locates drop-off locations dependent on the postal code.

