Exercise - Clean up your Azure DevOps environment
You're all done with the tasks for this module. In this unit, we'll help you clean up your Microsoft Azure DevOps environment.
Important
This page contains important cleanup steps. Cleaning up helps ensure that you don't run out of free build minutes. Be sure to perform the cleanup steps if you ran the template earlier in this module.
Clean up Azure resources
Here, you'll delete your Azure VM. The easiest way to delete resources is to delete their parent resource group. When you delete a resource group, you delete all resources in that group.
In the Create a release pipeline with Azure Pipelines module, you managed Azure resources through the Azure portal. Here, you'll tear down your deployment by using the Azure CLI through Azure Cloud Shell. The steps are similar to the steps that you used when you created the resources.
To clean up your resource group:
Go to the Azure portal, and sign in.
From the menu bar, select Cloud Shell. When prompted, select the Bash experience.

To delete the resource group that you used,
tailspin-space-game-rg, run the followingaz group deletecommand:az group delete --name tailspin-space-game-rgWhen prompted, to confirm the operation, enter
y.Note
If you are still signed in to SSH in Cloud Shell window from the previous step, run the
exitcommand to exit SSH, then run theaz deletecommand.As an optional step, after the previous command finishes, run the following
az group listcommand:az group list --output tableYou'll see that the resource group
tailspin-space-game-rgno longer exists.
Disable the pipeline or delete your project
Each module in this learning path provides a template that you can run to create a clean environment for the duration of the module.
Running multiple templates creates multiple Azure Pipelines projects, each pointing to the same GitHub repository. This action can cause multiple pipelines to run each time you push a change to your GitHub repository. This action, in turn, can cause you to run out of free build minutes on your hosted agents. Therefore, it's important to disable or delete your pipeline before you move on to the next module.
Choose either of the next two options.
Option 1: Disable the pipeline
This option disables the pipeline so that it doesn't process further build requests. You can reenable the build pipeline later if you want to. Choose this option if you want to keep your DevOps project and your build pipeline for future reference.
To disable the pipeline:
In Azure Pipelines, go to your pipeline.
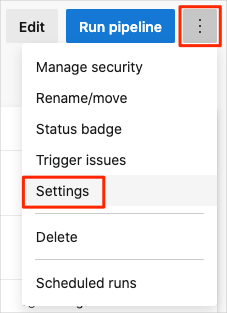
From the More actions menu (...), select Settings.
Under Processing of new run requests, select Disabled, then select Save.
Your pipeline will no longer process build requests.
Option 2: Delete the Azure DevOps project
This option deletes your Azure DevOps project, including what's on Azure Boards and your build pipeline. In future modules, you'll be able to run another template that brings up a new project in a state where this one leaves off. Choose this option if you don't need your DevOps project for future reference.
To delete the project:
In Azure DevOps, go to your project. Earlier, we recommended that you name this project Space Game - web - Agent.
Select Project settings in the lower-left corner of the Azure DevOps page.
In the Project details area, scroll down and select Delete.
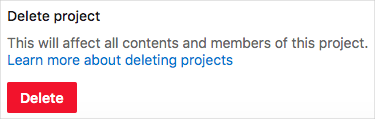
In the window that appears, enter the project name, then select Delete a second time.
Your project is now deleted.