Exercise - Customize and extend your OpenAPI documentation with XML comments and annotations
In this exercise, you enrich the documentation a developer sees about your API by adding comments and annotations to your code. First, let's see what we get from Swagger UI by default.
To examine the OpenAPI definition of the endpoint of our API in Swagger UI, navigate to
http://localhost:5000/swaggerin your browser. You should see output similar to the following when you select the Get method.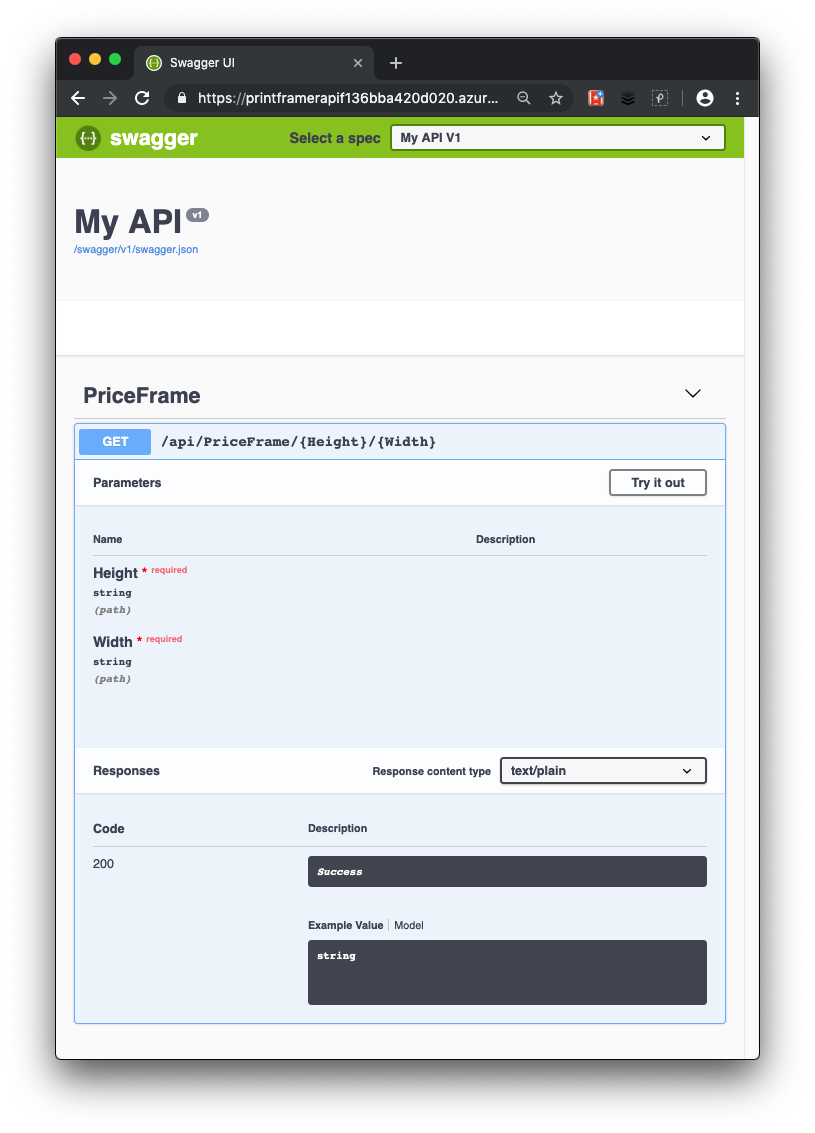
Swagger UI gives us some useful information about the API. It shows the methods you can call (in your simple case, one method called PriceFrame). You can see it's an HTTP Get operation that takes two required parameters named Height and Width. To see the API Call in action, you can select Try it out, enter values for Height and Width, and select Execute.
Your API users still don't have enough information to know the limitations of the PriceFrame method. Let's help them out with some more detailed information through XML comments.
Add XML comments to your API
Go back to the instance of Visual Studio Code that you used for the last exercise.
If the web API is still running in the last exercise, press ctrl+c on Windows or cmd+c on Mac to stop it.
To activate XML documentation in your project, update the PrintFramerAPI.csproj project file, add the
GenerateDocumentationFiletag to the existing<PropertyGroup>, and set it totrue.<PropertyGroup> <TargetFramework>net7.0</TargetFramework> <GenerateDocumentationFile>true</GenerateDocumentationFile> <NoWarn>$(NoWarn);1591</NoWarn> </PropertyGroup>In Startup.cs, add the following using statements.
using System.Reflection;
using System.IO;
In Startup.cs, tell Swashbuckle to use XML documentation by updating the call to the
AddSwaggerGen()inConfigureServices.public void ConfigureServices(IServiceCollection services) { services.AddControllers(); // Register the Swagger generator, defining 1 or more Swagger documents services.AddSwaggerGen(c => { c.SwaggerDoc("v1", new OpenApiInfo { Version = "v1", Title = "PrintFramer API", Description = "Calculates the cost of a picture frame based on its dimensions.", TermsOfService = new Uri("https://go.microsoft.com/fwlink/?LinkID=206977"), Contact = new OpenApiContact { Name = "Your name", Email = string.Empty, Url = new Uri("https://learn.microsoft.com/training") } }); // Set the comments path for the Swagger JSON and UI. var xmlFile = $"{Assembly.GetExecutingAssembly().GetName().Name}.xml"; var xmlPath = Path.Combine(AppContext.BaseDirectory, xmlFile); c.IncludeXmlComments(xmlPath); }); }In the preceding code, reflection determines the name of the XML file to load XML comments.
In the Controllers folder, open PriceFrameController.cs. Add the following XML comment block above the HttpGet attribute of the
GetPricemethod. Adding triple-slash comments to an action enhances the Swagger UI by adding the description to the section header./// <summary> /// Returns the price of a frame based on its dimensions. /// </summary> /// <param name="Height">The height of the frame.</param> /// <param name="Width">The width of the frame.</param> /// <returns>The price, in dollars, of the picture frame.</returns> /// <remarks> The API returns 'not valid' if the total length of frame material needed (the perimeter of the frame) is less than 20 inches and greater than 1000 inches.</remarks> [HttpGet("{Height}/{Width}")] public string GetPrice(string Height, string Width) { string result; result = CalculatePrice(Double.Parse(Height), Double.Parse(Width)); return $"The cost of a {Height}x{Width} frame is ${result}"; }To save all changes and make sure it builds locally, run the following command in the Visual Studio Code terminal window.
dotnet buildTo see your changes, run the ASP.NET application locally by entering the following in the Visual Studio Code terminal window:
dotnet runLook at the Swagger UI again at
http://localhost:5000/swagger, and observe the added information provided by your XML comments to the OpenAPI documentation.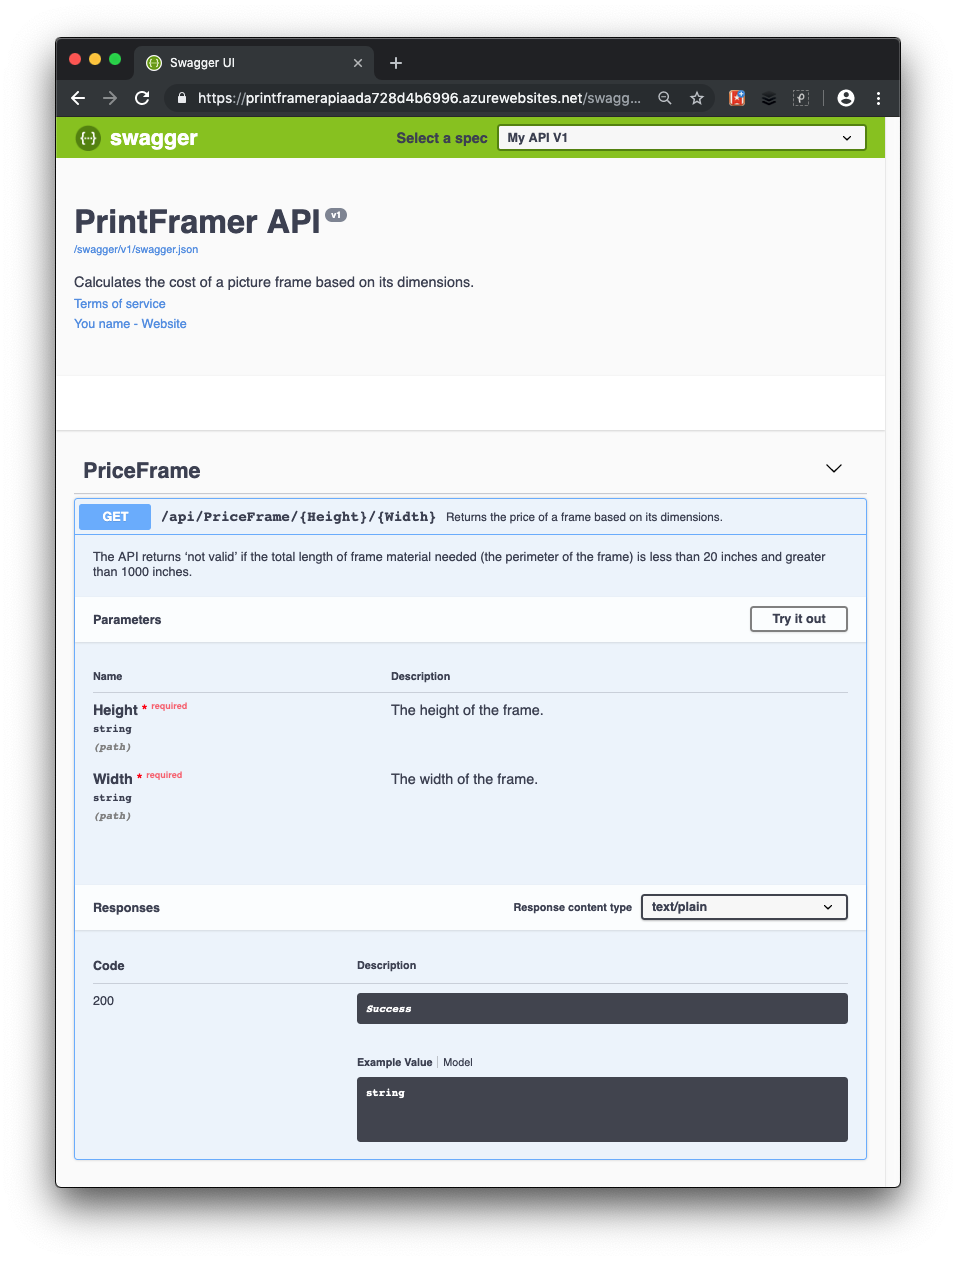
Add data annotations to your API
To enable Swagger to improve the OpenAPI documentation, you use attributes from the Microsoft.AspNetCore.Mvc namespace.
If the web API is still running in the last exercise, press ctrl+c on Windows or cmd+c on Mac to stop it.
To show that your
GetPriceAPI supports a content type response for text/plain, in the API controller, PriceFrameController.cs, add a[Produces("text/plain")]attribute above theGetPricedefinition.[HttpGet("{Height}/{Width}")] [Produces("text/plain")]The Response Content Type dropdown selects this content type as the default for the controller's GET actions.
Add Swashbuckle annotations to your API
So far, your API returns the status code 200 when it can calculate a price for the given frame dimensions. In the description of the GetPrice method, note the case when a price can't be calculated.
A more robust way to tell developers the response types and error codes is through the following XML comments and data annotations. Swashbuckle and the Swagger tooling use these values to clearly generate an OpenAPI description of the expected HTTP response codes.
Also update the HTTP verb filter constructor to include the Name property, and include the OpenAPI operationId value.
Add the following using statement to the PriceFrameController.cs file.
using Microsoft.AspNetCore.Http;In PriceFrameController.cs, replace
GetPricewith the following code and comment./// <summary> /// Returns the price of a frame based on its dimensions. /// </summary> /// <param name="Height">The height of the frame.</param> /// <param name="Width">The width of the frame.</param> /// <returns>The price, in dollars, of the picture frame.</returns> /// <remarks> /// Sample request: /// /// Get /api/priceframe/5/10 /// /// </remarks> /// <response code="200">Returns the cost of the frame in dollars.</response> /// <response code="400">If the amount of frame material needed is less than 20 inches or greater than 1000 inches.</response> [HttpGet("{Height}/{Width}", Name=nameof(GetPrice))] [Produces("text/plain")] [ProducesResponseType(StatusCodes.Status200OK)] [ProducesResponseType(StatusCodes.Status400BadRequest)] public ActionResult<string> GetPrice(string Height, string Width) { string result; result = CalculatePrice(Double.Parse(Height), Double.Parse(Width)); if (result == "not valid") { return BadRequest(result); } else { return Ok($"The cost of a {Height}x{Width} frame is ${result}"); } }This code update makes the following changes:
- The method uses the
BadRequest()andOk()methods to create a BadRequest (400) and an Ok status respectively, passing in the string result to the response. - The XML comments describe each status code this method can return.
- The HttpGet attribute includes a
Nameproperty to emit the OpenAPIoperationIdparameter. - The ProducesResponseType attributes list the different responses that the action can return. These attributes are combined with XML comments, as previously described, to include human-friendly descriptions with each response in the generated Swagger
- The method uses the
Rebuild the web API with the following command:
dotnet buildRun the ASP.NET application with the following command:
dotnet runLook at the Swagger UI again at
http://localhost:5000/swagger, and observe the added information provided by these annotations. The final Swagger UI for your API appears in the following image.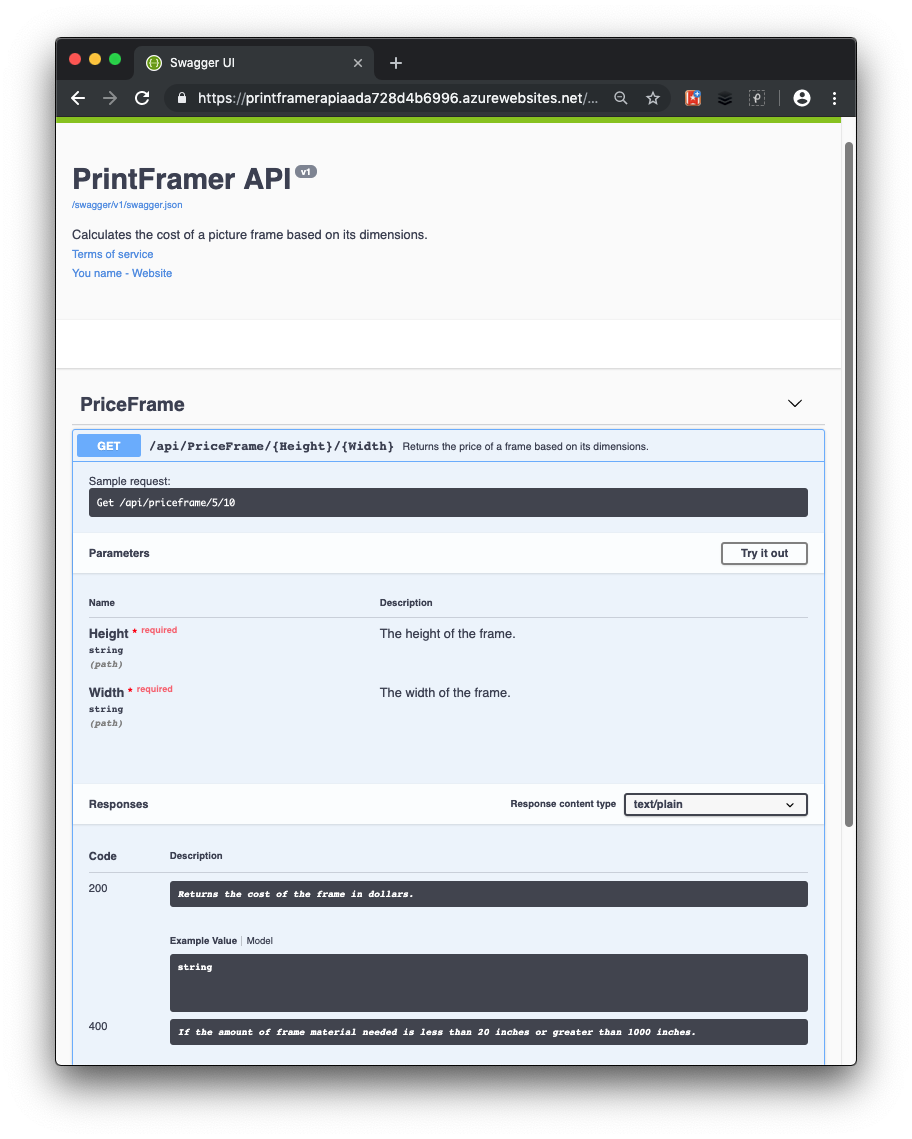
In this exercise, you enriched the information that a developer receives about your API, making it much easier to consume.