Integrate Microsoft 365 Groups and Dynamics 365 Customer Engagement apps
Microsoft 365 Groups
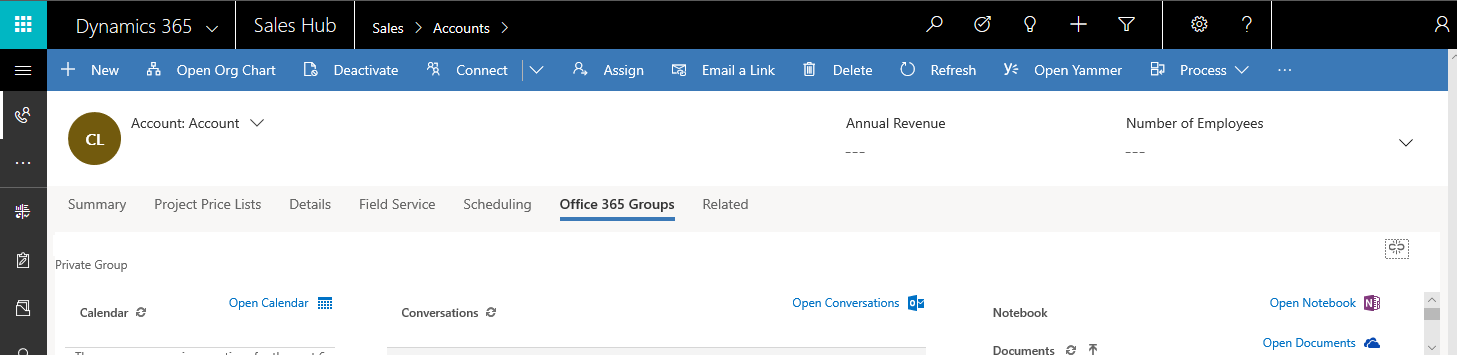
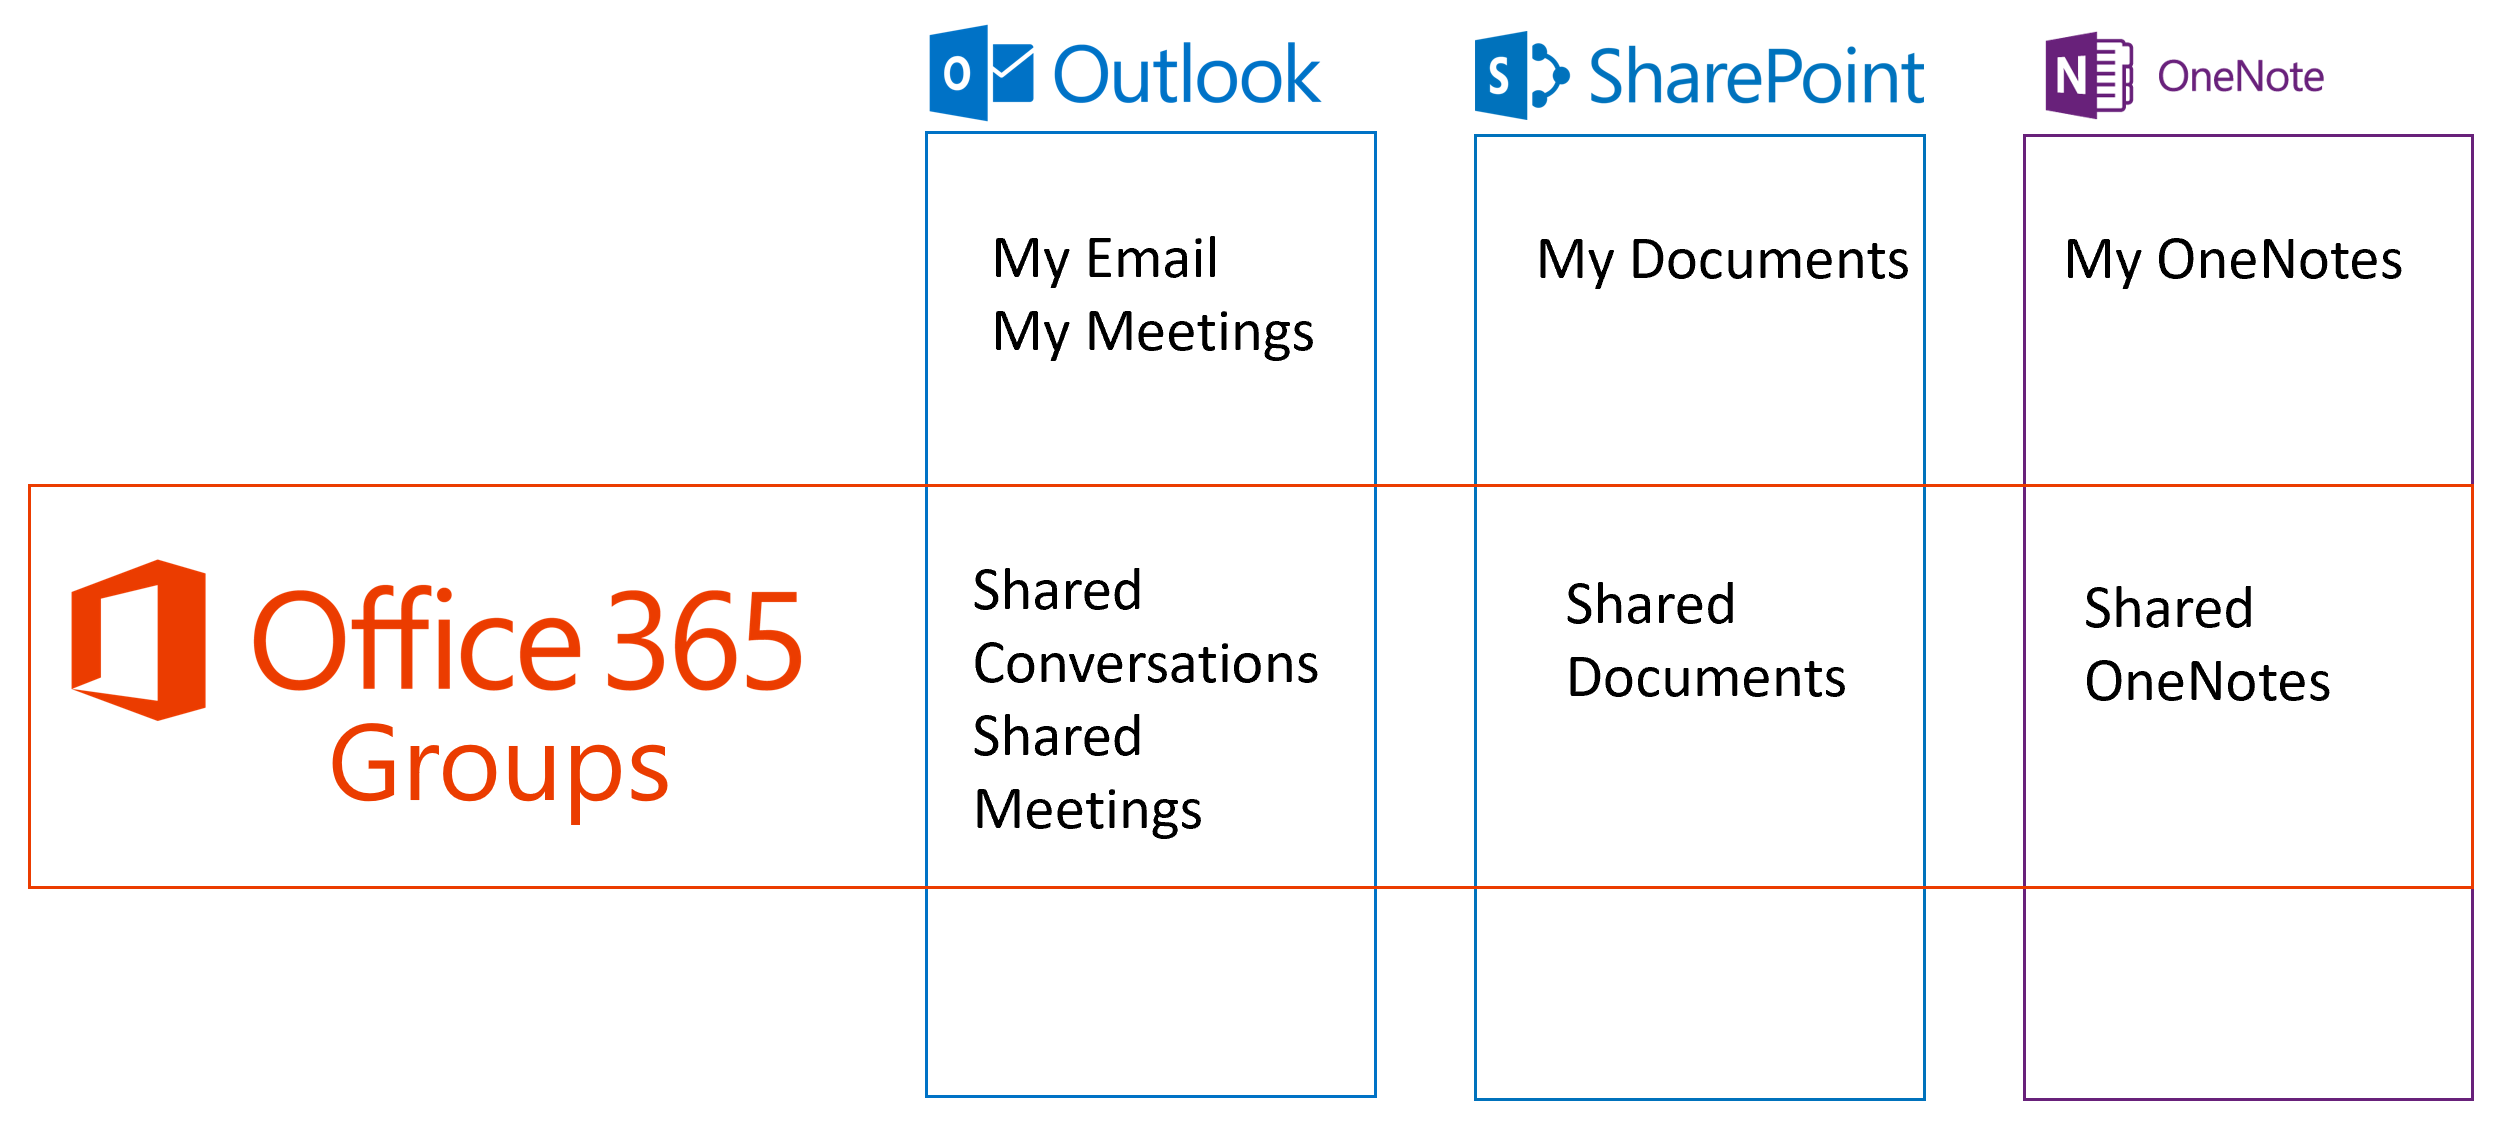
Microsoft 365 Groups, available with Dynamics 365, provide an environment for collaboration with Microsoft 365 users who don’t use Dynamics 365. For example, use Microsoft 365 Groups when a sales team has a major opportunity requiring input from several people who don’t have access to Dynamics 365. Microsoft 365 Groups provide a single location to share documents, conversations, meetings, and notes. You can enable Microsoft 365 Groups for any entity.
When looking at collaboration options you should consider Microsoft Teams integration with Dynamics 365 as a more modern collaboration experience.
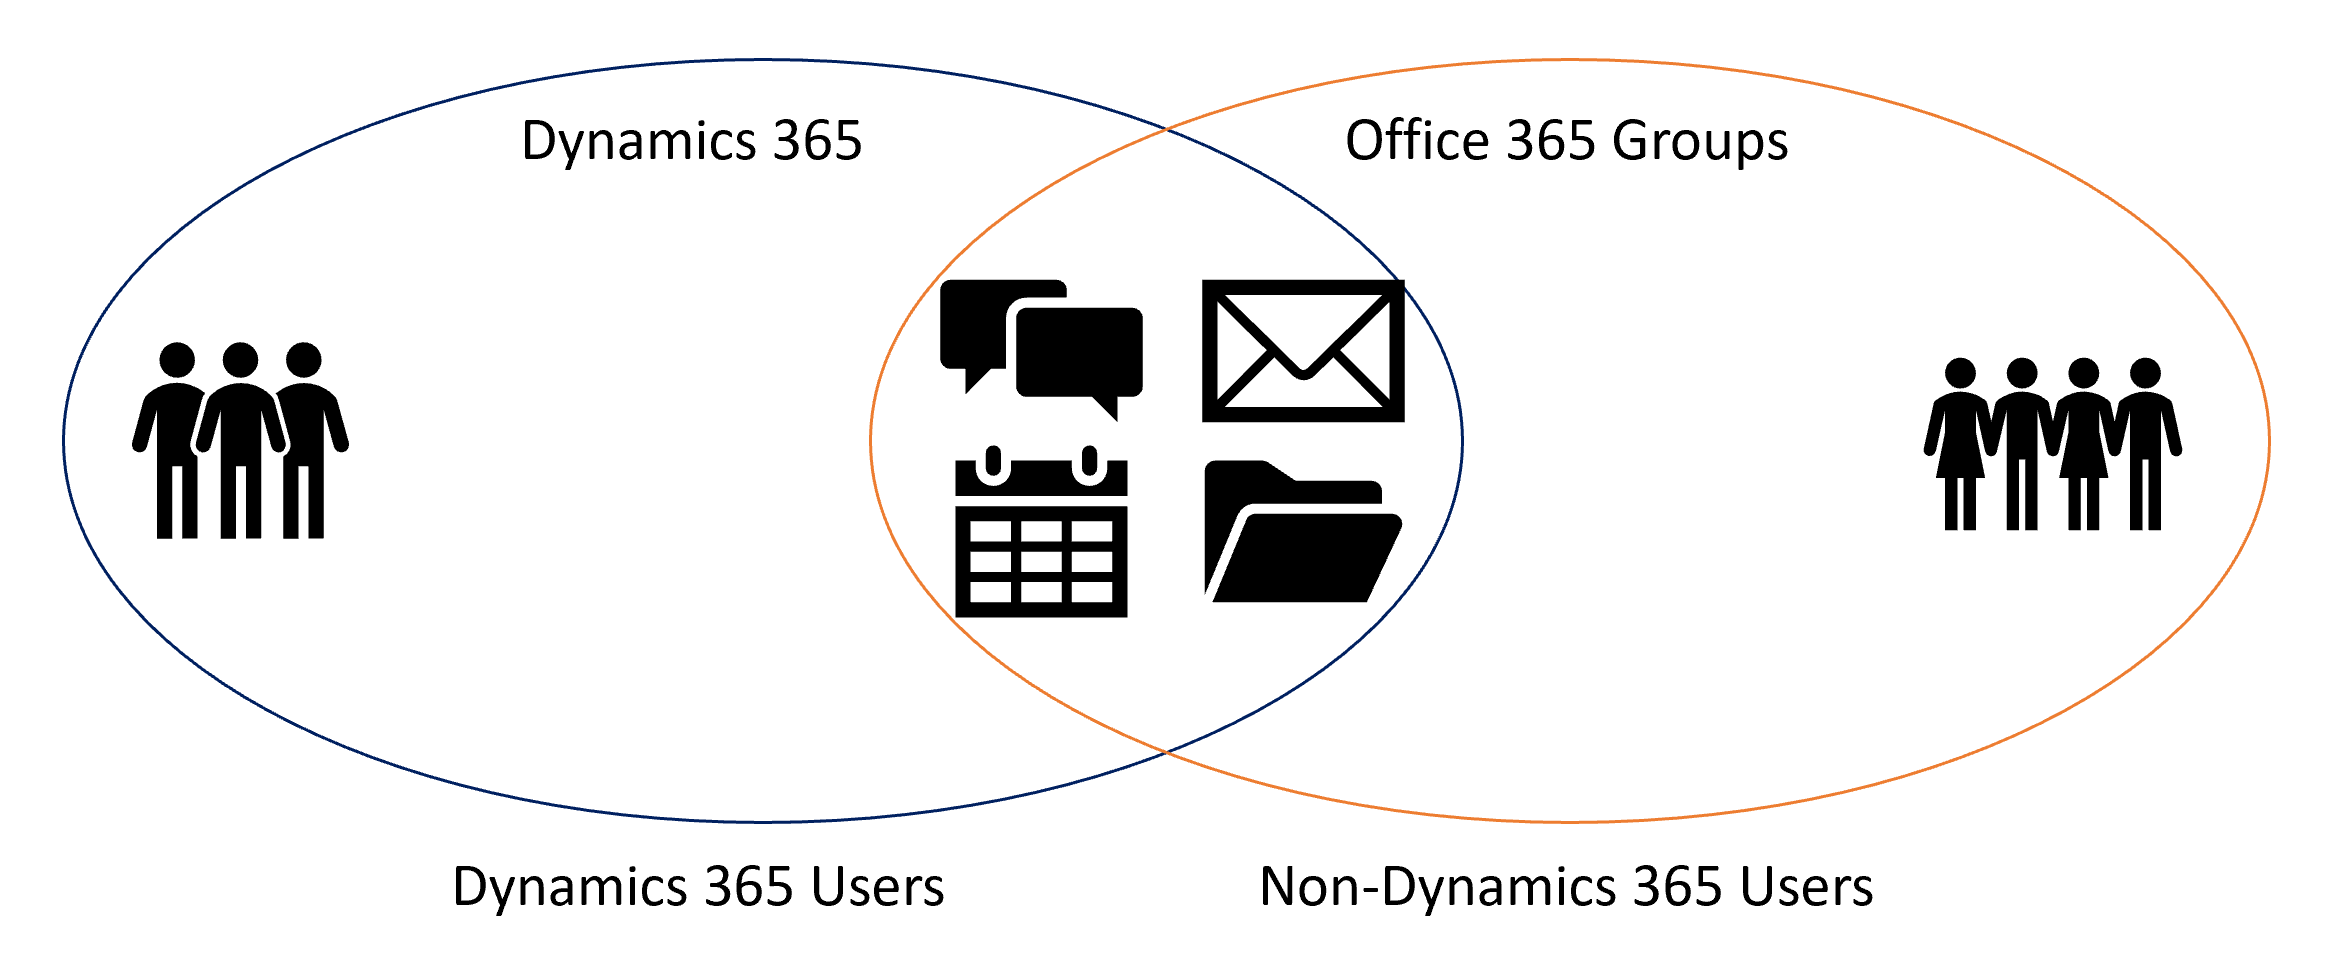
Collaborate with people inside and outside of your Dynamics 365 organization.
Microsoft 365 Groups in Dynamics 365
Allows group information to be surfaced in Dynamics 365 in the context of a record
Requires installation of Microsoft provided Dynamics 365 solution
Allows for auto-create of the group starting from Dynamics 365
Microsoft 365 Groups Connector
All task activity for a record is sent to a new or existing Group
Configuration starts from Microsoft 365 Outlook Web App
Microsoft 365 has over 60+ other connectors that can be used to bring other data into the group view
Microsoft 365 requirements
The following are required to use Microsoft 365 Groups with Dynamics 365:
Dynamics 365
This feature requires that you have an Microsoft 365 subscription or a subscription to an online service such as SharePoint Online or Exchange Online.
For full Microsoft 365 feature integration with Dynamics 365 (online) and Dynamics 365 (on-premises), you'll need Microsoft 365 Enterprise E3 or better. Skype for Business PSTN calling and conferencing requires Microsoft 365 Enterprise E5. Other Microsoft 365 plans are not supported.
Exchange Online
To use document storage with Microsoft 365 Groups, you will need SharePoint Online and access to the group OneNote notebook.
Microsoft 365 installation
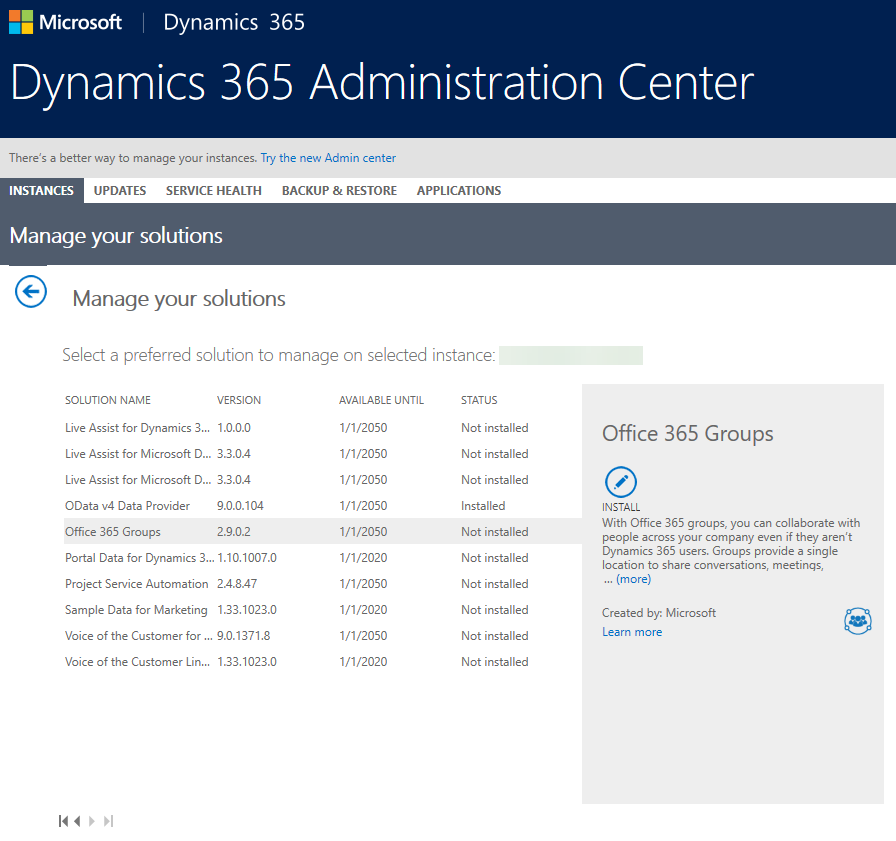
Microsoft 365 Groups is a Dynamics 365 solution you provision from your Microsoft 365 admin portal.
Browse to the Microsoft 365 admin center and sign in using Microsoft 365 Global administrator credentials.
Click Admin centers > Dynamics 365.
Click the Instances tab.
Choose your instance, and then click Solutions.
Select Microsoft 365 Groups and then click Install.
Review the terms of service and then click Install.
Once installation of the solution has completed, you can configure Microsoft 365 Groups.
Required privileges
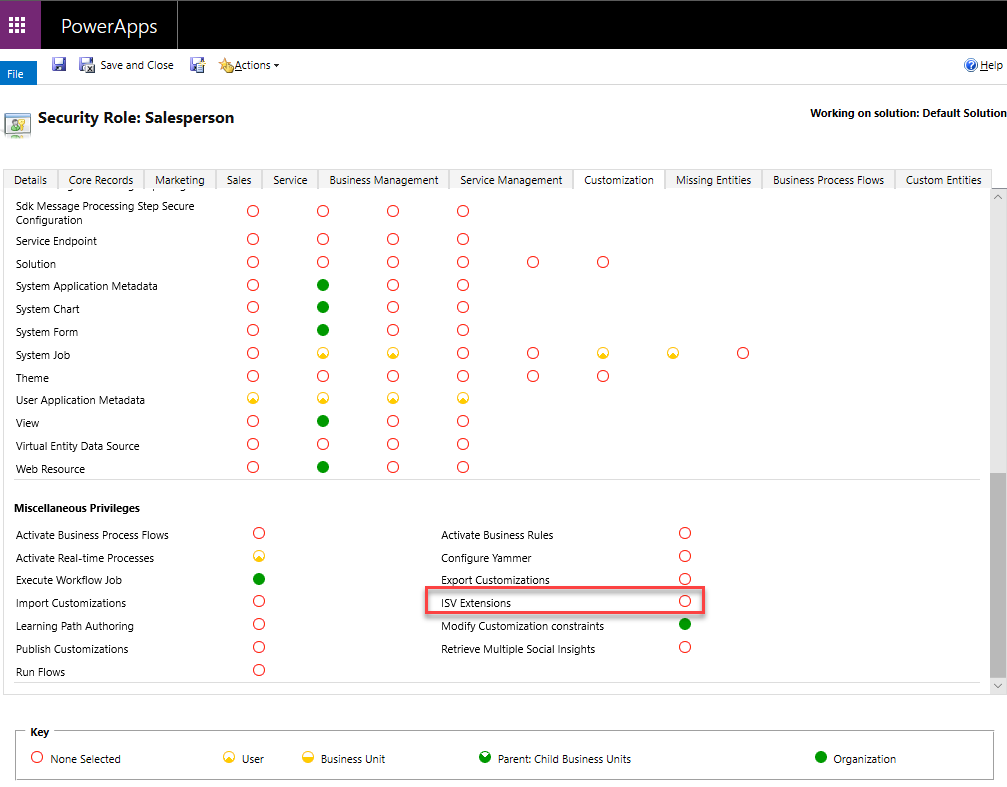
The security privilege, ISV Extensions, is required to use Microsoft 365 Groups. You can add or remove this privilege from custom or default security roles to meet your business needs. If a user doesn’t have this privilege, they won’t be able to see the Microsoft 365 Groups item in a record’s navigation menu.
Go to Environments > Select Environment >Security.
Click Security Roles.
Choose the security role to check and then click the Customization tab.
In the Miscellaneous Privileges section, review the ISV Extensions privilege setting. If the security role doesn’t have the ISV Extensions privilege, select it to set it to Organization.
Click Save and Close.
Microsoft 365 configuration
Once you provision Microsoft 365 Groups, you can enable them for any entity. Security group membership is associated with the entity. You configure Microsoft 365 Groups in Dynamics 365.
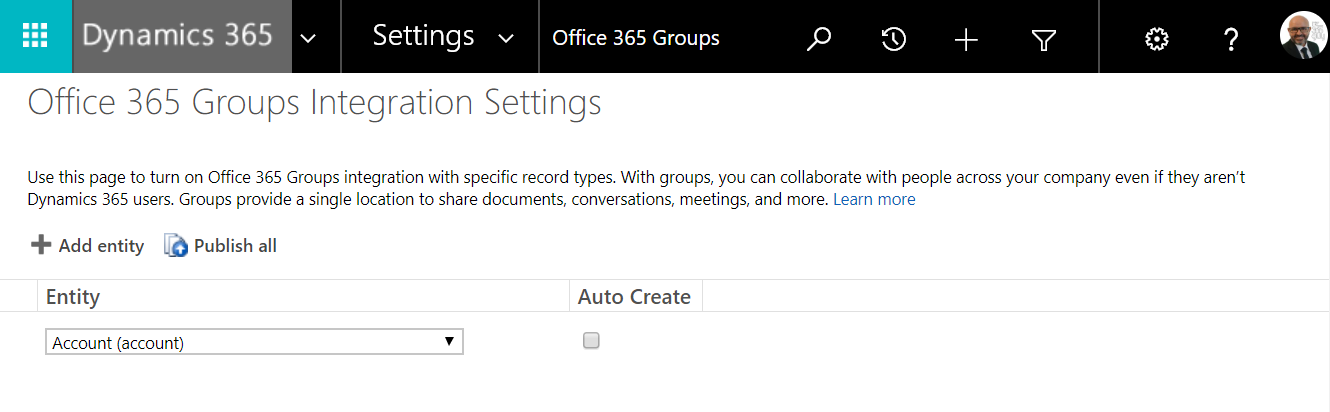
In Dynamics 365 Classic click Settings > Microsoft 365 Groups.
On the Microsoft 365 Groups Settings page, click Add entity and choose an entity from the list. Repeat this step for each entity you want to enable, including custom entities.
Optionally, you can click Auto-create for an entity to have a new group automatically created when a new record for that entity is created. However, we recommend you choose this option only for entities that typically require large groups to collaborate.
When you have added all the entities you want to enable for Microsoft 365 Groups, click Publish All.
All of your pending system customizations will be published, including those you may have saved but not published in another area.You’re now ready to use Microsoft 365 Groups.
Use the Microsoft 365 Connectors for Groups
Use the Microsoft 365 Connectors for Groups to connect new or existing Microsoft 365 Groups with Dynamics 365 so the group is notified when new activities are posted. To set it up, follow these steps:
Sign in to your Microsoft 365 Outlook.
Create or choose an Microsoft 365 Group.
Click Connectors.
Locate Dynamics 365, and then click Add.
If you have access to more than one Dynamics 365 instance, choose which instance to connect to this Microsoft 365 Group. If you only have access to one Dynamics 365 instance, this step will be skipped, and you will advance to the next step.
Choose the Dynamics 365 record you want to connect this Microsoft 365 Group to, and then click Save.
Once connected, the Dynamics 365 connector shows up at the top of the connection list with a summary of connected records.
To delete a connected record, click View, and then click Remove.
Note: the following about the Microsoft 365 Connectors for Groups:
Only account, lead, and opportunity records are supported.
You can connect up to five records.
Only task type activities are sent to the group as connector cards.
The activity appears as a new conversation in a card format in the group.
The fields in the card shown in the group conversation are not customizable.
Nothing is required in Dynamics 365 to make the connector work.
For sensitive information, you should connect your Dynamics 365 record to a private group where only approved members can view contents.
View in Dynamics 365
From with Dynamics 365 open the record you want to access Groups on and selected related records. From the list select Microsoft 365 Groups.