Exercise - Download Python AI libraries
In this section, we'll install the libraries that you'll need to build your AI model as we continue in the learning path. We'll use Anaconda to complete the downloads. Anaconda is a distribution of the Python and R programming languages. It includes libraries for development in scientific computing like data science, machine learning, predictive analysis, and more.
Tip
You can watch this Microsoft video about downloading and configuring an environment. The video shows an environment that's similar to the one we'll configure, but it's slighty different. Be sure to read the entire topic for the complete download instructions for this project.
Download Anaconda
Follow these steps to download and install Anaconda.
Go to the Anaconda download page to install Anaconda.
Select Download.
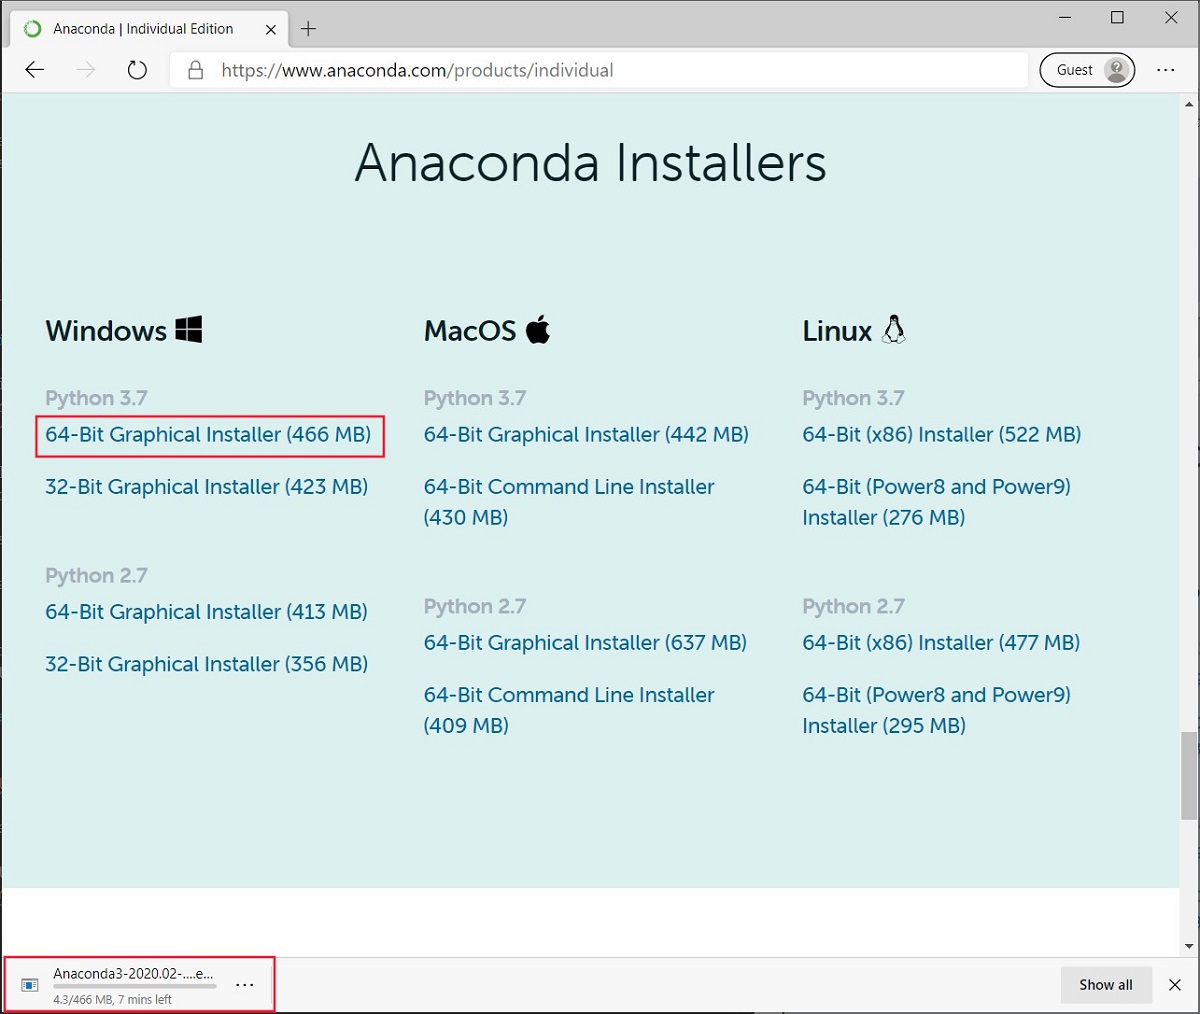
In the list of download links, select the link that corresponds to your computer operating system.
Wait for the download to finish.
To start the installation, select the executable file in the lower-left corner of your browser. (You can also open the download folder and run the executable from that location.)
Note
The following example shows a computer running Windows 10 with the Microsoft Edge browser. You should select the download that corresponds to your computer operating system.
Complete the steps to install Anaconda on your computer.
After installation completes, the application is available on your computer:
- If you're using Windows, run the Anaconda prompt from the Start menu.
- On a Mac, run the Anaconda prompt in your computer Terminal.
Use Anaconda to install AI libraries
Follow these steps to create the environment:
At the Anaconda prompt, run the
conda createcommand to start the Anaconda environment:conda create -n myenv python=3.7 pandas jupyter seaborn scikit-learn keras pytorch pillowThis command uses Anaconda to install all the libraries that we need for our model. In this command, we're also downloading a few other libraries that are good for data science. You might find these libraries useful for future development.
When you're prompted to install the packages, enter Y, and then press Enter.
To activate your new environment, run the
conda activatecommand:conda activate myenv
The new environment is ready to use, but we need to add one more library through a separate install command.
Install torchvision package
Follow these steps to install the torchvision package.
At the Anaconda prompt, run the
conda installcommand:conda install -c pytorch torchvisionWhen you're prompted to install the package, enter Y, and then press Enter.
Create project folder and Jupyter Notebook file
Now you have an environment you can use for the rest of the learning path. The last step is to create a project folder for your source code files.
Choose an easily accessible location on your computer, and create a folder named ClassifySpaceRocks.
Open Visual Studio Code, and then open the folder you created.
Note
If you were running Visual Studio Code before your finished the install and set up of your Anaconda environment, you'll need to restart Visual Studio Code so the app can detect the environment.
Create a Jupyter Notebook file named ClassifySpaceRockProgram.
Enter Ctrl + Shift + P to open the Command dropdown menu at the top of Visual Studio.
Select Jupyter: Create new blank notebook.
A new notebook file opens. The system shows a message about connecting to the Python kernel in the lower-right corner.
Add the following comment in the first cell of the new notebook:
# AI model to classify space rocksSelect the green arrow at the top of the cell to run it.
Enter Ctrl + S to save the file.
In the Save As dialog, browse to your folder.
Enter the name for the new notebook file. In our example, we'll use the name ClassifySpaceRockProgram. Make sure Jupyter is selected as the file type.
Select Save.
The saved Jupyter Notebook file should have the file extension .ipynb. You should see the file in the Explorer view in Visual Studio.
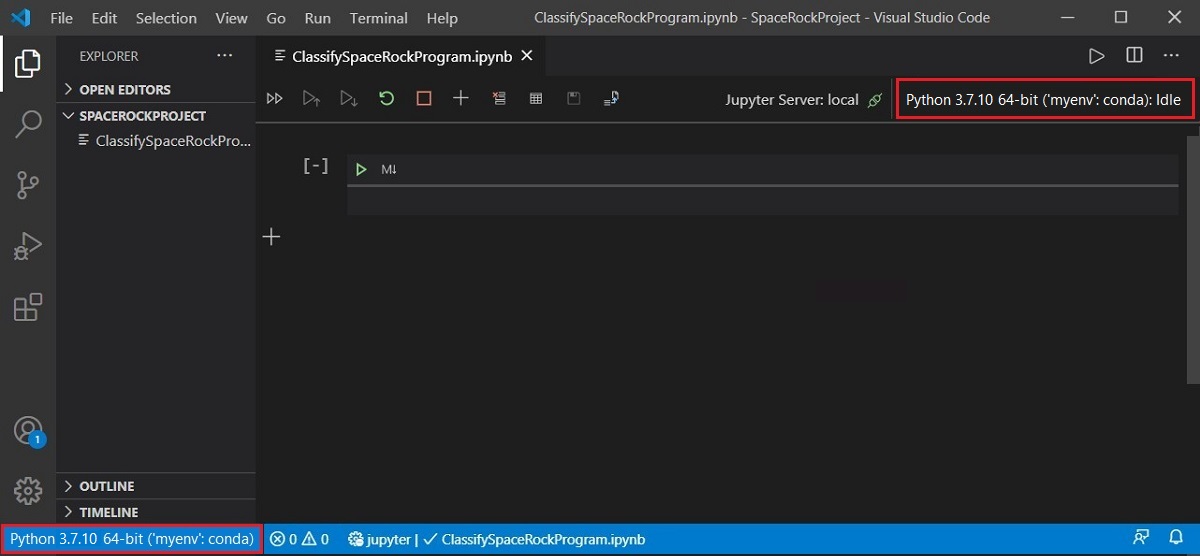
At the upper-right and lower-left corners of Visual Studio, change the environment to the new Anaconda environment you created.
Note
In some Python configurations, the Python 3 and Python 3.x N-bit ('myenv': conda) environments are essentially the same. If you change the environment by selecting ('myenv': conda), Visual Studio Code might report the new environment as Python 3 rather than ('myenv': conda).
Congratulations! You've installed all the libraries you need to make an AI program, and configured Visual Studio Code to find them.
Next steps
Continue to the next module in this Learning path and discover how to analyze images of rocks by using artificial intelligence.
Important
If you plan to continue to the next module in this Learning path, leave your Anacoda prompt open and your Jupyter Notebook file open in Visual Studio Code. If you close these applications, or plan to work on the module exercises across multiple sessions, you'll have to reopen the tools and reconfigure your working environment to continue your model development.