Exercise - Use Azure log analytics and schedule updates
Recently, your department moved all of their infrastructure to Azure. There are many virtual machines (VMs) serving up web sites and email functions. Your task is to keep these VMs up to date with the latest patches and security releases. You decide to roll out the Update Management solution to all of the VMs in your enterprise.
In the following exercise, you review the agent connectivity to log analytics and learn how to schedule update deployments.
Review Agent Connectivity to Log Analytics
To assess connectivity between the agent and Azure Log Analytics, perform the following steps in the Azure portal.
Sign into the Azure portal.
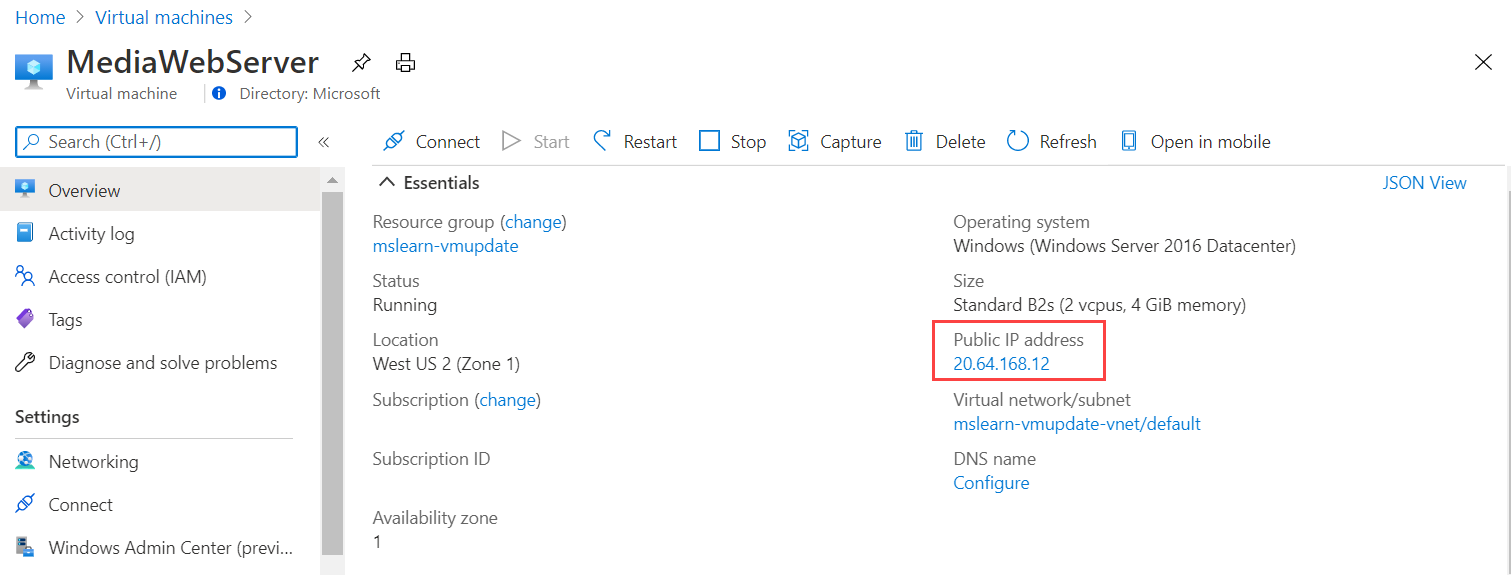
Select Virtual machines, and from the list select MediaWebServer.
On the Overview page, make a note of the Public IP Address.
On the Overview page, select Connect > Native RDP > Select.
Select Download RDP file.
From the browser, select Open file and Connect.
In Windows security, select More choices > Use different account.
In Enter your credentials, type the username and password that you specified when you created the virtual machine, and then select OK.
In the certificate warning dialog, select Yes.
On the remote machine, go to the Windows icon > Control Panel.
In Control Panel, search for and select Microsoft Monitoring Agent.
Select the Azure Log Analytics (OMS) tab.
Observe that the agent displays the following message: The Microsoft Monitoring Agent has successfully connected to Microsoft Operations Management Suite service.
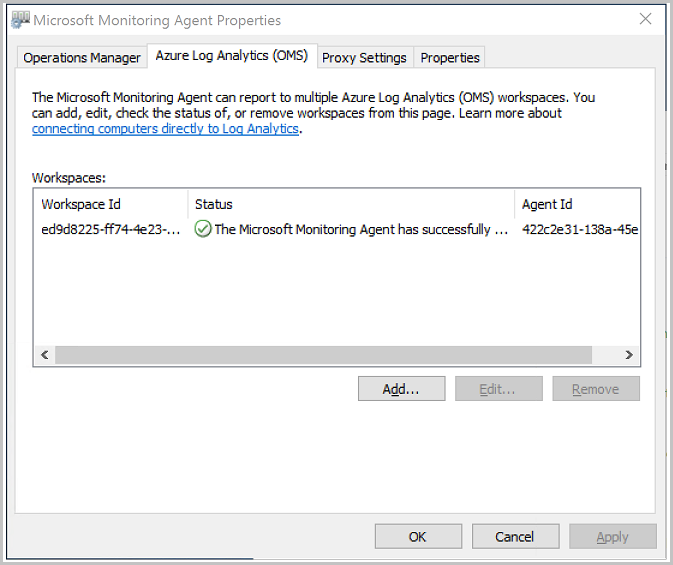
Select OK to close the Microsoft Monitoring Agent Properties window.
In the All Control Panel Items window, clear your search and select Administrative Tools.
Open the Event Viewer.
Expand Applications and Services Logs, and open Operations Manager.
Maximize the Event Viewer window.
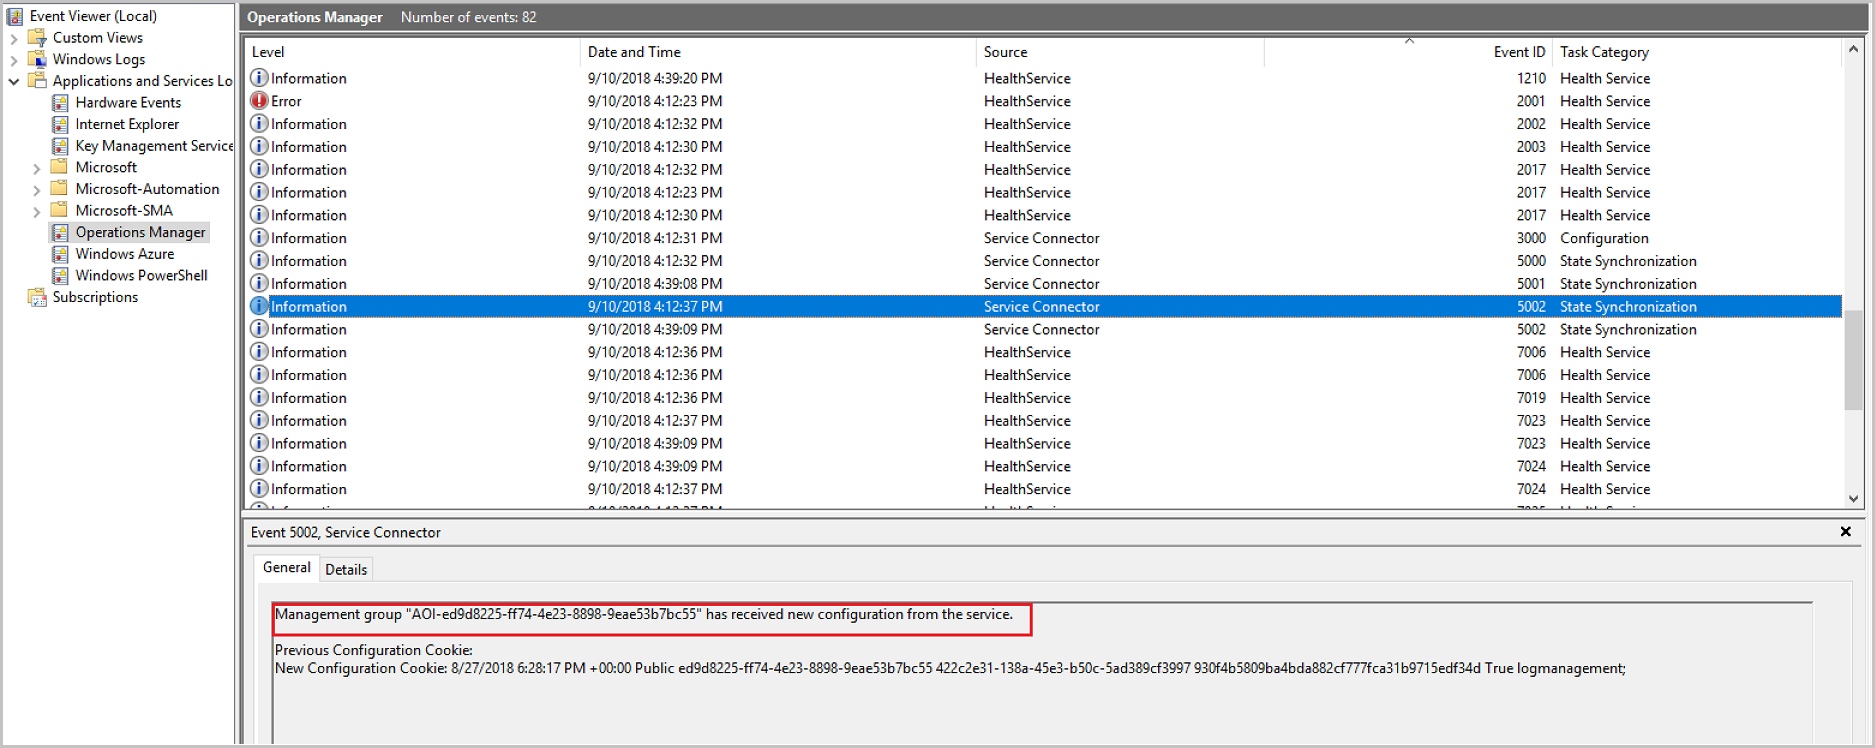
In the Operations Manager view, select the Event ID column heading to sort the list by Event ID.
Observe Event IDs 3000 and 5002. These events indicate that the computer is registered with the Log Analytics workspace and received new configuration from the service. Event ID 5002 is shown in the following image.
Close the Event Viewer and all other windows that were opened.
Sign out of the Remote Desktop Connection application.
Schedule Update Deployments
Here, you learn how to schedule updates for the virtual machine.
In the Azure portal, go to the VM MediaWebServer and select Guest + host updates > Go to Update management.
Select the tab Schedule update deployment.
Fill out the form using the information from the following table:
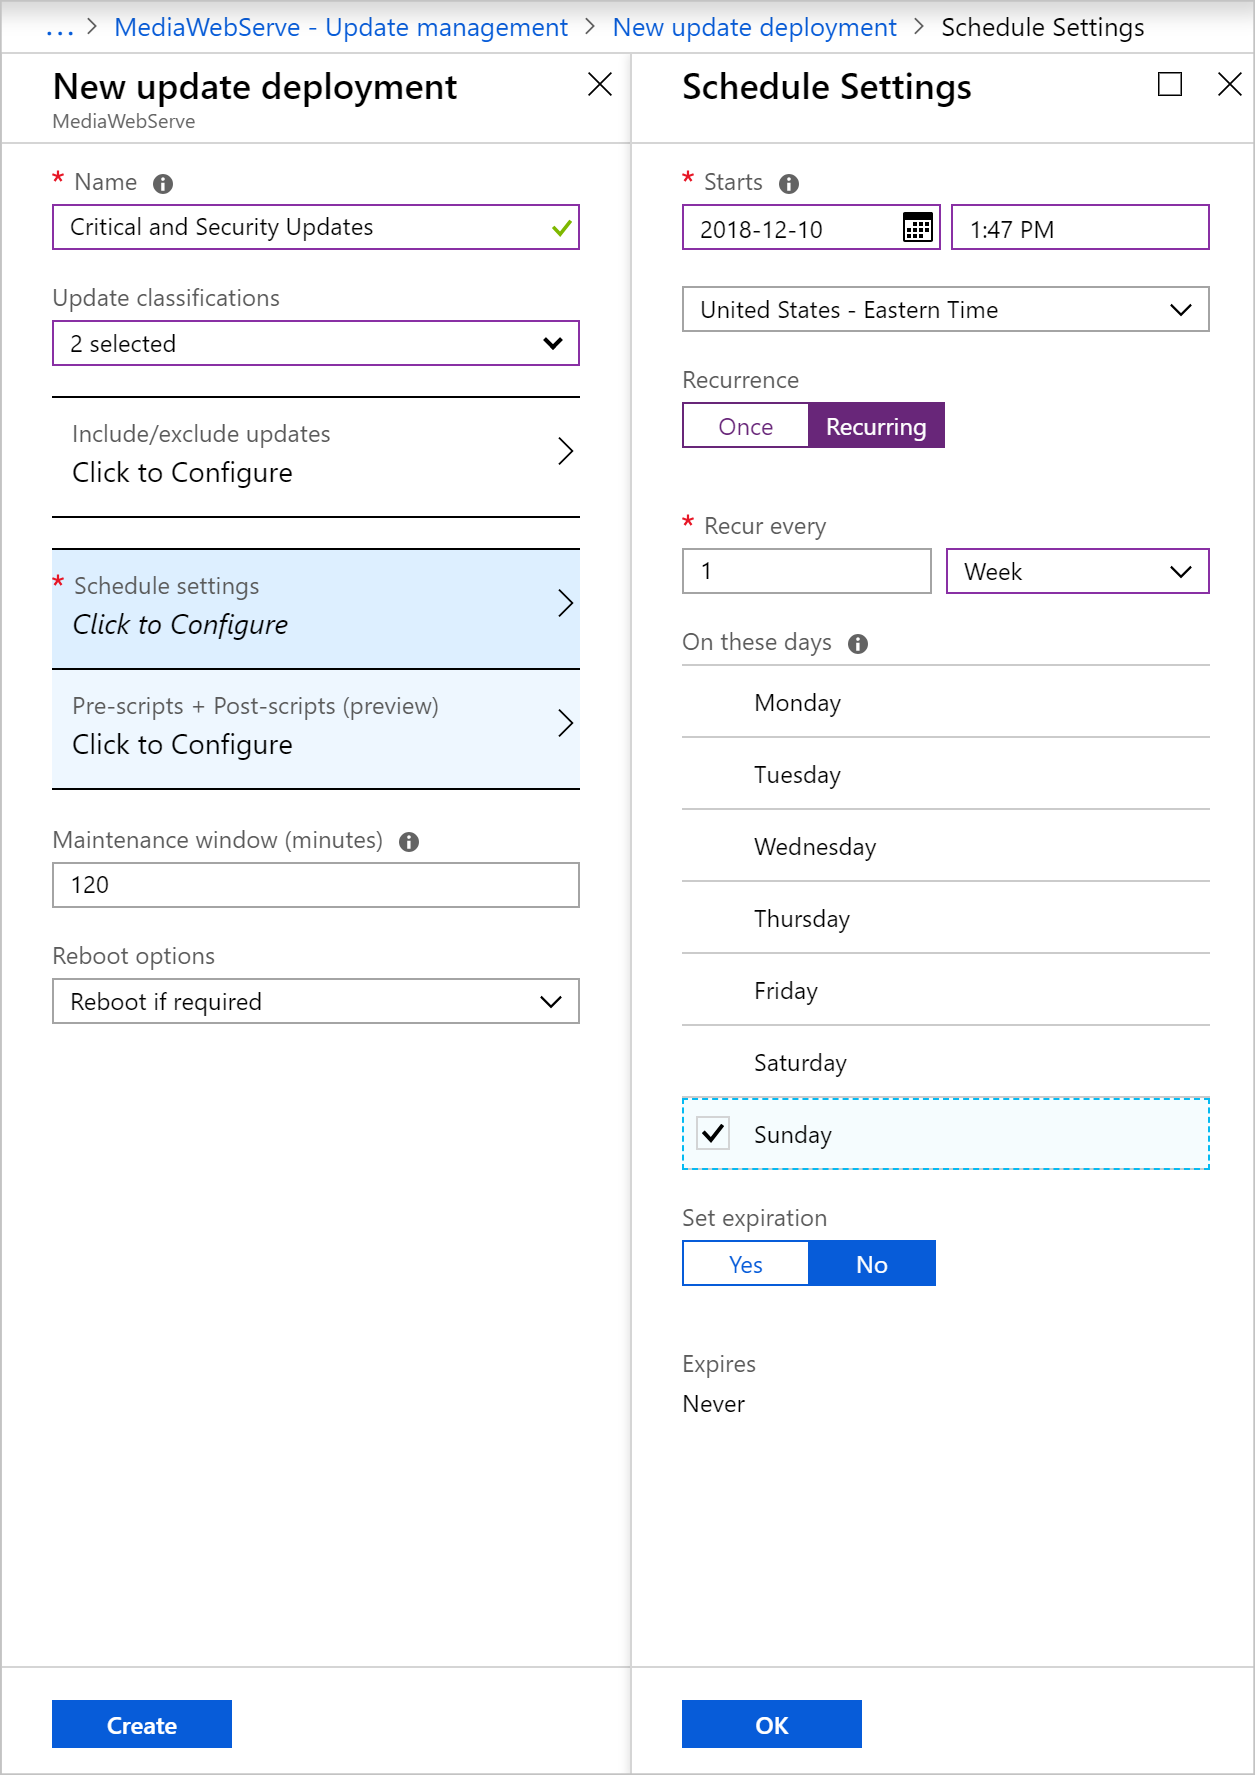
Field Values Name Critical and security updates Update classifications Select only Critical updates and Security updates Schedule settings Click to configure Start Increment the time up one hour Recurrence Recurring Recur every Configure update to occur once every week on Sunday Select OK.
On New update deployment, select Create.