Add and remove cluster nodes
To evaluate the operational aspects of Azure Stack HCI, you have been relying on a four-node cluster deployed into your proof-of-concept environment. In preparation for testing some of the more demanding production workloads, you anticipate that you will need to increase the number of nodes. You also want to prepare for the possibility of having to remove cluster nodes after the testing completes. You plan to test and document both scenarios, including any caveats applicable to stretched cluster deployments.
Overview of adding and removing Azure Stack HCI cluster nodes
Throughout the lifetime of Azure Stack HCI clusters, you might need to add or remove individual cluster nodes. When adding new servers, make sure that the physical hardware matches the one used by the existing nodes. The match applies to the processor model and memory type, and the type, size, and number of drives. In addition, you must follow each change to the number of cluster nodes with a successful cluster validation.
Note
Successful cluster validation is a prerequisite for Microsoft support.
There are some more considerations that apply to stretched clusters:
- Stretched clusters require that the number of cluster nodes and drives in each site are the same. When you add a server to a stretched cluster in one site, you have to also add a matching server to the other site.
- To add and remove servers in scenarios that involve stretched clusters, use Windows PowerShell.
Add or remove Azure Stack HCI cluster nodes by using Windows Admin Center
The procedure of adding a new server to an existing Azure Stack HCI cluster consists of the following high-level steps:
- Integrating the server into your datacenter's infrastructure. Details may vary depending on your datacenter setup, operational model, and the Azure Stack HCI hardware vendor's offering, but they typically involve rack mounting, cabling, establishing network connectivity, configuring out-of-band management controllers, applying the latest firmware, and running original equipment manufacturer (OEM) validation tests.
- Configuring the Azure Stack HCI operating system to comply with your organizational standards, including assigning host names according to your server naming convention and performing Active Directory Domain Services (AD DS) domain join.
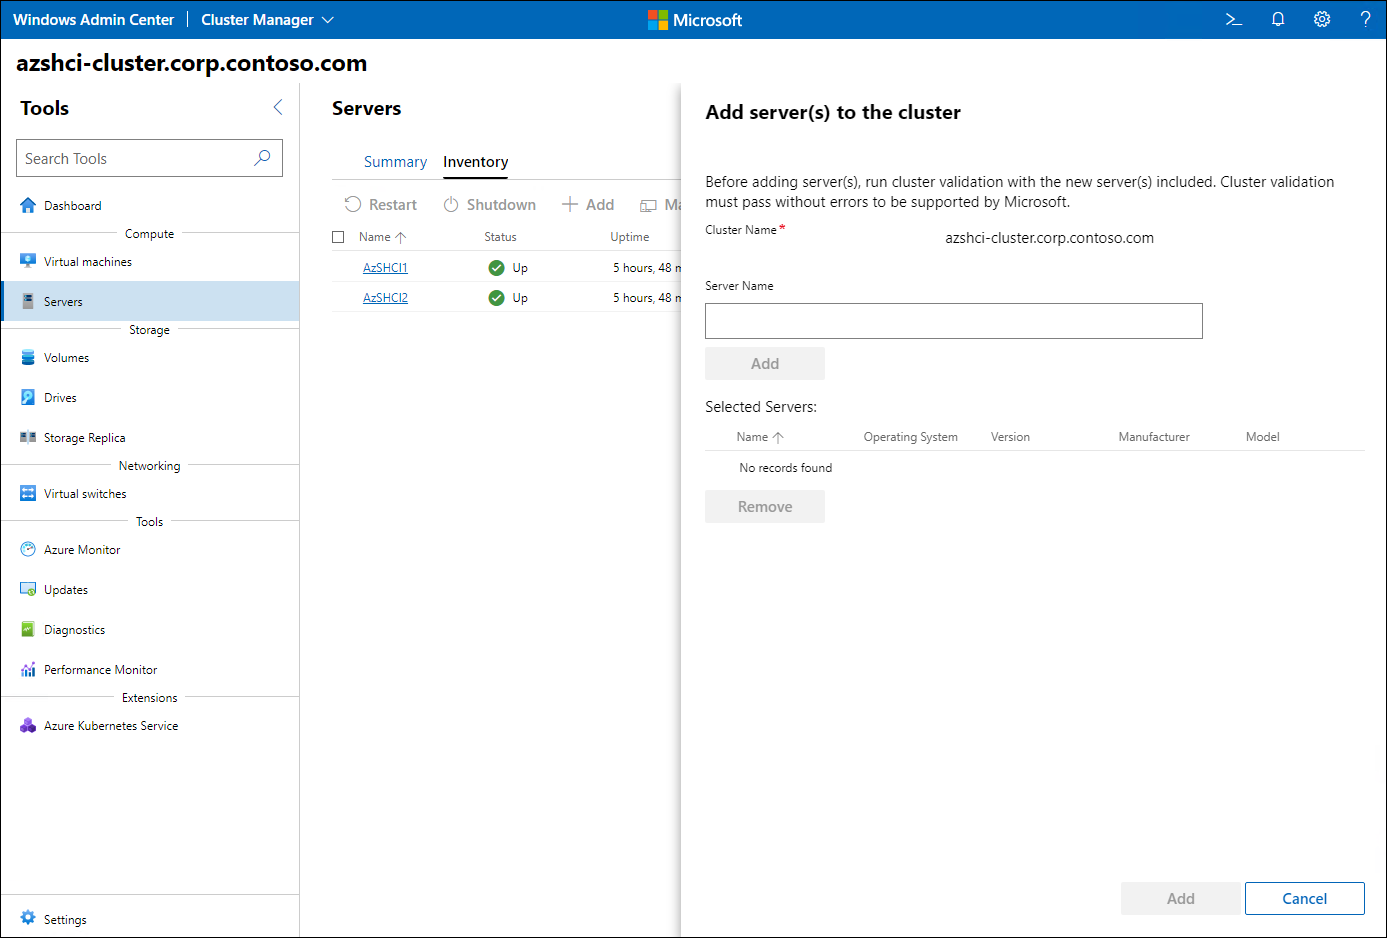
- Adding the server as an additional node to the Azure Stack HCI cluster. You can use Windows Admin Center for this purpose. After you connect to the cluster, in the Cluster Manager interface, in the Nodes pane, on the Inventory tab, you will find the option to add servers to the cluster.
- Running cluster validation. After making any significant change to the cluster configuration, you have to run cluster validation.
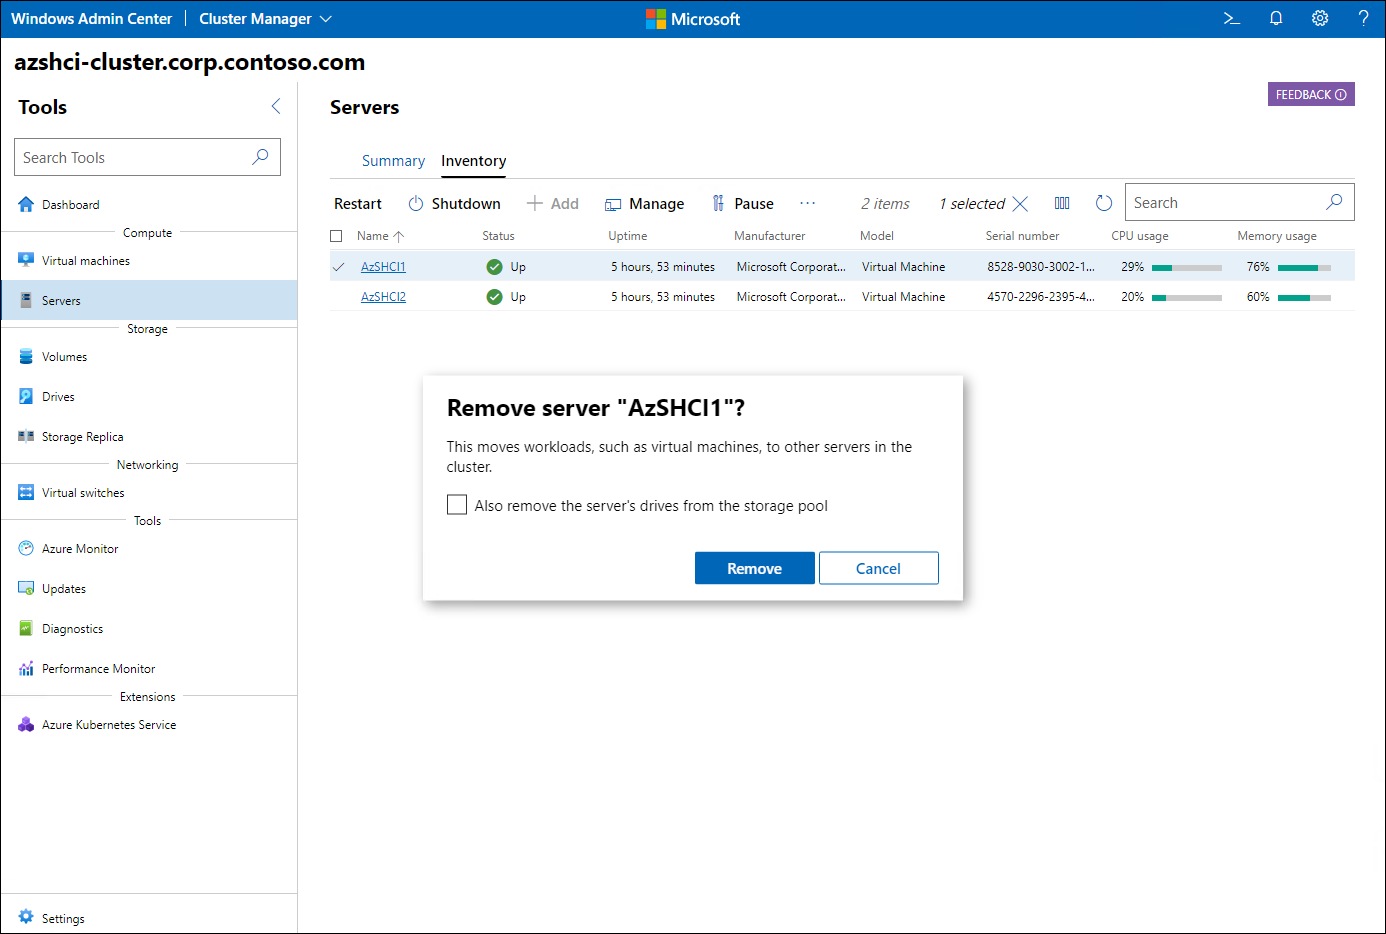
Similarly, you can use Windows Admin Center to remove a server from an Azure Stack HCI cluster. After you browse to the Cluster Manager interface and select any of the existing cluster nodes, on the Inventory tab, you will find the option to remove individual cluster nodes, including their drives. In this case, you also need to perform cluster validation.
Add or remove Azure Stack HCI stretched cluster nodes by using Windows PowerShell
The procedure of adding or removing Azure Stack HCI stretched cluster nodes consists of the following high-level steps:
- Start by running the Get-ClusterFaultDomainXML cmdlet to retrieve an XML representation of the site topology, including the list of existing servers and their site assignment, and store its content as an XML file.
- Modify the newly created file that contains the XML representation of the site topology so that it reflects the intended change. This means either deleting the entries that represent the existing cluster nodes you intend to remove or adding entries that represent the new servers you deployed to their respective sites.
- Run the Set-ClusterFaultDomainXML cmdlet with the -xml parameter pointing to the XML file in order to update the site topology.
- Next, depending on whether you are adding or removing servers, run either the Add-ClusterNode cmdlet or the Remove-ClusterNode cmdlet, with the -Name parameter set to the names of target servers.
- Finally, complete the procedure by rerunning the cluster validation by using the Test-Cluster cmdlet with the -InputObject parameter set to the cluster name.