Create a custom Azure Stack Hub Marketplace item
Every item published to the Azure Stack Hub Marketplace uses the Azure Gallery Package (.azpkg) format. The Azure Gallery Packager tool enables you to create a custom Azure Gallery package that you can upload to the Azure Stack Hub Marketplace, which can then be downloaded by users. The deployment process uses an Azure Resource Manager template.
Create a Marketplace item
To create a custom marketplace item, do the following:
Download the Azure Gallery Packager tool and the sample Azure Stack Hub gallery package. This download includes custom virtual machine templates. Extract the .zip file, and under the folder Custom virtual machines, you can use either the Linux or the Windows templates that are available. You can decide to reuse the pre-made templates and modify the respective parameters with the product details of the item that you will show on your Azure Stack Hub portal.
Create an Azure Resource Manager template or use our sample templates for Windows/Linux. These sample templates are provided in the packager tool .zip file you downloaded in step 1.
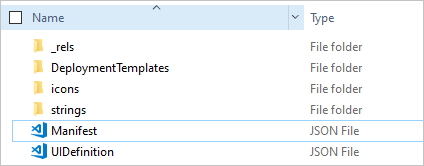
The Gallery package should contain the following structure:
Replace the following highlighted values (containing numbers) in the Manifest.json template with the value that you provided when uploading your custom image.
It's recommended that before publishing your own custom template, you try to publish the sample as-is and make sure it works in your environment. Once you've verified this step works, then delete the sample from gallery and make iterative changes until you are satisfied with the result.
The following template is a sample of the Manifest.json file:
{
  "$schema": "https://gallery.azure.com/schemas/2015-10-01/manifest.json#",
  "name": "Test", (1)
  "publisher": "<Publisher name>", (2)
  "version": "<Version number>", (3)
  "displayName": "ms-resource:displayName", (4)
  "publisherDisplayName": "ms-resource:publisherDisplayName", (5)
  "publisherLegalName": "ms-resource:publisherDisplayName", (6)
  "summary": "ms-resource:summary",
  "longSummary": "ms-resource:longSummary",
  "description": "ms-resource:description",
  "longDescription": "ms-resource:description",
  "links": [
    { "displayName": "ms-resource:documentationLink", "uri": "http://go.microsoft.com/fwlink/?LinkId=532898" }
    ],
  "artifacts": [
      {
        "isDefault": true
      }
  ],
  "images": [{
      "context": "ibiza",
      "items": [{
        "id": "small",
        "path": "icons\\Small.png", (7)
        "type": "icon"
        },
        {
            "id": "medium",
            "path": "icons\\Medium.png",
            "type": "icon"
        },
        {
            "id": "large",
            "path": "icons\\Large.png",
            "type": "icon"
        },
        {
            "id": "wide",
            "path": "icons\\Wide.png",
            "type": "icon"
        }]
    }]
}
The following list explains the preceding numbered values in the example template:
The name of the offerThe version of your template, without a spaceThe name that customers seeThe publisher name that customers seeThe name of the publisher, without a spaceThe publisher legal nameThe path and name for each icon
- For all fields referring to ms-resource, you must change the appropriate values inside the strings/resources.json file:
{
"displayName": "<OfferName.PublisherName.Version>",
"publisherDisplayName": "<Publisher name>",
"summary": "Create a VM",
"longSummary": "Create a virtual machine and use it",
"description": "<p>This is just a sample of the type of description you could create for your gallery item!</p><p>This is a second paragraph.</p>",
"documentationLink": "Documentation"
}
- To ensure that the resource can be deployed successfully, test the template with the Azure Stack Hub APIs.
- If your template relies on a virtual machine image, follow the instructions to add a virtual machine image to Azure Stack Hub.
- Save your Azure Resource Manager template in the /Contoso.TodoList/DeploymentTemplates/ folder.
- Choose the icons and text for your Marketplace item. Add icons to the Icons folder, and add text to the resources file in the Strings folder. Use the small, medium, large, and wide naming convention for icons.
- When you finish modifying your files, convert it to an .azpkg file. You perform the conversion using the AzureGallery.exe tool and the sample gallery package you downloaded previously. Run the following command:
.\AzureGallery.exe package -m c:\<path>\<gallery package name>\manifest.json -o c:\Temp