Exercise - Set up and view sign-in logs and audit logs
In this exercise, you view your Microsoft Entra sign-in logs, select columns and filter data for the logs, and then download the logs. You also view your Microsoft Entra instance audit logs through the Users menu.
In this exercise, you'll:
- View sign-in logs for your Microsoft Entra instance.
- Change columns to view in your sign-in logs.
- Filter data to include in your sign-in logs view.
- Download sign-in logs.
- View audit logs through the Users menu.
Note
This exercise is optional. If you don't have an Azure account, you can read through the following instructions to understand how to use Log Analytics to view your sign-in and audit logs.
If you want to complete this exercise but you don't have an Azure subscription or prefer not to use your own account, you can create a free account before you begin.
View Microsoft Entra sign-in logs
To see the sign-in logs for Microsoft Entra ID:
In the Azure portal, go to your Microsoft Entra instance.
In the left menu under Monitoring, select Sign-in logs:

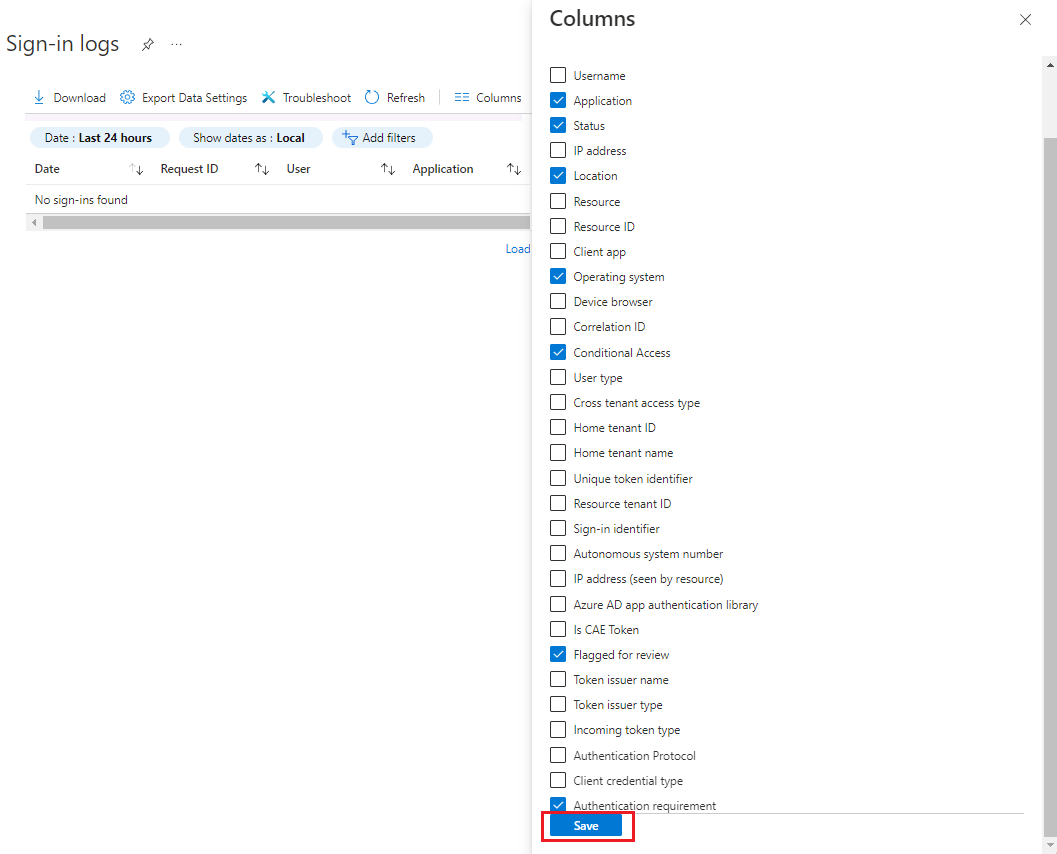
Change columns to use in your sign-in logs view
Then, change the columns that appear for sign-in logs:
In Sign-in logs in your Microsoft Entra instance, in the menu bar, select Columns.

In the Columns pane, for this exercise, select Operating system and Flagged for review to add those columns. Clear Resource ID to remove that column.
Select Save.
Filter data in sign-in logs
Next, add filters for the data in your sign-in logs:
In Sign-in logs in your Microsoft Entra instance, in the menu bar, select Add filters:

In the Pick a field dialog, select a filter, like Flagged for review, and then select Apply:
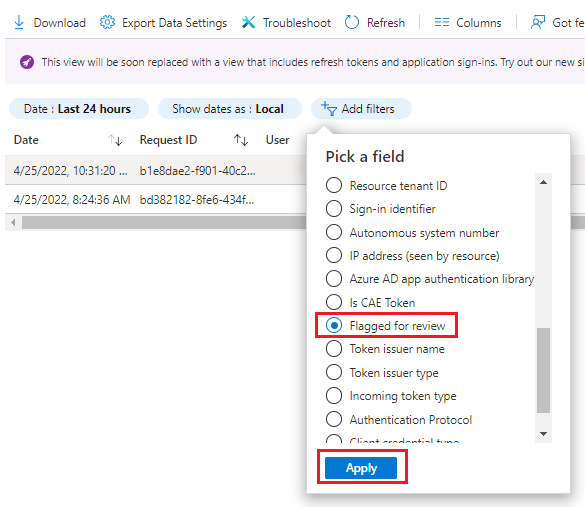
In the Flagged for review dialog, select Yes, and then select Apply.
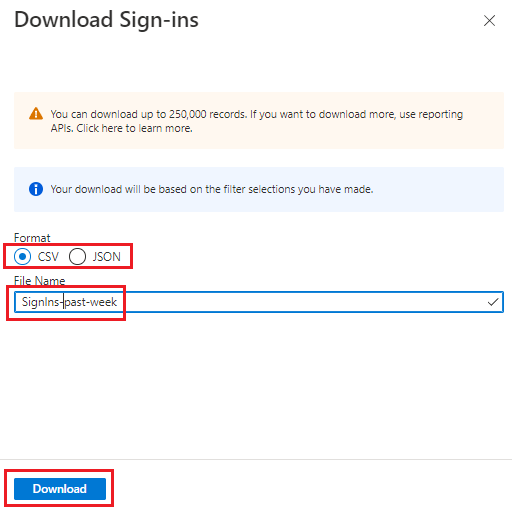
Download the sign-in logs
Now, download the data in your view:
In Sign-in logs in your Microsoft Entra instance, in the menu bar, select Download:

In the Download Sign-ins pane, select a format to use for the data: CSV or JSON. Enter a file name, and then select Download:
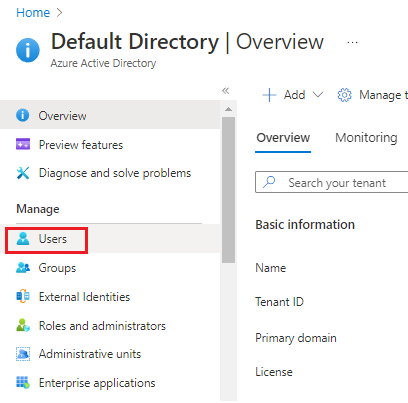
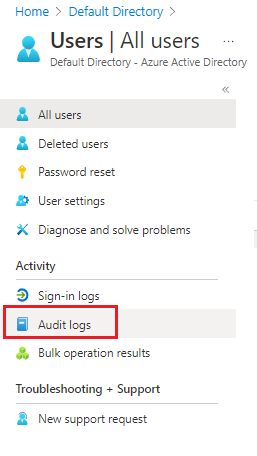
View audit logs by using the Users menu
To access audit logs through the Users menu in your Microsoft Entra instance:
In the left menu under Manage, select Users:
In the Users menu under Activity, select Audit logs:
Next unit: Integrate logs with a Log Analytics workspace
Having an issue? We can help!
- For issues related to this module, explore existing questions using the #azure training tag or Ask a question on Microsoft Q&A.
- For issues related to Certifications and Exams, post on Certifications Support Forums or visit our Credentials Help.