Exercise - Insert and replace images, HTML, and tables
In this exercise, you'll add text inside and outside of selected ranges of text, and replace the text of a selected range. You'll also learn how to insert images, HTML, and tables into the document.
Important
This exercise assumes you have created the Word add-in in the previous exercise in this module.
Add text inside a range
Open the file ./src/taskpane/taskpane.html.
Locate the
<button>element for the change-font button, and add the following markup after that line:<button class="ms-Button" id="insert-text-into-range">Insert Abbreviation</button><br/><br/>Open the file ./src/taskpane/taskpane.js.
Within the
Office.onReady()method call, locate the following line in theOffice.onReady()method:document.getElementById("change-font").onclick = changeFont;Add the following code immediately after it:
document.getElementById("insert-text-into-range").onclick = insertTextIntoRange;Add the following function to the end of the file:
async function insertTextIntoRange() {
  await Word.run(async (context) => {
    // TODO1: Queue commands to insert text into a selected range.

    // TODO2: Load the text of the range and sync so that the
    //        current range text can be read.

    // TODO3: Queue commands to repeat the text of the original
    //        range at the end of the document.

    await context.sync();
  })
  .catch(function (error) {
    console.log("Error: " + error);
    if (error instanceof OfficeExtension.Error) {
      console.log("Debug info: " + JSON.stringify(error.debugInfo));
    }
  });
}
Within the
insertTextIntoRange()function, replaceTODO1with the following code:const doc = context.document; const originalRange = doc.getSelection(); originalRange.insertText(" (C2R)", "End");Note
- The method is intended to insert the abbreviation ["(C2R)"] into the end of the Range whose text is "Click-to-Run". It makes a simplifying assumption that the string is present and the user has selected it.
- The first parameter of the
Range.insertTextmethod is the string to insert into theRangeobject. - The second parameter specifies where in the range the additional text should be inserted. Besides "End", the other possible options are "Start", "Before", "After", and "Replace".
- The difference between "End" and "After" is that "End" inserts the new text inside the end of the existing range, but "After" creates a new range with the string and inserts the new range after the existing range. Similarly, "Start" inserts text inside the beginning of the existing range and "Before" inserts a new range. "Replace" replaces the text of the existing range with the string in the first parameter.
- You saw in an earlier stage of the tutorial that the insert* methods of the body object don't have the "Before" and "After" options. This is because you can't put content outside of the document's body.
We'll skip over
TODO2until the next section.Within the
insertTextIntoRange()function, replaceTODO3with the following code. This code is similar to the code you created in the first stage of the tutorial, except that now you're inserting a new paragraph at the end of the document instead of at the start. This new paragraph will demonstrate that the new text is now part of the original range.doc.body.insertParagraph("Original range: " + originalRange.text, "End");
Add code to fetch document properties into the task pane's script objects
In all previous functions in this module, you queued commands to write to the Office document. Each function ended with a call to the context.sync() method, which sends the queued commands to the document to be executed.
But the code you added in the last step calls the originalRange.text property, and this is a significant difference from the earlier functions you wrote, because the originalRange object is only a proxy object that exists in your task pane's script. It doesn't know what the actual text of the range in the document is, so its text property can't have a real value.
It's necessary to first fetch the text value of the range from the document and use it to set the value of originalRange.text. Only then can originalRange.text be called without causing an exception to be thrown.
This fetching process has three steps:
- Queue a command to load (that is; fetch) the properties that your code needs to read.
- Call the context object's
sync()method to send the queued command to the document for execution and return the requested information. - Because the
sync()method is asynchronous, ensure that it has completed before your code calls the properties that were fetched.
These steps must be completed whenever your code needs to read information from the Office document.
Within the
insertTextIntoRange()function, replaceTODO2with the following code.originalRange.load("text"); await context.sync(); // TODO4: Move the doc.body.insertParagraph line here. // TODO5: Move the final call of context.sync here and ensure // that it doesn't run until the insertParagraph has // been queued.Move the
doc.body.insertParagraphline and paste in place ofTODO4.
When you're done, the completed insertTextIntoRange() function should look like the following:
async function insertTextIntoRange() {
await Word.run(async (context) => {
const doc = context.document;
const originalRange = doc.getSelection();
originalRange.insertText(" (C2R)", "End");
originalRange.load("text");
await context.sync();
doc.body.insertParagraph("Current text of original range: " + originalRange.text, "End");
await context.sync();
})
.catch(function (error) {
console.log("Error: " + error);
if (error instanceof OfficeExtension.Error) {
console.log("Debug info: " + JSON.stringify(error.debugInfo));
}
});
}
Add text between ranges
Open the file ./src/taskpane/taskpane.html.
Locate the
<button>element for the insert-text-into-range button, and add the following markup after that line:<button class="ms-Button" id="insert-text-outside-range">Add Version Info</button><br/><br/>Open the file ./src/taskpane/taskpane.js.
Within the
Office.onReady()method call, locate the following line in theOffice.onReady()method:document.getElementById("insert-text-into-range").onclick = insertTextIntoRange;Add the following code immediately after it:
document.getElementById("insert-text-outside-range").onclick = insertTextBeforeRange;Add the following function to the end of the file:
async function insertTextBeforeRange() {
  await Word.run(async (context) => {
    // TODO1: Queue commands to insert a new range before the
    //        selected range.

    // TODO2: Load the text of the original range and sync so that the
    //        range text can be read and inserted.
  })
  .catch(function (error) {
    console.log("Error: " + error);
    if (error instanceof OfficeExtension.Error) {
      console.log("Debug info: " + JSON.stringify(error.debugInfo));
    }
  });
}
Within the
insertTextBeforeRange()function, replaceTODO1with the following code:const doc = context.document; const originalRange = doc.getSelection(); originalRange.insertText("Office 2019, ", "Before");Note
- The method is intended to add a range whose text is "Office 2019, " before the range with text "Microsoft 365". It makes a simplifying assumption that the string is present and the user has selected it.
- The first parameter of the
Range.insertText()method is the string to add. - The second parameter specifies where in the range the additional text should be inserted. For more information about the location options, see the previous discussion of the
insertTextIntoRange()function.
Within the
insertTextBeforeRange()function, replaceTODO2with the following code.originalRange.load("text"); await context.sync(); // TODO3: Queue commands to insert the original range as a // paragraph at the end of the document. // TODO4: Make a final call of context.sync here and ensure // that it doesn't run until the insertParagraph has // been queued.Replace
TODO3with the following code. This new paragraph will demonstrate the fact that the new text isn't part of the original selected range. The original range still has only the text it had when it was selected.doc.body.insertParagraph("Current text of original range: " + originalRange.text, "End");Replace
TODO4with the following code:await context.sync();
Replace the text of a range
Open the file ./src/taskpane/taskpane.html.
Locate the
<button>element for the insert-text-outside-range button, and add the following markup after that line:<button class="ms-Button" id="replace-text">Change Quantity Term</button><br/><br/>Open the file ./src/taskpane/taskpane.js.
Within the
Office.onReady()method call, locate the following line in theOffice.onReady()method:document.getElementById("insert-text-outside-range").onclick = insertTextBeforeRange;Add the following code immediately after it:
document.getElementById("replace-text").onclick = replaceText;Add the following function to the end of the file:
async function replaceText() {
  await Word.run(async (context) => {
    // TODO1: Queue commands to replace the text.

    await context.sync();
  })
  .catch(function (error) {
    console.log("Error: " + error);
    if (error instanceof OfficeExtension.Error) {
      console.log("Debug info: " + JSON.stringify(error.debugInfo));
    }
  });
}
Within the
replaceText()function, replaceTODO1with the following code. The method is intended to replace the string "several" with the string "many". It makes a simplifying assumption that the string is present and the user has selected it.const doc = context.document; const originalRange = doc.getSelection(); originalRange.insertText("many", "Replace");Verify that you've saved all of the changes you've made to the project.
Test the add-in
- Repeat the steps from the previous exercise to sideload the add-in.
- If the add-in task pane isn't already open in Word, go to the Home tab, and select the Show Taskpane button in the ribbon to open it.
- In the task pane, select the Insert Paragraph button to ensure that there's a paragraph at the start of the document.
- Within the document, select the phrase "Click-to-Run". Be careful not to include the preceding space or following comma in the selection.
- Select the Insert Abbreviation button. Note that " (C2R)" is added. Note also that at the bottom of the document a new paragraph is added with the entire expanded text because the new string was added to the existing range.
- Within the document, select the phrase "Microsoft 365". Be careful not to include the preceding or following space in the selection.
- Select the Add Version Info button. Note that "Office 2019, " is inserted between "Office 2016" and "Microsoft 365". Note also that at the bottom of the document a new paragraph is added but it contains only the originally selected text because the new string became a new range rather than being added to the original range.
- Within the document, select the word "several". Be careful not to include the preceding or following space in the selection.
- Select the Change Quantity Term button. Note that "many" replaces the selected text.
Insert images, HTML, and tables
In this step of the tutorial, you'll learn how to insert images, HTML, and tables into the document.
Define an image
Complete the following steps to define the image that you'll insert into the document in the next part of this tutorial.
In the root of the project, create a new file named ./src/taskpane/base64Image.js.
Open the file base64Image.js and add the following code to specify the base64-encoded string that represents an image.
export const base64Image =
    "iVBORw0KGgoAAAANSUhEUgAAAZAAAAEFCAIAAABCdiZrAAAACXBIWXMAAAsSAAALEgHS3X78AAAgAElEQVR42u2dzW9bV3rGn0w5wLBTRpSACAUDmDRowGoj1DdAtBA6suksZmtmV3Qj+i8w3XUB00X3pv8CX68Gswq96aKLhI5bCKiM+gpVphIa1qQBcQbyQB/hTJlpOHUXlyEvD885vLxfvCSfH7KIJVuUrnif+z7nPOd933v37h0IIWQe+BEvASGEgkUIIRQsQggFixBCKFiEEELBIoRQsAghhIJFCCEULEIIBYsQQihYhBBCwSKEULAIIYSCRQghFCxCCAWLEEIoWIQQQsEihCwQCV4CEgDdJvYM9C77f9x8gkyJV4UEznvs6U780rvAfgGdg5EPbr9CyuC1IbSEJGa8KopqBWC/gI7Fa0MoWCROHJZw/lxWdl3isITeBa8QoWCRyOk2JR9sVdF+qvwnnQPsF+SaRSEjFCwSCr0LNCo4rYkfb5s4vj/h33YOcFSWy59VlIsgIRQs4pHTGvYMdJvIjupOx5Ir0Tjtp5K/mTKwXsSLq2hUWG0R93CXkKg9oL0+ldnFpil+yhlicIM06NA2cXgXySyuV7Fe5CUnFCziyQO2qmg8BIDUDWzVkUiPfHY8xOCGT77EWkH84FEZbx4DwOotbJpI5nj5CQWLTOMBj8votuRqBWDP8KJWABIr2KpLwlmHpeHKff4BsmXxFQmhYBGlBxzoy7YlljxOcfFAMottS6JH+4Xh69IhEgoWcesBNdVQozLyd7whrdrGbSYdIqFgkQkecMD4epO9QB4I46v4tmbtGeK3QYdIKFhE7gEHjO/odSzsfRzkS1+5h42q+MGOhf2CuPlIh0goWPSAogcccP2RJHI1riP+kQYdVK9Fh0goWPSAk82a5xCDG4zPJaWTxnvSIVKwKFj0gEq1go8QgxtUQQeNZtEhUrB4FZbaA9pIN+98hhhcatbNpqRoGgRKpdAhUrDIMnpAjVrpJSNApK/uRi7pEClYZIk84KDGGQ+IBhhicMP6HRg1ycedgVI6RELBWl4POFCr8VWkszpe3o76G1aFs9ws+dMhUrDIInvAAeMB0ZBCDG6QBh2kgVI6RAoWWRYPqBEI9+oQEtKgg3sNpUOkYJGF8oADxgOioUauXKIKOkxV99EhUrDIgnhAG+mCUQQhBpeaNb4JgOn3AegQKVhkvj2gjXRLLrIQgxtUQYdpNYsOkYJF5tUDarQg4hCDS1u3VZd83IOw0iFSsMiceUCNWp3WYH0Wx59R6ls9W1c6RAoWmQ8PaCNdz55hiMEN4zsDNhMDpXSIFCwylx5Qo1a9C3yVi69a2ajCWZ43NOkQKVgkph5wwHi+KQ4hBs9SC9+RMTpEChaJlwfUFylWEafP5uMKqIIOPv0sHSIFi8TFAzpLiXxF/KCbdetEGutFUSa6TXQsdKypv42UgZQhfrWOhbO6q8nPqqCD/zU4OkQKFpm9B7SRbrTpQwzJHNaL/VHyiRVF0dfC2xpOzMnKlUgjW0amhGRW/ZM+w5sqzuqTNWtb9nKBZDLoEClYZGYe0EYaENWHGDaquHJv5CPnz/H9BToWkjmsFkTdOX0GS22p1ovYNEdUr9vCeR3dJlIG1gojn2o8RKPiRX+D0iw6RAoWmYEH1HioiQZqq47VW32dalUlfi1fQf7ByEdUQpMpYfOJ46UPcFweKaMSaWyaWL8z/Mibxzgqe3G4CC6pT4dIwSLReUCNWrkJMdjh8sMSuk1d3bReRGb3hy97iS/SEl+5bQ0LqM4B9gvytaptC6kbwz++vD3ZG0r3EBDoWUg6RAoWCd0D9isXReTKTYghZbhdUB/UYlKV2TSHitZtYc9QrqynDGy/GnGg+4XJr779ShJ0gNdAKR3i/PAjXoIZe8BGBS+uhqtWAF4VXUWu3G//ORVqdVRiEumhWgFoVHT7gB1LnFAvVaJxYZJ+qx/XRuo1X0+RFqzPsF/QFZuEgrVcHnDPCGbFylnajN/wAZZvqgpR8IzO275tTvjnwl/4sORC6C9xWJLoYCKNrbpuR3Jazp/jxdUJmksoWIvvAfcLsD4LuLfn5hOJhWlVQ+lyNZDFcUl636GY5/Wpyzo3FRZ+WBeT1JhpGDVlIMMbjYfYM3Ba4zuXgkUPGBD5B5Kl6LaJ4/uh/CCDTvDjW4ROxZm4gj7+dwZLY24067AkF9OtesCaRYdIwaIHDIzMrmSzv2NNTgl4fLlSXw6kjs8pWN+FfHu3n8p/xpSBjWrwL0eHSMGiB/TL+h1JnNJ+xTA6MawXh1ogTWA5S5tvLS8vMVUM6s1j+TKZEASjQ6RgkVl6wH4pcUM+zs8qBq9WyRyMGozP+5J0/nzygrrLSkS4ONPmNg/vyr1npiQG9+kQKVhkBh5woFbSI8EuQwxTkS1j2xoG0zsHeBVcRsl/RNMqyoMOG9WRjAUd4pzD4GhoHjDsMIEqchX48JuUgU1zJN+kSa4D+LnjHfXiqqsa5Oejb8J/fs9TAZjFtiXXvgADpaqXZsqUFRY94NRq1agErFbrRWzVR9Tq9JlOrWy75NncCf982n+o+sYCDJTSIVKw6AGnRhoQbZsBv3S+MlyxAtC7xPF9WMUJDsi5M+gmVCWImpvolorOgXzTMPBAKR0iBWvuPWB4+4CiWj2Rz3MPcFSXHb90NmawbWDLRVZAc2pHZTkF2fWDKugQRqBUCvcQKVj0gI6qRxYQtfvGBIUdvHQ2fmk/VR7fk5Q5jr+2fmfygrpTfM+fu8qa6lEFHcIIlGocolWkQwwcLrr79oBB9YRxg7SDXbDjJISue71LHJWnrno+vRh+BX2Xq2QOO6+Hf3TTXsYl43M3BhVcZFNjEyvIluUNvAgrrIX1gINqRdpvM0C1EhatbBvowaM5neOVe/L2VX176/jip88CUysAhyV5SRheoFRSfV+i8RAvckH+XKyweBW8qNWeEelEP1XkKqgQw3j/T3sxyNv6cSKNm02xA3KrOvLV1gq4Xh1u3vUusWcE7KESK7jZlHvSoDqU+q/4CAUrItomWtUoRvup1KpRCWxb0KiNqFXvcoreWCem/ETh+ILRYJnvJzlxz+7wrt/l9qkuHUIIrMk9bxaZEjIltl2mYMWDjoVWFae1sAouVeQq2LUYZwfRaVG1dR9PnKp802EpxG016TCOgZsOb6tk9RayZVZVFKwZ8cff4b/+Htcq8sd17wInJt5UA17SUqnVWR0vbwf5Qn5KgPO6bo0mU0K2LJetbgtvqjgxQw8uqcbthDH+OrHS/5FV19MuJDXreoSCFQC9C3yxisQK8hVk1dteZ3W8qQY2VFm68OF/emj0JNJ430DKQCKN3gU6FrrNSHf9VaMrfI68F+ynXVKpkhxndRyX0TlQzv4hFKyABWuwMPGROWxiJ6kdmmibaJu+7gTpPRbgDbZsqJa9/T8AMrvIlnWx/m4Tx+XhY4yC5RXGGjzRbeHlbd3ZsWQO+Qp2mth84nFtSBoQtS0M1cobqqCD50BpMovrj/Dpufyk1OBXZueKgyq6KVjEI/bZMf3ef6aErTp2XiOzO8UtIe0gCuCoHMWm5MLWyJfK09HTdihdvwPjc+w0J4wvbJv4KhfF2VIKFnHLm8f4KjfhkF0yh00TN5vYfDJ510wVED0qR7ENv7Sa5SZQmlhB/gF2XsOoTdj+O6tjz8Dh3Tlbaow9XMNy/153rGGpDIJ+Ycv5bm6bcvVR5YaiPFCy8Kze6s+4lj4VpIHS1Vv4sORqa09YrlL5fa5hUbBmLFiDd/am6Soi0LtAqzqyMK9Sq8BDDEQVdMBooDSxgvXihAV14RfqxgBSsChYcREsmyv3lImtcU5raJs4q8sjV/MYYpgLrj9SxlP2C/iuiXxFl1EYL4GPym5/TRQsCla8BKu/3qFNbLl80a9yVKuwUIWzpmKQrnIPBcsrXHQPT+AucXzf70l91lahclT2FV7tNmEV8fI2t24jI8FLEC52Ysv9wpbAtsVLGNNy2+VyFWGFNX+4SWyReYHpKgrWUuAmsUXiDNNVFKwlsxJBLGyRGVh7LlfFAq5hzeTd38LL27oo0ABpnykSIG766pzWYH3GS0XBWvJr7yLg8/1F1J18l4pk1lXuhM1CaQkJPixN/jvXKlGMpVpa8u7CvSkj9CGshIIV92e7tOvxeBXGhGFIrN6Sp0ZPa5Jw1gfsdEzBWmbGb4BuE4d3JbdKtszHe1jllZTjsqTBvJtymFCwFpbxpRM77nAouzE+MnnBAiazK++rYZ9Flw4B4mODgrWkpG5I1nHf1gDFrPa1gveRNmQc+5jnOL2L/pDqzoGkN2mArpChFgrWXD3eS5J38KDJjDTKsMG4aaDlrXTjr1UdJkJPTLpCChYBAEmzSqcHOX8utySZXV65AFBFGezjgULBS1dIwaIflDzehVVeVZHFiIN/VFEGoZtVtyUxbtwrpGDNDb3fheUH26Z4Nq3bkhw5TKT9dtciqihDtynpWN2mK6RgzS/vemH5QemU9kZF0tohX6Er8VteSTmWPQlOZa5w4gwRQsFaZD/Yu5APLOhdyvs6XOfqu+faVhFlOKsrfwXjRRZHzFOwlumeKbkqr2xaVUmOdL3IiEPA5ZXmhPn4b2edy1gUrOVh/O2uaY/Vu2TEITi1eiCPMrRNnD9XC9Yz0Zgnc3SFFKxl9YPd5oT+Su2nkgQjIw7TklhR7ldMbOBzQldIwVpOxu+Z8SWScY7K8iKLEQf3bFTlUYZWdZjXVT4zTLrCGD16eAlm6QfdCJZ9WEdYLbYjDmG3FU/mRqoJD90EV3+Ga//o5aUPS77m2QiFrbQm6l24+ok6B+g2R0pj2xWy9SgFa6HV6o74kO9Ykx/vNsdlyficfGVkanRIgpV/4Euw3v/E4xZBMheYYKn2VZ0HcfS0quK6YaaE4/t8U9MSLlN55X4aRedAXouxVZab54Q0ytBtTnH933KvkIJFwdIEGsaRVjeZEiMOHsurRmWKyTfdlrj1wb1CCtZy+cHT2nSjorotuWbFvMj6w6/xhxN81xL/G/zsvY7ks384wfdBDHBURRmkB3EmukIBHpOaBVzDmlF55Wa5ffyeyZZF4VsrILM79e0XGb/5JX7zS8nHt+r92rDz79gvhPPWVkcZpF0S9cgTpHf51maFtQSCpTqOo0d1WCfPQRUyVFGGs7ouKaq5+IJmJdJYv8PLTMFaDj/ojcZDyd5ZMkd7IqKKMsDHqEcGsihYS+oHT0zvX016v3FQhYBqrV1/EGeCKxw7pkPBomAtGokV8W3dbXq/Z6A4rMNpYE5Wb8mjDPA9SZuucOb3Ey9B6OVVUH5wwFEZW3Xxg5kSTkxfUmjj/MrCdz7+ovpvclxYo2HTVKqVz5xtqyo6zfWil+VIQsGaGz/4xnevBelhHQD5Cl7eDqA88fCpcX6cns0Fv3JPHmUQWrZ7Y/yYDvcKaQkX2Q+6P46j5+uS5IN2xCEO9C7xrTWbC36toiyOpgq+KS25SVfICmtpyqsTM5ivbA/7HN8Iy1emjqQKOGu0lIHrj+SfEhD+5mFJ0t85AlQDJrrNwA6Kt01xuZCukIK1sILlIS+qolGRLJDZEQc/N6dmxqfmU85dufbTANbpPKCa3wXfa+3Co6JjIWX4coWzWt2jJSRT+EGftc/4nSNdlMmWo86R5ivDg3XdlryBVwR8ZCrVIdiTACdjrnBaJx7g24CCRcIqrwKvO1pVifNKpCPtoZwyRlrQfD0jM6iJMgQuoEyQUrAWX7B6F8ELVu8S38jMTqYUXS8BZ4ag8VBnGyP7NgQb6z/qMX7ZhV/lepGnoyhYMeP/vouRHxzw5rG80V0008CcZrBzEORS0VSoogxQDBz0D6fpULAWSrAi8IPDukYmE2uF0LfbBTPooQVCIGiiDG0zrEbG7ac8pkPBWiCEwEG3GeLOd/up3IiFXWQ5Xdjx/ZntfKmiDEC4FR9dIQVrQUhmxQXgsLf5pXem0JE9PDN4/jyAELnnS62JMoTa8P7EpCukYC0EH4QZv5JiH9YZJ6SIg9MM9i5nZgY1VWQgB3EmXnNh9ZCCRcGaSz4cvYE7VhQjoaSHdUKKODjNYIDzuKZl9ZZSI76pRJF1oiukYC2CH3TGoBHccRw99mGdcQKPODjN4Omz2YTabVRa3G3izeMovoHxc+wssihYc+8H30Z1Szcq8tBmgKvv8TGDmV3xweC8DtEwPk2HgkXBmm8/eFoLd+lXuH+kCzcBRhycZtAqzibUDiCxoiyvzuqRjuQQyuf1Ilu/UrDm2Q9G7Jikh3WCKrKcZvDN41BC7X/+NzBq+Nk3yurJZnx6UPTllap8/oBFFgVrfv1gxILVu5QfnUvmcOWe3y8+CBB0DuRHgvyI1F//Cp9+i7/6Bdbv4E/zuv5/yayyH3QYB3EmVrXCr/jDEu8DCtZ8+sG2OYNz+e2n8m27a76ngQ3+eYDtrlZv9UXqp3+BRMrVP9FUi1/PQiwEwUoZdIUULPrBaZAeoAtqUEXj4SzbOWmiDG0zuuVC4bcsyDddIQVrDhCO43iblhrMLfRMmSP1+fCP4ITz//4WHUuZ7dpQJ0VndfR6vHkDXSEFa/4E68Sc5Tejuns/Mn3dmVY4tUOvg9//J379C/zbTdQ/wN7HcsHSRBla1dmUV3SFFKy5JHVD7HAS9nEcPefP5YZ0rTDd8BtBBIMKtf/oJwDwP/+N869w/Hf44n3861/iP/4WFy+U/0QTZfB/EGe9qOyo5bKkFa4MXWE4sKd7OOVVtxnFcRw9x2X5cs+miRdXXX2Fb62RwRMB5hga/4Df/2o6+dNEGfwfxLle7ddEnqOwp7WRY9gfliJK27PCIh4f0YJDmTmqwzruIw69C5zVh/8FyG//aTq10nRl8H8QJ1/pq1VmVzKIyCXCpaYrpGDNkx98W4vFN3ZUlucPrlXm7JhueE2vEukRKfS8kdo5EDdPPWsfoWBF6gfP6gEvAKcM5Cv9/zIl5a0rKZEu5bVeUBGHaFi9pbz5/R/E2aiOaHcy611oTkwKVti89+7dO14Fd49QC3sfyz+183qkwjosBXacba2AfEVcJrdlSHUKR9SmFdxsyjXuRW6WO2vu+eRL5USc/YKvaHvKwPYriZV+kfPy1ZJZ7Iz63D1DuZT5c953rLBi4gcDyYsmc9g08cmXkk29xAryD3CzqbyNBXVTzbnyE3GIrnrdVf6YpzW/B3Gc247dVl++PRdZ3Za40qf5OrM6N07Boh8U7yKfO1a2VO28njCeM7GCT750dWupDuv4iThEQ2JFZ119TsRZL478+F+Xhsthnv2ysPSu6TbzLYc/U7BmgvCm9Bm/ShnYtiRS1TlA4yEaD3H+fEQQN5+46imq2q3fqMb62mbLyvld/g/iOM8k2mcDBl/Tc5ElFNfJXHQDIilYxIVa3Rm5o3wex0kZ2KqL+3ftp3hxFXsGGhU0Ktgv4Is0Xt4eytaVe5MrAlXT95Qx9Zj1yNBEGXoXk+c5pwydZR5EGWzXPCjWfBZZvUvxicWldwrWbHjXm1xe+Vy92jRH1KpzgL2P5U3Tz+ojp2TyD5SVyADV9r+wTRYfNFGGVnWC706kYdTwyZfYqktkS4gytKrDKzxw9EEVWexBSsGaDb3fTRYsP3lRofl65wD7BV1fBGFH302RJbWrwt0bEzRRBjcHca79UECt3pLIllOju60RKXd+cW9F1umzkQV1ukIKVoz8oLME8Hkcx6l9vUvsFyZvJDnv29XC5JdQFVlOfxSf8krFUXlCeZXMiWLnlC3BBY+30BqUb56LrBO6QgpWHAUr0OV2Z49NVUJdoGMNb103iqNq+o7wx0RPV2yqowzd5uSMW7eJPUOymDiQLWc1NL6057/Icr9XSChY8ypYmnUQvWYNcBPLUk3WEfb4Z0ggUYZuE1YR1meSWmxgBp1r7SrF8VZkdQ5Glh2TubjHRyhYS+cHO5bfXXan9LhPFTrvBDfHiVWHdRCbiIMmynBWn24T9rSGr3LKo9HfXygX9Z11nLciS7jIbOlHwYpXeeW/PcP3DpHSz4xRlVQu+x84N8WcxCHikFjR7QB4OOdsByBe3pYsLyaz2H6FTVOuj4PX8lZkveVeIQUrzoI10cQl0hNaxDkrLDfbdon0yMKT+0Mqvcv4Rhw2qsqqx89BnLM69gx5CZzZxc5ryev6LLKEGauJdGCjISlYxK8fnHgcZ72Im01dh1+MtsfL7E7OVW1UR/bLT8wpvn/VYZ3ZRhxSN3S1jM+DOGuF4b6EcFoAwJV7uNkUk1+DqtlbkSUU3SyyKFhzU14Zn/crF826eO9iZP9r09S1kcmWR+zb6bOpl/xVh3VmGHHQ7FT6b9k+qJJ6l3hVxJ4h7jYOjpQPtKljDWs6D0UWE6QUrFiQWBl53gpCI7d7Pyyg6B/UDUer39Vb2KpLNCuRxkYV1x+NfHEPjX1Vh3Uwo4jD+h2lmvufiOM85m235ek2cVjCy9uizUysYPMJdn6QLT8rWcI0HbpCCtZ8lFdOd5C6oSuy7LvIaZGcD/y1AjIlbFsjDY57l97HmqpM1kwiDvryymcDDLuNcrclbpKe1bFfwOFd8esns9h80k9s+SmyGMgKGjbwc81ZvT+Rwfh85J3npodcIo2bzb4rPH+O/cIEQRQOFWqe4frjOxPZfCIvHAY/bDTkHyjlwE6BBjVAO5nTLd7lH8i+gdbQIx/endp6f3o+LJN7F/hitf//mq6EhBVWkH7QqVbdpqutK2d4WjO7eFCyfZVD4+GEgz7+1QrqoMBaIbqIw8QoQ1BqBXXyw3adL65KfpvOFT2fK1l0hRSsOfCD475m05zwdLXvnz0DL66i8VByx3YOsGcEMDJeOPo7UvVENahCE2VwcxAnQLpN7Bfw8rZygd/DShb3CilYMRKsN67Xp3sXw/Upu1mopn2KfXzXqGHnNfIPROGwTWVQM01VveGTuSgiDvoog+cpgT69/4scju8HU9kJx3TWi3M2ryhmcA1rmvexVcSnjntbM5ZCxaY5YrXsjaSOhY6FRBopA8kcUoauIUnjod8tM0kxpVhC6l0o85ZBoVnKiXgdTeJV09iojvy+vM2nEC6vPaOEa1gUrNAFq22OpNWPyl5GeAqa5Z7z52hUAh5oOkAY/DOgbeLwbmjl6h0Yak/tcyJOYDWggY1qf9vUw6I7xqbpnNZgfUbBoiWM3A96a89wWJrabpw+w8vb2C+EpVZQr75nSiFGHDRRhrYZC7Wy6+j9AqzPvKRzB3WZc7WRrpAVVhRc/AvSPxOfk37sxnoRawUkc0ikJR6w28J5HWd1nNYiGgm1/Up+cigka3blnq4/xLzMTPT2wx6WkCmxwqJghcnvj/DTDXElItgVk/cNAPjWms3QOjtbr6oKA/5h1eNdAbSqOL6/UG+exMrI6udpDYk0BYuCFSZ//B3+5M/6/9+7wFe5IPNBMUG1sBJsehPA9Ue6iTgLeW2FvHHHcttEiDjgGpZrBmqFIKalxhPVYZ1gIw6a+V0I4iBOPBEie1QrCtbM3nwLQ+dAua6cLQfWxeEjU/mpbhONh4t5bdtPOZ6egjULuk1f01JjjqrpeyLtfYC7k9VburWbwCNmfM5RsFheLbQcqyfrCJMTvaFpu9qxIj2IEz0nJu8eClb0tf2iv+1Uh3Xgu1XWlXu6TqpH5QW/sOfPAztQRcEiruhYvqalzgW9S3yjsGZrBe/9BhIruKZ2fGf1uCRFWZ5TsFjVzxlvHitrAc9FluawN3y3bGd5TsEiEt4uzRNStf6dzMkb3enRRxna5uLXrf0K/SCApkAULOK2nl+k8yITaoGnyqOL2fLUp+E+Mr2II4t0QsHyJVhLhUpH7L4r7pkYZViex8BSFekULApWpGgm60wVcdCom7N59JLQbXHp3TMJXgK3vOvBqKF3gY6FbhPdJr5rLn5p8HVppJeTk+tVV10c9ONjF/UgzshNtoKUgR+nkTKGbRqJJ3j42f8Ds4luEx2rr2XfX6BjLdRNqJqsA8AqTgj967sydJt4cXWh3gypG8M2DKsFAGzJQMGaE2wzdV7v/3/vYl43wpJZbFty0ZmoOJr5XQiha02U1+QnOSRz/ZbWdmsgTWiDULDmkt5Fv93VfPlKje40KsrjykJr4HFBn23Lds9ujoaOgkVfGWtfqXF2mvZVQgcogZi0bKebo2CRBfSVmo7G0gahmv6lsy2v6OYoWMuL7ewiftPPyleqJutA1oJd1SFe9fcXz83ZD5vvmlPPXiUUrBBpm8Pooz1gZmAr7LtlYXylZiqXUDFldnVtZAIfHTZbN6e67IkVZMvIllm+UbDiR6uKRkWuDs5HfTI39CPz6Cs10/QGa1L6KIOf4ayzdXNTFbaZXWxUKVUUrBhjh7bdJyHt289pW+LvKzUrU4OIgz7KoNlVjJub8ybxmV3kK9xJpGDNj2wdlX3Fi2LuKzV7f0dlvK3pogzjW4rxdHOef3H5CvcWKVhzSLeJ43KQrd/j4yuTOeUqsl21ae7YjoXT2tyUk1N51Y9MShUFa845q6NRCTdtNFtfGc9rjgiDIMks8hXuA1KwFojTGo7LUcfZZ+srI3Nz3/3g6aKP2nITkIK1yLRNHJVnHF6fua/06eZsVYrDYaYr93CtQqmiYC00024jRkZMfKUtSQM3B8RxLAU3ASlYSydb31Tw5vEcfKsh+cqZuznPV2OjyhHzFKylpNtEozKXzVXc+8p4ujkPpG7gepWbgBSspSeCbcRoGA+LzkX3GDdmmZuAsXpc8hLMkrUC1uo4q+Pr0nINYpiLQjJb1kX2ySzgEIp4yNZOE5tPkMzyYsSlYLzZpFpRsIiaTAnbFvIPph75R4L8Lexi5/WEIdWEgkUAIJFGvoKbTS+jlYlPVm9h5zU2TUYWKFhketnaeY3MLi9GRFL1yZfYqlOqKFjEK8kcNk1sv+qHoUgoFzmLzSfYqjOyQMEiQZAysFXHJ19OMWaZuCpjV3D9EXbYv5iCRQJnrYBti9uIgUmVvYzBIcUAAAIqSURBVAmYLfNiULBIaGRK2GlyG9HfNdzFtsVNQAoWiYrBNiJlayq4CUjBIjMyNWnkK9i2uI3oVqq4CUjBIjPG3kbcec1tRPUlysL4nJuAFCwSJ9mytxEpWyNF6Ao2n2CnqZyXQShYZGasFbBV5zZiX6rsTUDmFShYJNbY24jXHy3venxmt39omZuAFCwyH2TLy7iNuH6nvwlIqaJgkXmzRcu0jWhvAho1bgJSsMg8M9hGXL+zoD9gtp9X4CYgBYssjmwZtUXbRrQPLe80KVUULLKI2NuIxudzv41obwJuW9wEpGCRRWe92O/FPKfr8VfucROQgkWWjExp/rYR7c7FG1VKFQWLLB+DXszx30a0NwF5aJlQsChb/W3EeMpW6gY3AQkFi4xipx9itY1obwJuW5QqIj5keQkIEJuRrhxfSlhhkSlka4YjXTm+lFCwyNREP9KV40sJBYv4sGY/bCNeuRfuC63ewvYrbgISChYJQrY2qmFtIw46F6cMXmlCwSIBEfhIV44vJRQsEi6BjHTl+FJCwSLR4XmkK8eXEgoWmQ3TjnTl+FJCwSIzZjDSVQPHl5JAee/du3e8CsQX3Sa6Y730pB8khIJFCKElJIQQChYhhFCwCCEULEIIoWARQggFixBCwSKEEAoWIYRQsAghFCxCCKFgEUIIBYsQQsEihBAKFiGEULAIIRQsQgihYBFCCAWLEELBIoQQChYhhILFS0AIoWARQkjA/D87uqZQTj7xTgAAAABJRU5ErkJggg==";
Insert an image
Open the file ./src/taskpane/taskpane.html.
Locate the
<button>element for the replace-text button, and add the following markup after that line:<button class="ms-Button" id="insert-image">Insert Image</button><br/><br/>Open the file ./src/taskpane/taskpane.js.
Locate the
Office.onReady()method call near the top of the file and add the following code immediately before that line. This code imports the variable that you defined previously in the file base64Image.js.import { base64Image } from "./base64Image";Within the
Office.onReady()method call, locate the following line in theOffice.onReady()method:document.getElementById("replace-text").onclick = replaceText;Add the following code immediately after it:
document.getElementById("insert-image").onclick = insertImage;Add the following function to the end of the file:
async function insertImage() {
  await Word.run(async (context) => {
    // TODO1: Queue commands to insert an image.

    await context.sync();
  })
  .catch(function (error) {
    console.log("Error: " + error);
    if (error instanceof OfficeExtension.Error) {
      console.log("Debug info: " + JSON.stringify(error.debugInfo));
    }
  });
}
Within the
insertImage()function, replaceTODO1with the following code. This line inserts the base 64 encoded image at the end of the document. (TheParagraphobject also has aninsertInlinePictureFromBase64()method and otherinsert*methods. See the following insertHTML section for an example.)context.document.body.insertInlinePictureFromBase64(base64Image, "End");
Insert HTML
Open the file ./src/taskpane/taskpane.html.
Locate the
<button>element for the insert-image button, and add the following markup after that line:<button class="ms-Button" id="insert-html">Insert HTML</button><br/><br/>Open the file ./src/taskpane/taskpane.js.
Within the
Office.onReady()method call, locate the following line in theOffice.onReady()method:document.getElementById("insert-image").onclick = insertImage;Add the following code immediately after it:
document.getElementById("insert-html").onclick = insertHTML;Add the following function to the end of the file:
async function insertHTML() {
  await Word.run(async (context) => {
    // TODO1: Queue commands to insert a string of HTML.

    await context.sync();
  })
  .catch(function (error) {
    console.log("Error: " + error);
    if (error instanceof OfficeExtension.Error) {
      console.log("Debug info: " + JSON.stringify(error.debugInfo));
    }
  });
}
Within the
insertHTML()function, replaceTODO1with the following code:const blankParagraph = context.document.body.paragraphs.getLast().insertParagraph("", "After"); blankParagraph.insertHtml('<p style="font-family: verdana;">Inserted HTML.</p><p>Another paragraph</p>', "End");Note
- The first line adds a blank paragraph to the end of the document.
- The second line inserts a string of HTML at the end of the paragraph; specifically two paragraphs, one formatted with Verdana font, the other with the default styling of the Word document. (As you saw in the
insertImage()method earlier, thecontext.document.bodyobject also has theinsert*methods.)
Insert a table
Open the file ./src/taskpane/taskpane.html.
Locate the
<button>element for the insert-html button, and add the following markup after that line:<button class="ms-Button" id="insert-table">Insert Table</button><br/><br/>Open the file ./src/taskpane/taskpane.js.
Within the
Office.onReady()method call, locate the following line in theOffice.onReady()method:document.getElementById("insert-html").onclick = insertHTML;Add the following code immediately after it:
document.getElementById("insert-table").onclick = insertTable;Add the following function to the end of the file:
async function insertTable() {
  await Word.run(async (context) => {
    // TODO1: Queue commands to get a reference to the paragraph
    //        that will proceed the table.

    // TODO2: Queue commands to create a table and populate it with data.

    await context.sync();
  })
  .catch(function (error) {
    console.log("Error: " + error);
    if (error instanceof OfficeExtension.Error) {
      console.log("Debug info: " + JSON.stringify(error.debugInfo));
    }
  });
}
Within the
insertTable()function, replaceTODO1with the following code. This line uses theParagraphCollection.getFirst()method to get a reference to the first paragraph and then uses theParagraph.getNext()method to get a reference to the second paragraph.const secondParagraph = context.document.body.paragraphs.getFirst().getNext();Within the
insertTable()function, replaceTODO2with the following code:const tableData = [ ["Name", "ID", "Birth City"], ["Bob", "434", "Chicago"], ["Sue", "719", "Havana"], ]; secondParagraph.insertTable(3, 3, "After", tableData);Note
- The first two parameters of the
insertTable()method specify the number of rows and columns. - The third parameter specifies where to insert the table, in this case after the paragraph.
- The fourth parameter is a two-dimensional array that sets the values of the table cells.
- The table will have plain default styling, but the
insertTable()method returns aTableobject with many members, some of which are used to style the table.
- The first two parameters of the
Verify that you've saved all of the changes you've made to the project.
Test the add-in
- Repeat the steps from the previous exercise to sideload the add-in.
- If the add-in task pane isn't already open in Word, go to the Home tab, and select the Show Taskpane button in the ribbon to open it.
- In the task pane, select the Insert Paragraph button at least three times to ensure that there are a few paragraphs in the document.
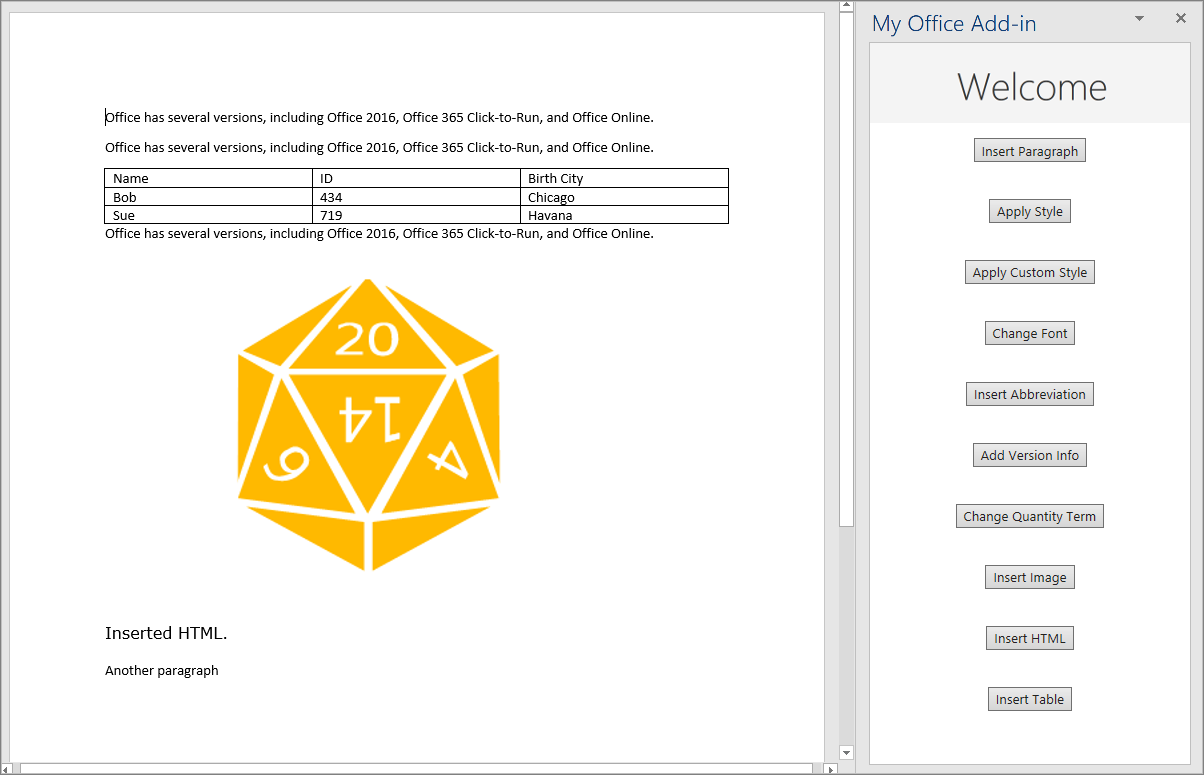
- Select the Insert Image button and note that an image is inserted at the end of the document.
- Select the Insert HTML button and note that two paragraphs are inserted at the end of the document, and that the first one has Verdana font.
- Select the Insert Table button and note that a table is inserted after the second paragraph.
Summary
In this exercise, you updated the add-in you created in a previous exercise to add images, HTML, and tables to a Word document. You also learned how to insert images, HTML, and tables into the document.