Configure the Microsoft Copilot Studio copilot
Integrating a Microsoft Copilot Studio copilot shares the full history of the conversation (the context) and any user-defined variables with Omnichannel for Customer Service. This feature allows Omnichannel for Customer Service to route incoming escalations to the appropriate live agent queue. It allows the live agents to review exactly what occurred in the prior conversation, so that they can resume at that point. This aspect prevents agents from potentially asking for information that the copilot previously captured.
Plan your copilot
When you're creating a copilot, consider how information that the copilot collects could affect the conversation if it needs to be transferred to an agent. Microsoft Copilot Studio copilots can ask questions to gain information and store it for later use as variables. Variables can be made available throughout the copilot. They're used to personalize messages that are provided to customers, determine how the copilot interacts with the customer, or indicate that it should be passed to other applications as input parameters. Variables can also be useful when a copilot transfers a conversation to an agent. Data from these variables can be used by Omnichannel for Customer Service routing rules to ensure that the conversation is sent to the appropriate location. For example, if a customer service copilot asks a customer to provide a reason for reaching out, and the customer indicates "billing," then the word "billing" is stored in the conversation as a variable. When the conversation is transferred to Omnichannel for Customer Service, a routing rule can identify this item as a billing request, and then ensure that it's routed to the correct location.
For more information, see using variables in a copilot.
Working with variables is one part of designing a copilot and controlling how customers interact with it. Microsoft Copilot Studio contains many different features that help control conversation flow and could have an impact on how the conversation is transferred. One of those key features is Topics, which dictate the conversation paths that customers are guided on while interacting with a copilot. For more information, see Conversation Topics dashboard.
Install extensions
To ensure that the copilot can successfully hand off conversations to Omnichannel for Customer Service, you need to install the Omnichannel Microsoft Copilot Studio extension in your environment to function correctly.
In scenarios where you use voice channels, you need to also install the following extensions in this order:
You must install all the extensions in your environment to be safe.
Transfer conversations to agents
Two primary components that are involved when a copilot transfers to an agent are:
Telling the copilot when to transfer the conversation to an agent.
Telling the copilot where, or to which queue, to transfer the conversation.
Tell the copilot to transfer the conversation to an agent
How a Microsoft Copilot Studio copilot tells the copilot that it's time to transfer a conversation to an agent is always the same. Microsoft Copilot Studio includes what is referred to as a "conversation node," called End the conversation. Conversation nodes are used to interact with the customer. They can display a message, ask customers a question, or direct them to a different topic. The End the conversation node signifies the end of the entire conversation and provides two actions that can be initiated:
End with survey - A survey appears that asks the user if their question or issue was answered or resolved correctly.
Transfer to agent - Escalates the conversation to a live agent.

Copilot authors can end a conversation and transfer to an agent from within a specific topic. For example, if a customer indicates to the copilot that their entire Point of Sale system is down, the copilot can automatically call the End the conversation node and transfer it to an agent. Another way that this task could be accomplished is by escalating the topic. All copilots include a conversation topic called Escalate. The Escalate topic includes a message that is presented to the customer and then calls the End the conversation node to transfer to an agent. Escalate topic is automatically triggered when someone types something like "speak to agent." It could also be triggered from within another topic by selecting Go to another topic and then selecting it.
Configure where to hand off the conversation
The second part of facilitating the transfer to an agent is to configure the copilot to send the conversation to a specific Omnichannel for Customer Service instance. Only copilots that are published can be used to ensure that the end-to-end capabilities work as expected. Make sure that you publish your copilot before validating the integrated experience.
Each copilot can only be configured to send conversations to one Omnichannel for Customer Service instance. You can define the Dynamics 365 instance in the individual copilot itself. If you need conversations from multiple copilots to be sent to a specific Dynamics 365 environment, each copilot needs to be configured individually.
The primary component that you need to provide is the application ID for the app that you previously registered in Microsoft Entra ID. Omnichannel for Customer Service models copilots as application users in the application. Modeling copilots as application users ensures that the copilot can have conversations set to it like a human agent would. It's important that the application ID is unique to your organization (your Microsoft Dataverse organization or environment). Each copilot that interacts with the same Omnichannel for Customer Service environment needs to use a different application ID. You might need to create multiple application registrations to support multiple copilots.
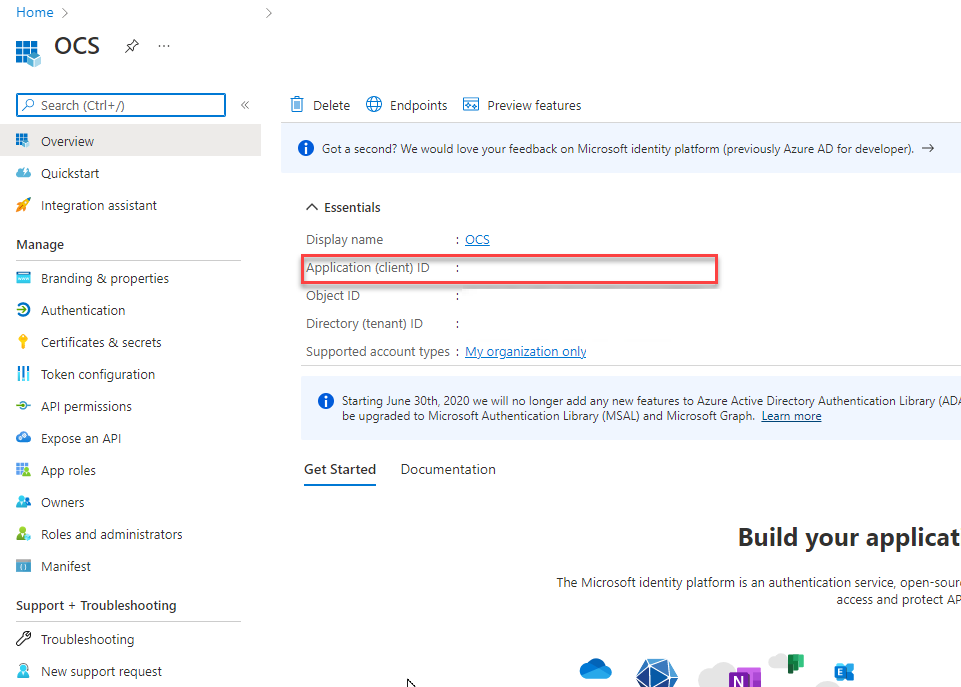
In your Azure portal, go to Microsoft Entra ID and select App registrations. All registered applications are displayed.
Select the application that you want to use with the copilot. The Application ID field is on the application's overview page.
Copy the ID and paste it into the Microsoft Copilot Studio Application ID field.

Configure the handoff
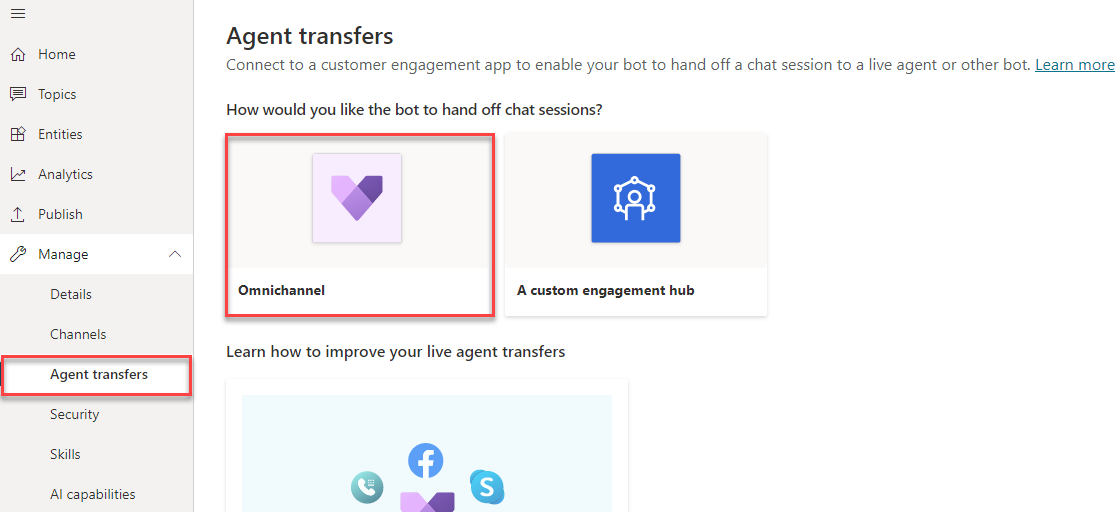
Expand Manage node and select Agent transfers.
This screen allows you to define how the copilot facilitates handoff to different applications like Omnichannel for Customer Service.
Select the Dynamics 365 Omnichannel for Customer Service tile to begin the configuration process.
On the Omnichannel configuration screen, you have multiple items that you can configure.
If you want to enable your copilot to be able to interact through voice such as Interactive Voice Response, or Real Time Media functionality, you can select Enable voice.
Important
You need to ensure that you have installed all the necessary extensions in your environment.
When configuring the connection, you need to provide the following information:
Environment this copilot is connected to: Used in scenarios where the copilot was previously connected to a Dynamics 365 Instance. This is likely already filled in. Make sure you select an environment where Omnichannel for Customer Service instance is provisioned. The list shows all available environments, even if Omnichannel for Customer Service isn't provisioned.
Application ID: This is the Application ID that you copied from Microsoft Entra ID.

After the connection is established, you can select the View details in Omnichannel link to go to the Omnichannel for Customer Service instance and finish the copilot configuration. For more information, see continue configuring the copilot connection in Omnichannel for Customer Service.


Remove the Omnichannel for Customer Service connection
If you no longer want to hand off conversations from a copilot to your Omnichannel for Customer Service environment, you can disconnect it from the environment. If you need to remove the connection with Omnichannel for Customer Service, you can select the Disconnect copilot option.

Work with content display issues
As you work with the handoff integration, you might find that some items, such as emojis and certain types of notes or variables, might not render as intended. One reason could be because of limitations within Omnichannel for Customer Service or the integration between them.
For more information on OCS issues and limitations, see Omnichannel for Customer Service issues and limitations.
For more information on known limitations with Microsoft Copilot Studio integration, see known limitations with Microsoft Copilot Studio integration.