Exercise - Design and implement a Type 1 slowly changing dimension with mapping data flows
In this exercise, you create a Data flow for a Type 1 SCD using Azure Synapse dedicated SQL pool as the source and destination. This data flow could then be added to a Synapse Pipeline and run as part of the extract, transform, load (ETL) process.
Setup source and dimension table
For this exercise you want to load a dimension table in Azure Synapse from source data that could be from many different system types, such as Azure SQL, Azure storage, etc. For this example you keep it simple by creating the source data in your Azure Synapse database.
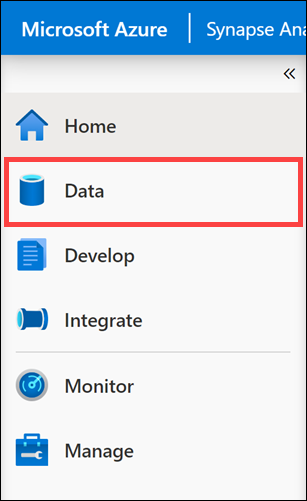
From Synapse Studio, navigate to the Data hub.
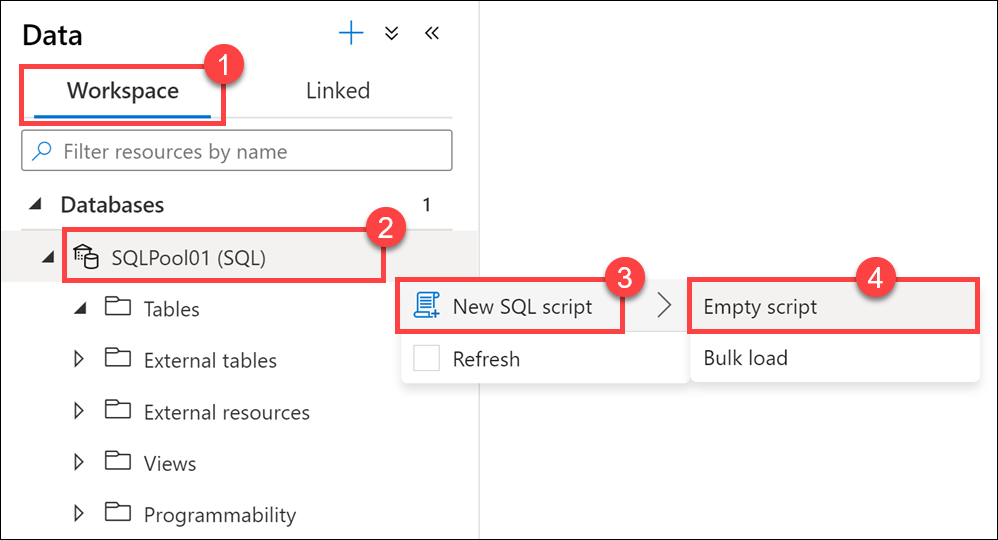
Select the Workspace tab (1), expand Databases, then right-click on SQLPool01 (2). Select New SQL script (3), then select Empty script (4).
Paste the following script into the empty script window, then select Run or hit
F5to execute the query:CREATE TABLE [dbo].[CustomerSource] ( [CustomerID] [int] NOT NULL, [Title] [nvarchar](8), [FirstName] [nvarchar](50), [MiddleName] [nvarchar](50), [LastName] [nvarchar](50), [Suffix] [nvarchar](10), [CompanyName] [nvarchar](128), [SalesPerson] [nvarchar](256), [EmailAddress] [nvarchar](50), [Phone] [nvarchar](25) ) WITH ( HEAP ) COPY INTO [dbo].[CustomerSource] FROM 'https://solliancepublicdata.blob.core.windows.net/dataengineering/dp-203/awdata/CustomerSource.csv' WITH ( FILE_TYPE='CSV', FIELDTERMINATOR='|', FIELDQUOTE='', ROWTERMINATOR='0x0a', ENCODING = 'UTF16' ) CREATE TABLE dbo.[DimCustomer]( [CustomerID] [int] NOT NULL, [Title] [nvarchar](8) NULL, [FirstName] [nvarchar](50) NOT NULL, [MiddleName] [nvarchar](50) NULL, [LastName] [nvarchar](50) NOT NULL, [Suffix] [nvarchar](10) NULL, [CompanyName] [nvarchar](128) NULL, [SalesPerson] [nvarchar](256) NULL, [EmailAddress] [nvarchar](50) NULL, [Phone] [nvarchar](25) NULL, [InsertedDate] [datetime] NOT NULL, [ModifiedDate] [datetime] NOT NULL, [HashKey] [char](64) ) WITH ( DISTRIBUTION = REPLICATE, CLUSTERED COLUMNSTORE INDEX )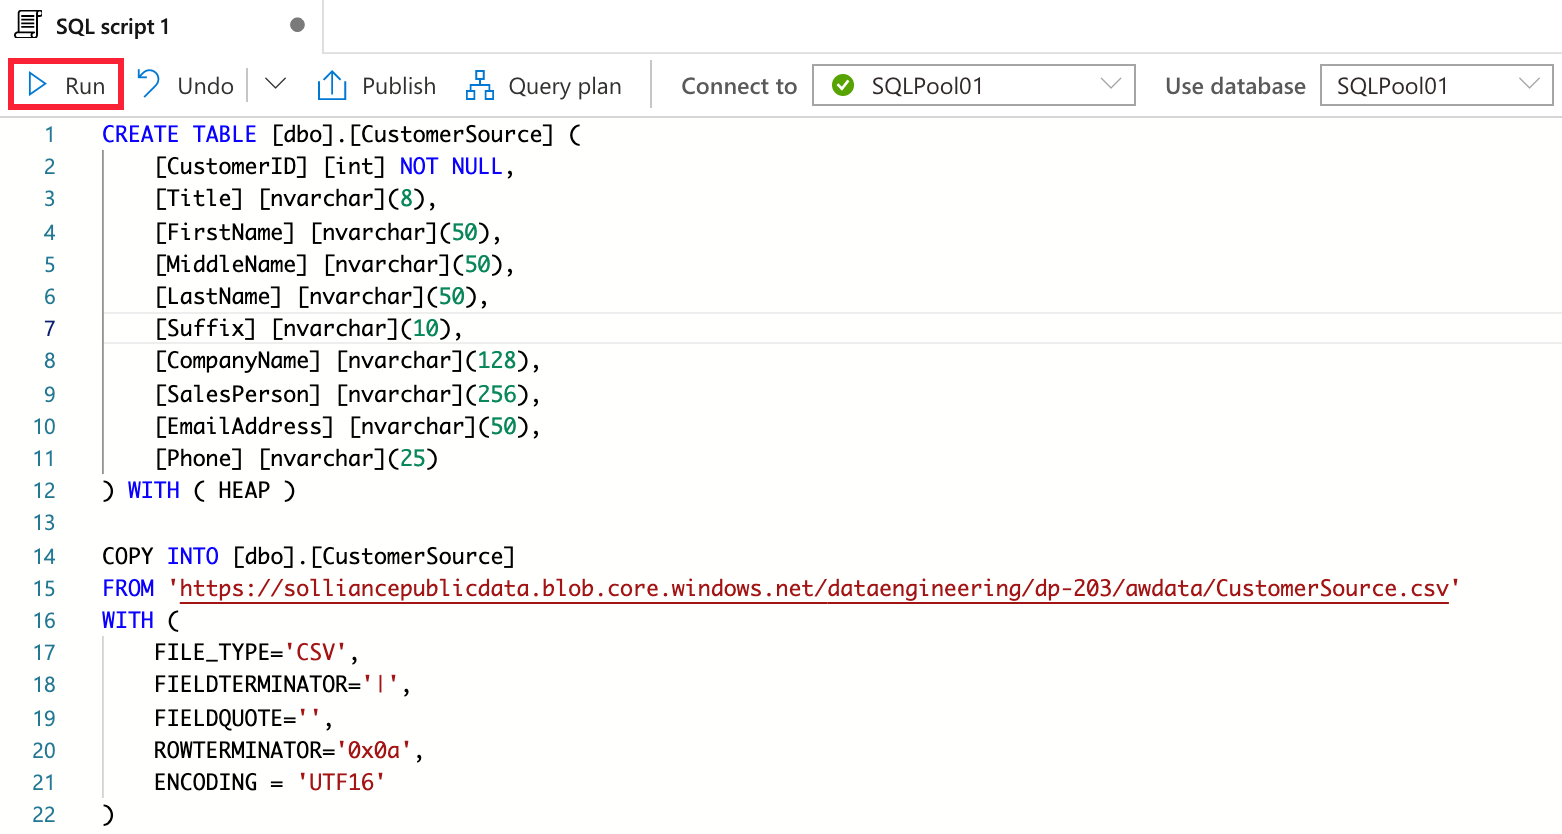
Create a mapping data flow
Mapping Data flows are pipeline activities that provide a visual way of specifying how to transform data, through a code-free experience. Next you will create a mapping data flow to create a Type 1 SCD.
Navigate to the Develop hub.
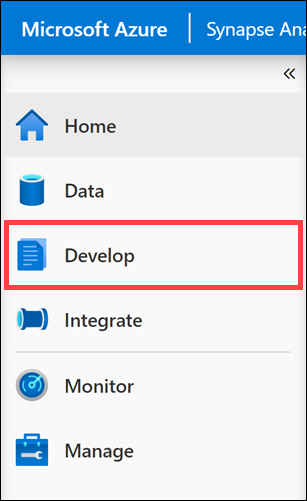
Select +, then select Data flow.
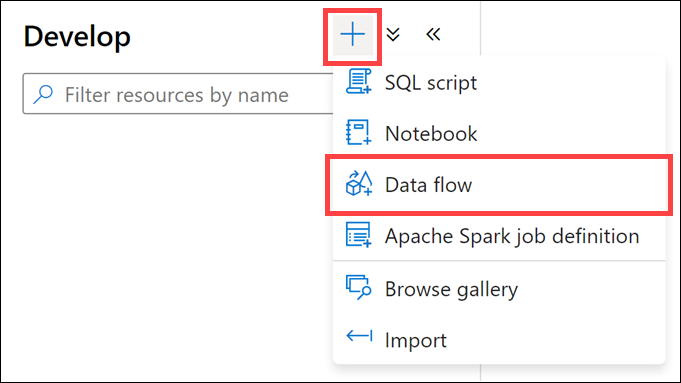
In the properties pane of the new data flow, enter
UpdateCustomerDimensionin the Name field (1), then select the Properties button (2) to hide the properties pane.
Select Add Source on the canvas.
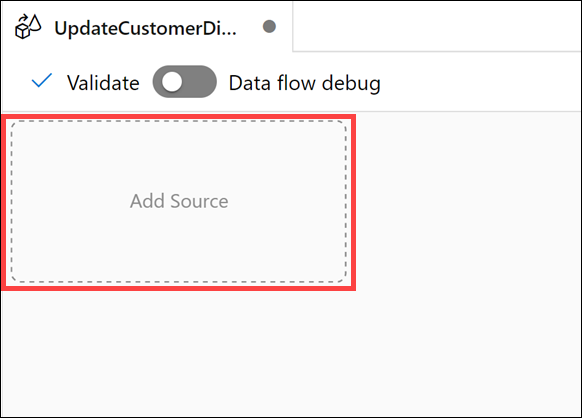
Under
Source settings, configure the following properties:- Output stream name: Enter
SourceDB - Source type: Select
Dataset - Options: Check
Allow schema driftand leave the other options unchecked - Sampling: Select
Disable - Dataset: Select + New to create a new dataset
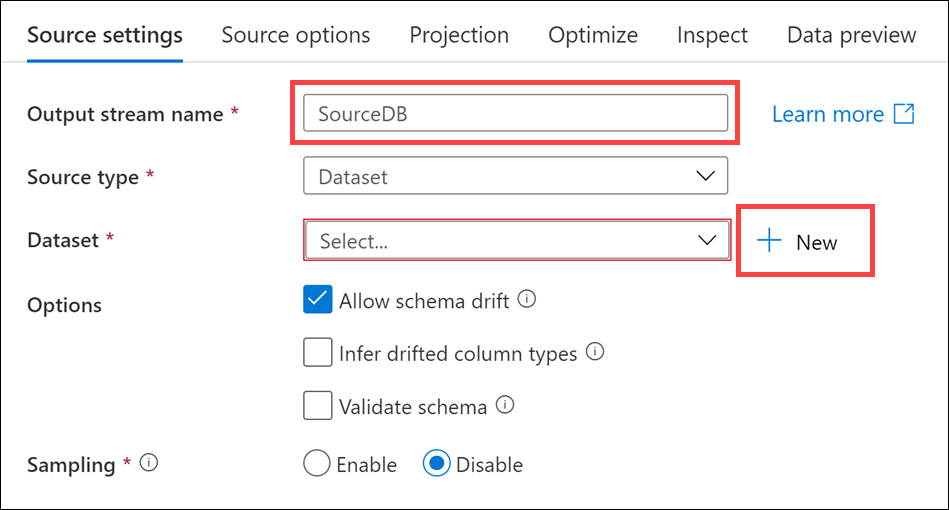
- Output stream name: Enter
In the new integration dataset dialog, select Azure Synapse Analytics, then select Continue.
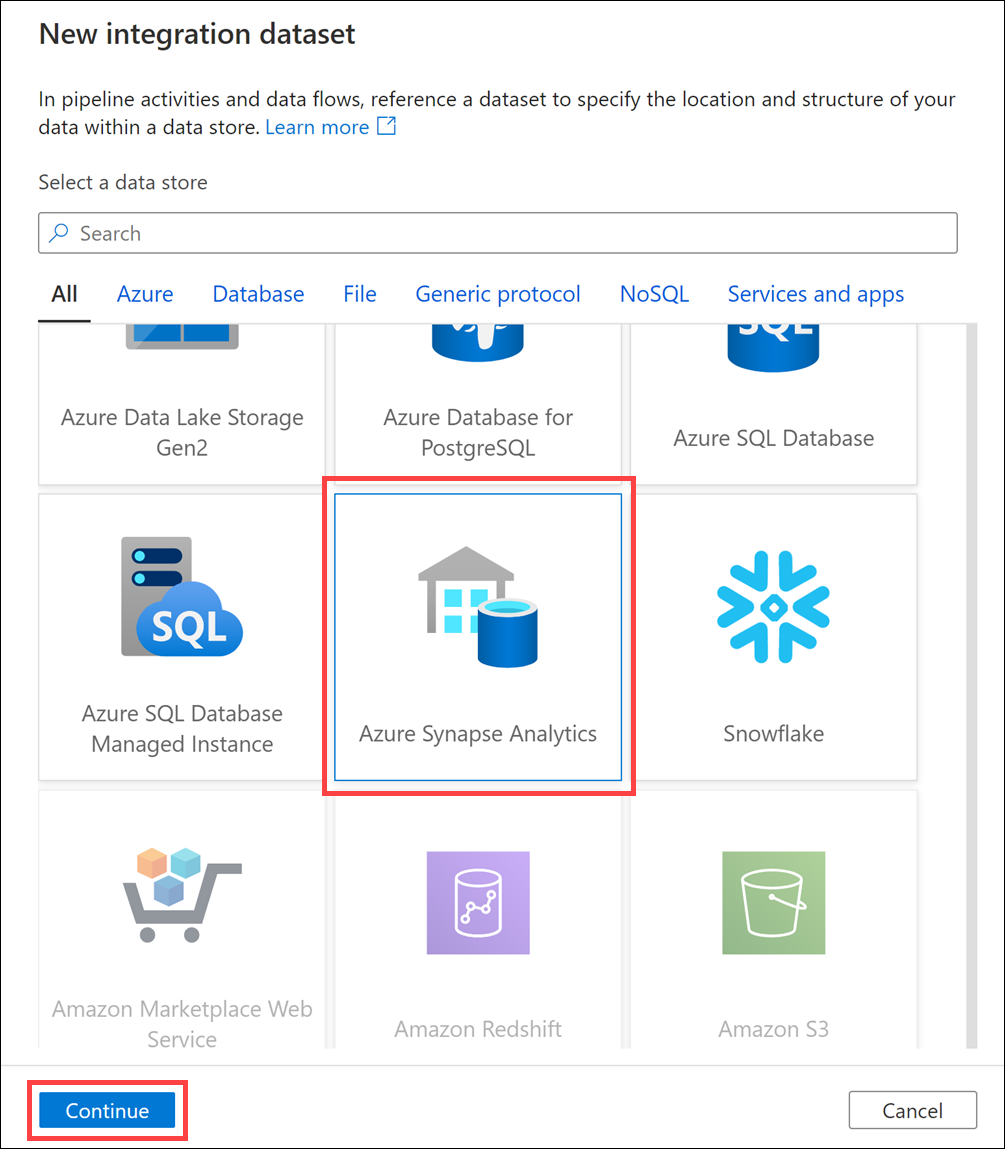
In the dataset properties, configure the following:
- Name: Enter
CustomerSource - Linked service: Select the Synapse workspace linked service
- Table name: Select the Refresh button next to the dropdown
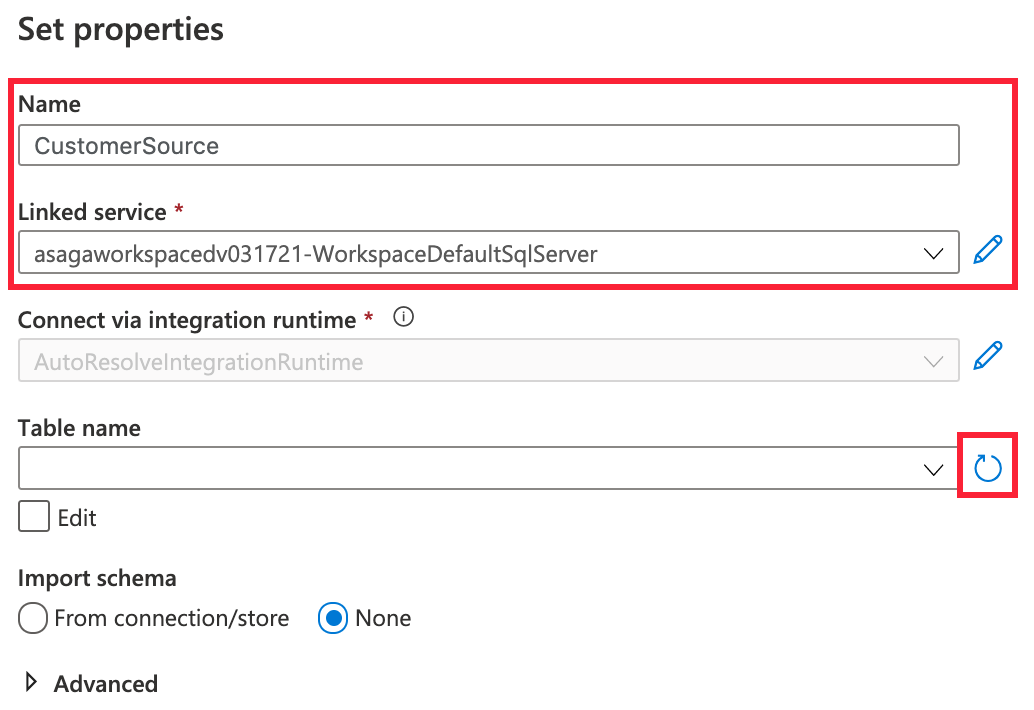
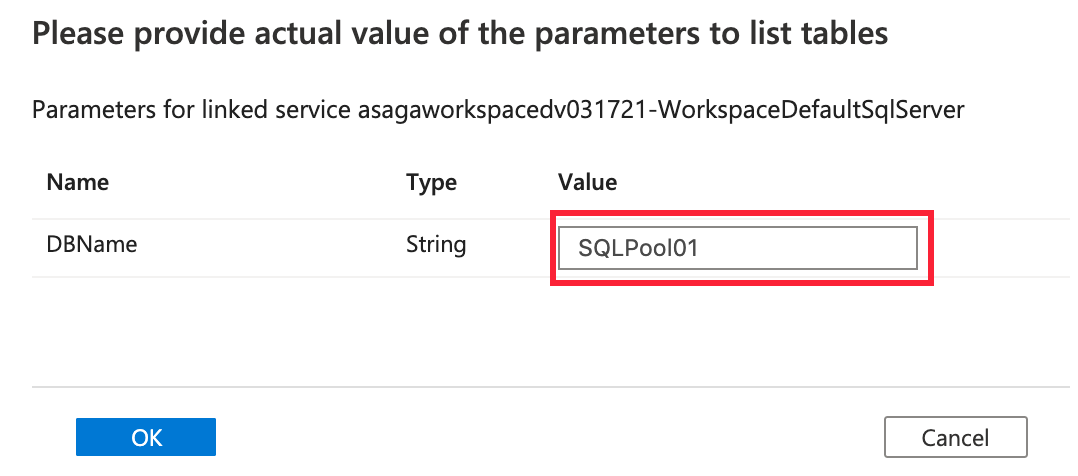
- Name: Enter
In the Value field, enter your SQL Pool name, then select OK.
Select
dbo.CustomerSourceunder Table name, selectFrom connection/storeunder Import schema, then select OK to create the dataset.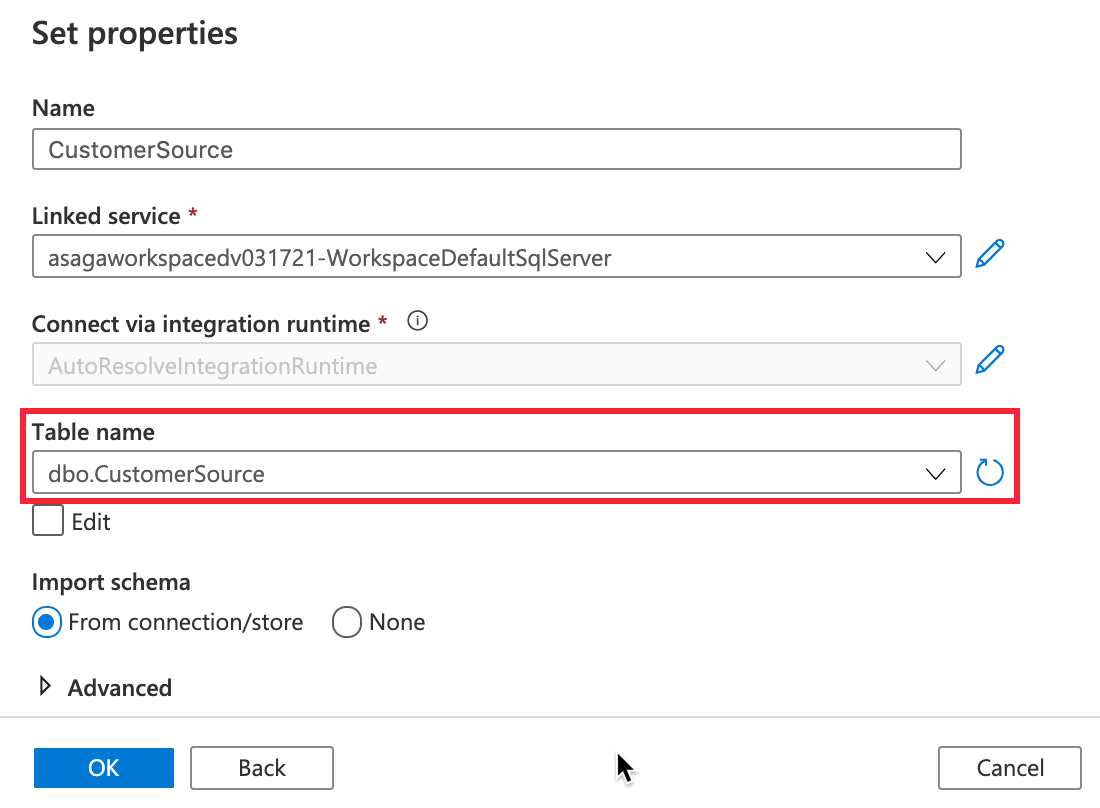
Select Open next to the
CustomerSourcedataset that you added.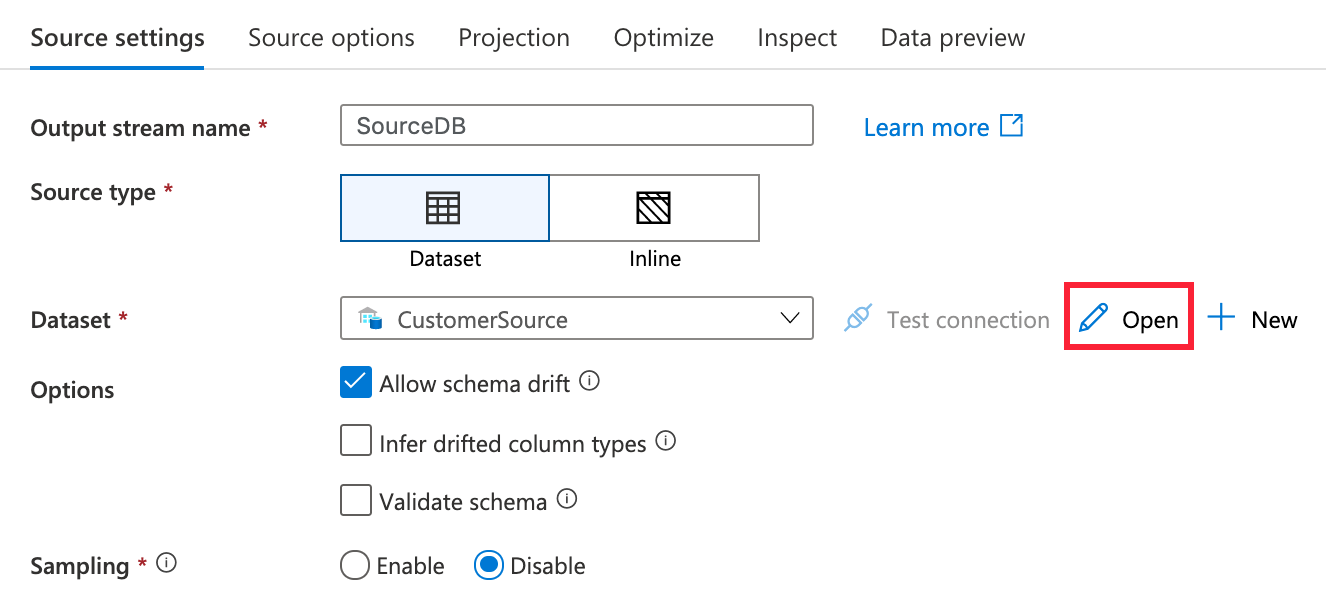
Enter your SQL Pool name in the Value field next to
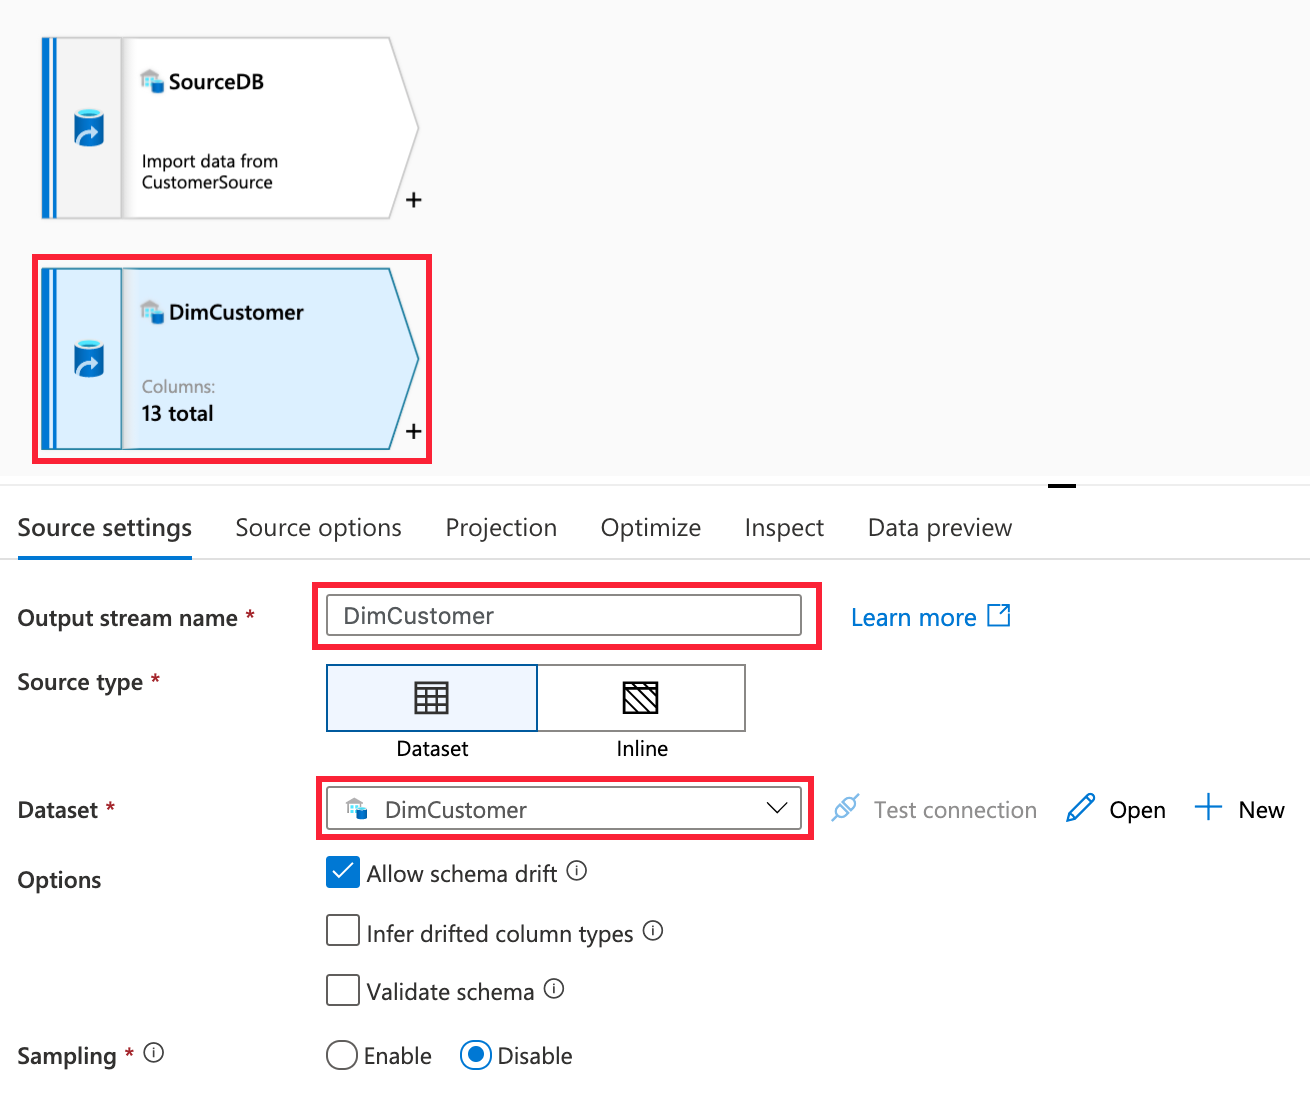
DBName.In the data flow editor, select the Add Source box below the SourceDB activity. Configure this source as the DimCustomer table following the same steps used for CustomerSource.
- Output stream name: Enter
DimCustomer - Source type: Select
Dataset - Options: Check
Allow schema driftand leave the other options unchecked - Sampling: Select
Disable - Dataset: Select + New to create a new dataset. Use the Azure Synapse linked service and choose DimCustomer table. Be sure to set the DBName to your SQL Pool name.
- Output stream name: Enter
Add transformations to data flow
Select + to the right of the
SourceDBsource on the canvas, then select Derived Column.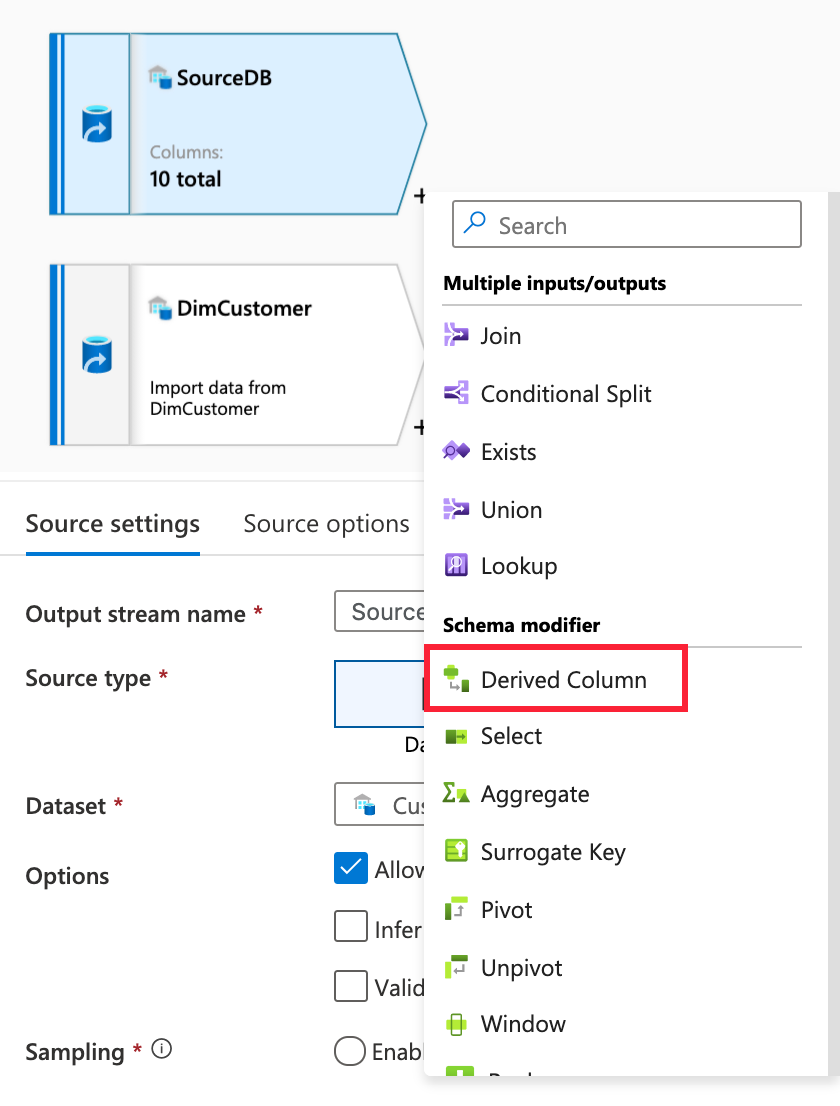
Under
Derived column's settings, configure the following properties:- Output stream name: Enter
CreateCustomerHash - Incoming stream: Select
SourceDB - Columns: Enter the following:
Column Expression Description Type in HashKeysha2(256, iifNull(Title,'') +FirstName +iifNull(MiddleName,'') +LastName +iifNull(Suffix,'') +iifNull(CompanyName,'') +iifNull(SalesPerson,'') +iifNull(EmailAddress,'') +iifNull(Phone,''))Creates a SHA256 hash of the table values. We use this to detect row changes by comparing the hash of the incoming records to the hash value of the destination records, matching on the CustomerIDvalue. TheiifNullfunction replaces null values with empty strings. Otherwise, the hash values tend to duplicate when null entries are present.
- Output stream name: Enter
Select + to the right of the
CreateCustomerHashderived column on the canvas, then select Exists.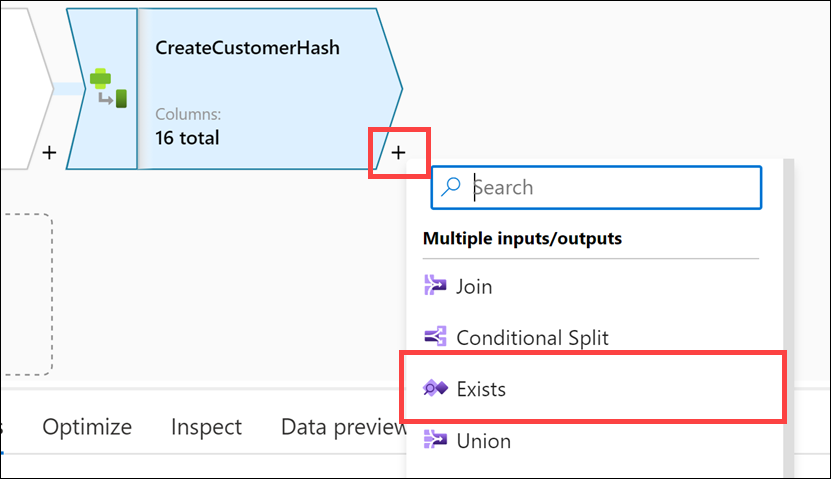
Under
Exists settings, configure the following properties:- Output stream name: Enter
Exists - Left stream: Select
CreateCustomerHash - Right stream: Select
SynapseDimCustomer - Exist type: Select
Doesn't exist - Exists conditions: Set the following for Left and Right:
Left: CreateCustomerHash's column Right: SynapseDimCustomer's column HashKeyHashKey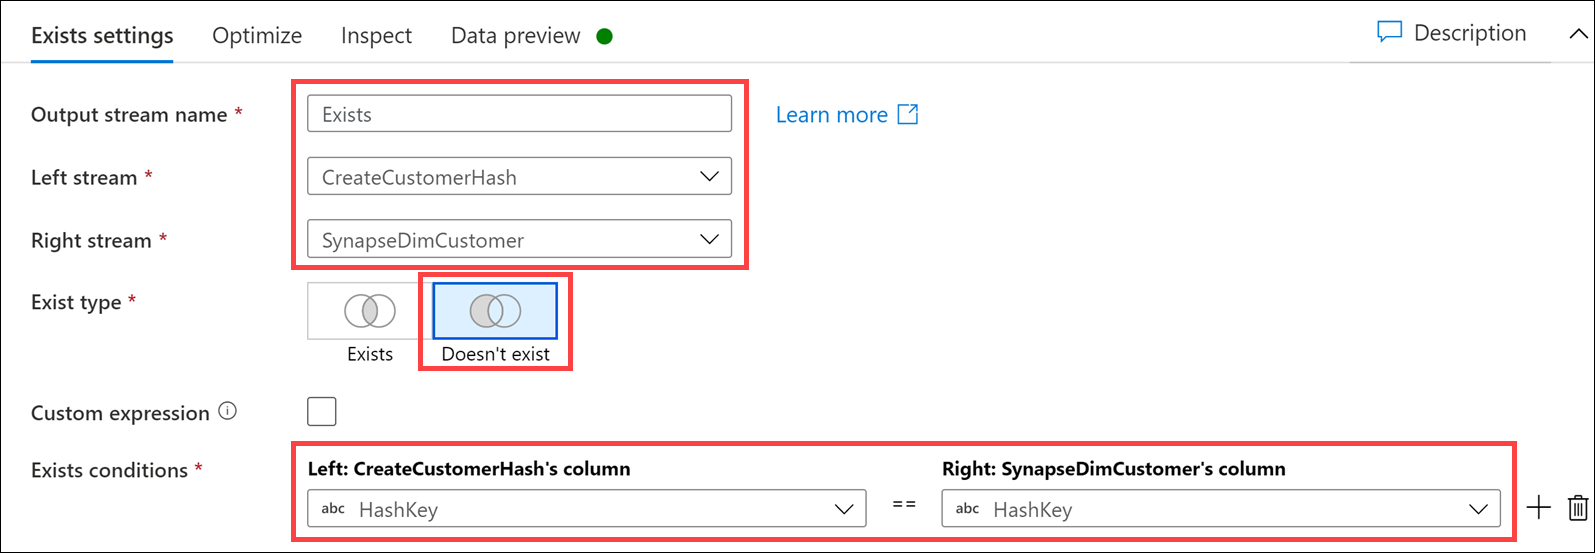
- Output stream name: Enter
Select + to the right of
Existson the canvas, then select Lookup.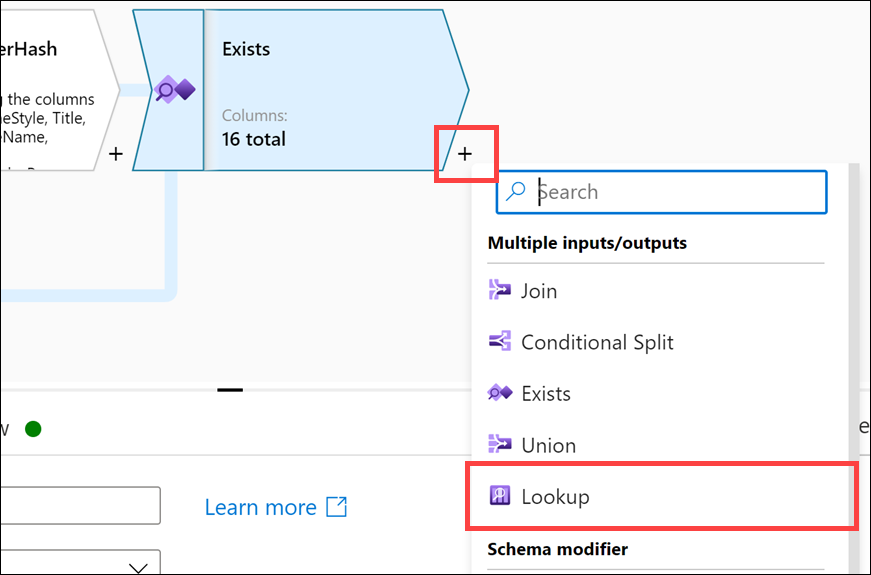
Under
Lookup settings, configure the following properties:- Output stream name: Enter
LookupCustomerID - Primary stream: Select
Exists - Lookup stream: Select
SynapseDimCustomer - Match multiple rows: Unchecked
- Match on: Select
Any row - Lookup conditions: Set the following for Left and Right:
Left: Exists's column Right: SynapseDimCustomer's column CustomerIDCustomerID
- Output stream name: Enter
Select + to the right of
LookupCustomerIDon the canvas, then select Derived Column.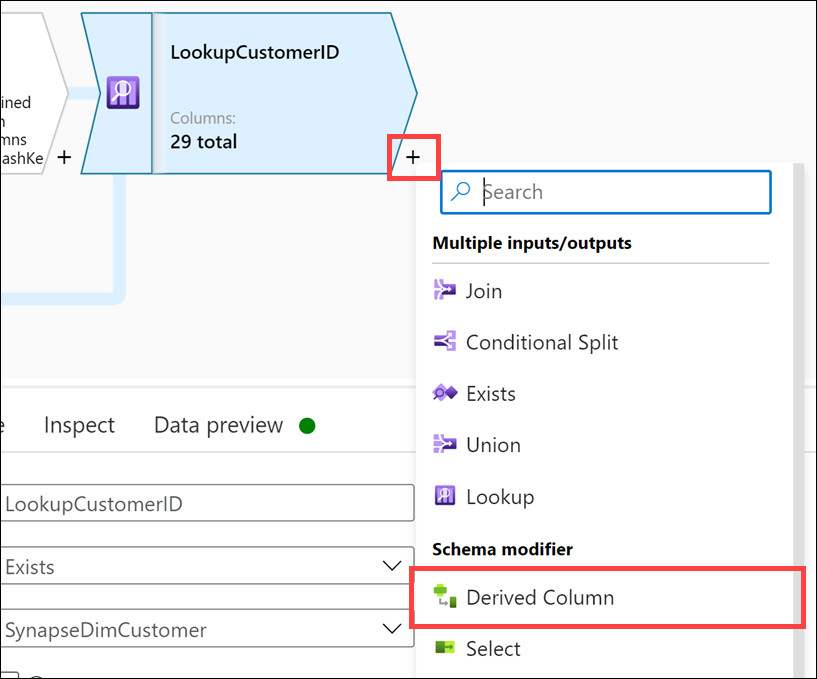
Under
Derived column's settings, configure the following properties:- Output stream name: Enter
SetDates - Incoming stream: Select
LookupCustomerID - Columns: Enter the following:
Column Expression Description Select InsertedDateiif(isNull(InsertedDate), currentTimestamp(), {InsertedDate})If the InsertedDatevalue is null, insert the current timestamp. Otherwise, use theInsertedDatevalue.Select ModifiedDatecurrentTimestamp()Always update the ModifiedDatevalue with the current timestamp.
Note
To insert the second column, select + Add above the Columns list, then select Add column.
- Output stream name: Enter
Select + to the right of the
SetDatesderived column step on the canvas, then select Alter Row.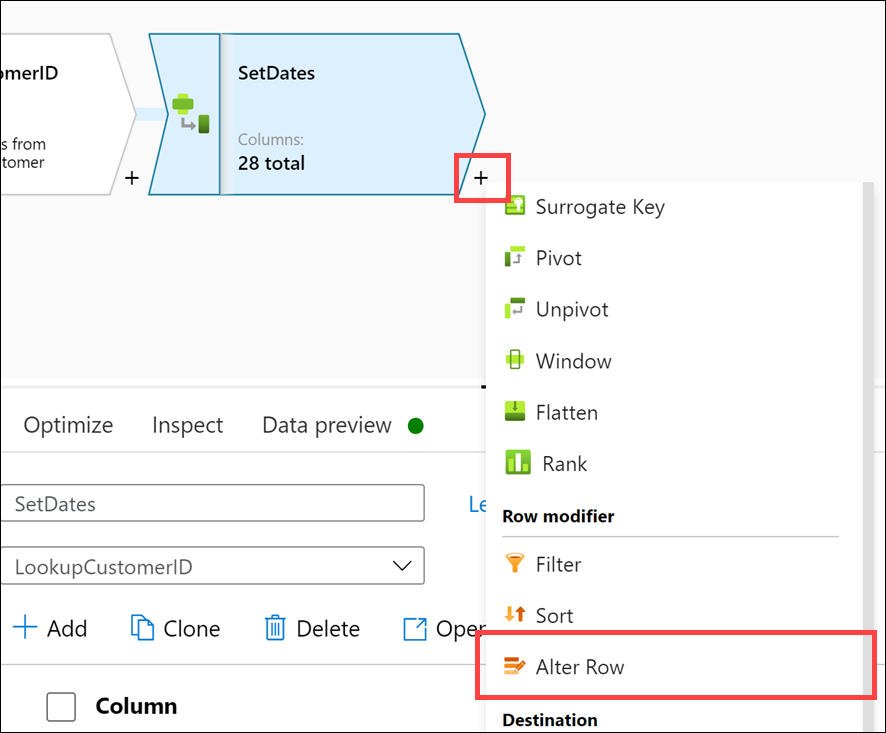
Under
Alter row settings, configure the following properties:- Output stream name: Enter
AllowUpserts - Incoming stream: Select
SetDates - Alter row conditions: Enter the following:
Condition Expression Description Select Upsert iftrue()Set the condition to true()on theUpsert ifcondition to allow upserts. This ensures that all data that passes through the steps in the mapping data flow will be inserted or updated into the sink.
- Output stream name: Enter
Select + to the right of the
AllowUpsertsalter row step on the canvas, then select Sink.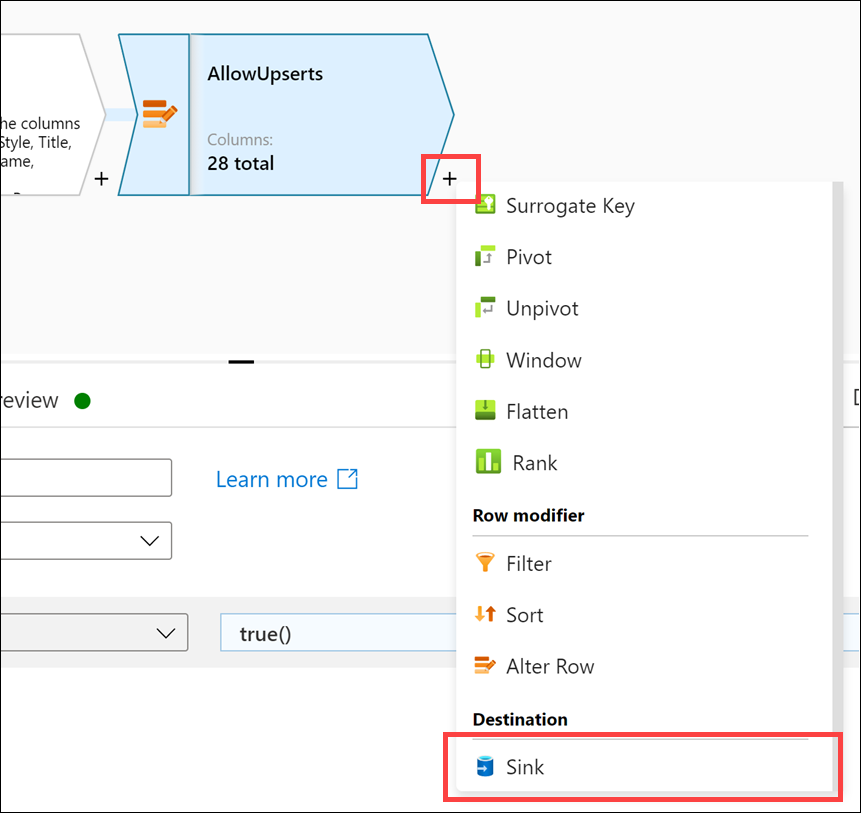
Under
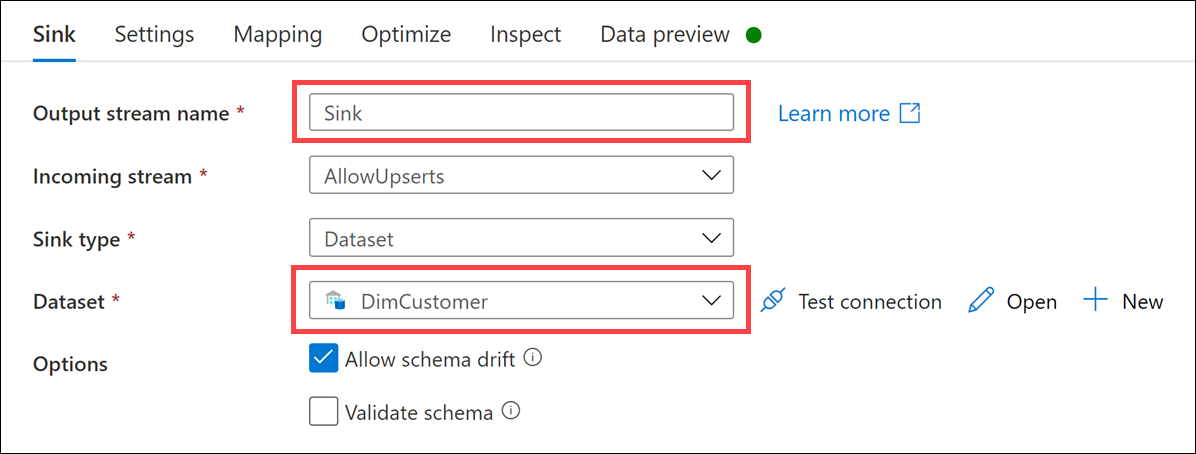
Sink, configure the following properties:- Output stream name: Enter
Sink - Incoming stream: Select
AllowUpserts - Sink type: Select
Dataset - Dataset: Select
DimCustomer - Options: Check
Allow schema driftand uncheckValidate schema
- Output stream name: Enter
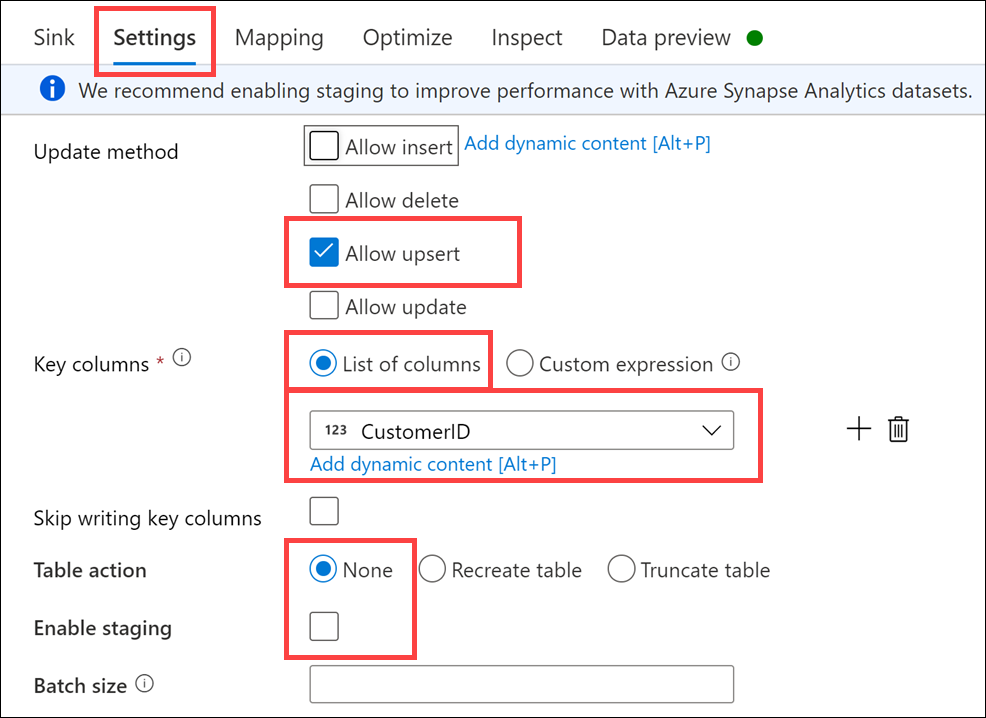
Select the Settings tab and configure the following properties:
- Update method: Check
Allow upsertand uncheck all other options - Key columns: Select
List of columns, then selectCustomerIDin the list - Table action: Select
None - Enable staging: Unchecked
- Update method: Check
Select the Mapping tab, then uncheck Auto mapping. Configure the input columns mapping as outlined below:
Input columns Output columns SourceDB@CustomerIDCustomerIDSourceDB@TitleTitleSourceDB@FirstNameFirstNameSourceDB@MiddleNameMiddleNameSourceDB@LastNameLastNameSourceDB@SuffixSuffixSourceDB@CompanyNameCompanyNameSourceDB@SalesPersonSalesPersonSourceDB@EmailAddressEmailAddressSourceDB@PhonePhoneInsertedDateInsertedDateModifiedDateModifiedDateCreateCustomerHash@HashKeyHashKey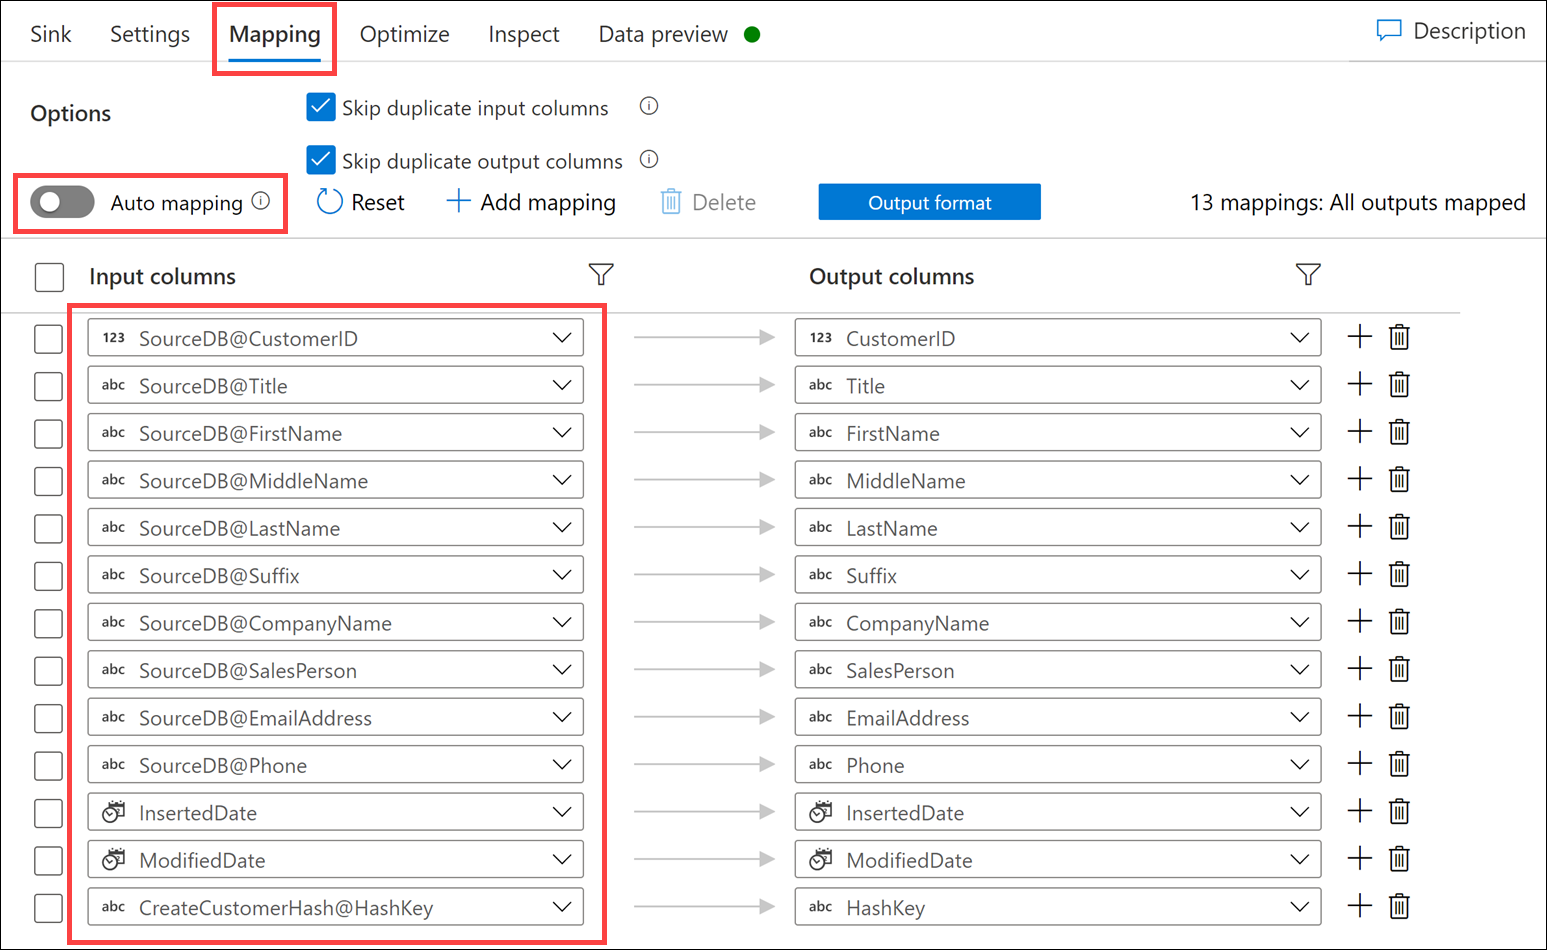
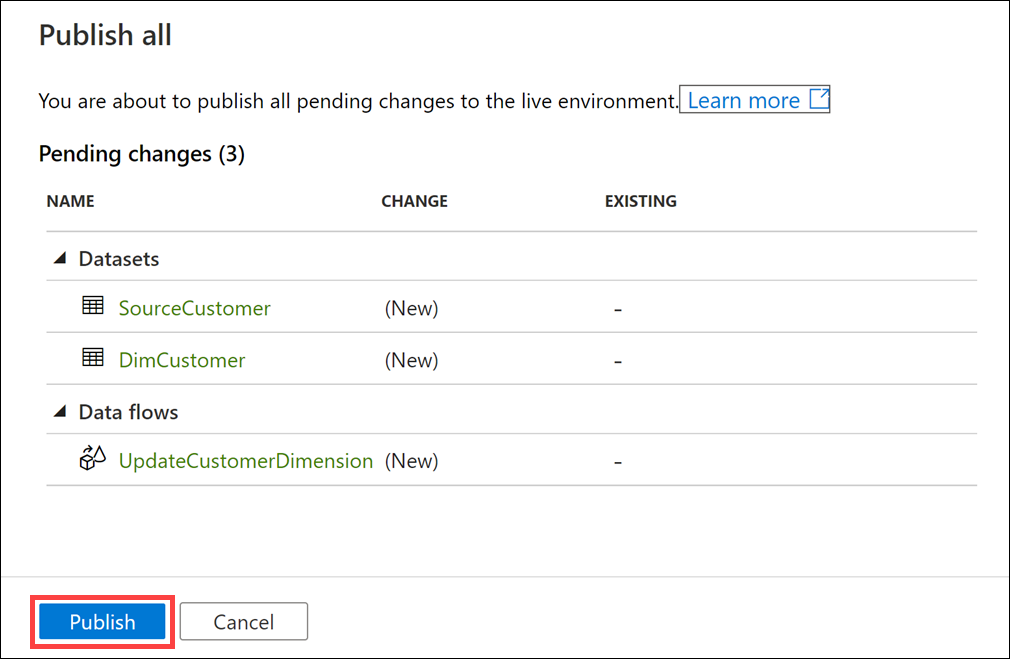
The completed mapping flow should look like the following. Select Publish all to save your changes.

Select Publish.
How to test the data flow
You have completed a Type 1 SCD data flow. If you choose to test it out you could add this data flow to a Synapse integration pipeline. Then you could run the pipeline once to do the initial load of the customer source data to the DimCustomer destination.
Each additional run of the pipeline will compare the data in the source table to what is already in the dimension table (using the HashKey) and only update records that have changed. In order to test this, you could update a record in the source table then run the pipeline again and verify the record updates in the dimension table.
Take the customer Janet Gates as an example. The initial load shows the LastName is Gates and the CustomerId is 4.

Here is an example statement that would update the customer last name in the source table.
UPDATE [dbo].[CustomerSource]
SET LastName = 'Lopez'
WHERE [CustomerId] = 4
After updating the record and running the pipeline again, DimCustomer would show this updated data.

The customer record successfully updated the LastName value to match the source record and updated the ModifiedDate, without keeping track of the old LastName value. That is the expected behavior for a Type 1 SCD. If history was required for the LastName field then you would modify the table and data flow to be one of the other SCD types you have learned.