Exercise - Build your Xamarin.Forms UI and application logic
At this point, the mobile app is a simple "Hello World" app. In this unit, you'll add the UI and some basic application logic.
The UI for the app will consist of:
- A text-entry control to enter some phone numbers.
- A button to send your location to those numbers using Azure Functions.
- A label that will show a message to the user of the current status, such as the location being sent and location sent successfully.
Xamarin.Forms supports a design pattern called Model-View-ViewModel (MVVM). You can read more about MVVM in the Xamarin MVVM docs, but the essence of it is, each page (View) has a viewmodel that exposes properties and behavior.
Viewmodel properties are 'bound' to components on the UI by name, and this binding synchronizes data between the View and viewmodel. For example, a string property on a viewmodel called Name could be bound to the Text property of a text-entry control on the UI. The text-entry control shows the value in the Name property and, when the user changes the text in the UI, the Name property is updated. If the value of the Name property is changed in the viewmodel, an event is raised to tell the UI to update.
Viewmodel behavior is exposed as command properties, a command being an object that wraps an action that is executed when the command is invoked. These commands are bound by name to controls like buttons, and tapping a button will invoke the command.
Create a base viewmodel
Viewmodels implement the INotifyPropertyChanged interface. This interface has a single event, PropertyChanged, which is used to notify the UI of any updates. This event has event args that contain the name of the property that has changed. It's common practice to create a base viewmodel class implementing this interface and providing some helper methods.
Right-click ImHere project and select Add > class.
Name the new class "BaseViewModel" and select Add.
Add a using directive for
System.ComponentModelandSystem.Runtime.CompilerServices.using System.ComponentModel; using System.Runtime.CompilerServices;Make the class
publicand derive fromINotifyPropertyChanged.public class BaseViewModel : INotifyPropertyChangedImplement the
INotifyPropertyChangedinterface by adding thePropertyChangedevent:public event PropertyChangedEventHandler PropertyChanged;Add
Setmethod to trigger thePropertyChangedevent.protected void Set<T>(ref T field, T value, [CallerMemberName] string propertyName = null) { if (Equals(field, value)) return; field = value; PropertyChanged?.Invoke(this, new PropertyChangedEventArgs(propertyName)); }This method refers to the backing field, the new value, and the property name. If the field hasn't changed, the method returns, otherwise, the field is updated and the
PropertyChangedevent is raised. ThepropertyNameparameter on theSetmethod is a default parameter and is marked with theCallerMemberNameattribute. When this method is called from a property setter, this parameter is normally left as the default value. The compiler will then automatically set the parameter value to be the name of the calling property.
The full code for this class is below.
 using System.ComponentModel;
 using System.Runtime.CompilerServices;
namespace ImHere
{
public class BaseViewModel : INotifyPropertyChanged
{
public event PropertyChangedEventHandler PropertyChanged;
protected void Set<T>(ref T field, T value, [CallerMemberName] string propertyName = null)
{
    if (Equals(field, value)) return;
    field = value;
    PropertyChanged?.Invoke(this, new PropertyChangedEventArgs(propertyName));
}
}
}
Create a viewmodel for the page
The MainPage will have a text-entry control for phone numbers and a label to display a message. These controls will be bound to properties on a viewmodel.
Create a class called
MainViewModelin theImHere.NET Standard project.Add a using directive for
Xamarin.FormsandSystem.Threading.Tasks.using Xamarin.Forms; using System.Threading.Tasks;Make this class public and derive from
BaseViewModel.public class MainViewModel : BaseViewModelAdd two
stringproperties,PhoneNumbersandMessage, each with a backing field. In the property setter, use the base classSetmethod to update the value and raise thePropertyChangedevent.string message = ""; public string Message { get => message; set => Set(ref message, value); } string phoneNumbers = ""; public string PhoneNumbers { get => phoneNumbers; set => Set(ref phoneNumbers, value); }Add a read-only command property called
SendLocationCommand. This command will have a type ofICommandfrom theSystem.Windows.Inputnamespace.public ICommand SendLocationCommand { get; }Add a constructor to the class, and in this constructor, initialize the
SendLocationCommandas a new Xamarin.FormsCommand.public MainViewModel() { SendLocationCommand = new Command(async () => await SendLocation()); }Create a
asyncmethod calledSendLocationand pass a lambda function thatawaits call to the constructor. The body of this method will be updated later in this module.async Task SendLocation() { }
The complete code for this class is shown below.
using System.Threading.Tasks;
using System.Windows.Input;
using Xamarin.Forms;
namespace ImHere
{
public class MainViewModel : BaseViewModel
{
 string message = "";
 public string Message
 {
     get => message;
     set => Set(ref message, value);
 }

 string phoneNumbers = "";
 public string PhoneNumbers
 {
     get => phoneNumbers;
     set => Set(ref phoneNumbers, value);
 }
public MainViewModel()
{
    SendLocationCommand = new Command(async () => await SendLocation());
}
public ICommand SendLocationCommand { get; }
async Task SendLocation()
{
}
}
}
Create the user interface
Xamarin.Forms UIs can be built using XAML.
Open the
MainPage.xamlfile from theImHereproject. The page will open in the XAML editor.Note
The
ImHere.UWPproject also contains a file calledMainPage.xaml. Make sure you're editing the one in the .NET Standard library.Add the following XAML inside the top-level
ContentPageto set an instance of the viewmodel as the binding context of the page.<ContentPage.BindingContext> <local:MainViewModel/> </ContentPage.BindingContext>Overwrite the
StackLayoutwith the following code:<StackLayout Padding="20"> <Label Text="Phone numbers to send to:" HorizontalOptions="Start"/> <Editor Text="{Binding PhoneNumbers}" HeightRequest="100"/> </StackLayout>- The
Editorcontrol will be used to add phone numbers, and theLabelabove describes the purpose of this field to the user. - The
StackLayoutchild controls stack either horizontally or vertically in the order in which the controls are added, so adding theLabelfirst will put it above theEditor. Editorcontrols are multi-line entry controls, allowing the user to enter multiple phone numbers, one per line.
The
Textproperty on theEditoris bound to thePhoneNumbersproperty on theMainViewModel. The syntax for binding is to set the property value to"{Binding <property name>}". The curly braces will tell the XAML compiler that this value is special and should be treated differently from a simplestring.- The
Add a
Buttonbelow theEditorcontrol. We'll use this button to send the user's location.<Button Text="Send Location" BackgroundColor="Blue" TextColor="White" Command="{Binding SendLocationCommand}" />The
Commandproperty is bound to theSendLocationCommandcommand on the viewmodel. When the button is tapped, the command will be executed.Add a
Labelbelow theButtoncontrol. We'll display status messages in this label.<Label Text="{Binding Message}" HorizontalOptions="Center" VerticalOptions="CenterAndExpand" />The full code for this page is below.
<?xml version="1.0" encoding="utf-8"?>
<ContentPage xmlns="http://xamarin.com/schemas/2014/forms"
             xmlns:x="http://schemas.microsoft.com/winfx/2009/xaml"
             xmlns:local="clr-namespace:ImHere"
             x:Class="ImHere.MainPage">
    <ContentPage.BindingContext>
        <local:MainViewModel/>
    </ContentPage.BindingContext>
    <StackLayout Padding="20">
        <Label Text="Phone numbers to send to:" HorizontalOptions="Start"/>
        <Editor Text="{Binding PhoneNumbers}" HeightRequest="100"/>
        <Button Text="Send Location" BackgroundColor="Blue" TextColor="White"
                Command="{Binding SendLocationCommand}" />
        <Label Text="{Binding Message}"
               HorizontalOptions="Center" VerticalOptions="CenterAndExpand" />
    </StackLayout>
</ContentPage>
Run the app to see the new UI. If you want to validate the bindings at this point, you can do so by adding breakpoints to the properties or the
SendLocationmethod.Note
When you compile this app, you will see a warning about
SendLocationlackingawaitmodifiers. You can ignore this warning as this will be resolved once more code is added to this method in the next unit.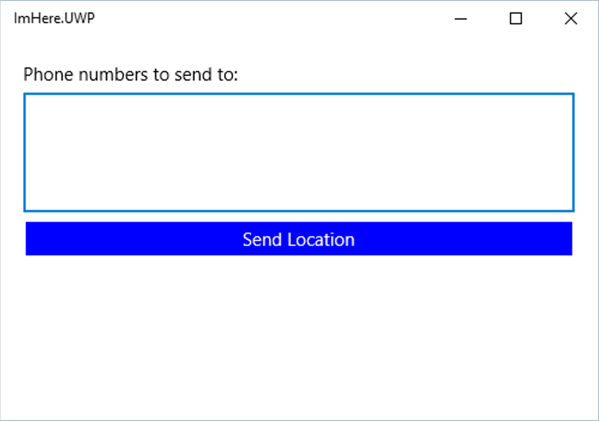
Summary
In this unit, you learned how to create the UI for the app using XAML, along with a viewmodel to handle the application's logic. You also learned how to bind the viewmodel to the UI. In the next unit, you'll add location lookup to the viewmodel.