Lab - Explore the Data management workspace
Read this first - before you start the lab!
Important
For this lab, you CANNOT sign in with your own credentials. Use the following steps to sign in to your lab environment with the correct credentials.
Ensure that you are signed in to Microsoft Learn.
Select Launch VM mode or Sign in to launch VM mode in this unit.
In the Resources tab on the lab side bar, select the T icon next to Password in the MININT box, to have the administrator password for the Virtual Machine entered for you.
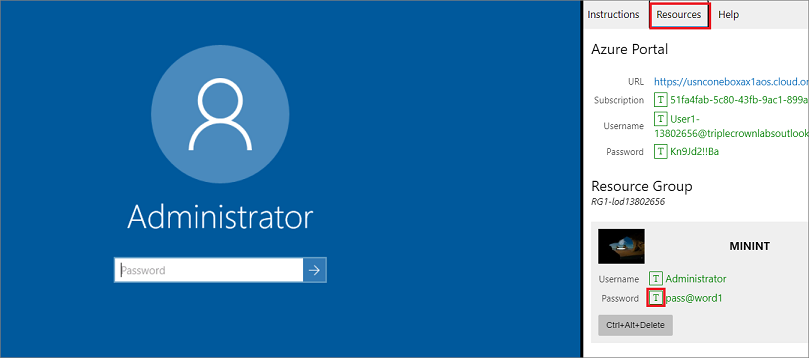
Select Enter.
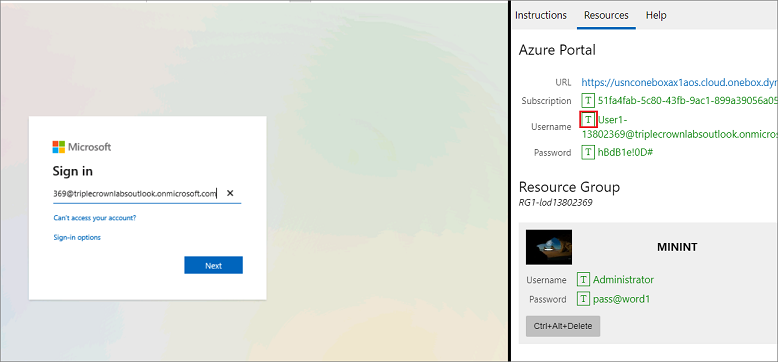
Microsoft Edge will open. Wait for it to navigate to the Sign in page for finance and operations.
On the Microsoft Sign in page in finance and operations, place your mouse cursor into the Username field.
On the Resources tab of the lab side bar, below the Azure portal heading, select the T icon next to Username, then press Enter.
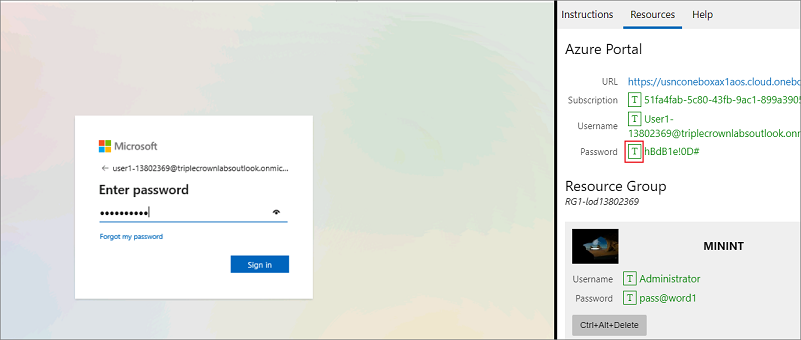
Your mouse cursor will now be in the Password page.
On the Resources tab of the lab side bar, below the Azure portal heading, select the T icon next to select Password, then press Enter.
Don't stay signed in or store the password on the virtual machine.
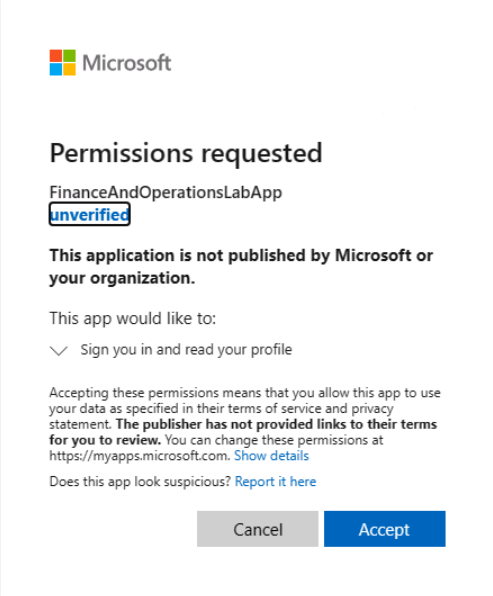
Select Accept in the Permissions requested page.
To see the lab instructions, select the Instructions tab on the lab side bar.
You can now begin your work on this lab.
Scenario
In this lab, you will explore some of the features in the Data management workspace in the company USMF.
- In company USMF, go to Workspaces > Data management.
- You will see the message Execution history was successful in the Action center.
- Select Templates in the Data management workspace.
- Select New, and when the new draft appears, enter 035 – General Ledger Setup in the Template ID field.
- In the Description field, enter General Ledger Setup.
- Under the Entities field, select Add entity, and in the Entity name dropdown, select All types test entity, and then select Add entity. The entity source will also be under the Template details FastTab.
- The Template status is currently set to Draft. To validate this new template select Validate template at the top of the page.
- Select Save and close in the Templates page.
- Select the Data entities tile in the Data management workspace.
- View available entities in finance and operations apps.
- Select any of the entities of your choice, such as All types test entity.
- Select Entity structure in the top menu, to see the data source. Here, you can enable or disable running business logic in your project. For instance, for data migration, you might have modified the settings of certain configurations to meet customer requirements; however, the legacy data would violate the new rule, so you might need to make the decision to turn off the rule for historical data.
- Select Target fields in the top menu. Here you can view and edit the target fields.
- Close the Target fields page.
- Close the Entity structure page.
- Select Entity model view in top menu of the Target entities page. This provides better visibility by grouping entities for each category and sub category of nodes, and by grouping the entity models.
- In the tree on the left, expand All\SystemAdministration and select Master.
- In the tree, expand All\SalesAndMarketing and select Document to see various entity types and entities.
- Close the Entity model view page.
- Select Entity category view in the Target entities page.
- In the tree, expand All\Configuration and select SystemAdministration.
- Close the Entity category view page.
- Close the Target entities page.
- Select the Data task automation tile.
- Select Load default tasks to open the drop-down dialog.
- From the drop-down, select a value, MS_Sample_DMFManifest.
- Select Load and wait for the information statement that says the Manifest is loaded successfully.
- Select Cancel.
- Close the Data task automation page.
- Select the Configure data source tile. Here, you can view, edit, and create data types such as CSV, Excel, and Package.
Go to the next lab instructions from the lab environment
Select the Next button in the bottom-right corner of the lab side bar.