Docker Hub provides a convenient hosting service for your image repositories. You can easily deploy to Docker Hub manually from Visual Studio.
Create a Docker account and Docker Hub repository
Sign up for a Docker account, if you don't already have one.
If you don't have a Docker Hub repository, create one at Docker Hub.
Publish the image for a single project to Docker Hub
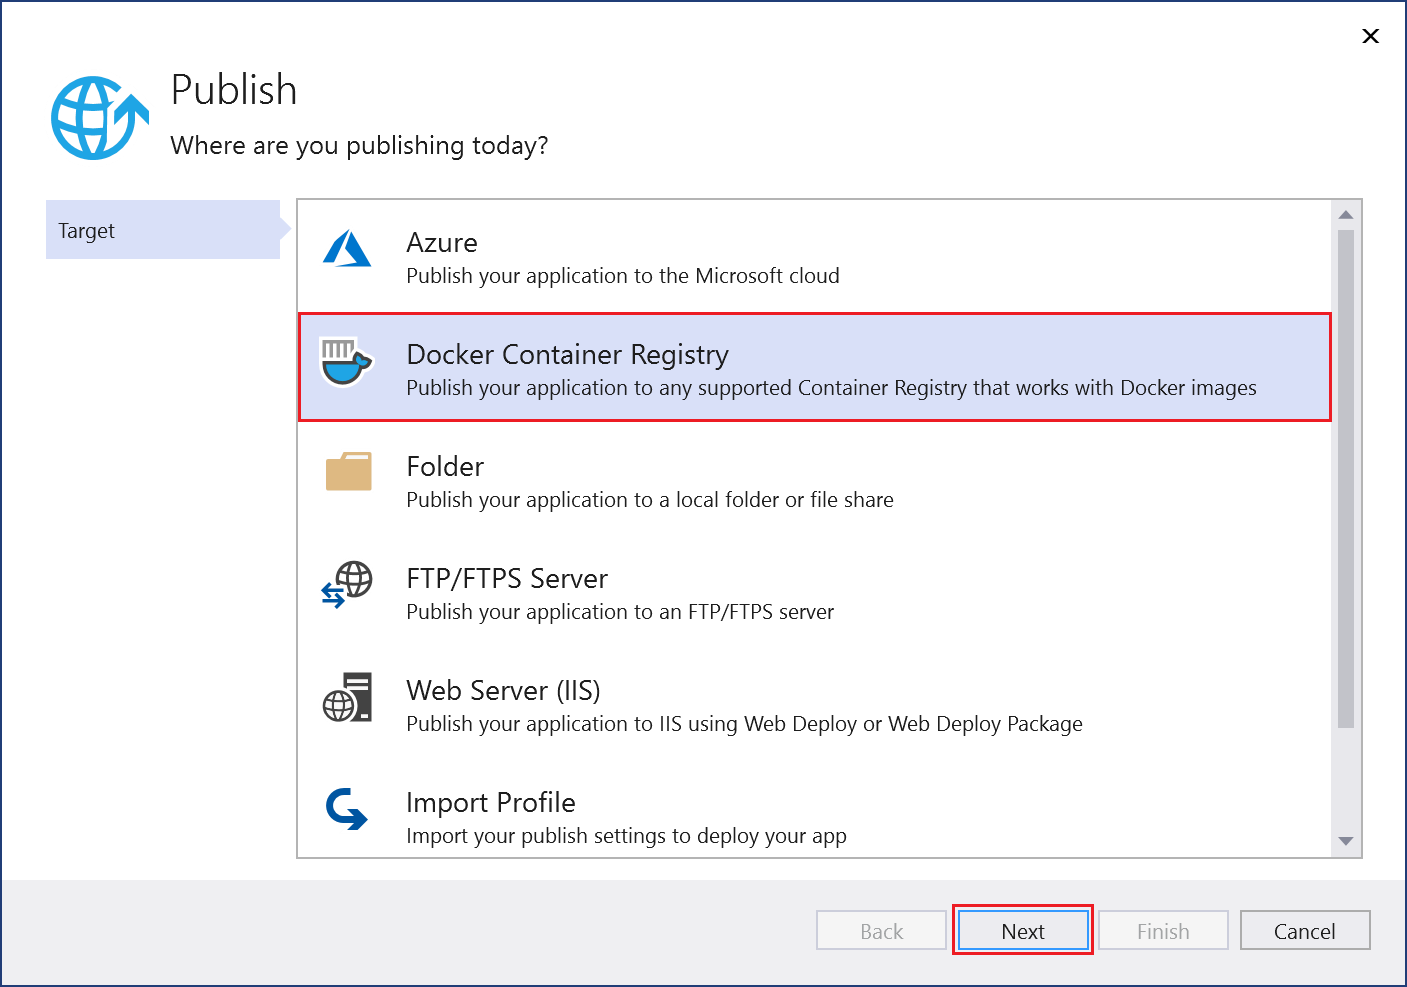
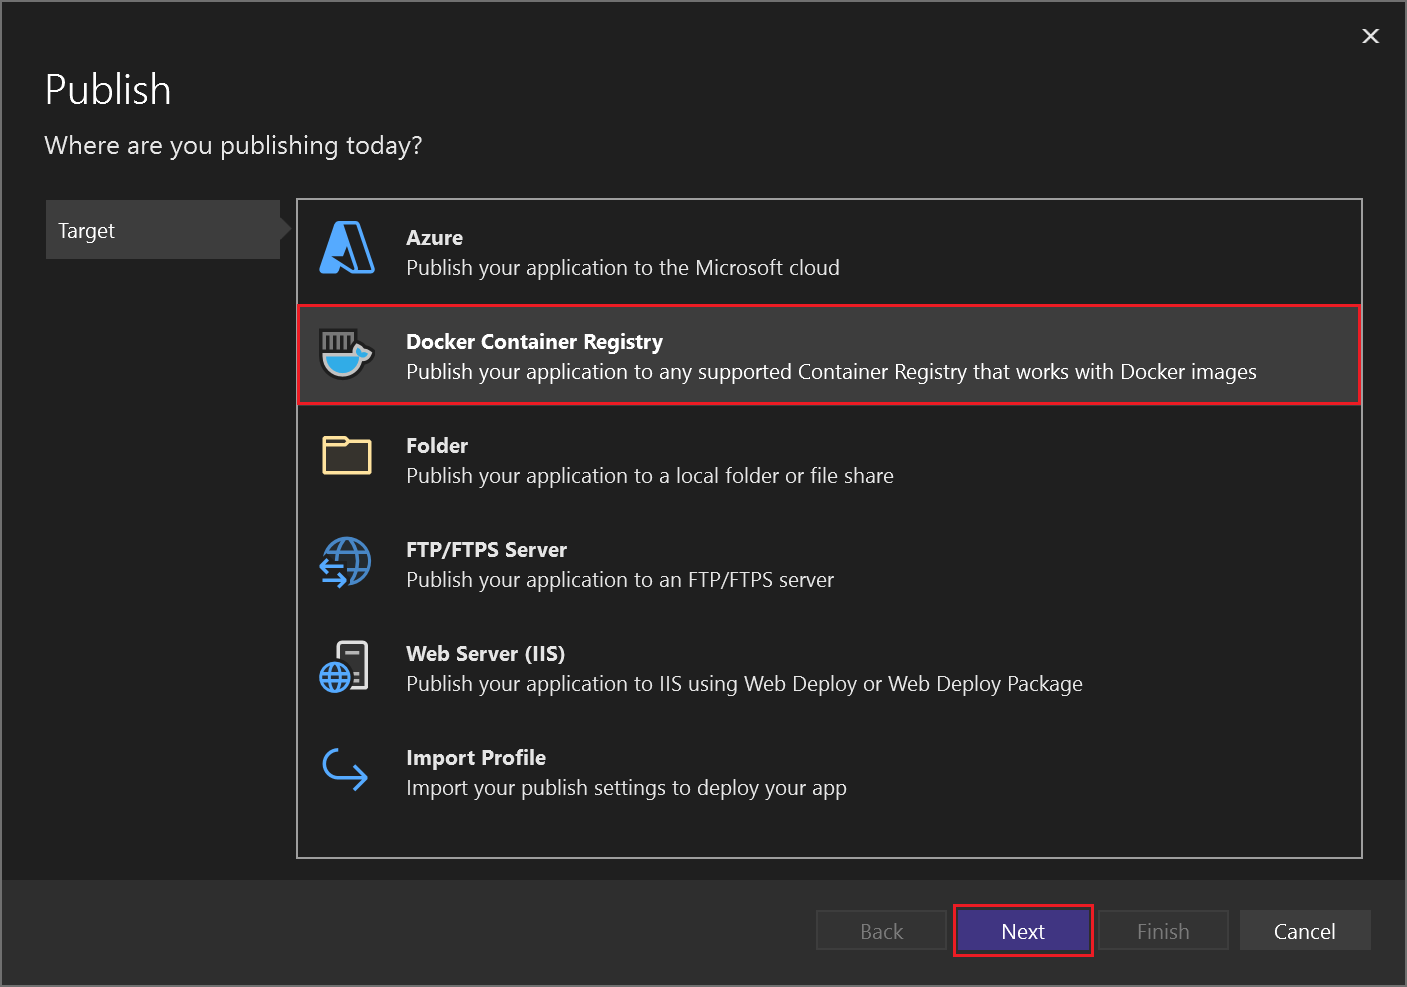
Right-click on the project node and choose Publish.... A screen showing deployment options appears.
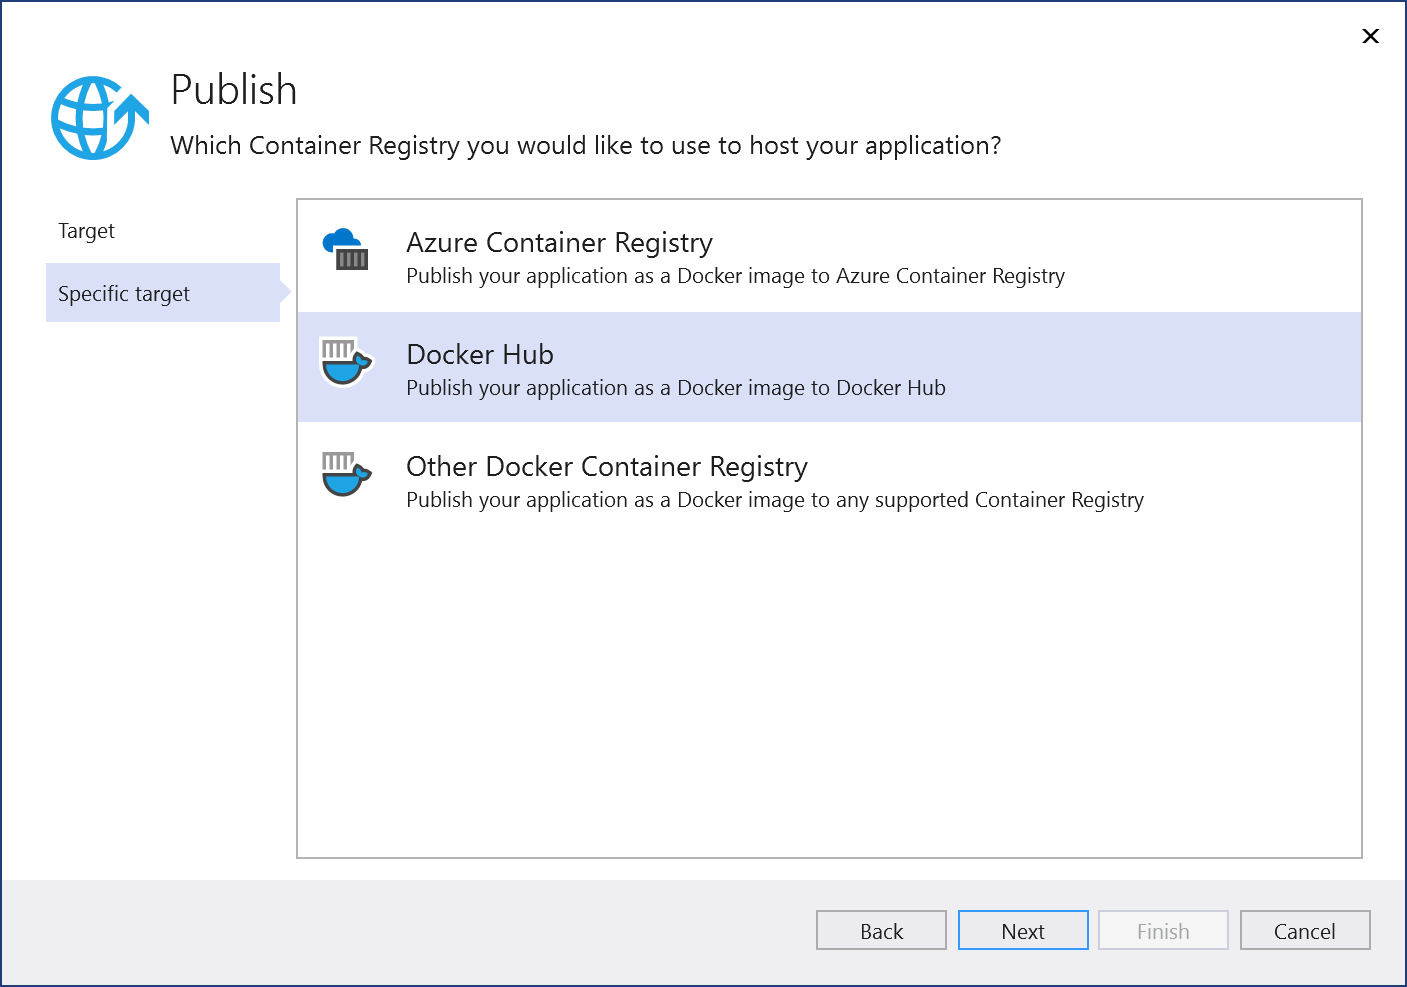
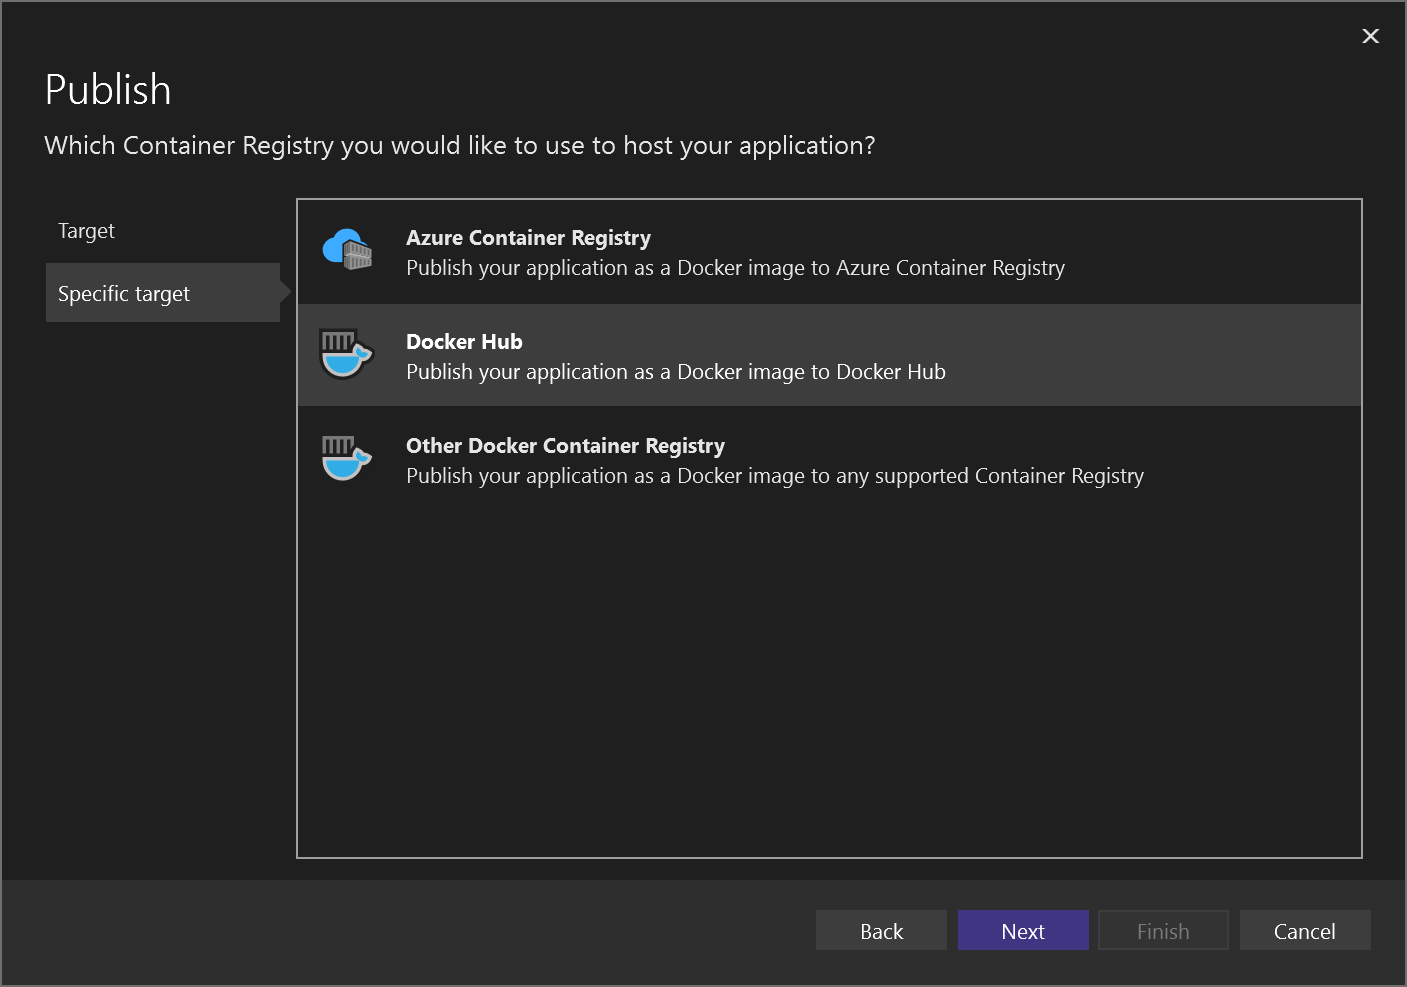
Choose Docker Container Registry, and then choose Docker Hub.
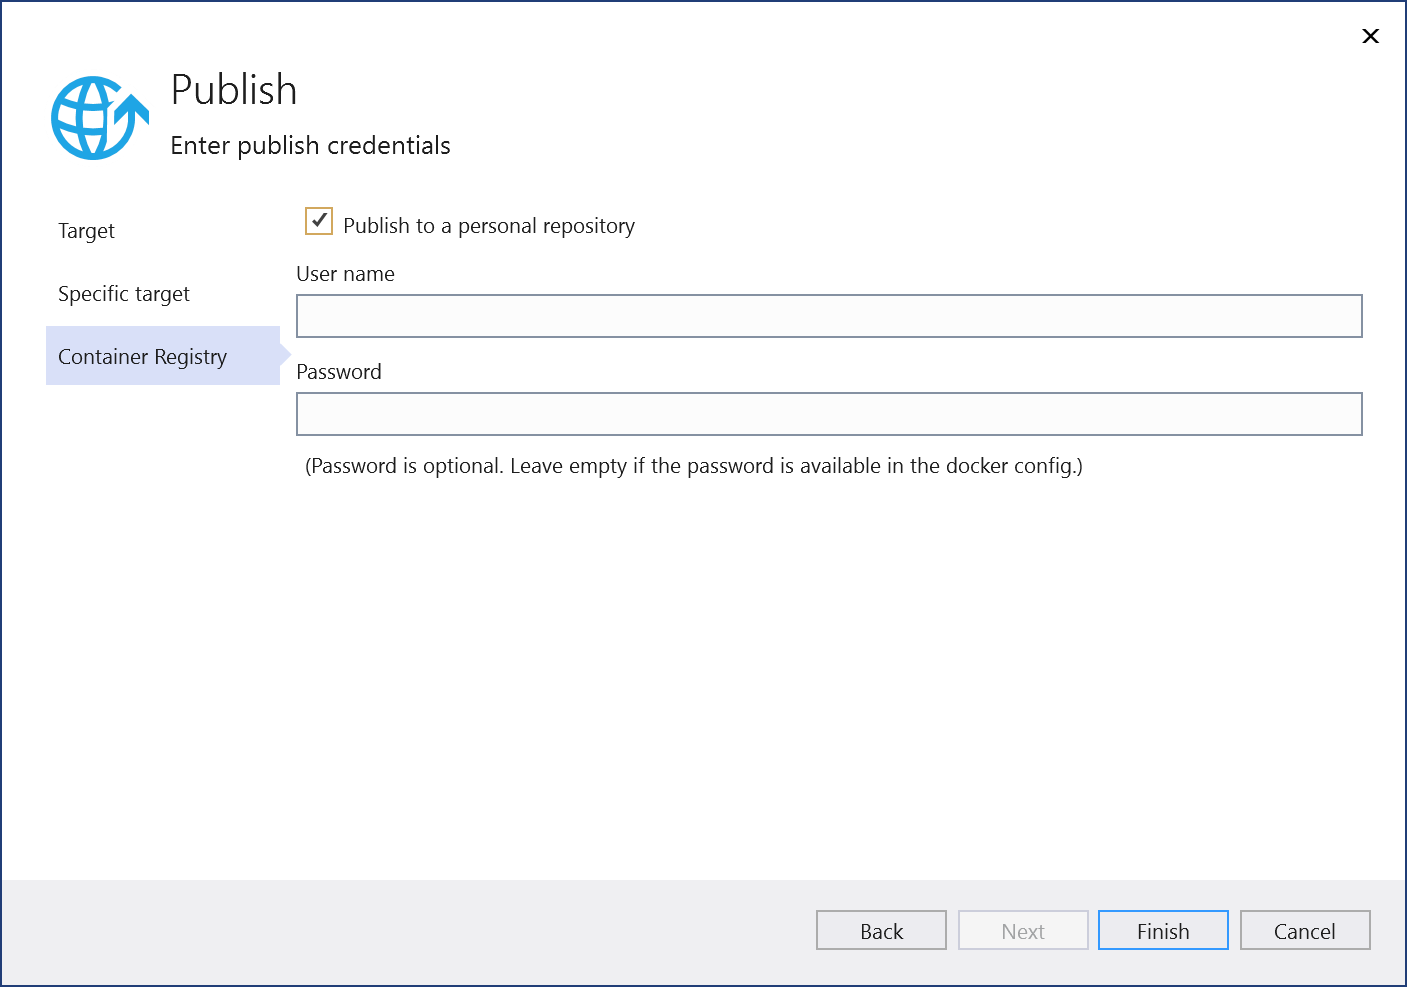
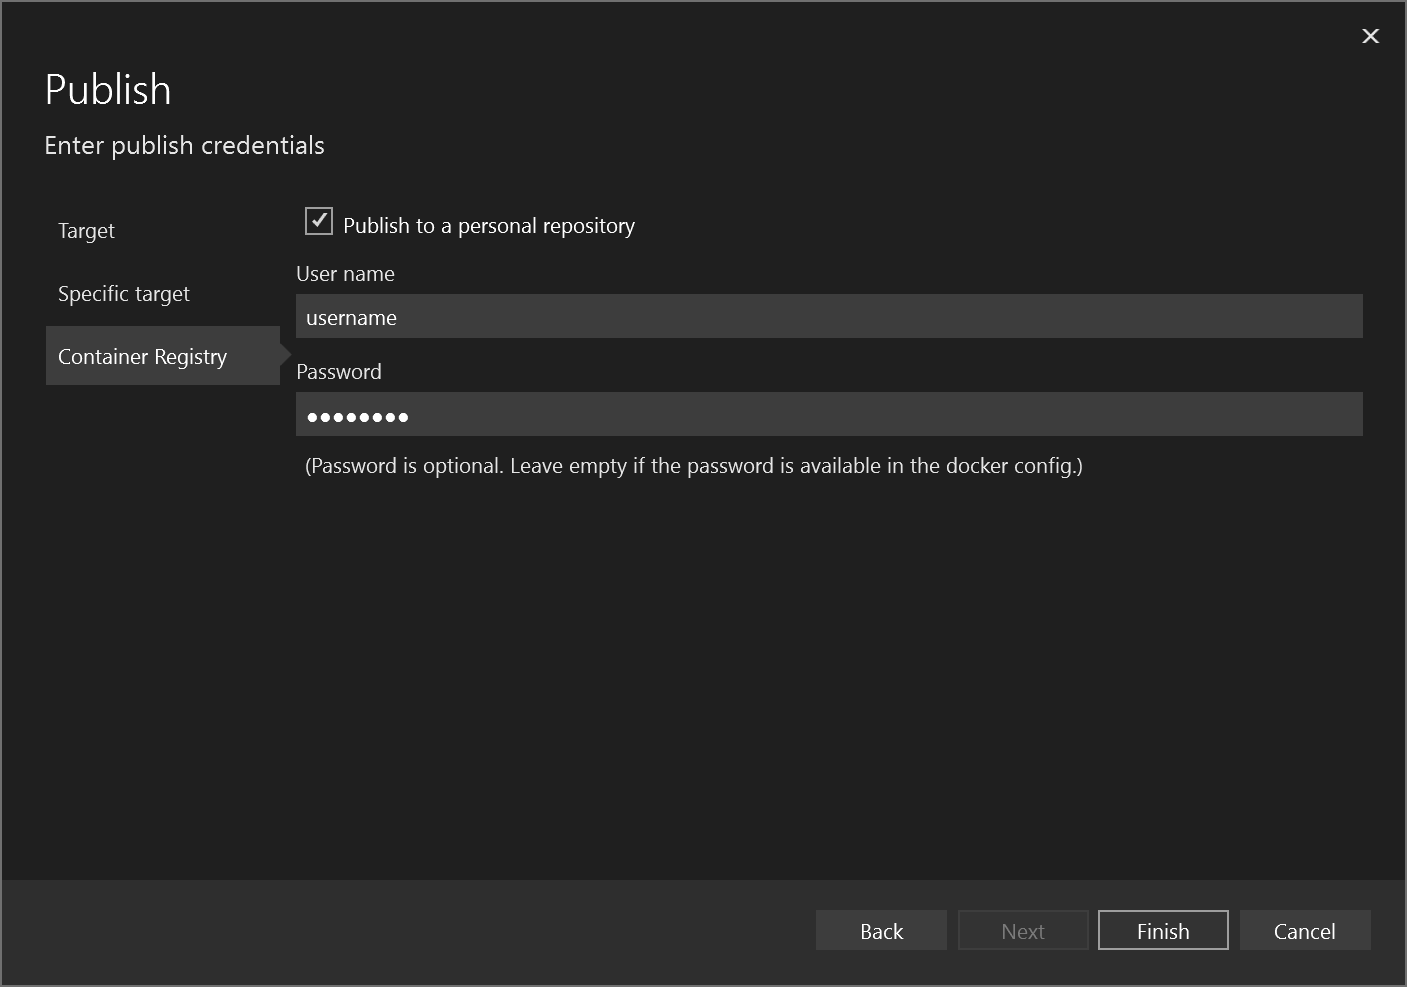
Enter your Docker credentials.
If you are connecting to your own repository (not part of an organization), leave the checkbox for Publish to a personal repository checked. If the repository is owned by an organization, clear the checkbox, and enter the organization name. Enter your Docker username and password for your Docker account that has permissions to access the repository that you are connecting to, and then select Save.
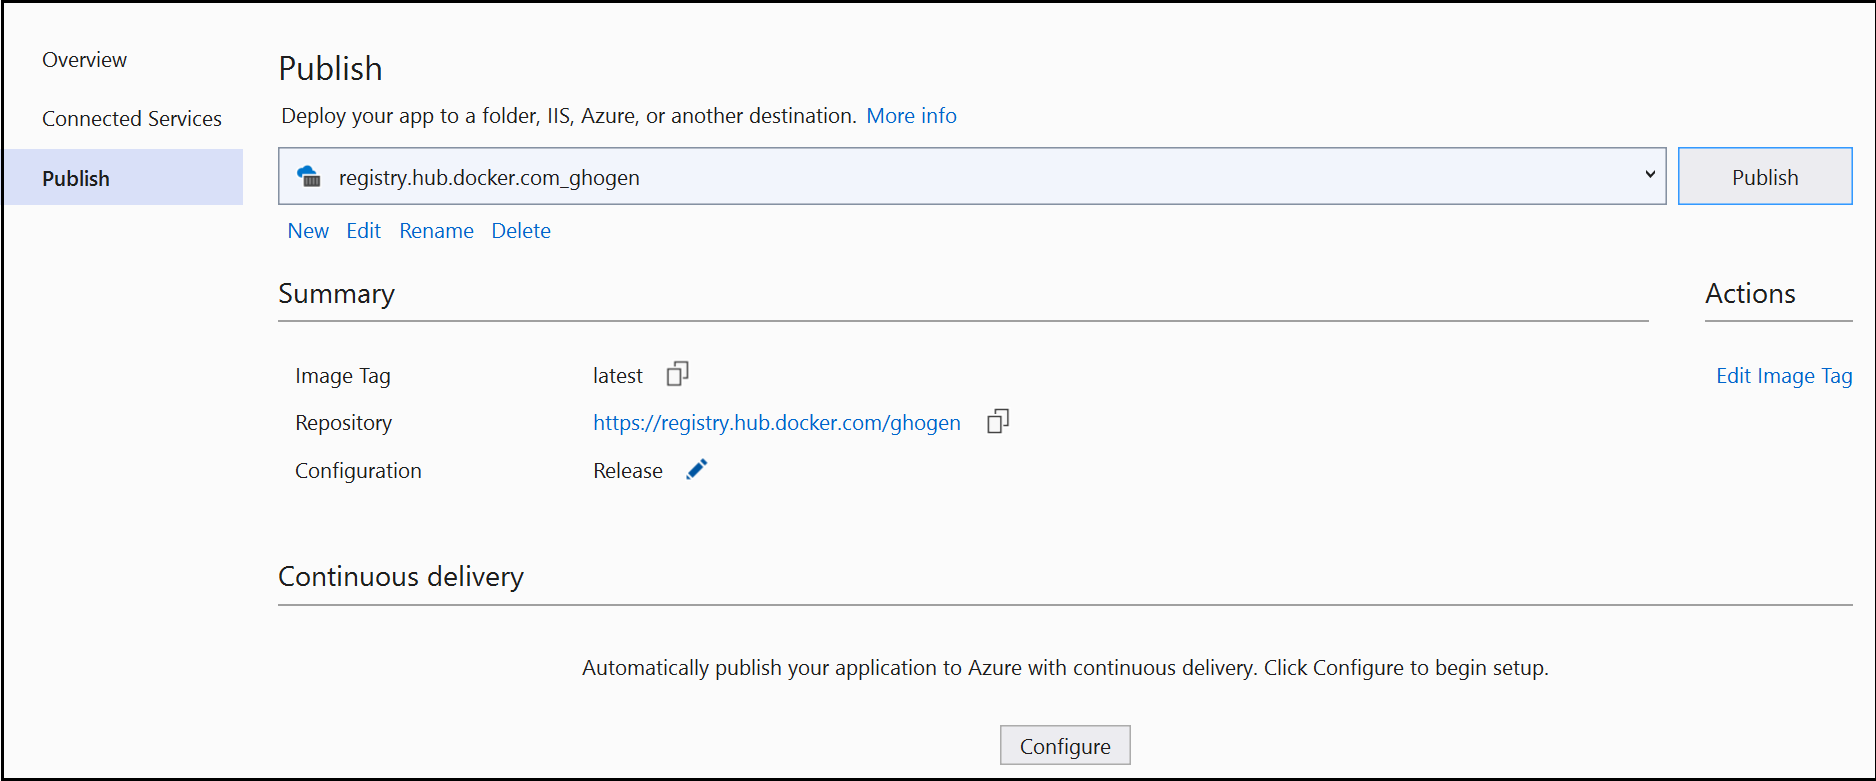
Visual Studio attempts to deploy your image to the Docker Hub. If successful, the Publish screen appears with the URL for the repository image, the image tag, repository, and the build configuration (for example, Release).
You can update the image at any time by clicking on the Publish button on this page. Or, you can modify or remove the profile, by using the links underneath the URL.
This certification measures your ability to accomplish the following technical tasks: Design and implement processes and communications, design and implement a source control strategy, design and implement build and release pipelines, develop a security and compliance plan, and implement an instrumentation strategy.
Build a container project in Visual Studio using the command line, either with MSBuild.exe or using Docker build, and learn how to enable detailed build logs.
Explore tools available for working with Docker containers in Visual Studio for Windows, including CI/CD, and choose whether to work with a Dockerfile, or build a containerized app without a Dockerfile.