Connect to projects in Team Explorer
Team Explorer connects Visual Studio 2019 and earlier to Team Foundation version control (TFVC) repositories, and to projects hosted on Azure DevOps Services or an on-premises Azure DevOps Server (formerly known as Team Foundation Server, or TFS). You can manage source code, work items, and builds.
Important
With the release of Visual Studio 2019 version 16.8, the Git version control experience is on by default. If you'd like to learn more about how it compares with Team Explorer, see the Side-by-side comparison of Git and Team Explorer page.
However, if you prefer to continue to use Team Explorer in Visual Studio 2019, go to Tools > Options > Environment > Preview Features and then toggle the New Git user experience checkbox. (This option is not available in Visual Studio 2022 and later.)
How you use Team Explorer to connect to a project depends on the version of Visual Studio 2019 you're using.
In Visual Studio 2019 version 16.8 and later
Open Visual Studio 2019.
On the start window, select Clone a repository.
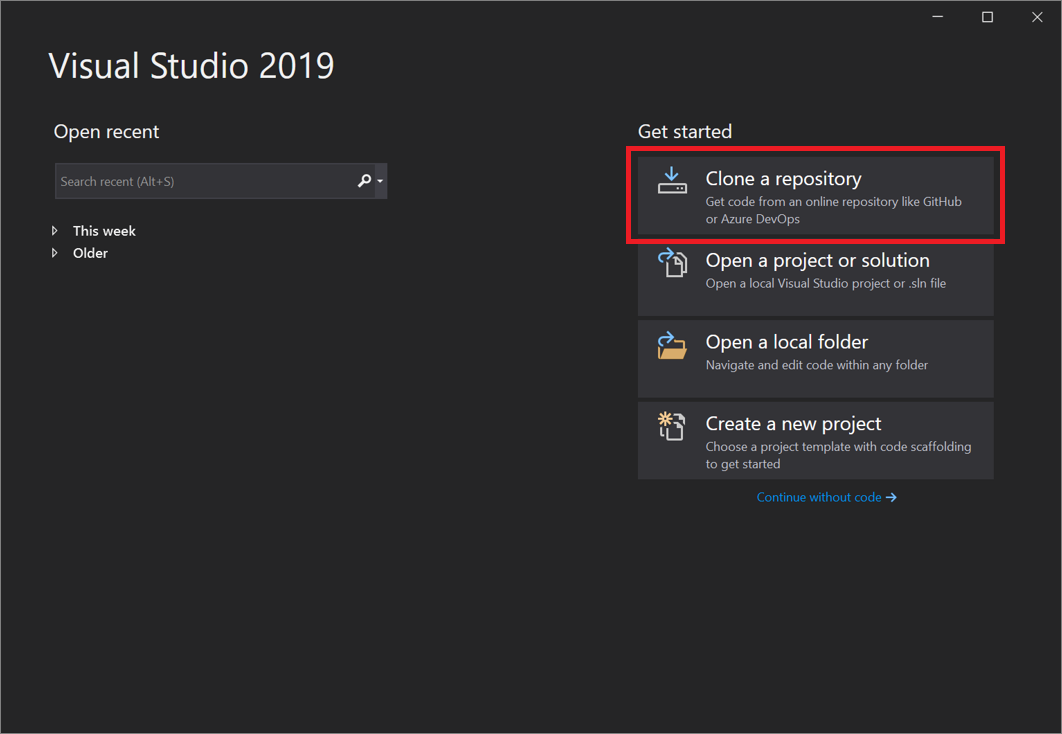
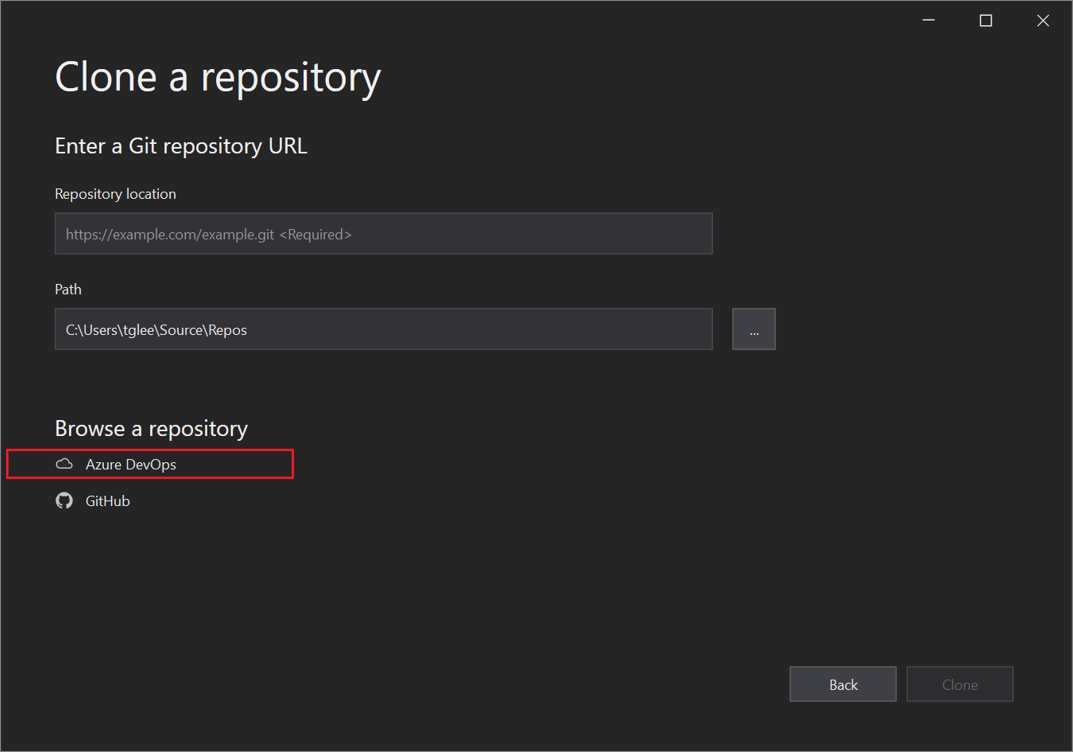
In the Browse a repository section, select Azure DevOps.
If you see a sign-in window, sign in to your account.
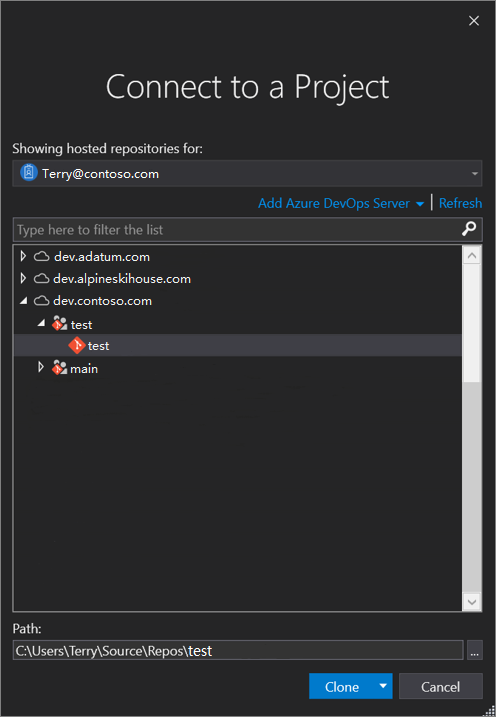
In the Connect to a Project dialog box, choose the repo that you want to connect to, and then select Clone.
Tip
If you don't see a pre-populated list of repos to connect to, select Add Azure DevOps Server to enter a server URL. (Alternatively, you might see a "No servers found" prompt that includes links to add an existing Azure DevOps Server or to create an Azure DevOps account.)
Next, Visual Studio opens Solution Explorer that shows the folders and files.
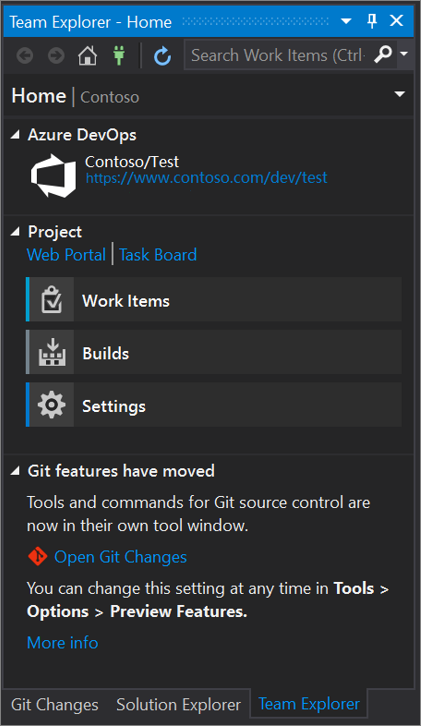
Select the Team Explorer tab to view the Azure DevOps actions.
In Visual Studio 2019 version 16.7 and earlier
Open Visual Studio 2019.
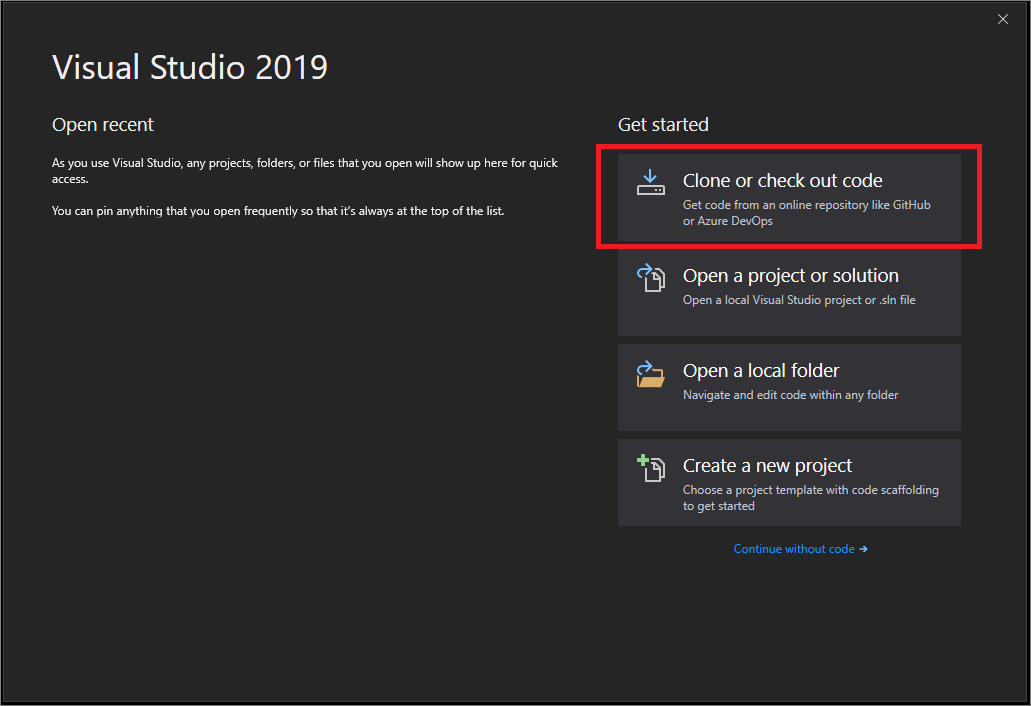
On the start window, select Clone or check out code.
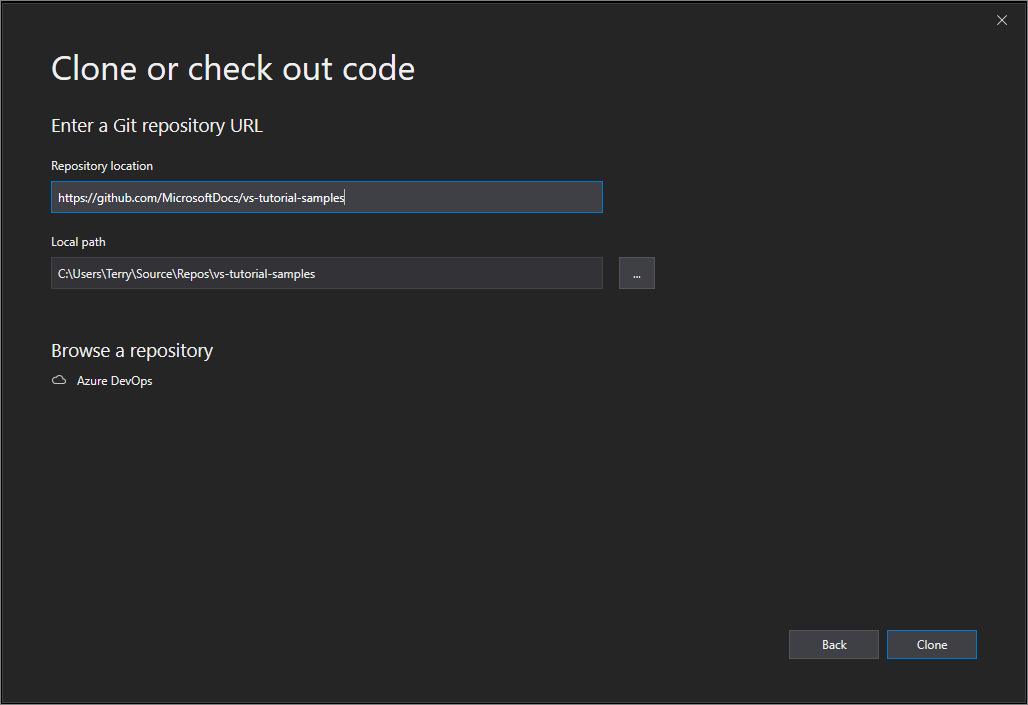
In the Browse a repository section, select Azure DevOps.
If you see a sign-in window, sign in to your account.
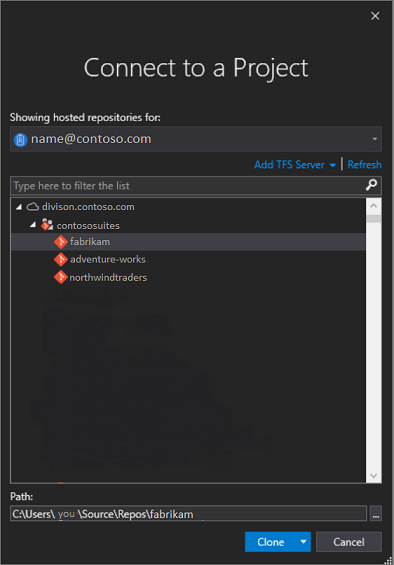
In the Connect to a Project dialog box, choose the repo that you want to connect to, and then select Clone.
Note
What you see in the list box depends on the Azure DevOps repositories that you have access to.
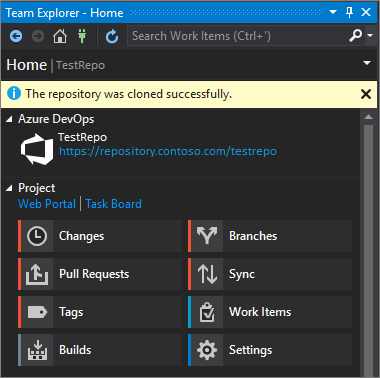
Visual Studio opens Team Explorer and a notification appears when the clone is complete.
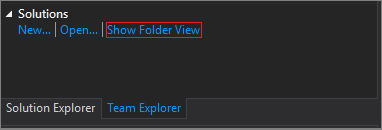
To view your folders and files, select the Show Folder View link.
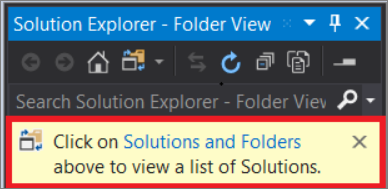
Visual Studio opens Solution Explorer.
Choose the Solutions and Folders link to search for a solution file (specifically, an .sln file) to open.
If you do not have a solution file in your repo, a 'No Solutions Found' message appears. However, you can double-click any file from the folder menu to open it in the Visual Studio code editor.
Related content
Explore the following resources to continue your learning:
Feedback
Coming soon: Throughout 2024 we will be phasing out GitHub Issues as the feedback mechanism for content and replacing it with a new feedback system. For more information see: https://aka.ms/ContentUserFeedback.
Submit and view feedback for