Dynamics 365 integration
Dynamics 365 is an enterprise resource planning (ERP) and customer relationship management (CRM) solution provider that includes many intelligent business applications, such as Sales, Customer Service, Marketing, Project Service, Field Service, Social Engagement, HR, and more.
Integrating Viva Goals with Dynamics 365 allows you to automatically update key results and initiatives with metrics from any Dynamics 365 app, enabling leaders and managers to obtain a holistic view of business operations from within Viva Goals.
Set up Dynamics 365 integration
Tenant admin configuration
A tenant administrator can enable Dynamics 365 integration for all Viva Goals organizations in their tenant by following the steps below:
Log in to Viva Goals as a tenant admin.
In the top right corner, select the Viva Goals Admin Center icon to go to the Admin portal.
In the left-hand navigation, select Integrations.
Find the Dynamics 365 integration and toggle its status to On, then select Save.
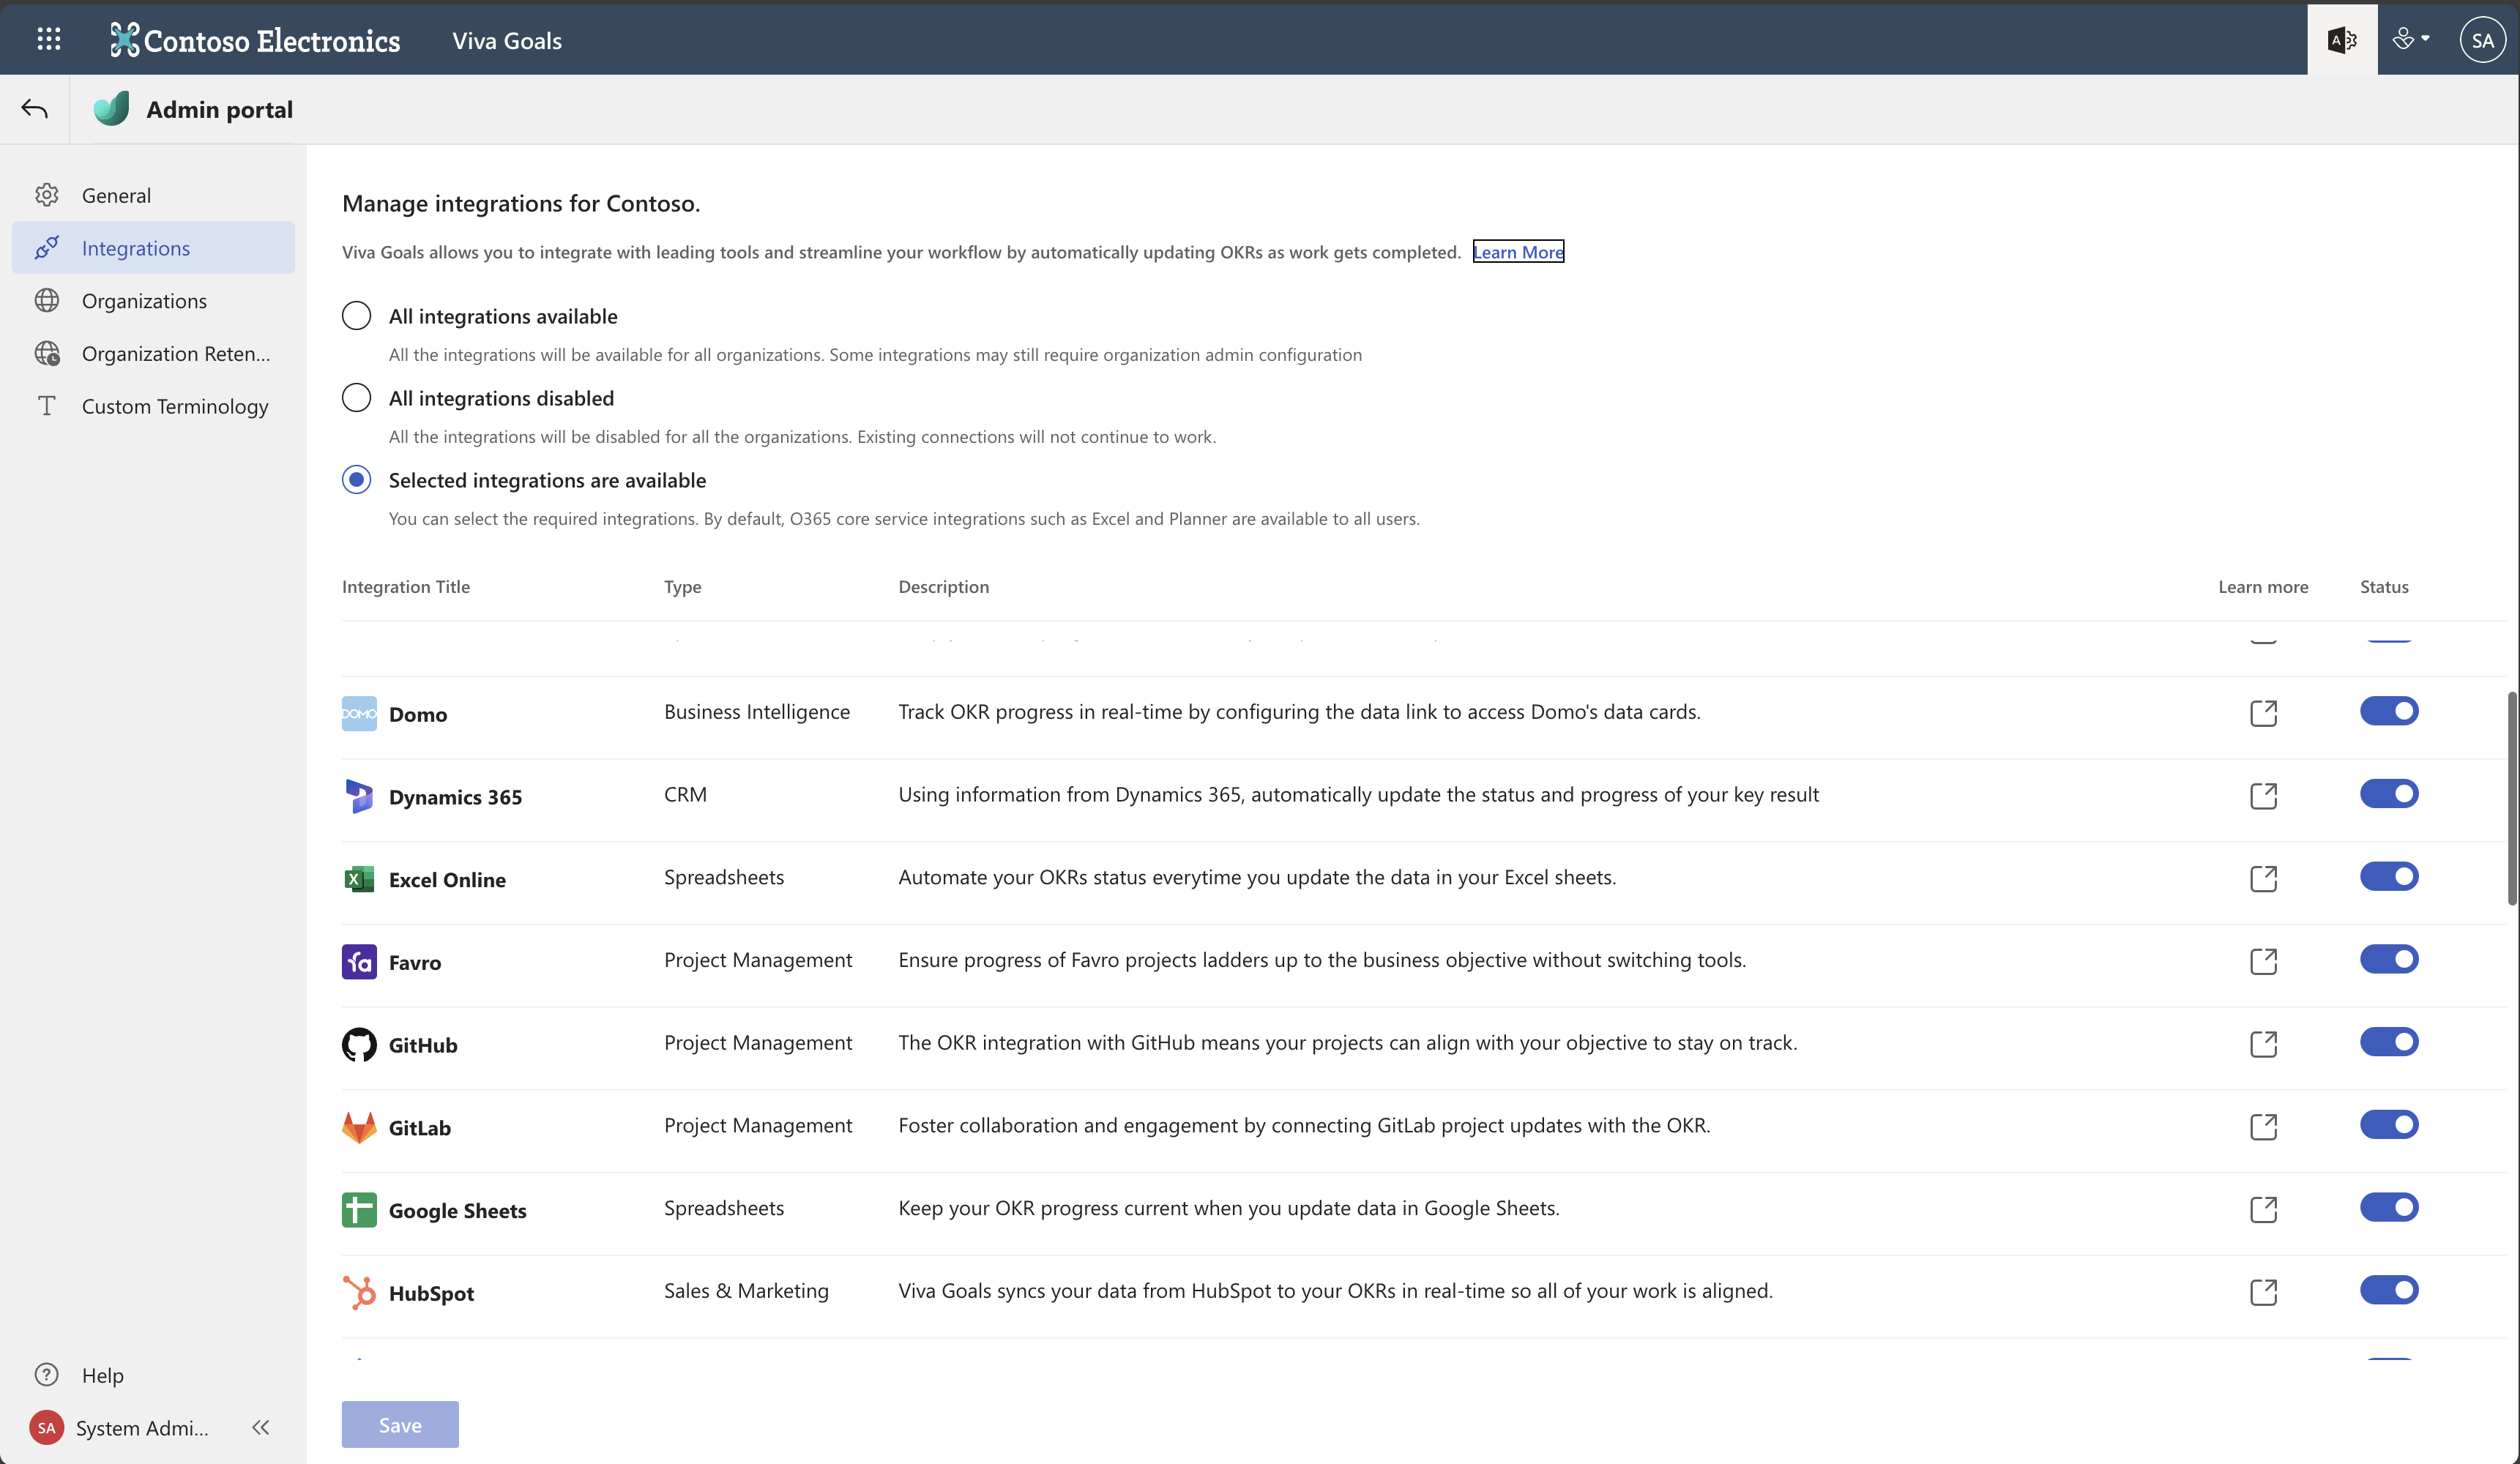

Once the tenant admin enables the integration, the Dynamics 365 integration will be available to all the Viva Goals organizations within the tenant.
Organization admin configuration
An organization admin can use these steps to enable the Dynamics 365 integration within their specific Viva Goals organization:
Log in to Viva Goals as an organization admin.
Starting from the navigation sidebar, go to Admin > Integrations.
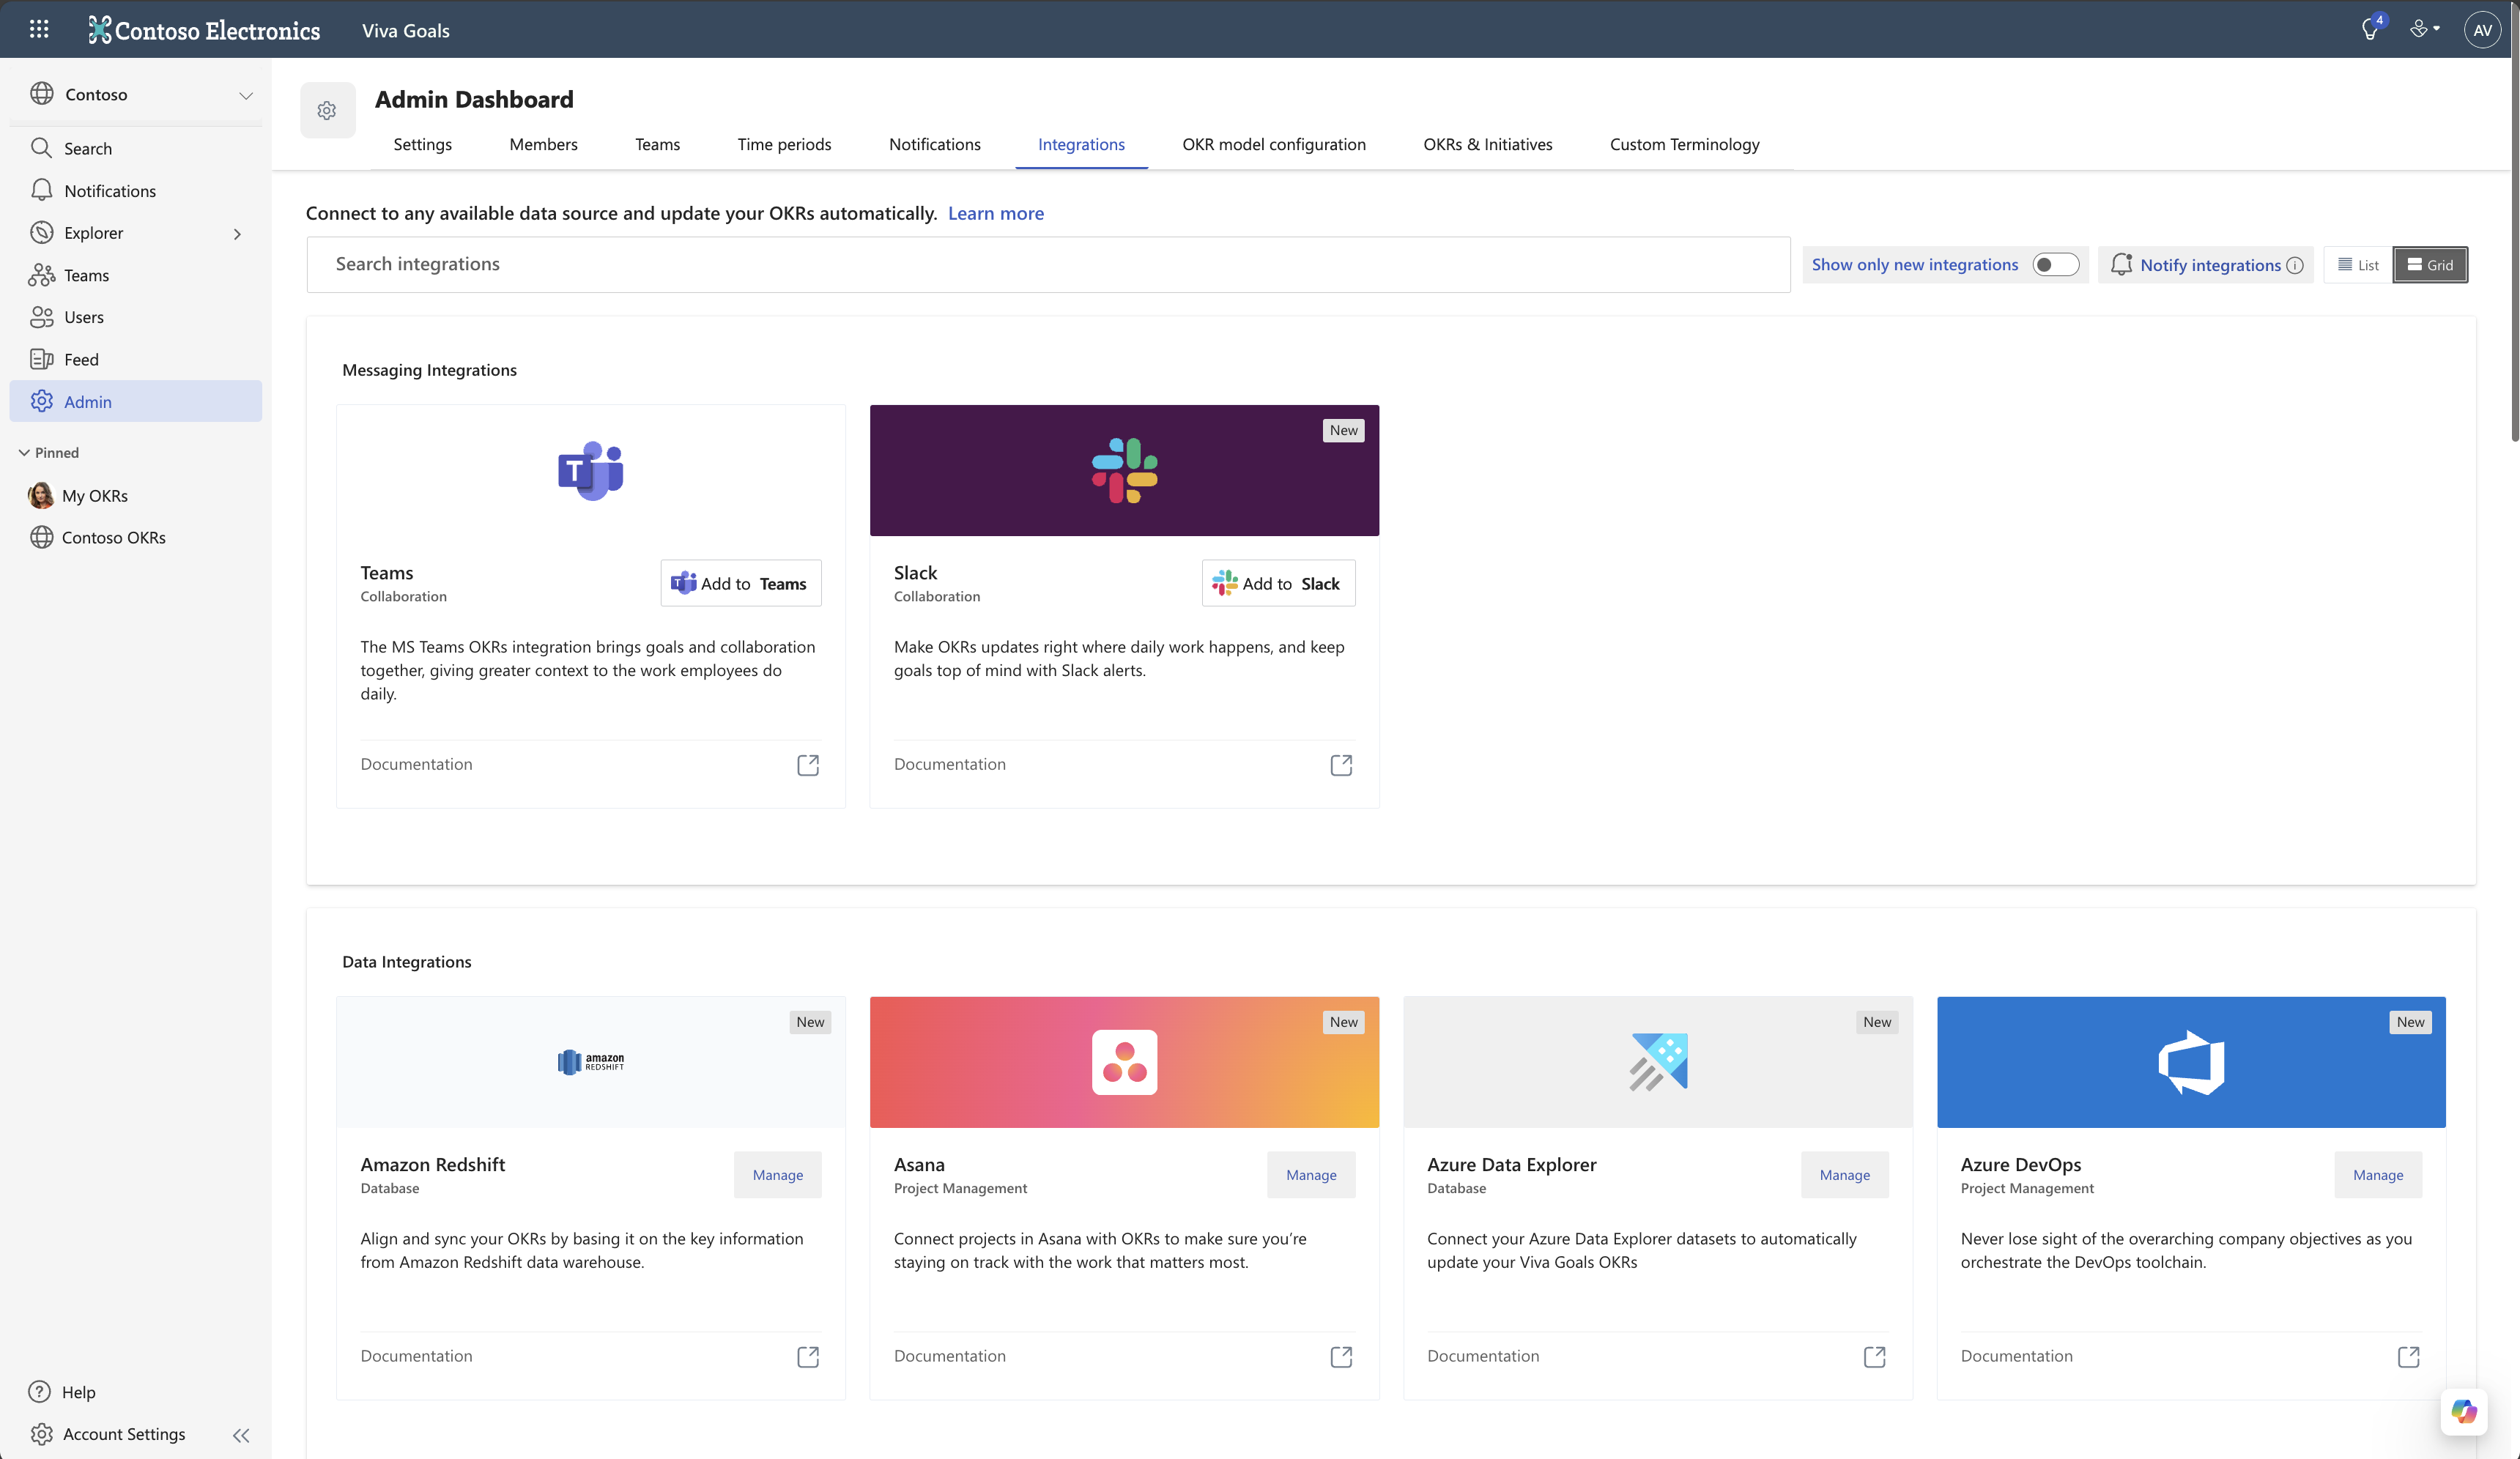
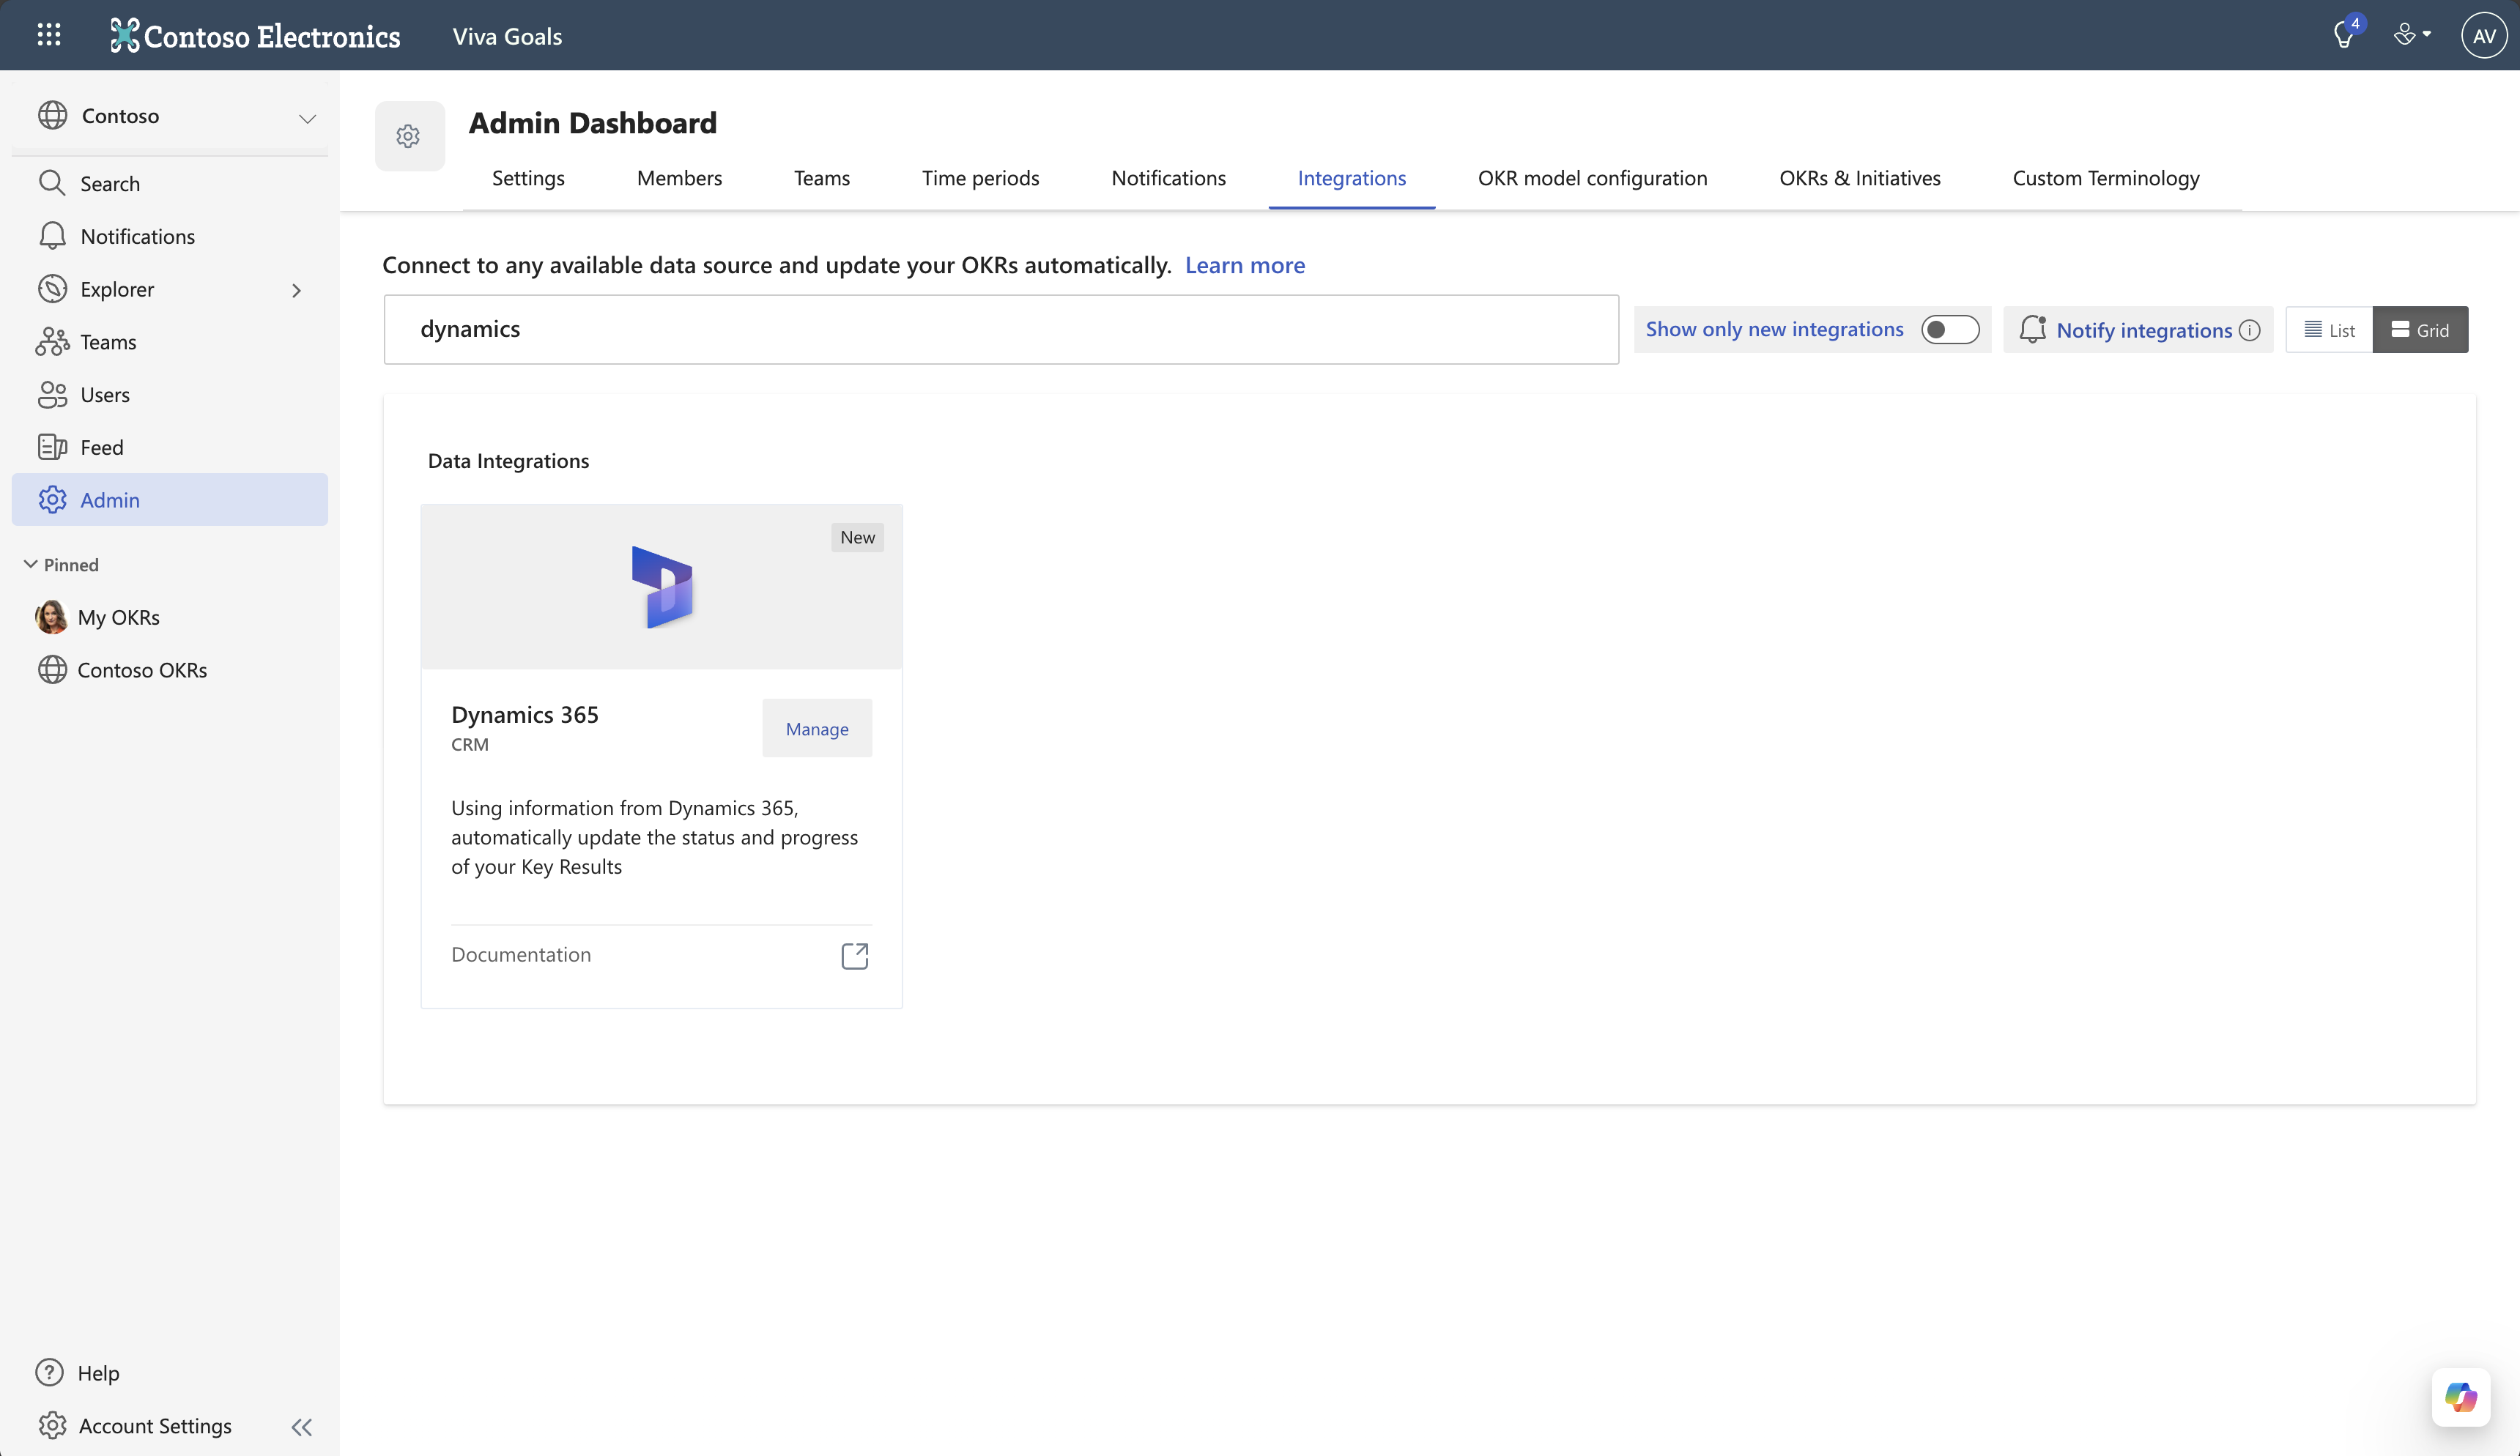
Navigate to Dynamics 365 and select Enable (or Manage if the integration has already been enabled).
Select New Connection and follow the prompts to sign in with your Microsoft credentials.

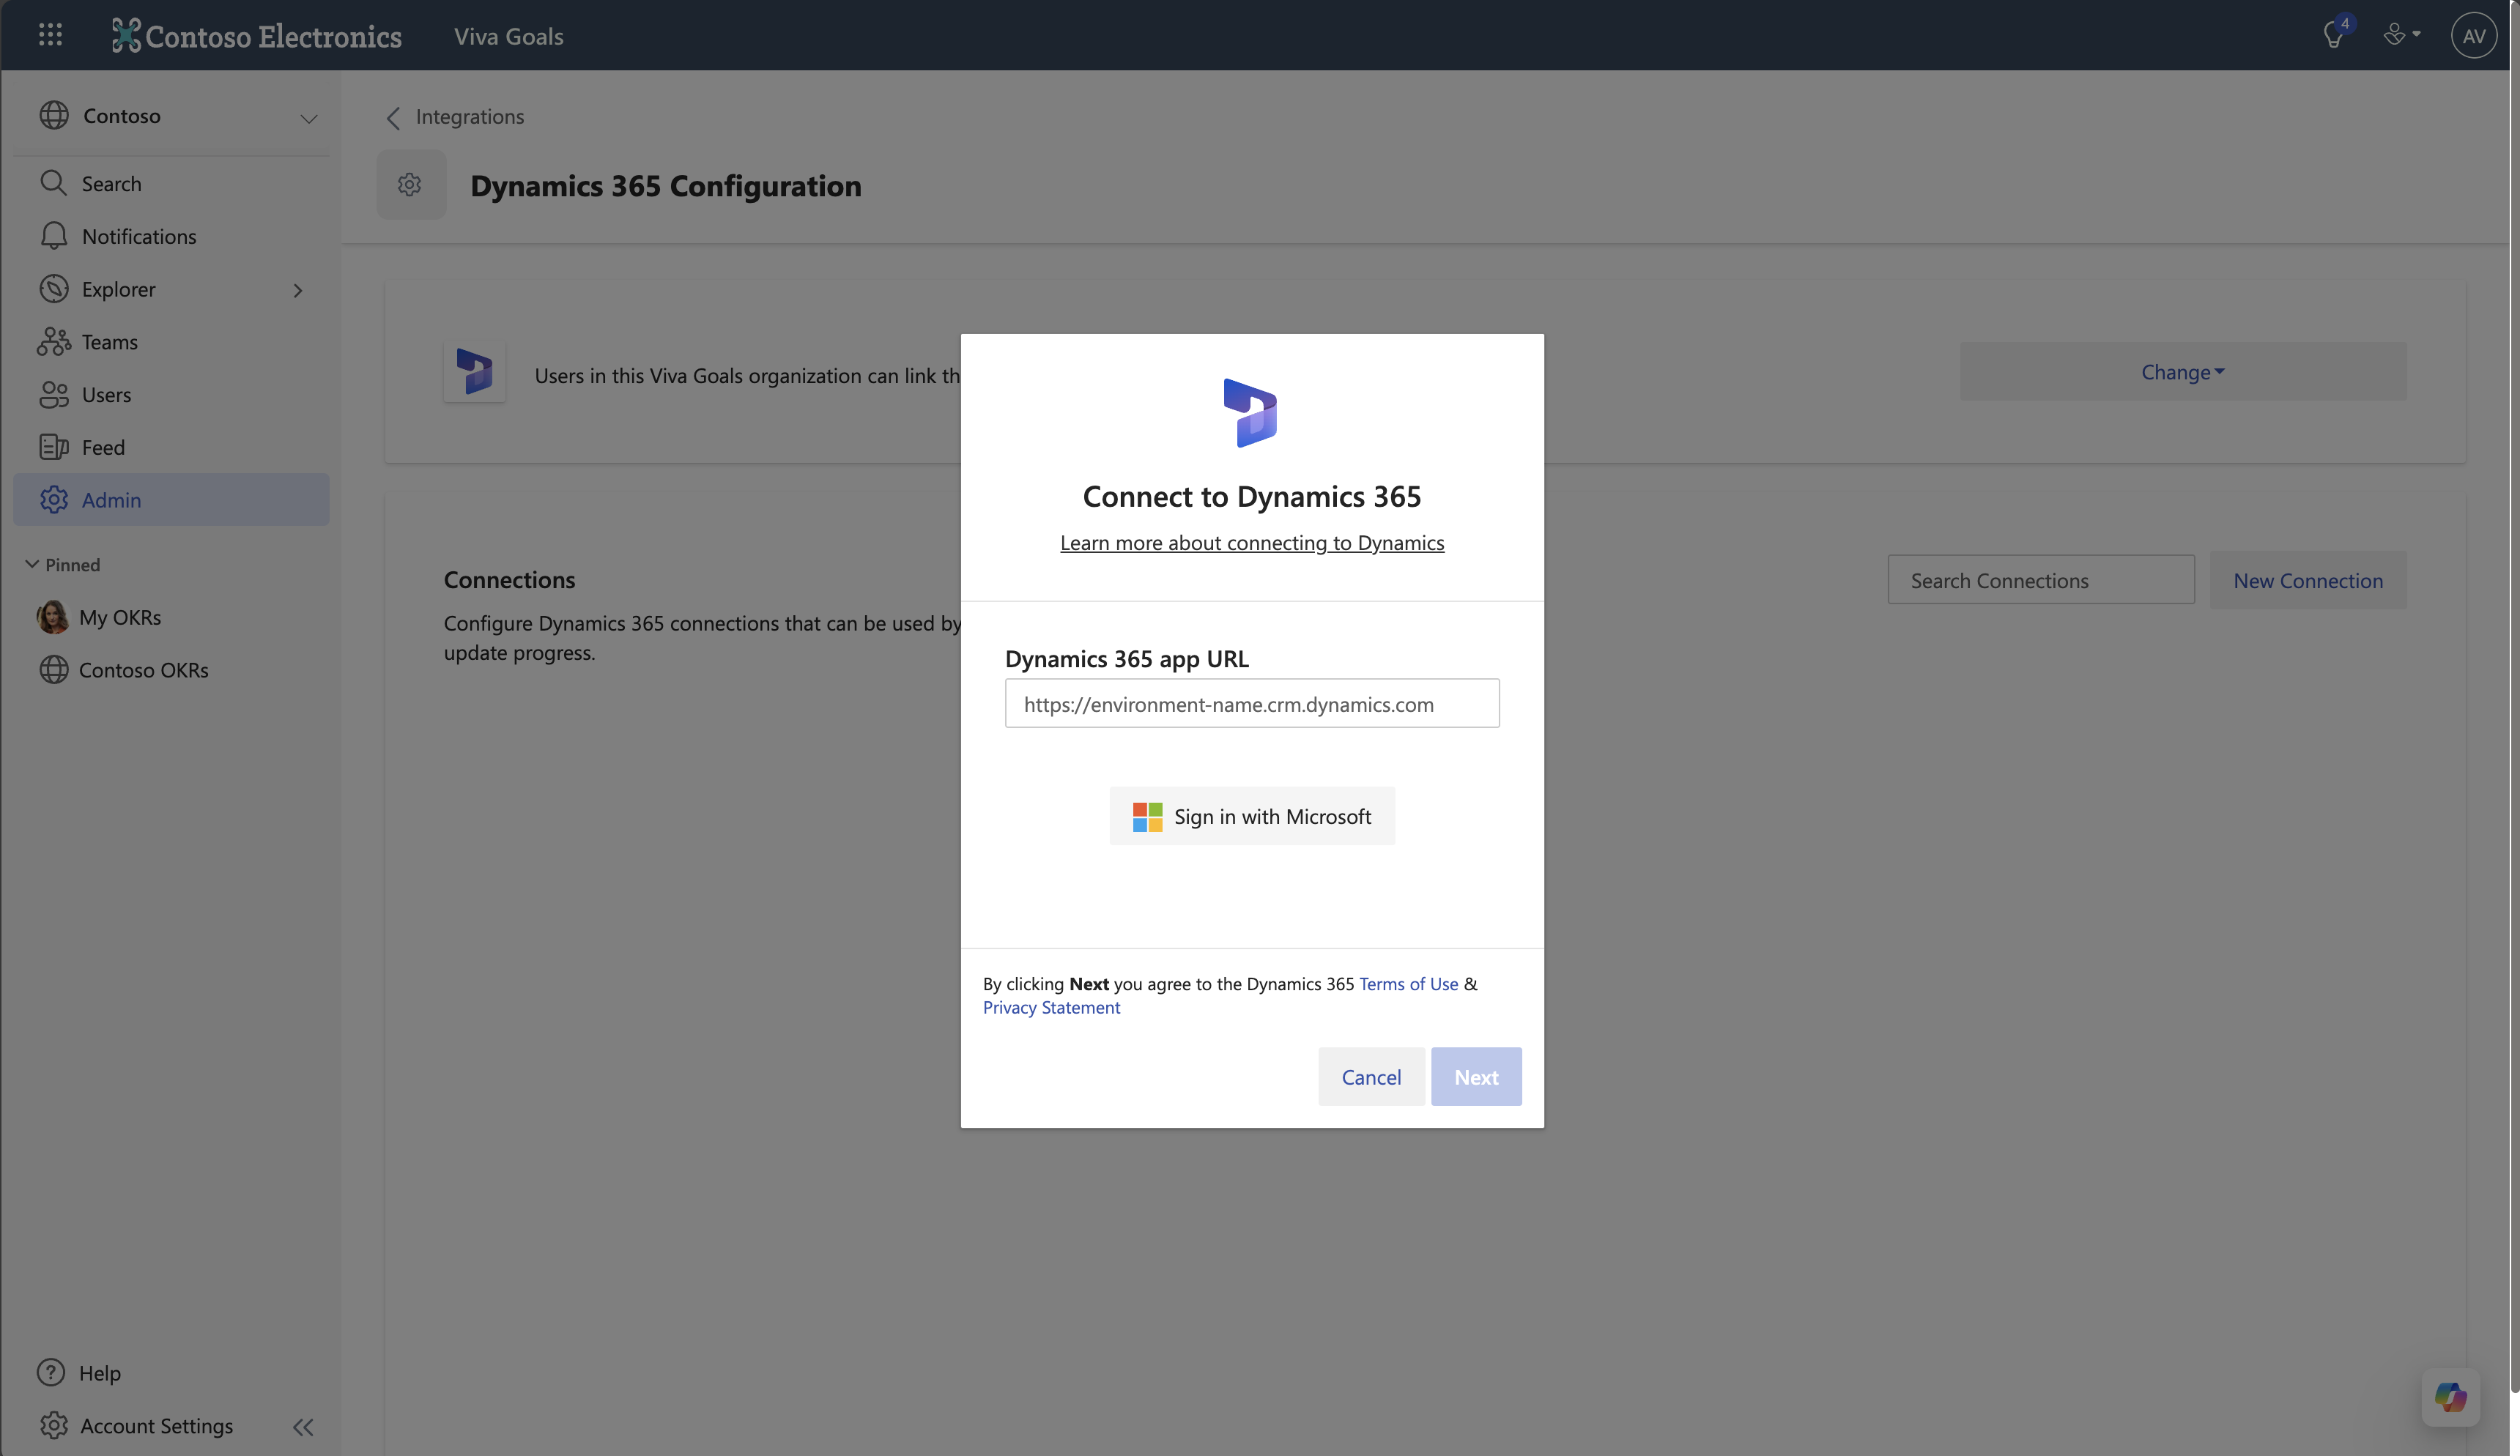
Select Next to complete the setup.


Viva Goals allows you to connect with multiple Dynamics 365 accounts. Select New Connection to continue adding accounts. Each account should have a unique name. Users will be allowed to swap connections when they link their key results to Dynamics 365.
Connect Dynamics 365 metrics to a key result
After setup is complete, users within your organization can link their key results (KRs) to any Dynamics 365 metric by connecting to a view or report in Dynamics 365.
Add a new key result or edit an existing key result by selecting that key result's More options (...) > Edit.
Under Progress and Status, there's a section with the text "Connect to a data source for automatic progress updates" followed by a list of integration icons. Select the Dynamics 365 icon. If you have multiple Dynamics 365 connections, select the connection that your view is associated with before proceeding to the next step.
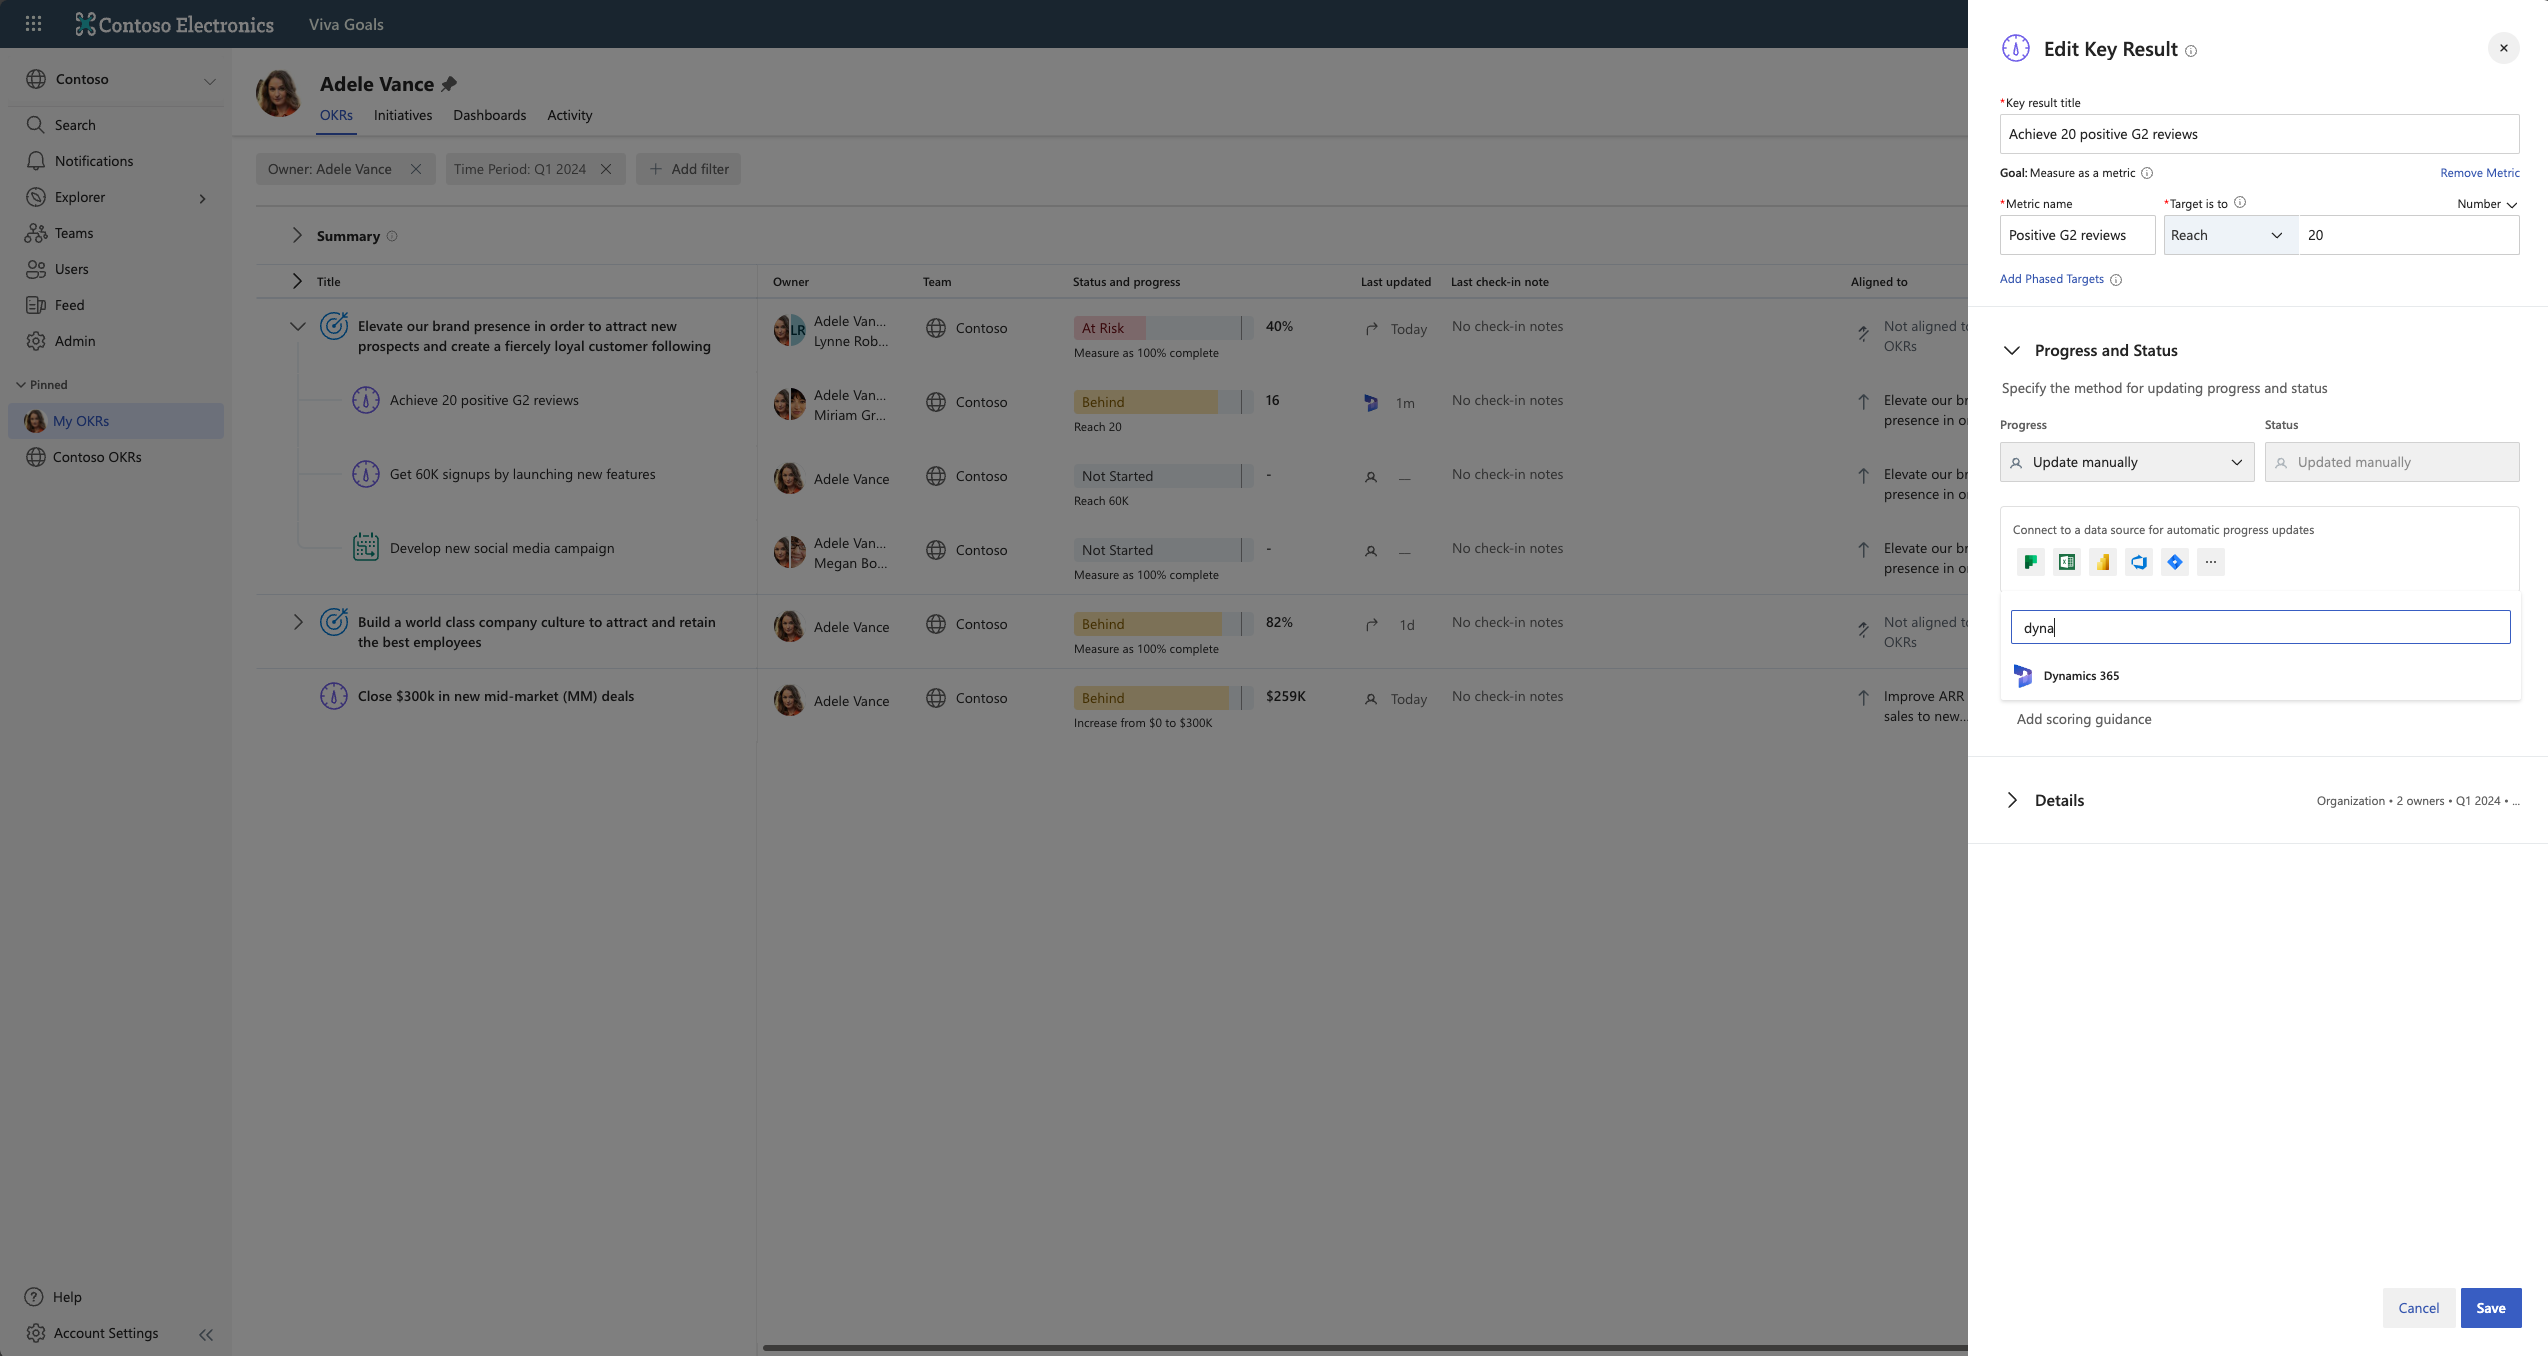
In the App field, select the Dynamics 365 app of your choice to connect its metrics to the KR.
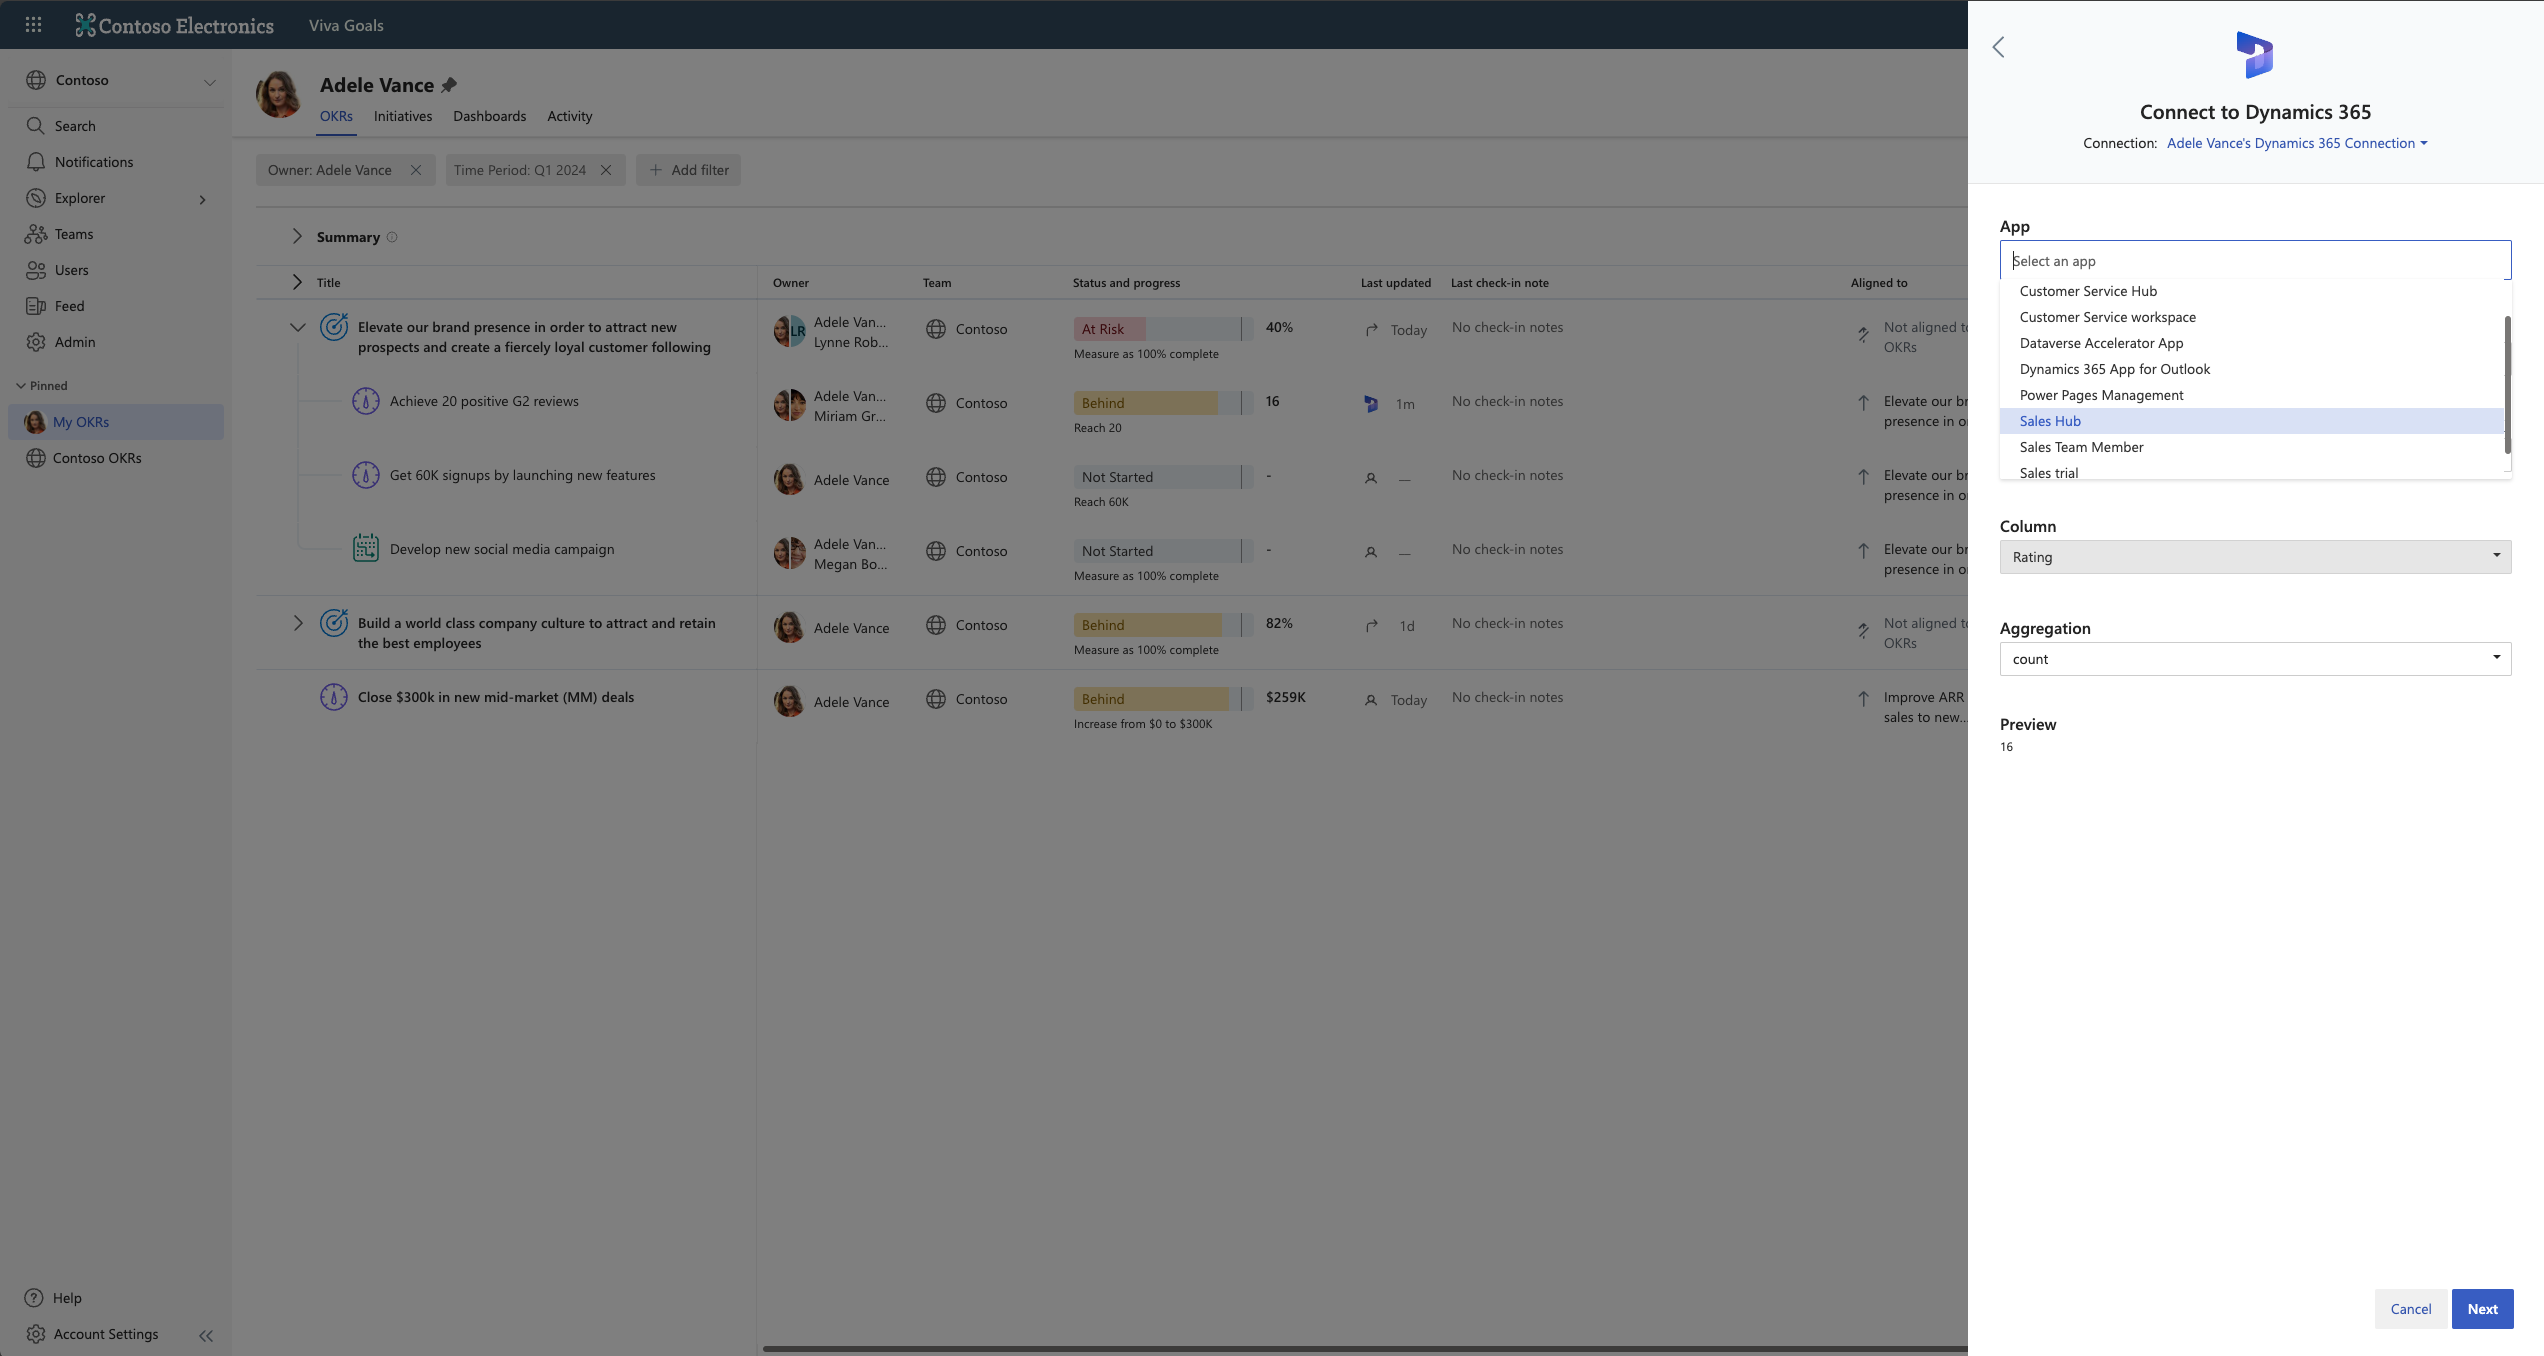
In the Site map entity field, select the entity within the app that measures the metric's progress.

In the View field, select the view you want to connect to.

In the Column field, select the column (of the view) that you want to designate as the metric for success. The available fields will vary based on the configuration of the view you select.

In the Aggregation field, choose an aggregation based on the type of KR view and how you want to calculate progress.

Select Next and then Save to finish updating your key result.
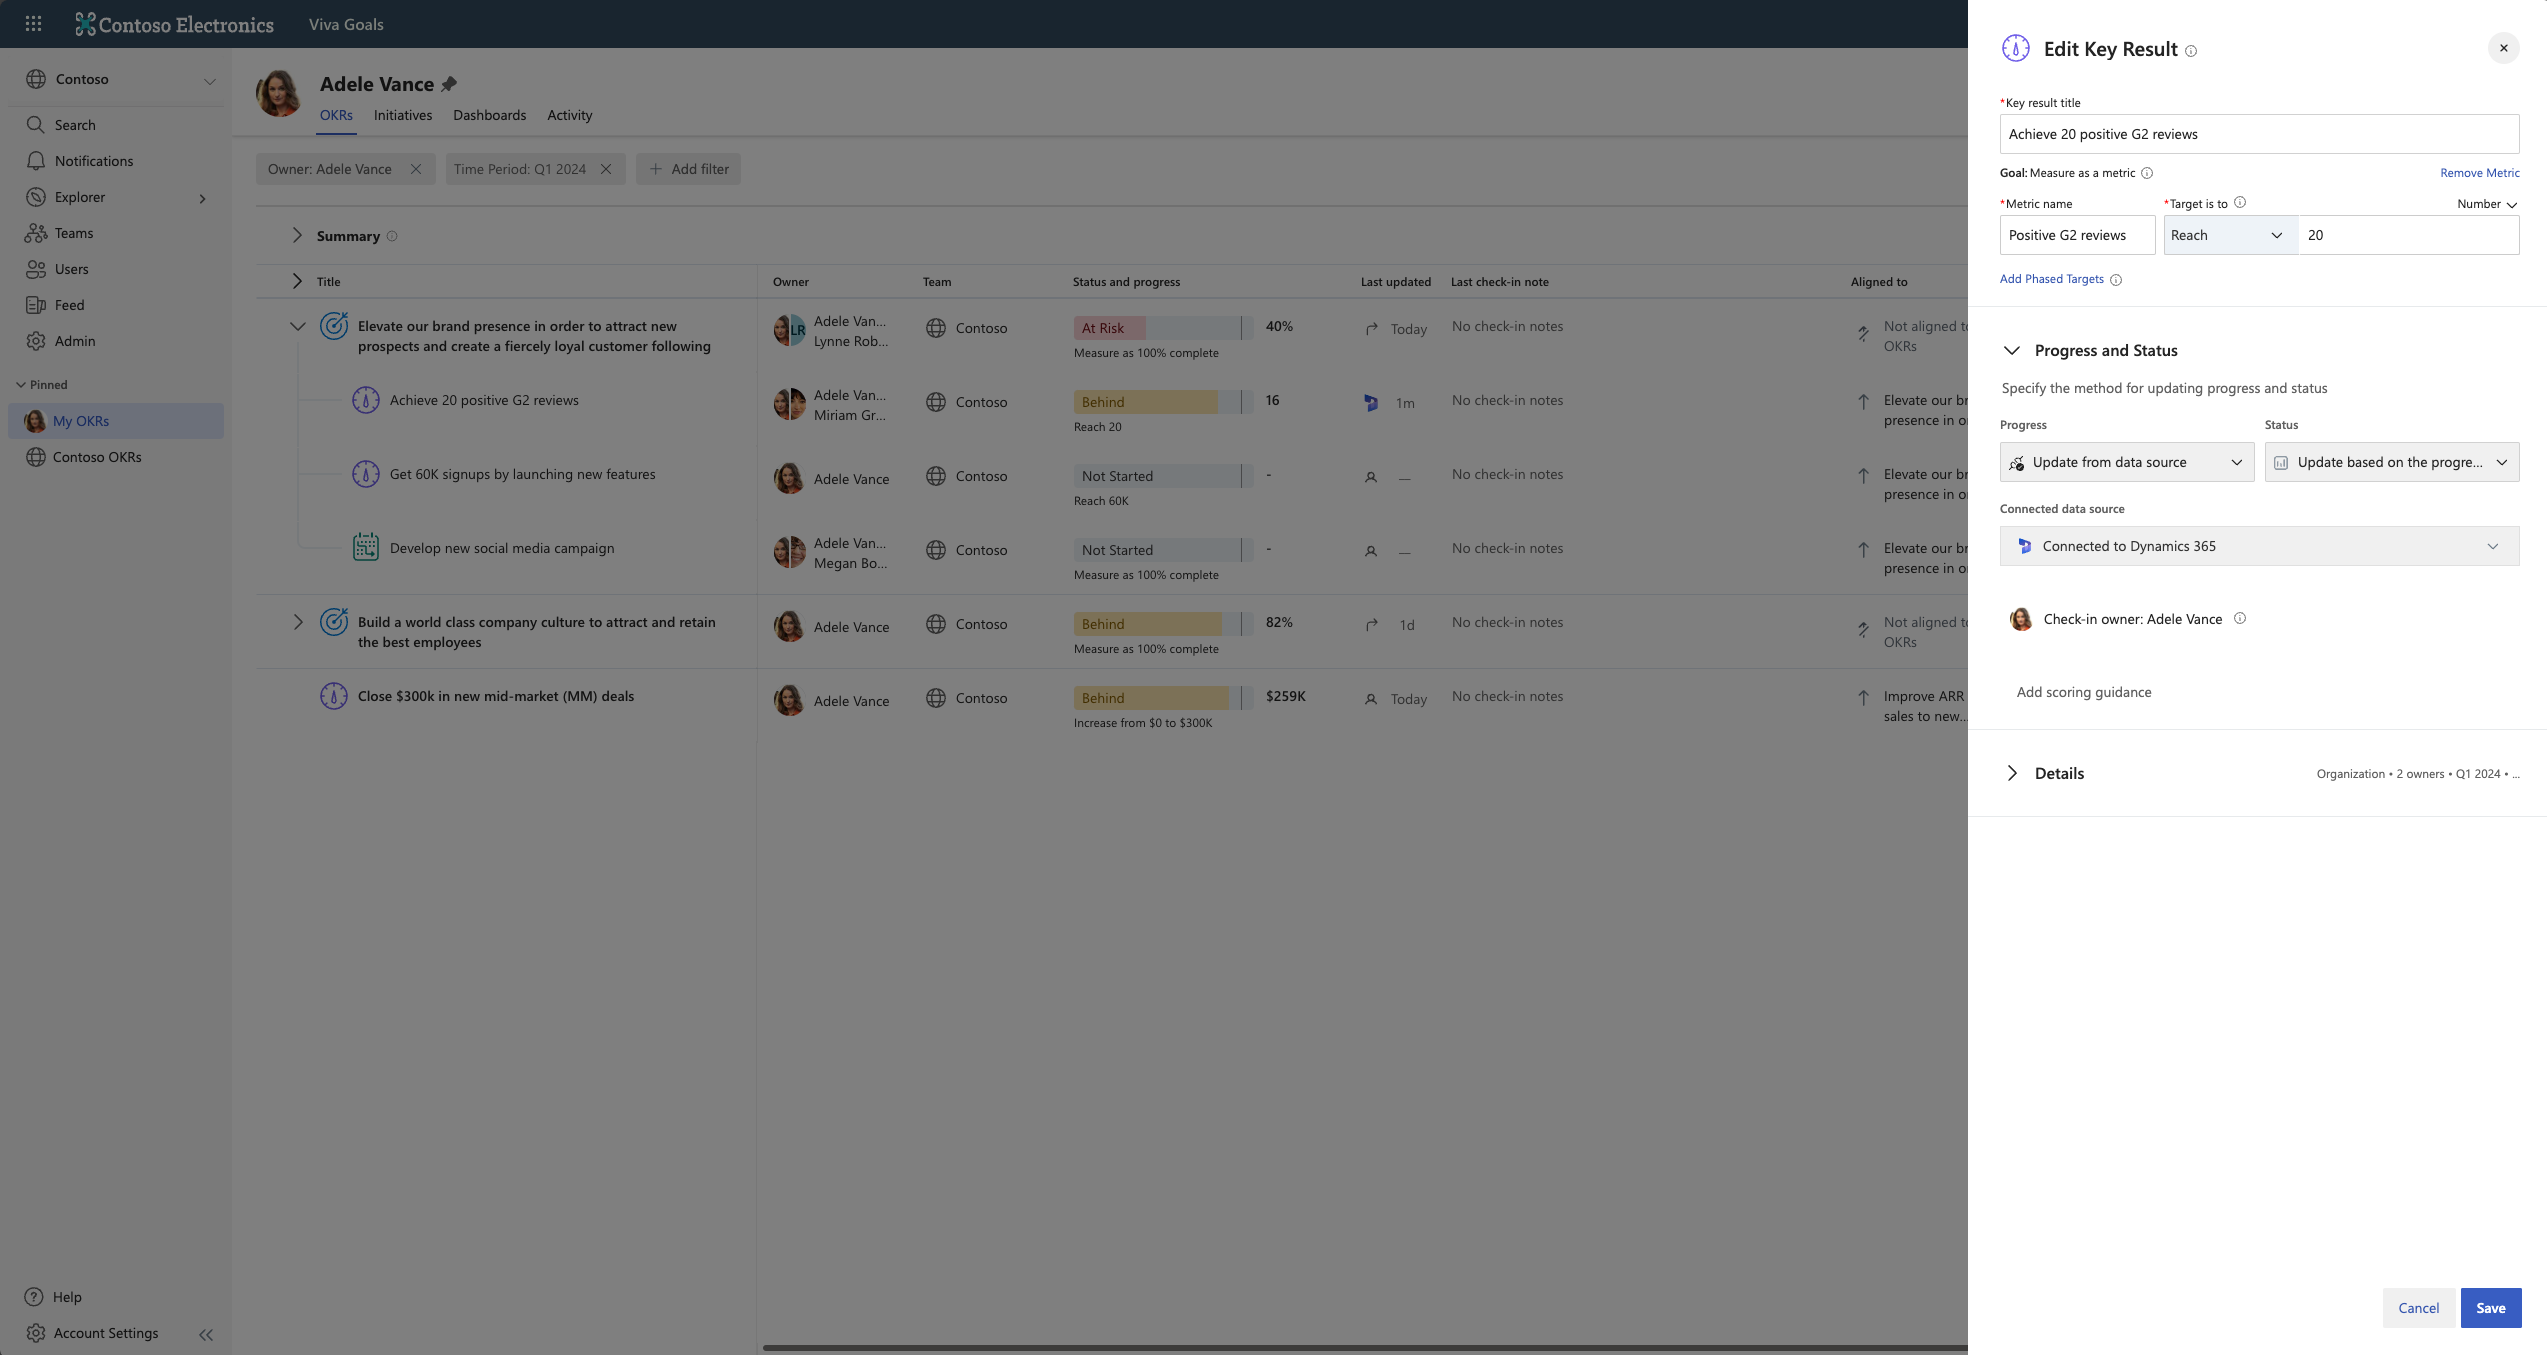


You should now see a Dynamics 365 icon next to the key result's progress bar. The key result will automatically sync every hour. To refresh it manually, select the Dynamics 365 icon and choose Sync.

Feedback
Coming soon: Throughout 2024 we will be phasing out GitHub Issues as the feedback mechanism for content and replacing it with a new feedback system. For more information see: https://aka.ms/ContentUserFeedback.
Submit and view feedback for