Automate query data exports to Azure
With Microsoft Entra ID, you can automate the export of query data from Microsoft Viva Insights in Workplace Analytics. You can do this by using an OData query link in Workplace Analytics to connect and automatically refresh an Azure data store of your choice, such as through Azure Data Factory or Azure Synapse Analytics.
Pick a setup path
To set up the automated OData connection between query data and an Azure data store, use one of the following paths to create and configure a new Azure analytics app, which needs company-specific information (secrets) about your private network and your choice data store.
- Set up with Azure Data Factory UI – This path steps you through creating and registering an app and creating a data factory for the data export through the Azure Data Factory UI.
- Set up with Azure Synapse Analytics - This path steps you through creating and registering an app and creating an OData pipeline for exporting query data through the Azure Synapse Analytics.
- Set up with Azure PowerShell – This path automates the process end-to-end through PowerShell with predefined scripts that create and register the app, prompt for your organization’s specific parameters, and create and deploy the data factory.
Prerequisites
- Viva Insights or Workplace Analytics analyst – Must be assigned a license and an Analyst role for Viva Insights or Workplace Analytics and have query results with the data you want to export.
- Microsoft Azure subscription – If you don't have an Azure subscription, create a free account now. You’ll be using Microsoft Entra ID, OData connector, and Data Factory for this setup.
- Azure data store – Your data store must be supported by the OData connector.
- Azure admin – You need Azure admin privileges to create and register the app in Azure. You also need to ask the Azure global admin to grant you permissions in Azure Data Factory to connect your new app to the Azure data store.
To set up with Azure Data Factory UI
The following steps you through how to automate the export of Workplace Analytics query data to your choice Azure data store with the Azure Data Factory UI. Use the following steps in conjunction with the Azure documentation to complete this setup.
Follow the steps in Register an application using the Azure portal to create and register a new analytics app in Microsoft Entra ID.
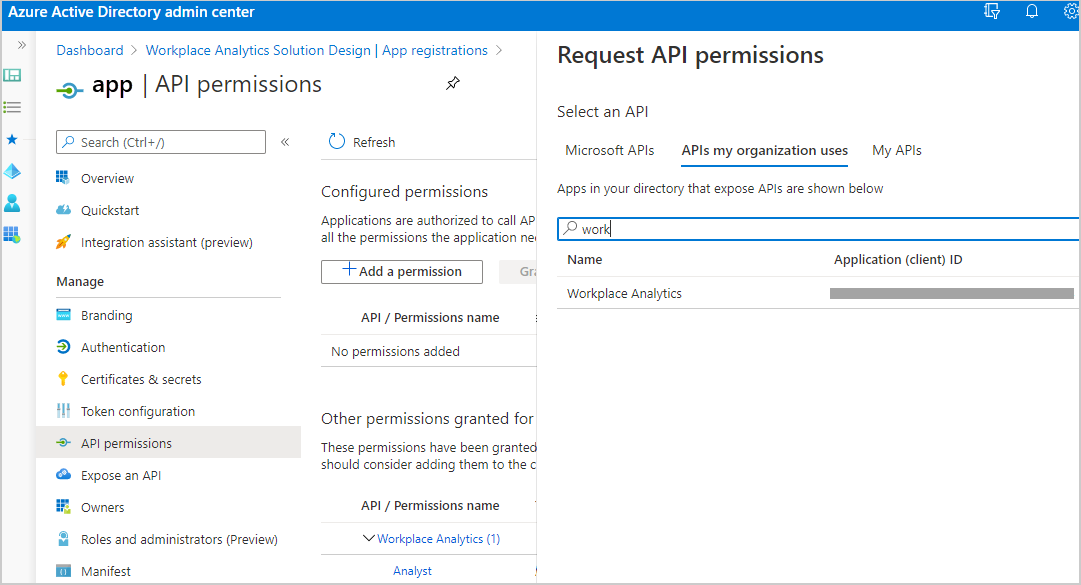
In Microsoft Entra App registrations, select the app from Step 1, and then grant it permissions for accessing Workplace Analytics by selecting View API permissions, and then select Add a permission.
Enter and search for the Workplace Analytics app name or ID and then select the applicable name from the list.
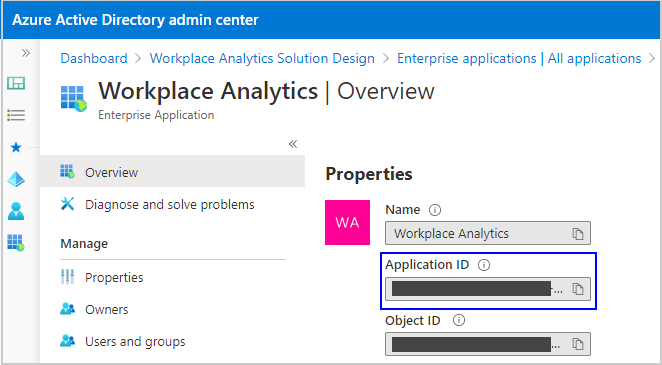
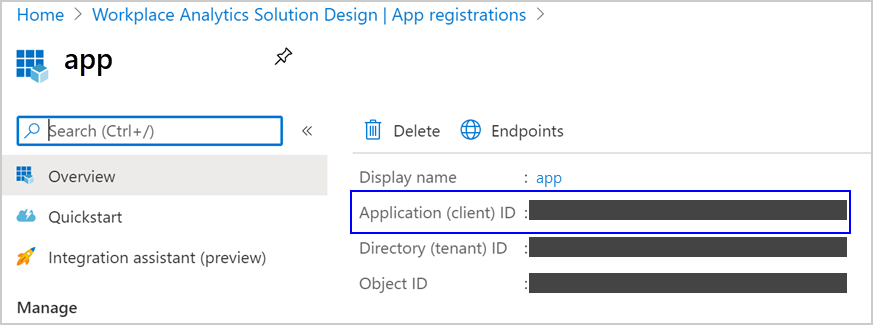
To find the Application (client) ID:
In Active Directory, select all applications, and then enter Workplace Analytics for the enterprise app that you want to use.
Select it from the list.
In Application ID, copy the ID and paste it in APIs my organization uses search field.
In Request API permissions, select Application permissions, select Analyst, and then select Add permissions.
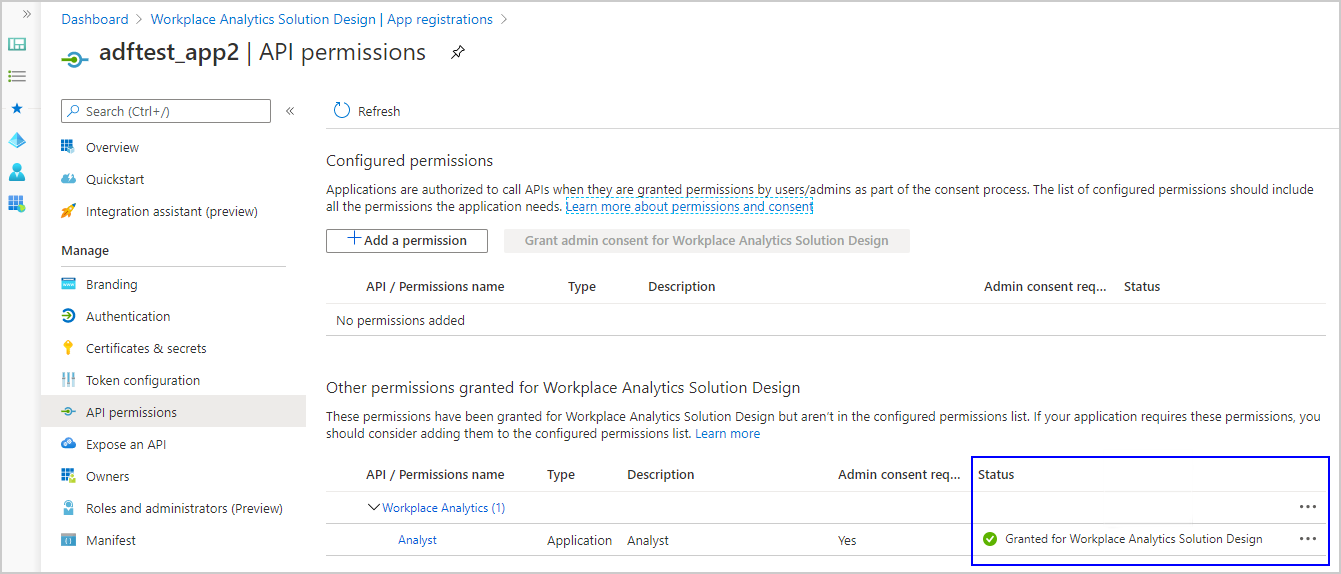
In API permissions, the global admin must select Grant admin consent for [Workplace Analytics…] before you can continue to the next step.
Follow the steps in Create data factory to create a new analytics data factory within Microsoft Entra ID.
In the Azure Data Factory Overview, select Author & Monitor to open Azure Data Factory.
Note
Keep all your browser windows open because you must switch between them to complete the following steps.
In Azure Data Factory, select Create a pipeline.
Select the ellipsis (...) next Datasets, and then select New dataset. For more details, see Datasets in Azure Data Factory.
In Select a data store, enter odata, and then select OData.
In General, enter a name and description for the query data you’re linking to.
Select Connection, select New, and then enter a name and description for the OData link, such as WPA_Odata_Collab.
In Connect via integration runtime, select AutoResolveIntegrationRuntime.
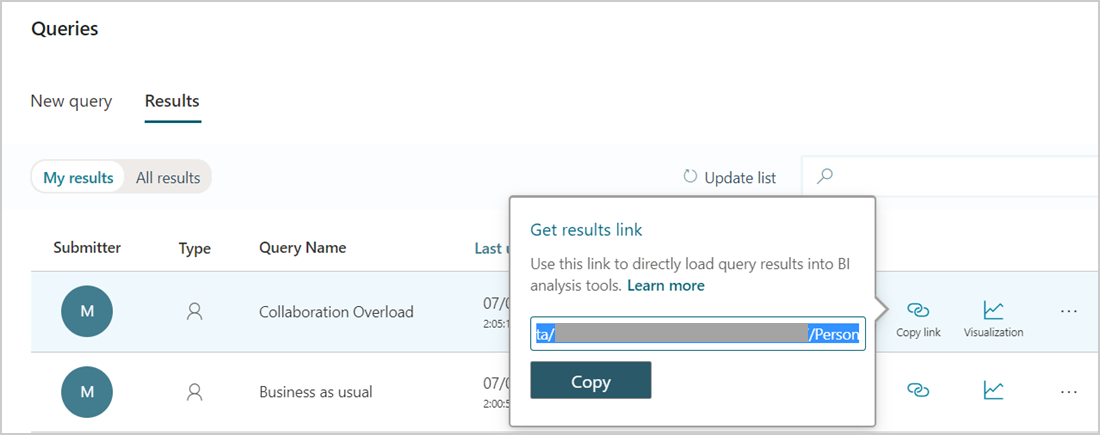
In Workplace Analytics, select Analyze > Query designer > Results, and then copy the OData link for the query data you want to connect to Azure.
Important
For automatically refreshed data, you must link to a query that uses the Auto-refresh option in Workplace Analytics. For static query results, you’ll need to enter a new OData link each time to update the query data in the connected Azure data store.
In Service URL, paste the query OData link that you copied in the previous step.
In Microsoft Entra resource, enter
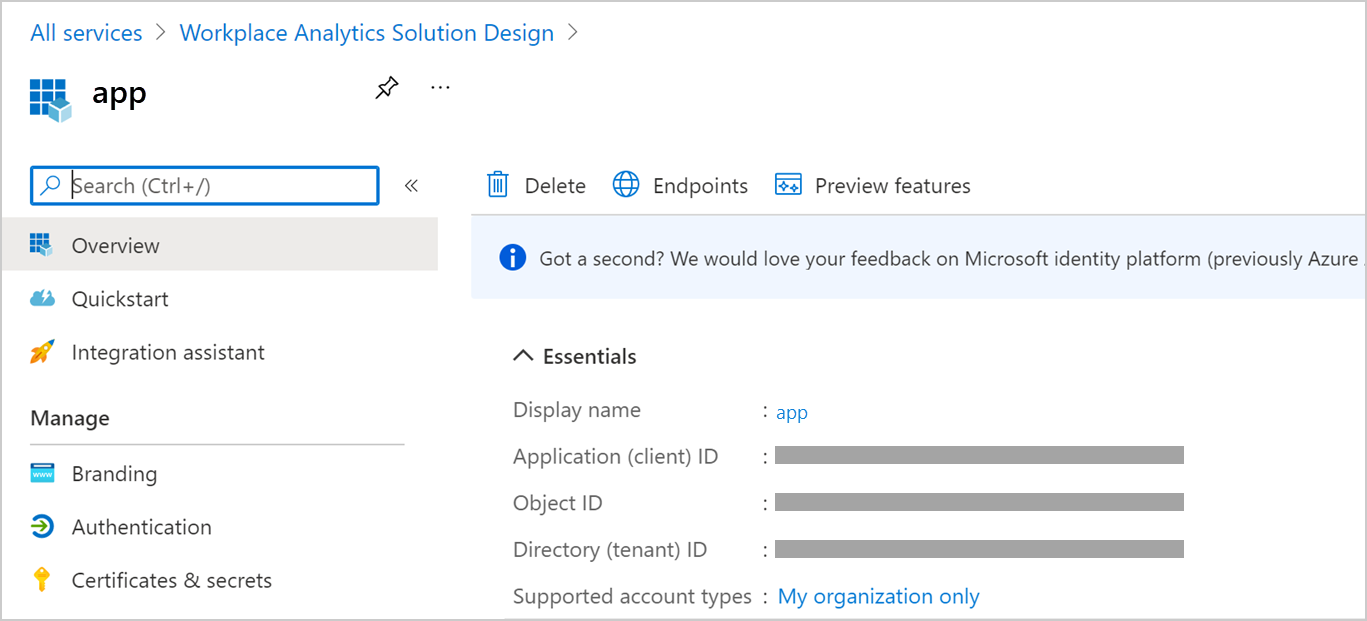
https://workplaceanalytics.office.com.In Active Directory, select Overview for the new app, and then copy the Application (client) ID.
In Azure Data Factory > New linked service > Service principal ID, copy the client ID. For details, see Screenshot that shows linked service properties..
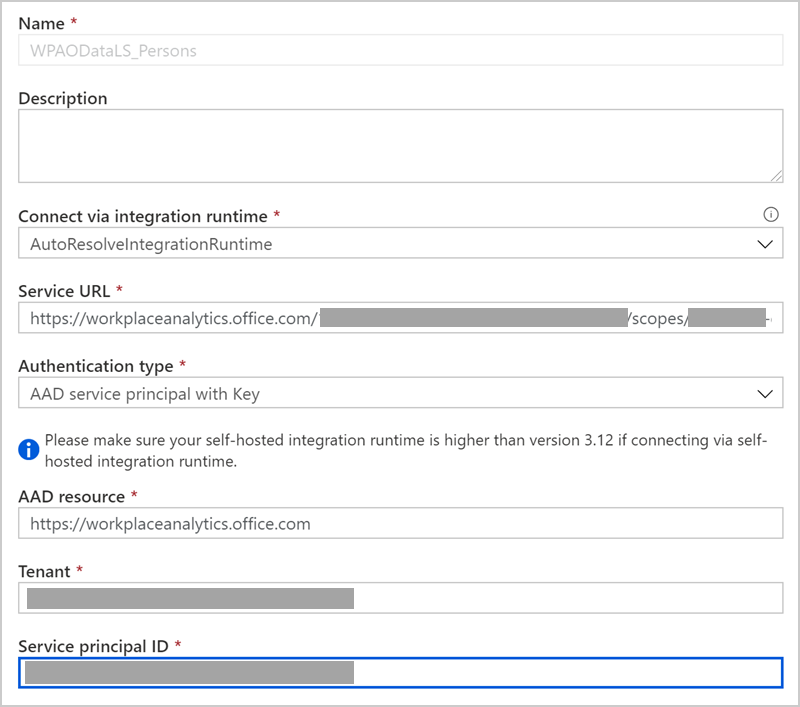
In Authentication type, select either Microsoft Entra service principal with Key or Microsoft Entra service principal with Cert. Keep New linked service (OData) open in a separate browser window. For details about these options, see Use Azure Key Vault secrets in pipeline activities.
In Microsoft Entra ID > your newly registered analytics app, select Certificates & secrets, and then do one of the following.
- For Key authentication, select New client secret and in Add a client secret, enter a description, select when it expires, and then select Add. In Client secrets, select the new secret, and then select the Copy icon to copy it.
- For Certificate authentication (preferred for higher security), select a certificate and copy it.
In Azure Data Factory, do the following for the applicable authentication type:
- For Service principal key, paste the new client secret copied in the previous step in Service principal key.
- For Azure key vault, copy and paste the certificate and the other required information. See Set and retrieve a secret from Azure Key Vault for details.
Select Test connection to test the OData linked service.
After you see Connection successful, select Create.
In Connection > Linked service for the new OData linked service, select the new dataset you just created in the previous steps.
In Connection > Path, select Edit, and then enter the Entity set name. To find it, copy the OData query link from Workplace Analytics > Analyze > Query designer > Results, and open the query link in a new browser window. Search for metadata to find the entity name, which is shown after $metadata#. For example, the entity set name shown in this graphic is Persons:

Select Preview data for the path to confirm you entered the correct entity.
In Azure Data Factory > Properties, confirm the name and description for this new dataset.
Select Publish all at the top, and then select Publish.
In Pipelines, create a new pipeline that can use the new OData dataset to copy the query data to the external resource. For details, see Create a pipeline.
For the new pipeline, select Source, and in Source dataset, select the name of new OData dataset, and in Use query, select Table.
Create a linked service for the data store you want to export to. For details, see Linked services.
In Azure Data Factory > Author, select the new pipeline, and then select Add trigger > Trigger now to manually run the last published pipeline, as shown in the following graphic. You can also schedule a trigger for this new pipeline by selecting Add trigger > New/Edit > New, and complete the required information for it. See Pipeline execution and triggers in Azure Data Factory for details.

In Sink > Sink dataset, select the linked service name you created in a previous step.
You can then use this new data factory to access query data from Workplace Analytics and copy it to your choice data store (blob storage) by using the Azure Resource Manager template. You can reuse this new app over time for multiple projects without having to repeat these steps. You can also reuse the data factory you created for new pipelines.
To set up with Azure Synapse Analytics
The following steps you through how to automate the export of Workplace Analytics query data to your choice Azure data store with the Azure Synapse Analytics. Use the following steps in conjunction with the Azure documentation to complete this setup.
Follow the steps in Register an application using the Azure portal to create and register a new analytics app in Microsoft Entra ID.
In Microsoft Entra App registrations, select the app from Step 1, and then grant it permissions for accessing Workplace Analytics by selecting View API permissions, and then select Add a permission.
Enter and search for the Workplace Analytics or Viva Insights app name or ID and then select the applicable name from the list.
To find the Application (client) ID:
In Active Directory, select all applications, and then enter Workplace Analytics or Viva Insights for the enterprise app that you want to use.
Select it from the list.
In Application ID, copy the ID and paste it in APIs my organization uses search field.
In Request API permissions, select Application permissions, select Analyst, and then select Add permissions.
In API permissions, the global admin must select Grant admin consent for [Workplace Analytics…] before you can continue to the next step.
Follow the steps in Create A Synapse Workspace create a new Synapse Workspace within your Azure portal.
In the Azure Synapse resource in portal, select Open Synapse Studio to open the Azure Synapse Workspace.
Note
Keep all your browser windows open because you must switch between them to complete the following steps.
In Azure Synapse Studio, select Integrate, and then add a Pipeline.
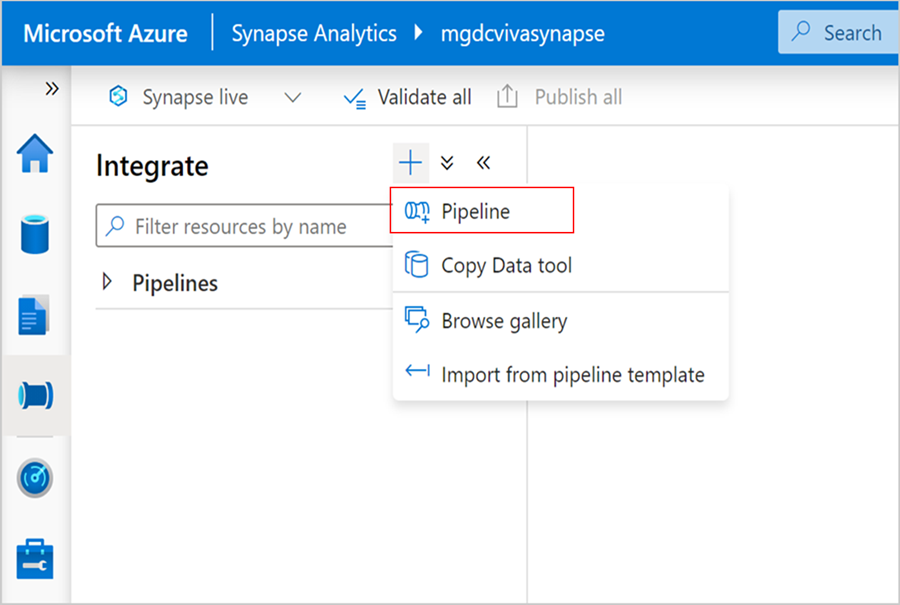
In the new Pipeline activities menu, select Move and Transform, and then drag a Copy data into your pipeline workspace.
Select the ellipsis (...) next Datasets, and then select New dataset.
In the Source section, add a new source.
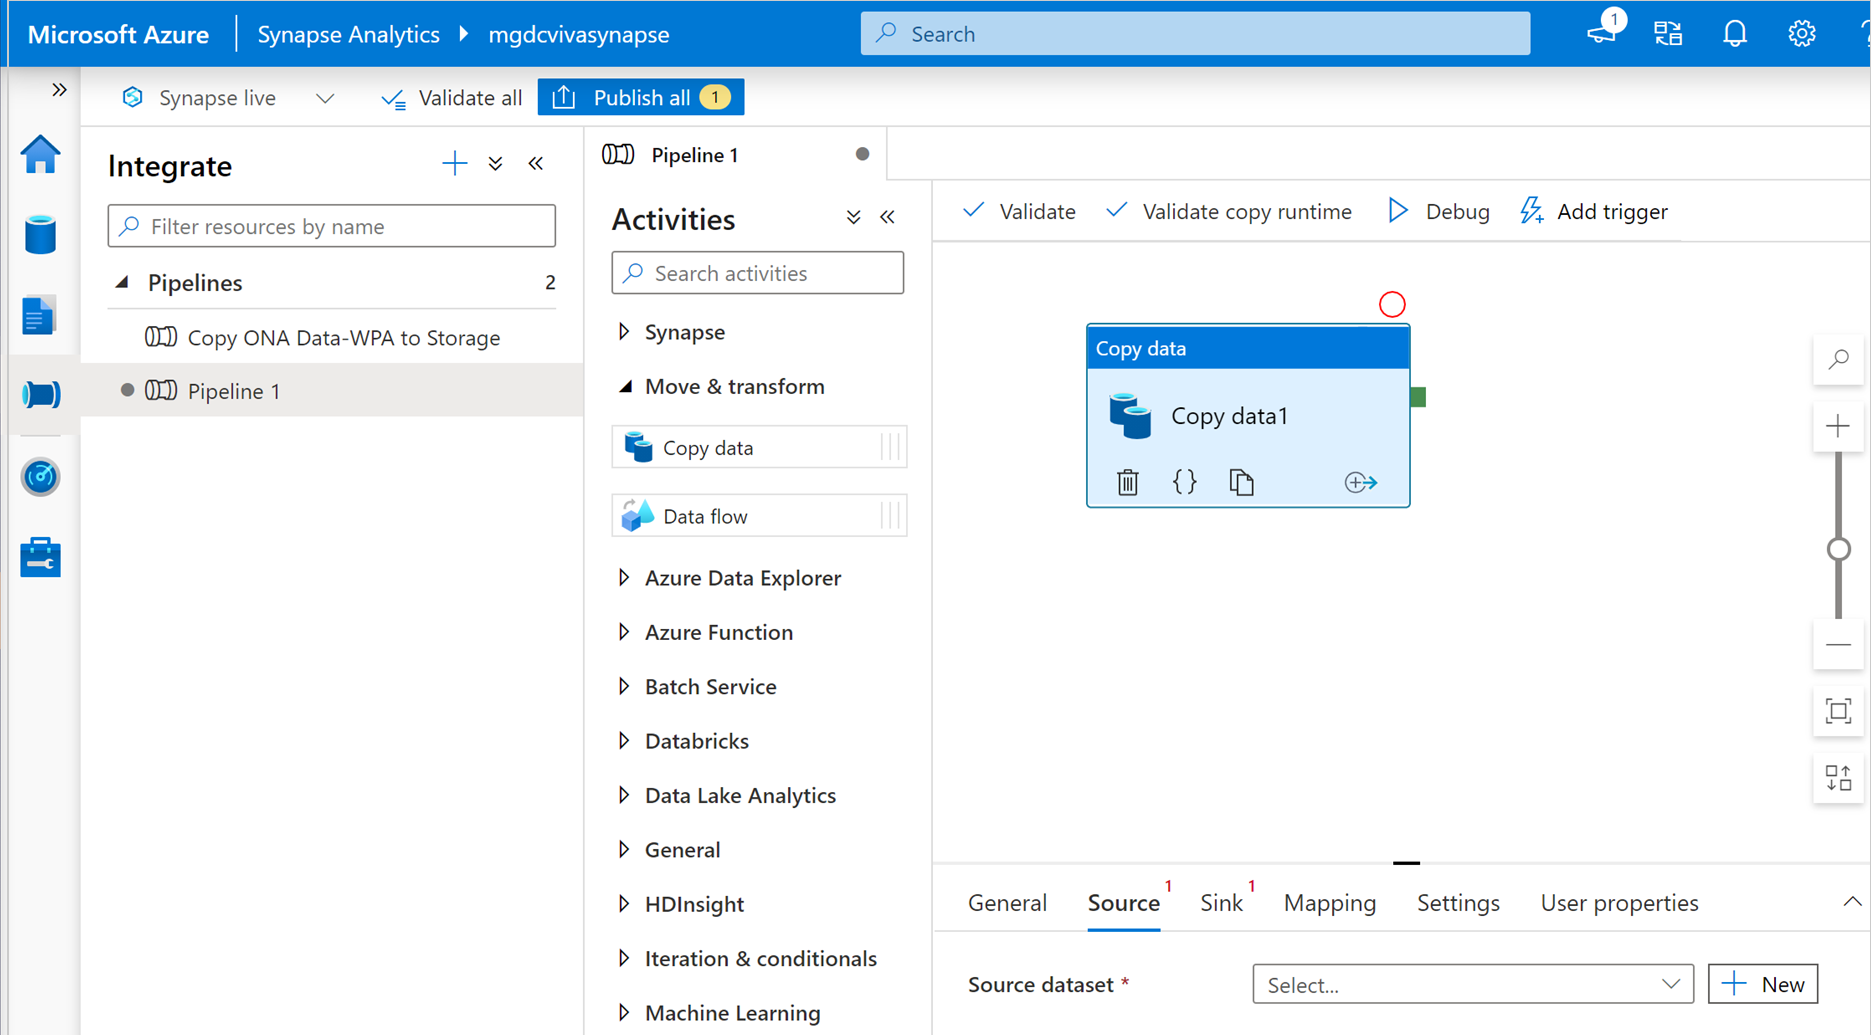
In New Integration Dataset, enter odata, and then select OData.
In Set Properties, enter a name and create a new linked service.
In New linked service (Odata), enter a name and description for the query data you’re linking to.
In Connect via integration runtime, select AutoResolveIntegrationRuntime.
In Viva Insights in Workplace Analytics, select Analyze > Query designer > Results, and then copy the OData link for the query data you want to connect to Azure.
Important
For automatically refreshed data, you must link to a query that uses the Auto-refresh option. For static query results, you’ll need to enter a new OData link each time to update the query data in the connected Azure data store.
In Azure Synapse New linked Service URL, paste the query OData link that you copied in the previous step.
In Microsoft Entra resource, enter
https://workplaceanalytics.office.com.In Active Directory, select Overview for the new app, and then copy the Application (client) ID.
In Azure Synapse Studio > New linked service (Odata) > Service principal ID, copy the client ID. For details, see Linked service properties.
In Authentication type, select either Microsoft Entra service principal with Key or Microsoft Entra service principal with Cert. Keep New linked service (OData) open in a separate browser window. For details about these options, see Use Azure Key Vault secrets in pipeline activities.
In Microsoft Entra ID > your newly registered analytics app, select Certificates & secrets, and then do one of the following.
- For Key authentication, select New client secret, and then in Add a client secret, enter a description, select when it expires, and then select Add. In Client secrets, select the new secret, and then select the Copy icon to copy it.
- For Certificate authentication (preferred for higher security), select a certificate and copy it.
In Azure Synapse studio, do the following for the applicable authentication type:
- For Service principal key, paste the new client secret copied in the previous step in Service principal key.
- For Azure key vault, copy and paste the certificate and the other required information. See Set and retrieve a secret from Azure Key Vault for details.
Select Test connection to test the OData linked service.
After you see Connection successful, select Create.
In Set Properties > Linked service for the new OData linked service, select the new linked service you just created in the previous steps.
In Source > Path, select Edit, and then enter the Entity set name. To find it, copy the OData query link from Workplace Analytics > Analyze > Query designer > Results, and open the query link in a new browser window. Then search for metadata to find the entity name, which is shown after $metadata#. For example, the entity set name shown in this graphic is Persons:
Select Preview data for the path to confirm you entered the correct entity.
In the Sink section, add a new sink dataset and in the New Integration Dataset, select Azure Data Lake Storage Gen2, and then select Continue.
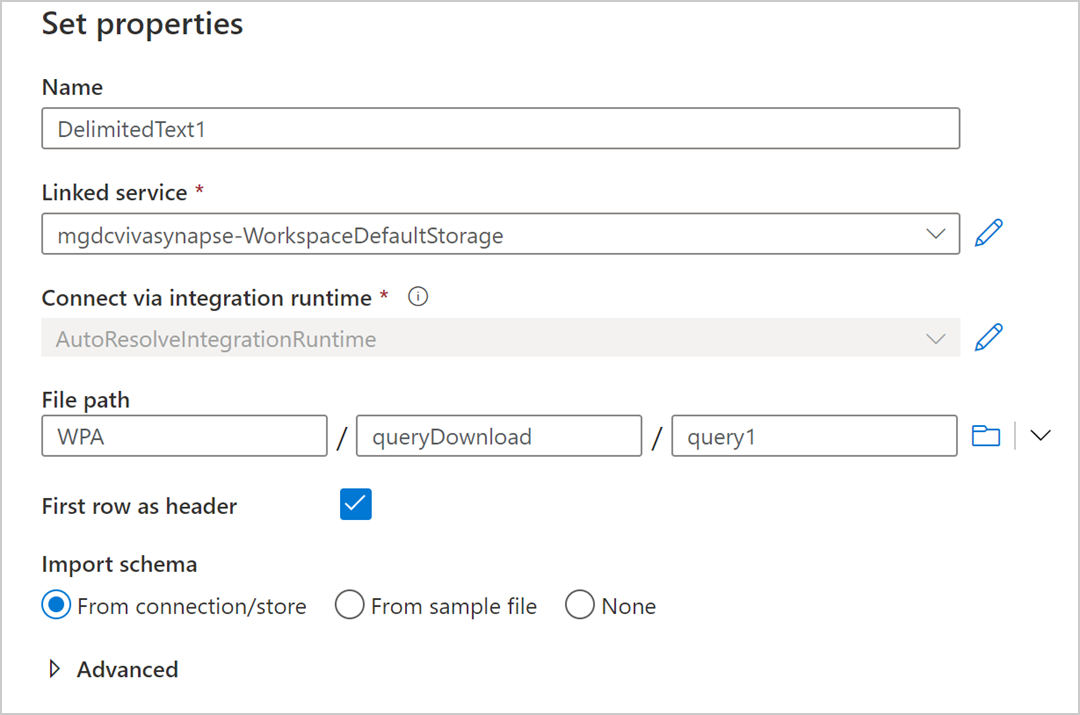
For Select Format, select Delimited Text, and then select Continue.
In Set Properties, enter a name, select First row as header, and then select your default Synapse storage account (which is already linked), or create a new linked service.
Enter a file path for the destination of the copied file in the storage. If you leave File empty, the copy pipeline automatically generates a name for the file in the destination directory.
Validate and if successful, select Publish all at the top.
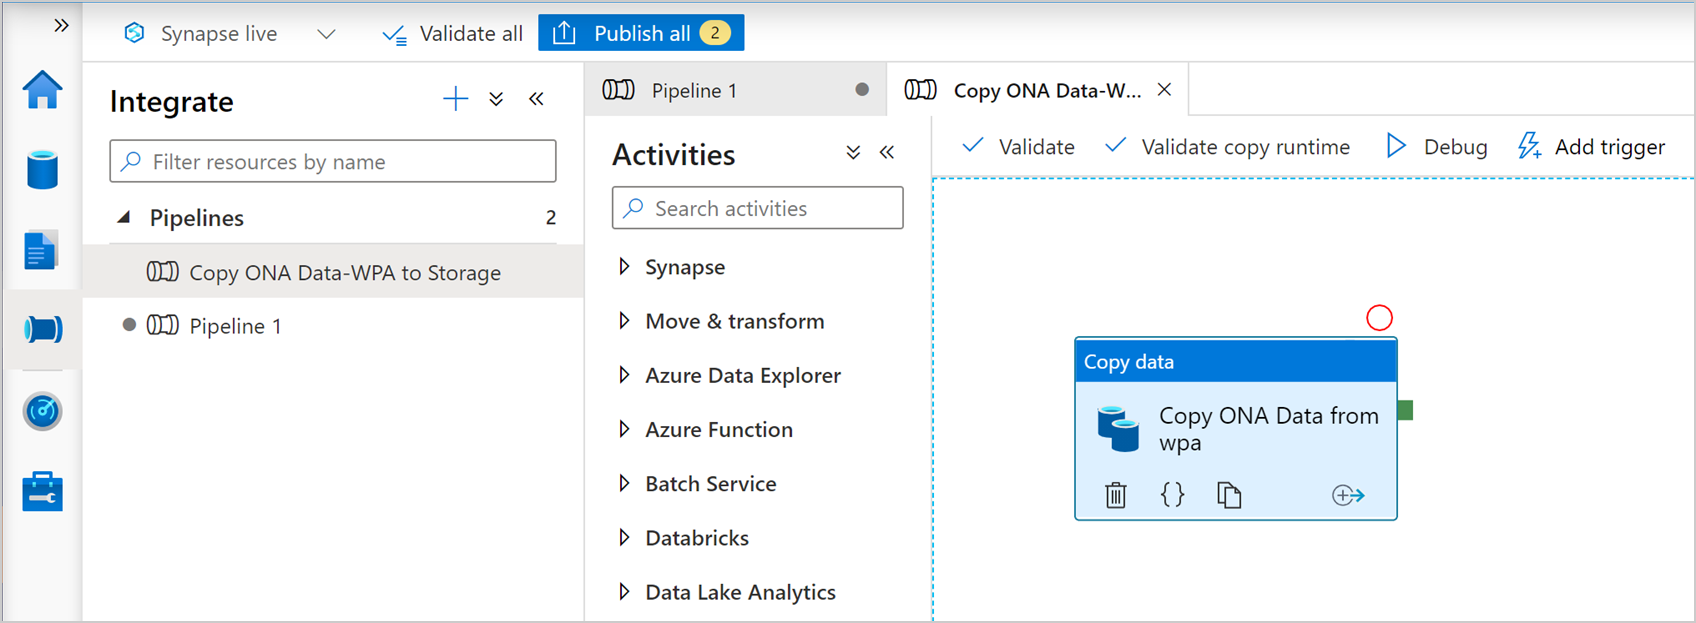
After it publishes successfully, select Add trigger, and then Trigger now or select the trigger.
After it successfully runs, go to your Azure Data Lake Linked Service to locate the transferred data. Select More > Refresh to view the latest available data.
Related topics
Feedback
Coming soon: Throughout 2024 we will be phasing out GitHub Issues as the feedback mechanism for content and replacing it with a new feedback system. For more information see: https://aka.ms/ContentUserFeedback.
Submit and view feedback for