Use Quick Assist to help users
Quick Assist is an application that enables a person to share their Windows or macOS device with another person over a remote connection. Your support staff can use it to remotely connect to a user's device and then view its display, make annotations, or take full control. In this way, they can troubleshoot, diagnose technological issues, and provide instructions to users directly on their devices.
Before you begin
All that's required to use Quick Assist is suitable network and internet connectivity. No roles, permissions, or policies are involved. Neither party needs to be in a domain. The helper must have a Microsoft account. The sharer doesn't have to authenticate.
Authentication
The helper can authenticate when they sign in by using a Microsoft account (MSA) or Microsoft Entra ID. Local Active Directory authentication isn't currently supported.
Network considerations
Quick Assist communicates over port 443 (https) and connects to the Remote Assistance Service at https://remoteassistance.support.services.microsoft.com by using the Remote Desktop Protocol (RDP). The traffic is encrypted with TLS 1.2. Both the helper and sharer must be able to reach these endpoints over port 443:
| Domain/Name | Description |
|---|---|
*.aria.microsoft.com |
Accessible Rich Internet Applications (ARIA) service for providing accessible experiences to users. |
*.cc.skype.com |
Required for Azure Communication Service. |
*.events.data.microsoft.com |
Required diagnostic data for client and services used by Quick Assist. |
*.flightproxy.skype.com |
Required for Azure Communication Service. |
*.live.com |
Required for logging in to the application (MSA). |
*.monitor.azure.com |
Required for telemetry and remote service initialization. |
*.registrar.skype.com |
Required for Azure Communication Service. |
*.support.services.microsoft.com |
Primary endpoint used for Quick Assist application |
*.trouter.skype.com |
Used for Azure Communication Service for chat and connection between parties. |
aadcdn.msauth.net |
Required for logging in to the application (Microsoft Entra ID). |
edge.skype.com |
Used for Azure Communication Service for chat and connection between parties. |
login.microsoftonline.com |
Required for Microsoft login service. |
remoteassistanceprodacs.communication.azure.com |
Used for Azure Communication Service for chat and connection between parties. |
turn.azure.com |
Required for Azure Communication Service. |
Important
Quick Assist uses Edge WebView2 browser control. For a list of domain URLs that you need to add to the allow list to ensure that the Edge WebView2 browser control can be installed and updated, see Allow list for Microsoft Edge endpoints.
Working with Quick Assist
Either the support staff or a user can start a Quick Assist session.
- Support staff ("helper") and the user ("sharer") can start Quick Assist in any of a few ways:
- Type Quick Assist in the Windows search and press ENTER.
- Press CTRL + Windows + Q.
- For Windows 10 users, from the Start menu, select Windows Accessories, and then select Quick Assist.
- For Windows 11 users, from the Start menu, select All Apps, and then select Quick Assist.
- In the Help someone section, the helper selects the Help someone button. The helper might be asked to choose their account or sign in. Quick Assist generates a time-limited security code.
- Helper shares the security code with the user over the phone or with a messaging system.
- The sharer enters the provided code in the Security code from assistant box under the Get help section, and then selects Submit.
- The sharer receives a dialog asking for permission to allow screen sharing. The sharer gives permission by selecting the Allow button and the screen sharing session is established.
- After the screen sharing session is established, the helper can optionally request control of the sharer's screen by selecting Request control. The sharer then receives a dialog asking them if they want to Allow or Deny the request for control.
Note
In case the helper and sharer use different keyboard layouts or mouse settings, the ones from the sharer are used during the session.
How it works
- Both the helper and the sharer start Quick Assist.
- The helper selects Help someone. Quick Assist on the helper's side contacts the Remote Assistance Service to obtain a session code. An RCC chat session is established, and the helper's Quick Assist instance joins it. The helper then provides the code to the sharer.
- After the sharer enters the code in their Quick Assist app, Quick Assist uses that code to contact the Remote Assistance Service and join that specific session. The sharer's Quick Assist instance joins the RCC chat session.
- The sharer is prompted to confirm allowing the helper to share their desktop with the helper.
- Quick Assist starts RDP control and connects to the RDP Relay service.
- RDP shares the video to the helper over https (port 443) through the RDP relay service to the helper's RDP control. Input is shared from the helper to the sharer through the RDP relay service.

Data and privacy
Microsoft logs a small amount of session data to monitor the health of the Quick Assist system. This data includes the following information:
- Start and end time of the session
- Errors arising from Quick Assist itself, such as unexpected disconnections
- Features used inside the app such as view only, annotation, and session pause
Note
No logs are created on either the helper's or sharer's device. Microsoft can't access a session or view any actions or keystrokes that occur in the session.
The sharer sees only an abbreviated version of the helper's name (first name, last initial) and no other information about them. Microsoft doesn't store any data about either the sharer or the helper for longer than three days.
In some scenarios, the helper does require the sharer to respond to application permission prompts (User Account Control), but otherwise the helper has the same permissions as the sharer on the device.
Install Quick Assist on Windows
Install Quick Assist from the Microsoft Store
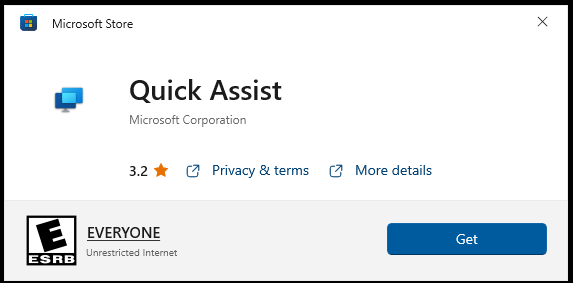
- Download the new version of Quick Assist by visiting the Microsoft Store.
- In the Microsoft Store, select Get in Store app. Then, give permission to install Quick Assist. When the installation is complete, Get changes to Open.

For more information, visit Install Quick Assist.
Install Quick Assist with Intune
Before installing Quick Assist, you need to set up synchronization between Intune and Microsoft Store for Business. If you've already set up sync, log into Microsoft Store for Business and skip to step 5.
- In the Intune admin center, go to Tenant administration / Connectors and tokens / Microsoft Store for Business and verify that Microsoft Store for Business sync is set to Enable.
- Using your Global Admin account, log into Microsoft Store for Business.
- Select Manage / Settings and enable Show offline apps.
- Choose the Distribute tab and verify that Microsoft Intune is Active. You may need to use the +Add management tool link if it's not.
- Search for Quick Assist and select it from the Search results.
- Choose the Offline license and select Get the app
- In the Intune admin center, choose Sync.
- Navigate to Apps / Windows and you should see Quick Assist (Offline) in the list.
- Select it to view its properties.
- By default, the app isn't assigned to any user or device, select the Edit link. Assign the app to the required group of devices and choose Review + save to complete the application install.
Note
Assigning the app to a device or group of devices instead of a user is important because it's the only way to install a store app in device context.
Visit Add Microsoft Store apps to Microsoft Intune for more information.
Install Quick Assist Offline
To install Quick Assist offline, you need to download your APPXBUNDLE and unencoded XML file from Microsoft Store for Business. Visit Download an offline-licensed app for more information.
- Start Windows PowerShell with Administrative privileges.
- In PowerShell, change the directory to the location you've saved the file to in step 1:
cd <location of package file> - Run the following command to install Quick Assist:
Add-AppxProvisionedPackage -Online -PackagePath "MicrosoftCorporationII.QuickAssist_8wekyb3d8bbwe.AppxBundle" -LicensePath "MicrosoftCorporationII.QuickAssist_8wekyb3d8bbwe_4bc27046-84c5-8679-dcc7-d44c77a47dd0.xml" - After Quick Assist has installed, run this command to confirm that Quick Assist is installed for the user:
Get-AppxPackage *QuickAssist* -AllUsers
Microsoft Edge WebView2
The Microsoft Edge WebView2 is a development control that uses Microsoft Edge as the rendering engine to display web content in native apps. The new Quick Assist application has been developed using this control, making it a necessary component for the app to function.
- For Windows 11 users, this runtime control is built in.
- For Windows 10 users, the Quick Assist Store app detects if WebView2 is present on launch and if necessary, installs it automatically. If an error message or prompt is shown indicating WebView2 isn't present, it needs to be installed separately.
For more information on distributing and installing Microsoft Edge WebView2, visit Distribute your app and the WebView2 Runtime
Install Quick Assist on macOS
Quick Assist for macOS is available for interactions with Microsoft Support. If Microsoft products on your macOS device are not working as expected, contact Microsoft Support for assistance. Your Microsoft Support agent will guide you through the process of downloading and installing it on your device.
Note
Quick Assist for macOS is not available outside of Microsoft Support interactions.
Next steps
If you have any problems, questions, or suggestions for Quick Assist, contact us by using the Feedback Hub app.
Feedback
Coming soon: Throughout 2024 we will be phasing out GitHub Issues as the feedback mechanism for content and replacing it with a new feedback system. For more information see: https://aka.ms/ContentUserFeedback.
Submit and view feedback for