Events
31 Mar, 23 - 02 Apr, 23
The biggest SQL, Fabric and Power BI learning event. March 31 – April 2. Use code FABINSIDER to save $400.
Register todayThis browser is no longer supported.
Upgrade to Microsoft Edge to take advantage of the latest features, security updates, and technical support.
Applies to: ![]() SQL Server
SQL Server
Merge replication is a good solution to the problem of moving data between a central server and mobile clients that are only occasionally connected. By using the replication wizards, you can easily configure and administer a merge replication topology.
This tutorial shows you how to configure a replication topology for mobile clients. For more information about merge replication, see the overview of merge replication.
This tutorial teaches you to use merge replication to publish data from a central database to one or more mobile users so that each user gets a uniquely filtered subset of the data.
In this tutorial, you will learn how to:
This tutorial is for users who are familiar with fundamental database operations, but who have limited experience with replication. Before you start this tutorial, you must complete Tutorial: Prepare SQL Server for replication.
To complete this tutorial, you need SQL Server, SQL Server Management Studio (SSMS), and an AdventureWorks database:
At the publisher server (source), install:
AdventureWorks2022 sample database. To enhance security, the sample databases are not installed by default.At the subscriber server (destination), install any edition of SQL Server, except SQL Server Express or SQL Server Compact. The publication that's created in this tutorial does not support either SQL Server Express or SQL Server Compact.
Install SQL Server Management Studio.
Install SQL Server 2017 Developer edition.
Download the AdventureWorks sample database. For instructions on restoring a database in SSMS, see Restoring a database.
Note
Replication is not supported on SQL Server instances that are more than two versions apart.
In SQL Server Management Studio, you must connect to the publisher and subscriber by using a login that is a member of the sysadmin fixed server role. For more information on this role, see Server-level roles.
Estimated time to complete this tutorial: 60 minutes
In this section, you create a merge publication by using SQL Server Management Studio to publish a subset of the Employee, SalesOrderHeader, and SalesOrderDetail tables in the AdventureWorks2022 sample database. These tables are filtered with parameterized row filters so that each subscription contains a unique partition of the data. You also add the SQL Server login used by the Merge Agent to the publication access list (PAL).
Connect to the publisher in SQL Server Management Studio, and then expand the server node.
Start the SQL Server Agent by right-clicking it in Object Explorer and selecting Start. If this step doesn't start the agent, you'll need to manually do so from SQL Server Configuration Manager.
Expand the Replication folder, right-click Local Publications, and select New Publication. The New Publication Wizard starts:

On the Publication Database page, select AdventureWorks2022, and then select Next.
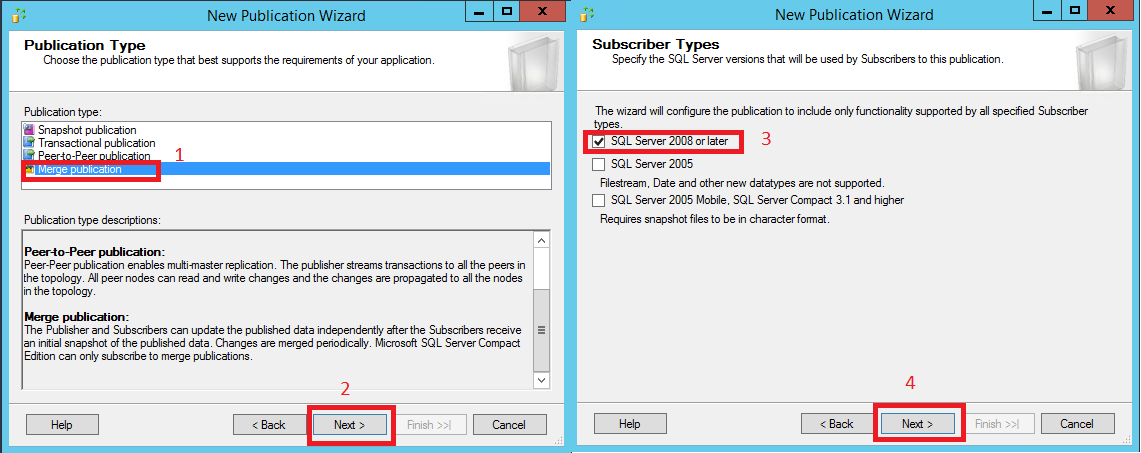
On the Publication Type page, select Merge publication, and then select Next.
On the Subscriber Types page, ensure that only SQL Server 2008 (10.0.x) or later is selected, and then select Next:
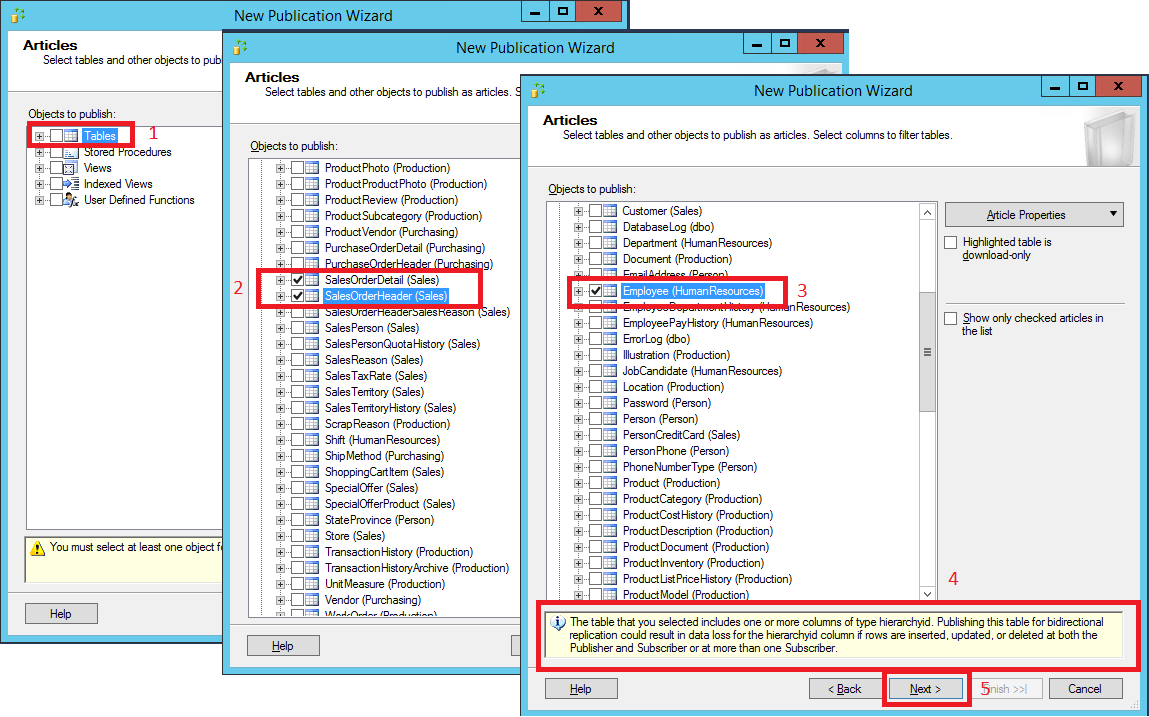
On the Articles page, expand the Tables node. Select the following three tables: Employee, SalesOrderHeader, and SalesOrderDetail. Select Next.
Note
The Employee table contains a column (OrganizationNode) that has the hierarchyid data type. This data type is supported for replication only in SQL Server 2017.
If you're using a build earlier than SQL Server 2017, a message appears at the bottom of the screen to notify you of potential data loss for using this column in bidirectional replication. For the purpose of this tutorial, you can ignore this message. However, this data type should not be replicated in a production environment unless you're using the supported build.
For more information about replicating the hierarchyid data type, see Using hierarchyid columns in replication.
On the Filter Table Rows page, select Add and then select Add Filter.
In the Add Filter dialog box, select Employee (HumanResources) in Select the table to filter. Select the LoginID column, select the right arrow to add the column to the WHERE clause of the filter query, and modify the WHERE clause as follows:
WHERE [LoginID] = HOST_NAME()
Select A row from this table will go to only one subscription, and select OK.

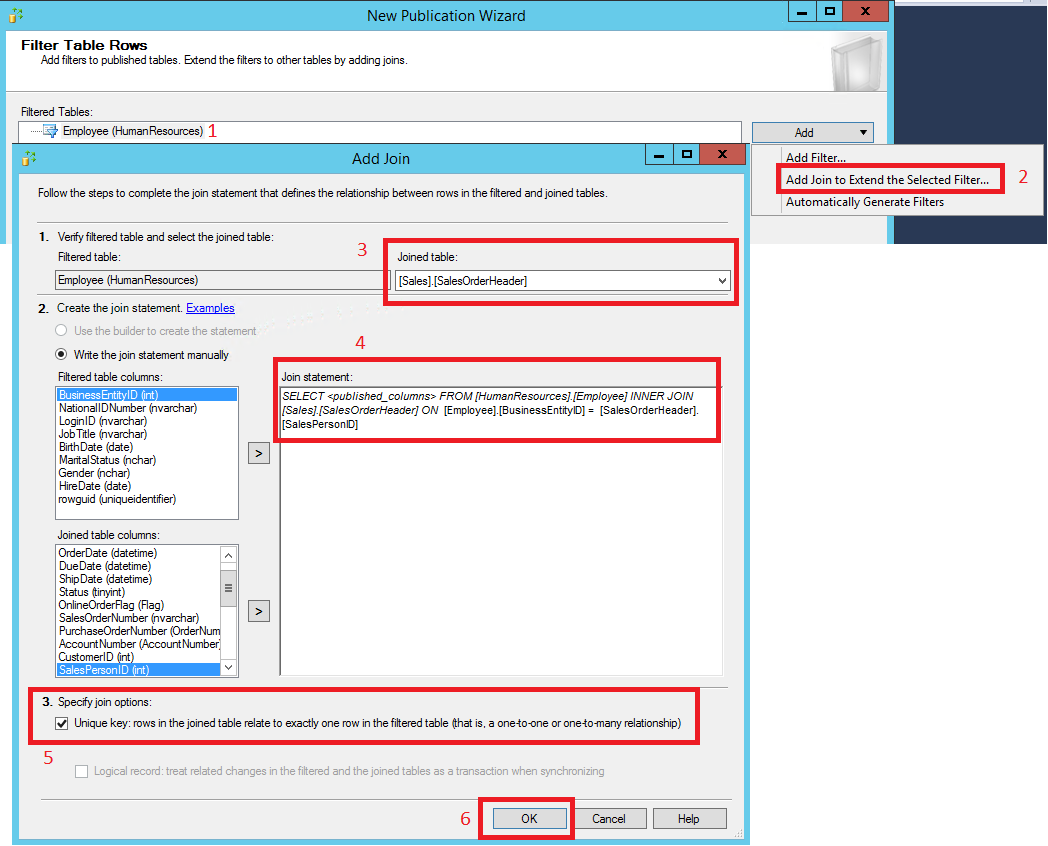
On the Filter Table Rows page, select Employee (Human Resources), select Add, and then select Add Join to Extend the Selected Filter.
a. In the Add Join dialog box, select Sales.SalesOrderHeader under Joined table. Select Write the join statement manually, and complete the join statement as follows:
ON [Employee].[BusinessEntityID] = [SalesOrderHeader].[SalesPersonID]
b. In Specify join options, select Unique key, and then select OK.
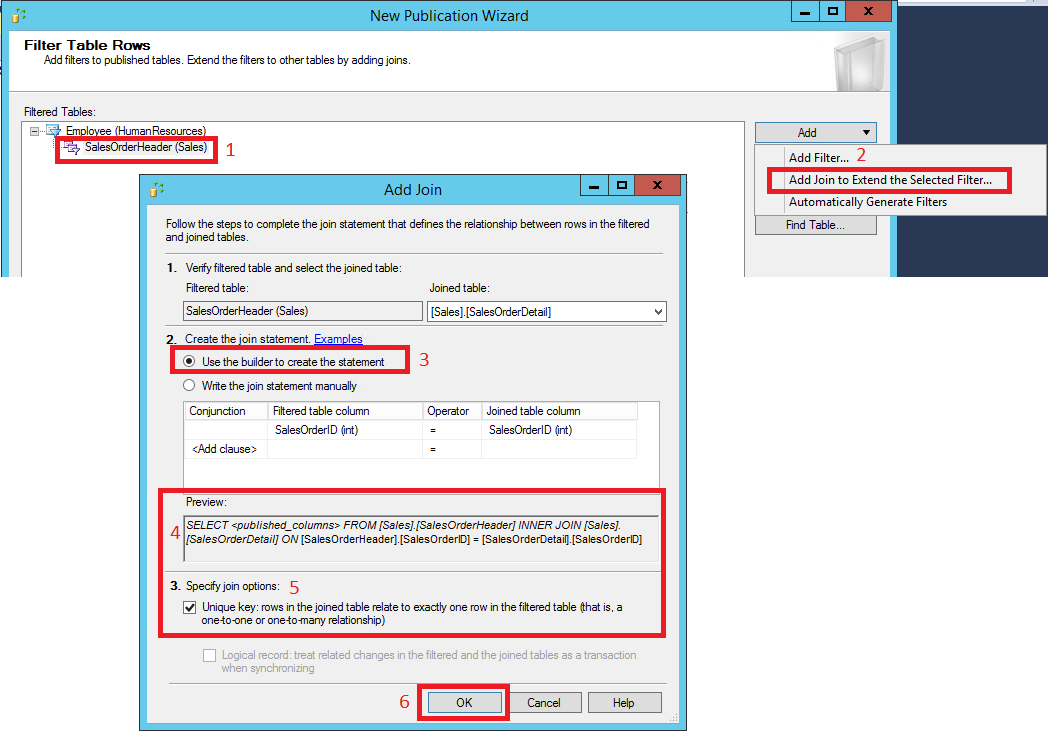
On the Filter Table Rows page, select SalesOrderHeader, select Add, and then select Add Join to Extend the Selected Filter.
a. In the Add Join dialog box, select Sales.SalesOrderDetail under Joined table.
b. Select Use the Builder to create the statement.
c. In the Preview box, confirm that the join statement is as follows:
ON [SalesOrderHeader].[SalesOrderID] = [SalesOrderDetail].[SalesOrderID]
d. In Specify join options, select Unique key, and then select OK. Select Next.
Select Create a snapshot immediately, clear Schedule the snapshot agent to run at the following times, and select Next:

On the Agent Security page, select Security Settings. Enter <Publisher_Machine_Name>\repl_snapshot in the Process account box, supply the password for this account, and then select OK. Select Next.

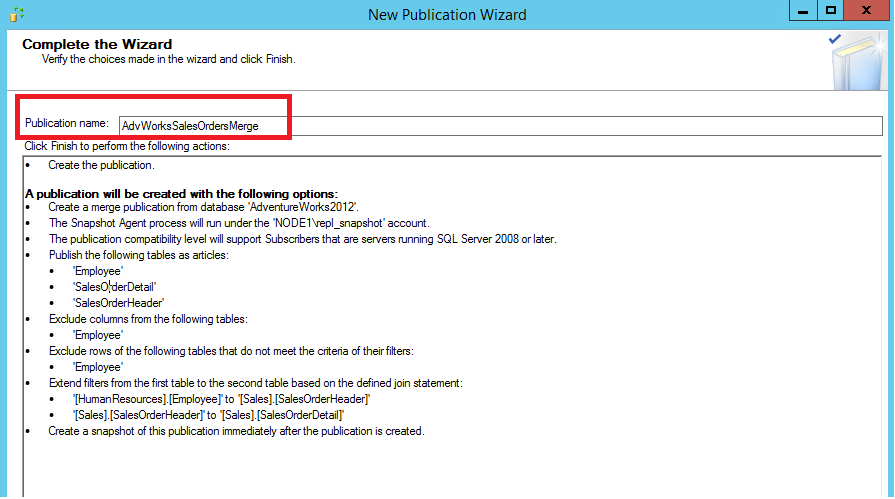
On the Complete the Wizard page, enter AdvWorksSalesOrdersMerge in the Publication name box and select Finish:
After the publication is created, select Close. Under the Replication node in Object Explorer, right-click Local Publications and select Refresh to view your new merge replication.
Connect to the publisher in SQL Server Management Studio, expand the server node, and then expand the Replication folder.
In the Local Publications folder, right-click AdvWorksSalesOrdersMerge, and then select View Snapshot Agent Status:

The current status of the Snapshot Agent job for the publication appears. Ensure that the snapshot job has succeeded before you continue to the next lesson.
Connect to the publisher in SQL Server Management Studio, expand the server node, and then expand the Replication folder.
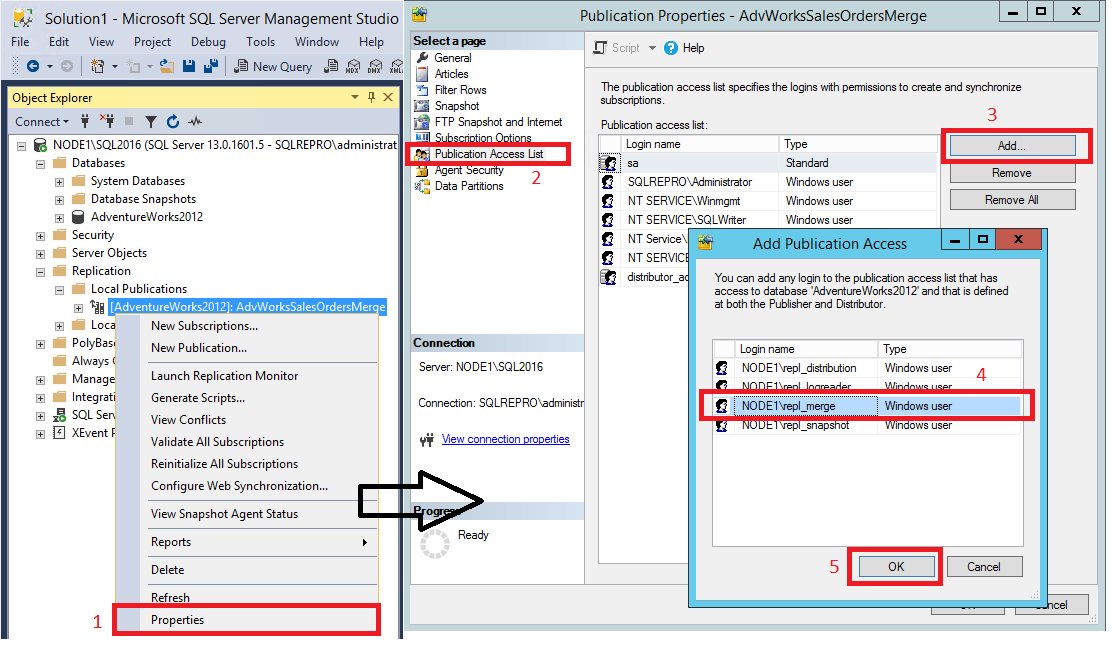
In the Local Publications folder, right-click AdvWorksSalesOrdersMerge, and then select Properties.
a. Select the Publication Access List page, and select Add.
b. In the Add Publication Access dialog box, select <Publisher_Machine_Name>\repl_merge and select OK. Select OK again.
For more information, see:
In this section, you add a subscription to the merge publication that you created previously. This tutorial uses the remote subscriber (NODE2\SQL2016). You then set permissions on the subscription database and manually generate the filtered data snapshot for the new subscription.
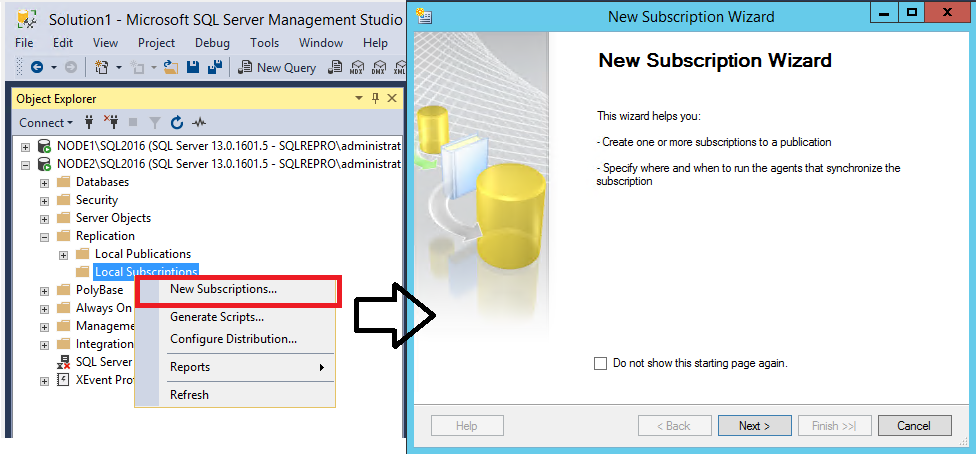
Connect to the subscriber in SQL Server Management Studio, and expand the server node. Expand the Replication folder, right-click the Local Subscriptions folder, and then select New Subscriptions. The New Subscription Wizard starts:
On the Publication page, select Find SQL Server Publisher in the Publisher list.
In the Connect to Server dialog box, enter the name of the publisher instance in the Server name box, and select Connect.
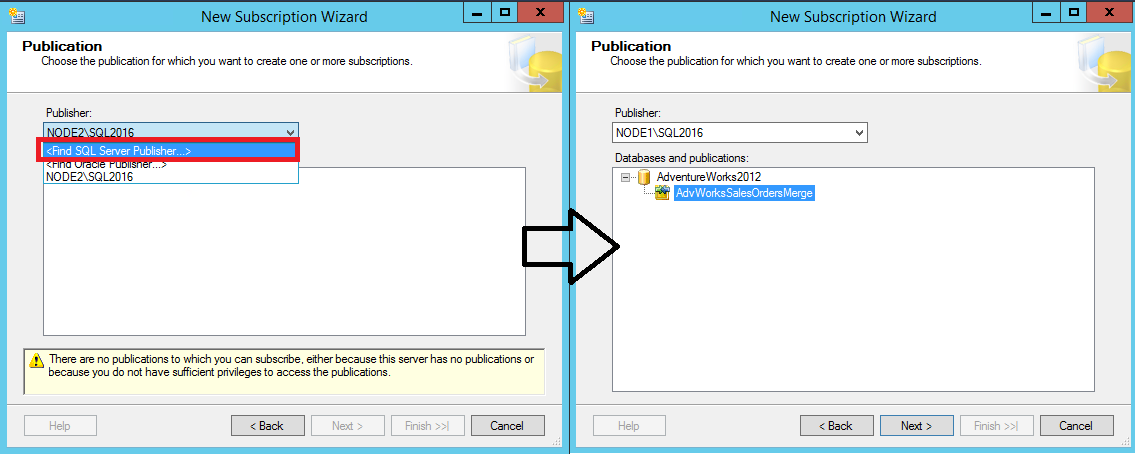
Select AdvWorksSalesOrdersMerge, and select Next.
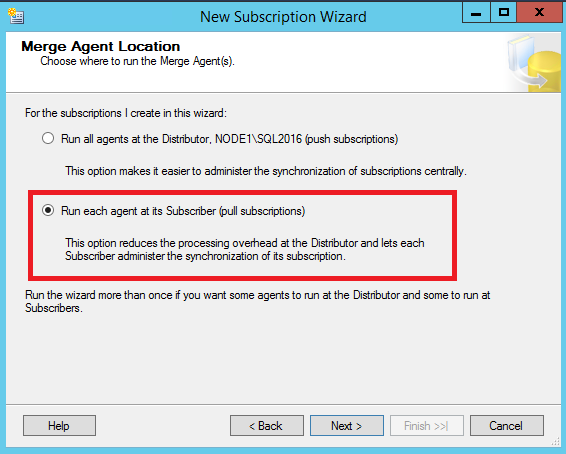
On the Merge Agent Location page, select Run each agent at its Subscriber, and then select Next:
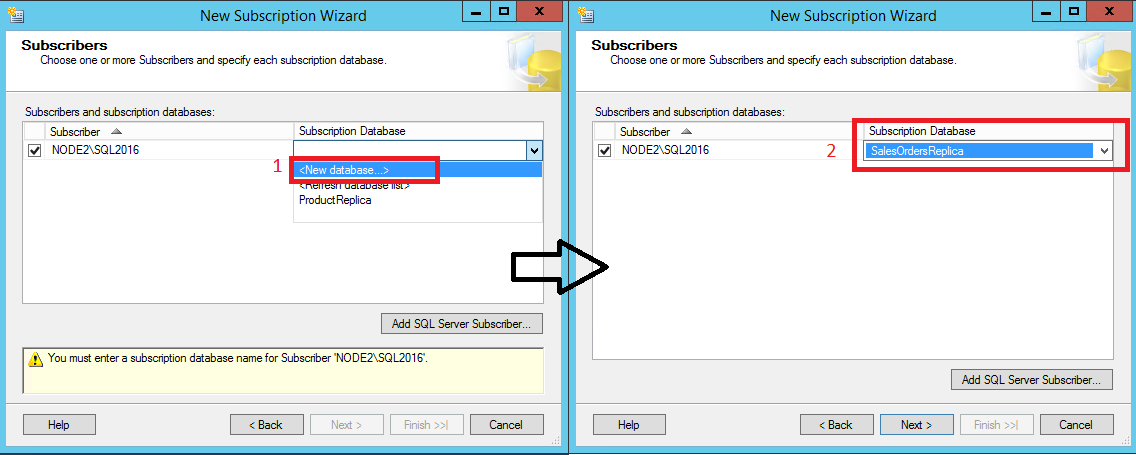
On the Subscribers page, select the instance name of the subscriber server. Under Subscription Database, select New Database from the list.
In the New Database dialog box, enter SalesOrdersReplica in the Database name box. Select OK, and then select Next.
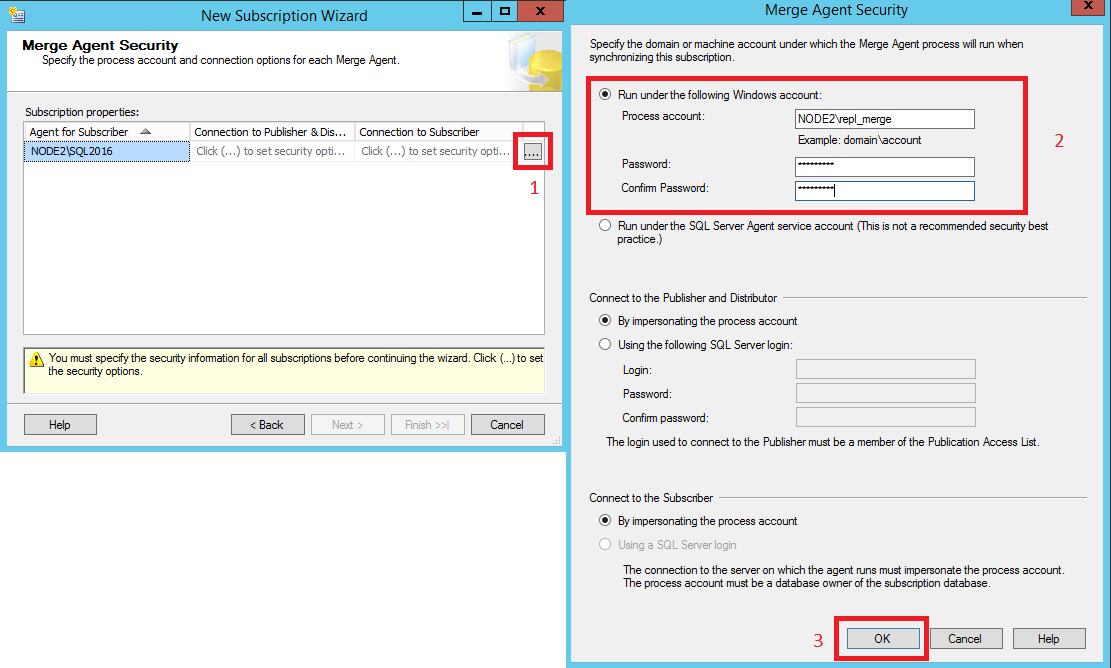
On the Merge Agent Security page, select the ellipsis (…) button. Enter <Subscriber_Machine_Name>\repl_merge in the Process account box, and supply the password for this account. Select OK, select Next, and then select Next again.
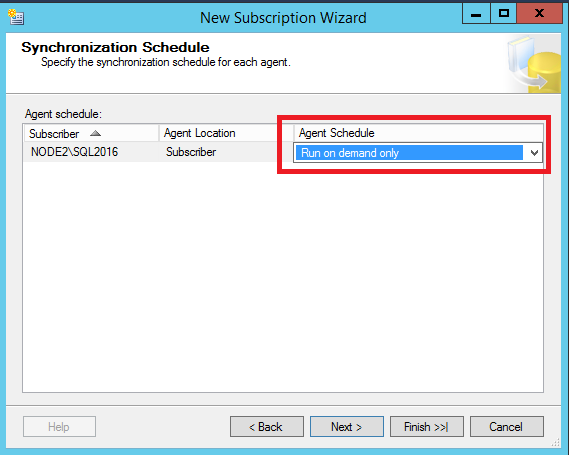
On the Synchronization Schedule page, set Agent Schedule to Run on demand only. Select Next.
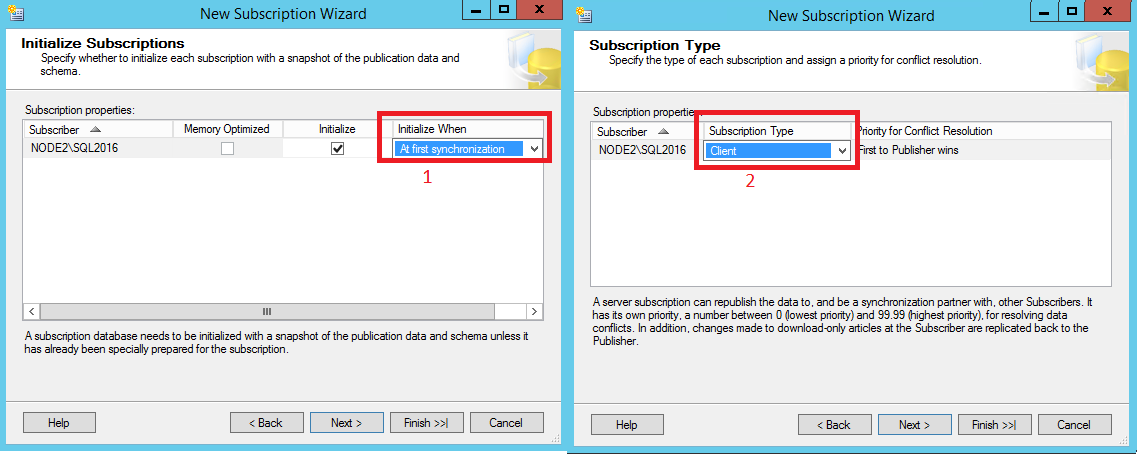
On the Initialize Subscriptions page, select At first synchronization from the Initialize When list. Select Next to proceed to the Subscription Type page, and select the appropriate subscription type. This tutorial uses Client. After you select the subscription type, select Next again.
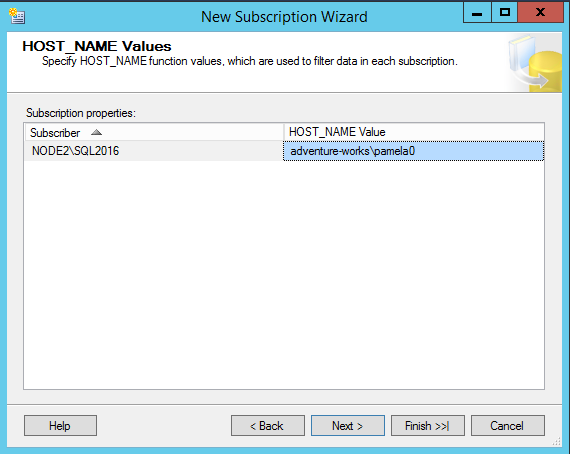
On the HOST_NAME Values page, enter a value of adventure-works\pamela0 in the HOST_NAME Value box. Then select Finish.
Select Finish again. After the subscription is created, select Close.
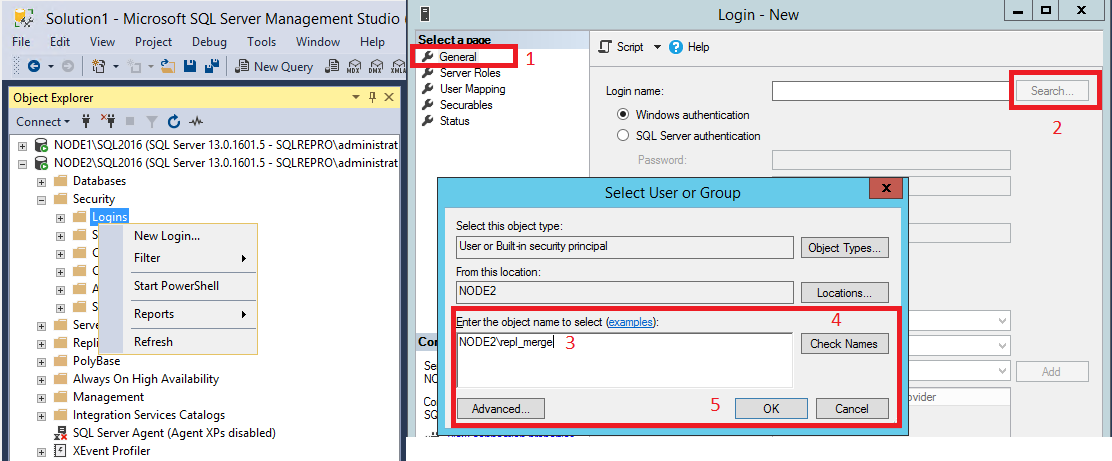
Connect to the subscriber in SQL Server Management Studio. Expand Security, right-click Logins, and then select New Login.
On the General page, select Search and then enter <Subscriber_ Machine_Name>\repl_merge in the Enter the Object Name box. Select Check Names, and then select OK.
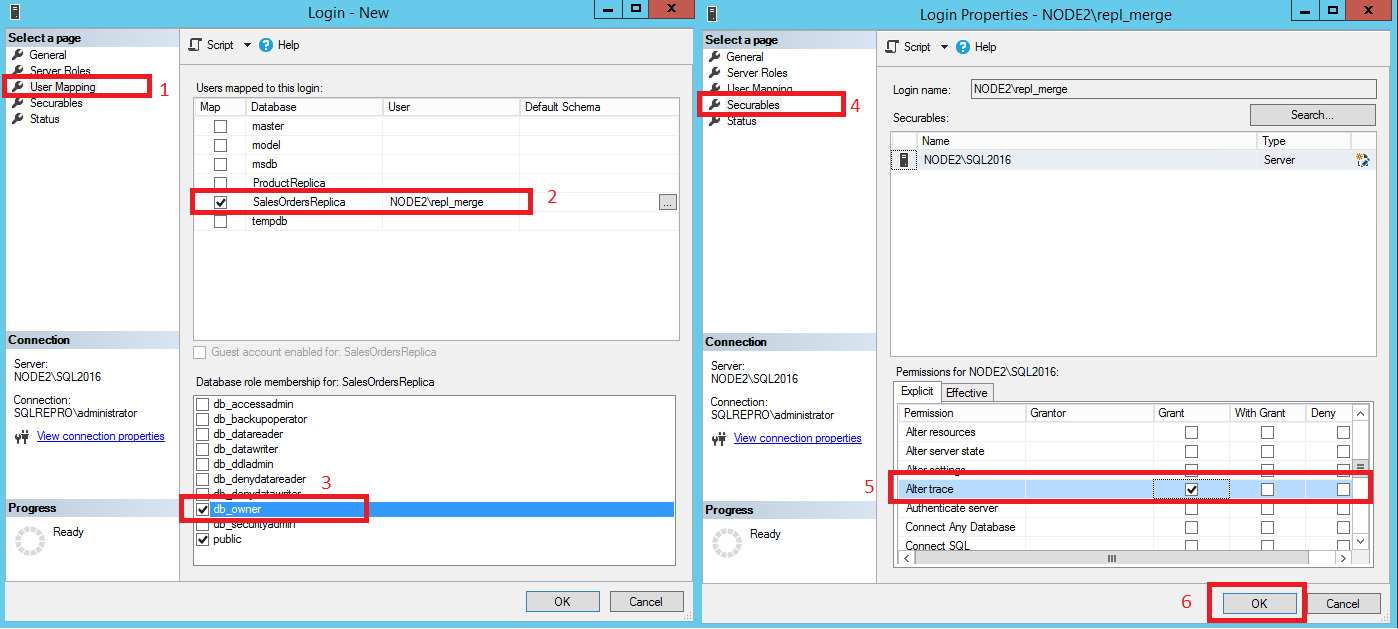
On the User Mapping page, select the SalesOrdersReplica database and select the db_owner role. On the Securables page, grant the Explicit permission to Alter Trace. Select OK.
Connect to the publisher in SQL Server Management Studio, expand the server node, and then expand the Replication folder.
In the Local Publications folder, right-click the AdvWorksSalesOrdersMerge publication, and then select Properties.
a. Select the Data Partitions page, and select Add.
b. In the Add Data Partition dialog box, enter adventure-works\pamela0 in the HOST_NAME Value box, and then select OK.
c. Select the newly added partition, select Generate the selected snapshots now, and then select OK.

For more information, see:
In this section, you start the Merge Agent to initialize the subscription by using SQL Server Management Studio. You also use this procedure to synchronize with the publisher.
Connect to the subscriber in SQL Server Management Studio.
Make sure that the SQL Server Agent is running. If it's not, right-click the SQL Server Agent in Object Explorer and select Start. If this step fails to start your agent, you'll need to do so manually by using SQL Server Configuration Manager.
Expand the Replication node. In the Local Subscriptions folder, right-click the subscription in the SalesOrdersReplica database, and then select View Synchronization Status.
Select Start to initialize the subscription.

Events
31 Mar, 23 - 02 Apr, 23
The biggest SQL, Fabric and Power BI learning event. March 31 – April 2. Use code FABINSIDER to save $400.
Register todayTraining
Module
Sync sales orders from and to Dynamics 365 Business Central and Dynamics 365 Sales - Training
Learn about and set up bidirectional synchronization.
Documentation
Tutorial: Prepare for replication - SQL Server
In this tutorial, learn how to prepare your publisher, distributor, and subscriber for replication by creating Windows accounts, preparing the snapshot folder, and configuring distribution.
Tutorial: Configure Transactional Replication - SQL Server
This tutorial teaches you how to configure Transactional Replication between two fully connected SQL Server instances.
Replication tutorials - SQL Server
Use these tutorials to help prepare your server for replication in SQL Server, and then learn to configure both transactional and merge replication.