Visit the Action center to see remediation actions
During and after an automated investigation, remediation actions for threat detections are identified. Depending on the particular threat and how automated investigation and remediation capabilities are configured for your organization, some remediation actions are taken automatically, and others require approval. If you're part of your organization's security operations team, you can view pending and completed remediation actions in the Action center.
Applies to:
The unified Action center
Recently, the Action center was updated. You now have a unified Action center experience. To access your Action center, go to https://security.microsoft.com/action-center and sign in.

What's changed?
The following table compares the new, unified Action center to the previous Action center.
| The new, unified Action center | The previous Action center |
|---|---|
| Lists pending and completed actions for devices and email in one location (Microsoft Defender for Endpoint plus [Microsoft Defender for Office 365]/defender-office-365/mdo-about |
Lists pending and completed actions for devices (Microsoft Defender for Endpoint only) |
| Is located at: https://security.microsoft.com/action-center |
Is located at: https://securitycenter.windows.com/action-center |
| In the Microsoft Defender portal, choose Action center.
|
In the Microsoft Defender portal, choose Automated investigations > Action center.
|


The unified Action center brings together remediation actions across Defender for Endpoint and Defender for Office 365. It defines a common language for all remediation actions, and provides a unified investigation experience.
You can use the unified Action center if you have appropriate permissions and one or more of the following subscriptions:
- Microsoft Defender XDR
- Defender for Endpoint
- [Defender for Office 365]/defender-office-365/mdo-about
- Defender for Business
Using the Action center
To get to the unified Action center in the improved Microsoft Defender portal:
Go to the Microsoft Defender portal and sign in.
In the navigation pane, select Action center.
Use the Pending actions and History tabs. The following table summarizes what you'll see on each tab:
Tab Description Pending Displays a list of actions that require attention. You can approve or reject actions one at a time, or select multiple actions if they have the same type of action (such as Quarantine file). TIP: Make sure to review and approve (or reject) pending actions as soon as possible so that your automated investigations can complete in a timely manner.
History Serves as an audit log for actions that were taken, such as: - Remediation actions that were taken as a result of automated investigations
- Remediation actions that were approved by your security operations team
- Commands that were run and remediation actions that were applied during Live Response sessions
- Remediation actions that were taken by threat protection features in Microsoft Defender Antivirus
Provides a way to undo certain actions (see Undo completed actions).
To customize, sort, filter, and export data in the Action center, take one or more of the following steps:
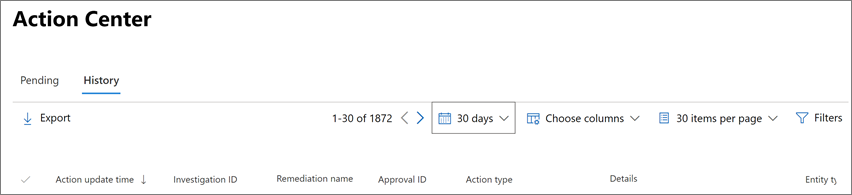
- Select a column heading to sort items in ascending or descending order.
- Use the time period filter to view data for the past day, week, 30 days, or 6 months.
- Choose the columns that you want to view.
- Specify how many items to include on each page of data.
- Use filters to view just the items you want to see.
- Select Export to export results to a .csv file.

Next steps
- View and approve remediation actions
- See the interactive guide: Investigate and remediate threats with Microsoft Defender for Endpoint
See also
Tip
Do you want to learn more? Engage with the Microsoft Security community in our Tech Community: Microsoft Defender for Endpoint Tech Community.
Comentarios
Próximamente: A lo largo de 2024 iremos eliminando gradualmente GitHub Issues como mecanismo de comentarios sobre el contenido y lo sustituiremos por un nuevo sistema de comentarios. Para más información, vea: https://aka.ms/ContentUserFeedback.
Enviar y ver comentarios de