Create a Universal Print policy in Microsoft Intune
Many organizations are moving their printer infrastructure to the cloud. Universal Print is a cloud-based printing solution in Microsoft 365. It uses built-in cloud printers, built-in legacy printers, and runs entirely in Microsoft Azure.
When Universal Print is deployed with Universal Print-compatible printers, it doesn't require any on-premises infrastructure. For a guided simulation, go to Universal Print guided simulation.
Using the settings catalog in Intune, you can create a printer policy, and deploy the policy to your managed users and devices. Then, on their devices, end users select the printer from a list of registered Universal Print printers to print.
This feature applies to:
- Windows 11
- Windows 10 21H2 with July 2022 update and later
This article shows you how to create a Universal Print policy in Microsoft Intune. To learn more about Universal Print and onboarding, go to What is Universal Print and Set up Universal Print.
Tip
The PrintProvisioning tool and the printers.csv file process is deprecated. Be sure to use the steps in this article to install universal printers.
Before you begin
To use this feature, you need the following subscriptions:
- Universal Print: For more specific information, go to License Universal Print.
- Microsoft Intune: For more specific information, go to Microsoft Intune licensing.
Every printer must be registered in the Universal Print service (UP), which uses Microsoft Entra ID. To create the Intune policy, you need the device ID, printer shared ID, and printer shared name.
For more specific information, go to What is printer registration?
Admin accounts need the following roles/licenses:
Printer Administrator or Global Administrator roles: Needed to add printers.
For more information on these roles, go to Microsoft Entra built-in roles.
Intune Administrator or Global Administrator roles: Needed to create and assign Intune policies.
For more information on these roles, go to Role-based access control (RBAC) with Microsoft Intune
An assigned Universal Print license.
End user accounts need the following permissions/licenses:
- An assigned Universal Print license
- Have access rights to the printer service and the Universal Print service
If the profile is assigned to a Microsoft Entra user/user group that can't access the printers because of permissions, then Intune grants the assigned user/user group the permissions.
These settings use the UniversalPrint CSP.
Create the policy
This policy includes your printer information. When you assign the policy, the printers are automatically installed. Then, on their devices, users select a printer that you added.
Sign in to the Microsoft Intune admin center.
Select Devices > Configuration > Create > New policy.
Enter the following properties:
- Platform: Select Windows 10 and later.
- Profile type: Select Settings catalog.
Select Create.
In Basics, enter the following properties:
- Name: Enter a descriptive name for the profile. Name your profiles so you can easily identify them later. For example, a good profile name is Win11: Universal Print policy.
- Description: Enter a description for the profile. This setting is optional, but recommended.
Select Next.
In Configuration settings, select Add settings. In the settings picker, select Printer Provisioning, and select the settings you want to configure.
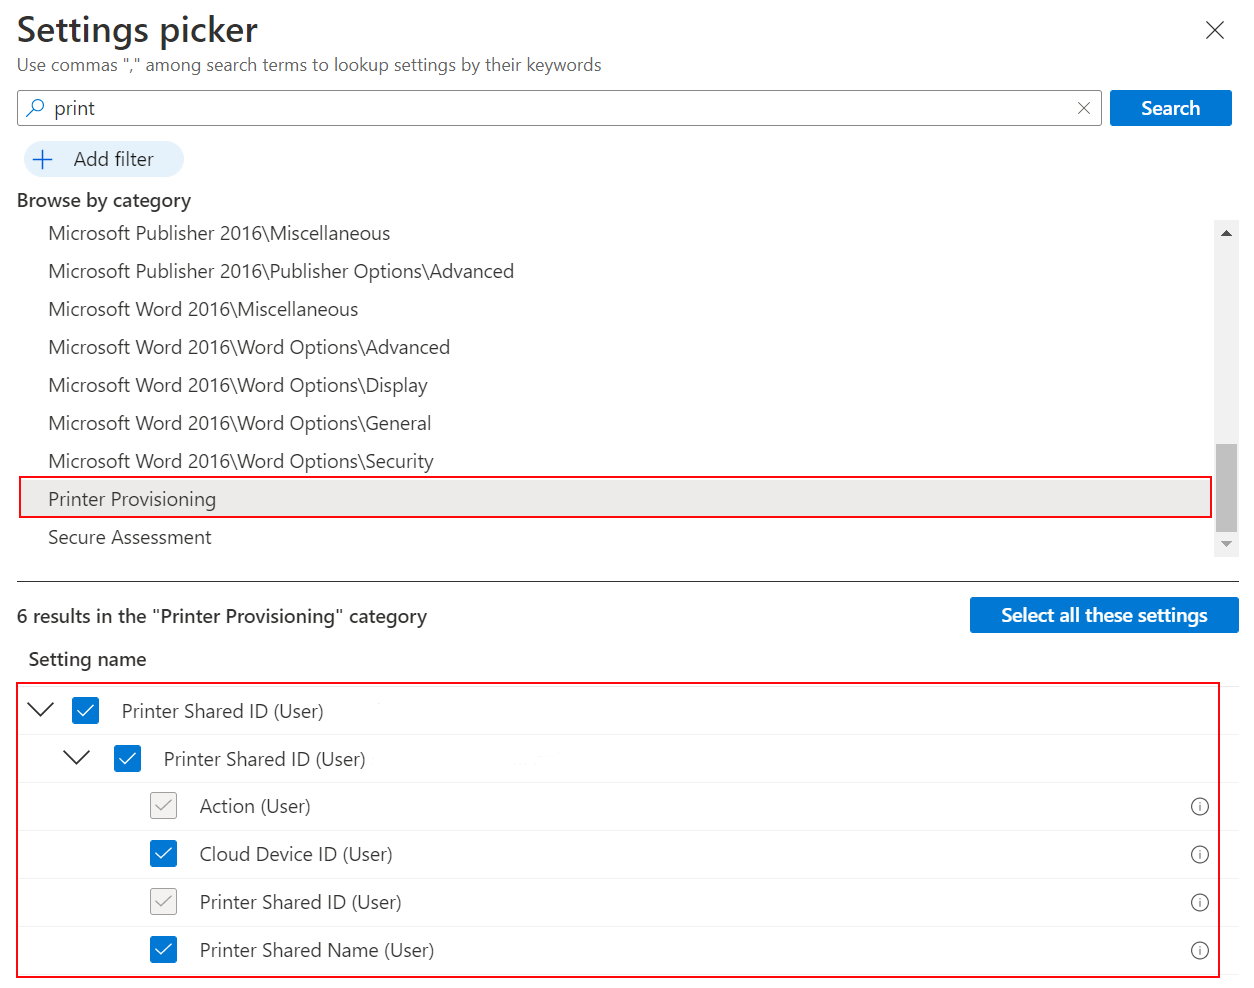
Close the settings picker.
Configure the settings:
- Action: Select Install to install a printer. When users receive the policy, the printer will automatically install.
- Cloud Device ID: Enter the printer ID. This ID is created when the printer is registered in Microsoft Entra ID using the Universal Print service. To get the ID, use the Universal Print portal.
- Printer Shared ID: Enter the Shared ID of the printer. To get the ID, use the Universal Print portal.
- Printer Shared Name: Enter the Shared Name of the printer. To get the name, use the Universal Print portal.
You can add more printers using the Add button:

Select Next.
In Scope tags (optional), assign a tag to filter the profile to specific IT groups. For more information about scope tags, see Use RBAC roles and scope tags for distributed IT.
Select Next.
In Assignments, select the users that will receive your profile.
These user accounts need access rights to the printer and the Universal Print service. If the profile is assigned to a Microsoft Entra user/user group that can't access the printers because of permissions, then Intune grants the assigned user/user group the permissions.
If users don't have permissions, then the following message is shown:
The selected groups may not have Universal Print permissions to selected printers. If this is the case, Intune will provide these groups with the correct permissions.For more information on assigning profiles in Intune, go to Assign user and device profiles. For more information on user scope vs. device scope in the settings catalog, go to Use the settings catalog to configure settings: Device scope vs. user scope settings.
Select Next.
In Review + create, review your settings. When you select Create, your changes are saved, and the profile is assigned. The policy is also shown in the profiles list.
Failures and reporting
After you assign the profile, you can monitor its status. The Intune reports show if a profile successfully applied, failed, has conflicts, and more. For more specific information, go to Monitor device configuration profiles in Microsoft Intune.
For information on all the reporting data you can view, go to Intune reports.
Common issues
When you deploy the printer policy, you might get a
Error 0x8007007f (ERROR_PROC_NOT_FOUND)message.The
ERROR_PROC_NOT_FOUNDis a very common error, and is usually associated with theDelayLoadedDLLs missing or missing APIs.To resolve this error, make sure your Windows OS client version is supported. The supported versions are listed at the top of this article.
If a printer is removed from the Universal Print service, unshared, or if permissions are removed, then the Intune policy will fail to install the printer.
Make sure the printer is discoverable on the device. If users can't discover or install the printer manually, then the Intune policy will also fail to install the printer.
Make sure the SharedID and PrinterID are entered correctly in the Intune policy.
In some cases, the PrinterID and SharedID are reversed, which prevents the printer from being discovered. For more information on these settings, go to Create the policy (in this article).
The Application event log may shows errors related to Universal Print.
Enable tracing
If the common issues (in this article) don't resolve your issue, you can use Fiddler tracing, the Print-Collect script, and UPPrinterInstaller.exe to resync the Intune installation of the universal printer. You can review these logs for possible issues. You can also work with the Intune support team to review and analyze these logs.
For more information and specific steps, go to Universal Print troubleshooting guide - Use PrintCollect, Fiddler, and UPPrinterInstaller.
Related articles
Palaute
Tulossa pian: Vuoden 2024 aikana poistamme asteittain GitHub Issuesin käytöstä sisällön palautemekanismina ja korvaamme sen uudella palautejärjestelmällä. Lisätietoja on täällä: https://aka.ms/ContentUserFeedback.
Lähetä ja näytä palaute kohteelle