Create manual test cases
TFS 2017 | TFS 2015
Create manual test cases to check that each deliverable meets your users' needs. Manual test cases define individual steps testers perform, including steps that are shared across test cases. To test different data, you specify parameters for the test steps. To learn more, see Share steps between test cases and Repeat a test with different data. For an overview of test artifacts, see Test objects and terms.
Organize your test cases by adding them to test plans and test suites. Then assign testers to run the tests.
For an overview of test artifacts, see Test objects and terms.
Note
Test iterations are designed to support data-driven scenarios, not workflow-driven scenarios. From a best practice perspective, if you have two test scenarios where the workflows are different, consider creating separate test cases. Also see FAQs for manual testing.
Prerequisites
You must connect to a project. If you don't have a project yet, create one.
You must be added to a project. To get added, Add users to a project or team.
To view test-related work items, you must have Basic access or higher and permissions to view work items under the corresponding Area Path.
To add test plans and test suites, manual test cases, delete test artifacts, and define test configurations you must have Basic + Test Plans access level or have one of the following Visual Studio subscriptions:
To add or edit test-related artifacts, you must have the following permissions:
- To add or modify test plans, test suites, test cases, or other test-based work item types, you must have Edit work items in this node permission set to Allow under the corresponding Area Path.
- To modify test plan properties such as build and test settings, you must have Manage test plans permission set to Allow under the corresponding Area Path.
- To create and delete test suites, add, and remove test cases from test suites, change test configurations associated with test suites, and modify a test suite hierarchy (move a test suite), you must have Manage test suites permission set to Allow under the corresponding Area Path.
To learn more, see Manual test access and permissions.
Create test cases
If you haven't already, create a test plan and requirement-based test suites.
Select a requirement-based test suite. In the right-hand pane, choose + (New) and then choose New test case.
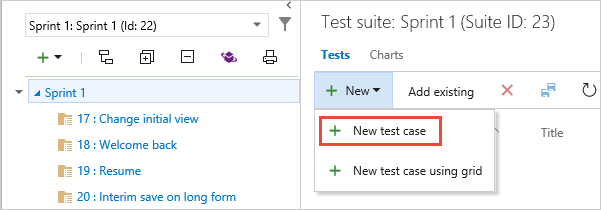
The test suite shown here was created from a User Story work item in the team's backlog board. When you add a test case to this kind of suite, the test case is automatically linked to the backlog item. To create test cases this way, open the shortcut menu for the work item and choose Add test.
Choose the Click or type here to add a step link and add test steps with a description of the action required to carry out the test and the expected results so that any team member can run the test. You can add attachments to a step if you want. Repeat until you have added all the steps for the test. Now you've created a test case that you can run.
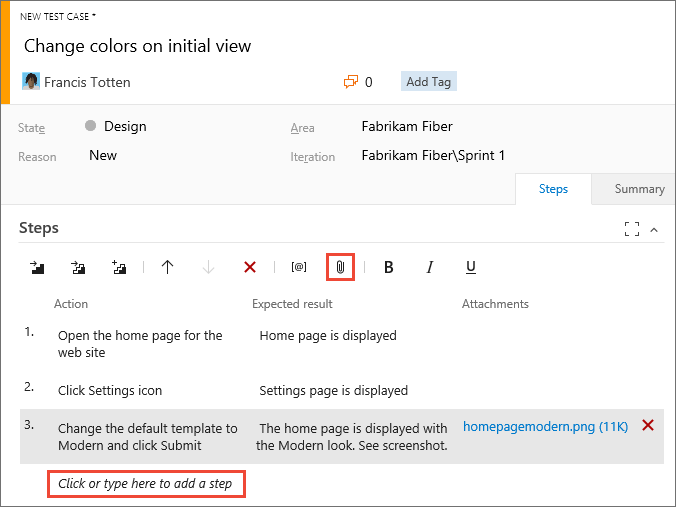
You can share steps between test cases. For more information, see Share steps.
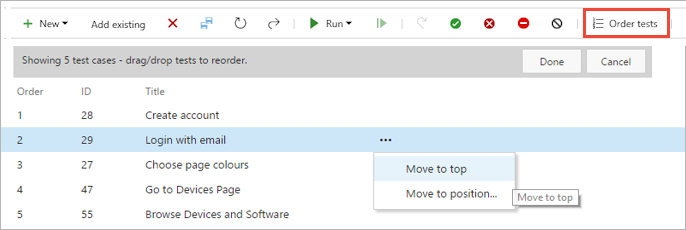
You can reorder manual test cases in static suites, requirement-based suites, and query-based suites. Choose Order tests on the tool bar, then drag and drop one or more tests. Or open the shortcut menu for a test to move it to the top or to another position. After reordering the tests, you can sort them by the Order field and then run them in that order with the web runner.
Tip
You can create a test case that automatically links to a requirement—User Story (Agile), Product Backlog Item (Scrum), Requirement (CMMI), or Issue (Basic)—when you create a test from the Kanban board. To learn more, see Add, run, and update inline tests.
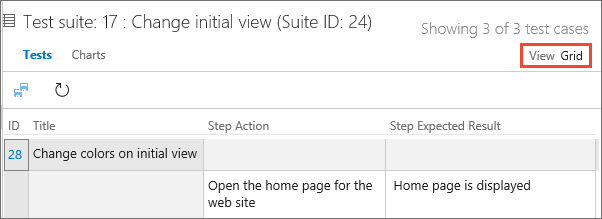
Use the Grid view to edit test cases
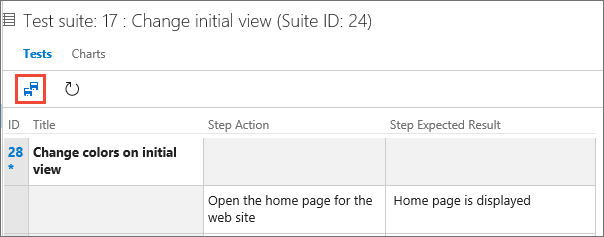
Switch between Grid and List views using the View menu at the right of the window.
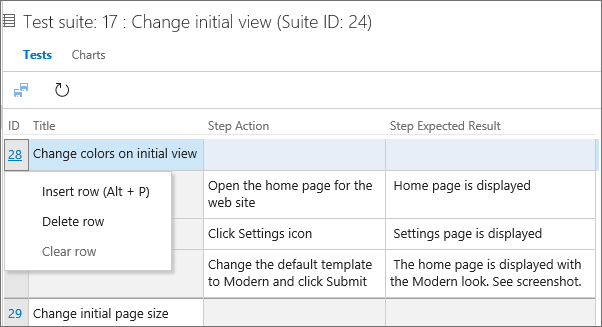
On the grid shortcut menu, you can add, delete, or clear rows.
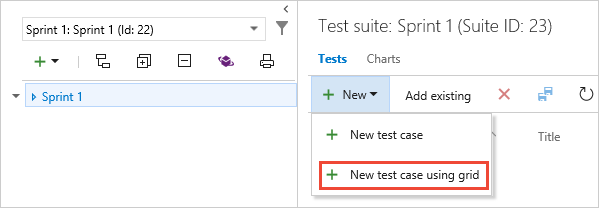
You can use the Grid View when you add multiple test cases to the test suite:
Note
Do not use the Teams plugin for Excel to add or update test case work items. Excel cannot parse the format used to store test steps, and in some cases this may affect the formatting of the test case work items.
You can edit other fields in the Grid view. In the List view, use the column options to select the fields in the test case work item.
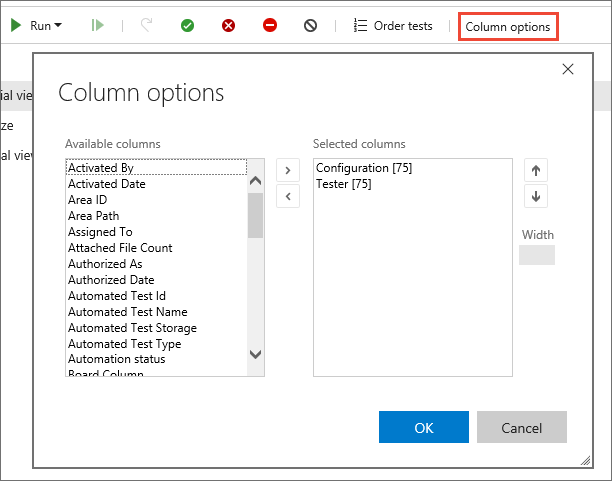
You can then view and edit these fields when you switch to the Grid view.
Use Excel to copy test case information into a Grid view
You can copy test cases and test steps from an existing Excel worksheet. This is supported only with Internet Explorer and Chrome browsers.
Copy the columns from Excel that you want to use for the title, action, and expected results fields. Copying does not copy column formatting, other than multiline, from the worksheet. Paste these columns into the Grid view, edit if necessary, and save them.
You can copy the data from the Grid view and paste it into your Excel worksheet. Copying does not copy test step formatting, other than multiline, into the worksheet.
Assign testers
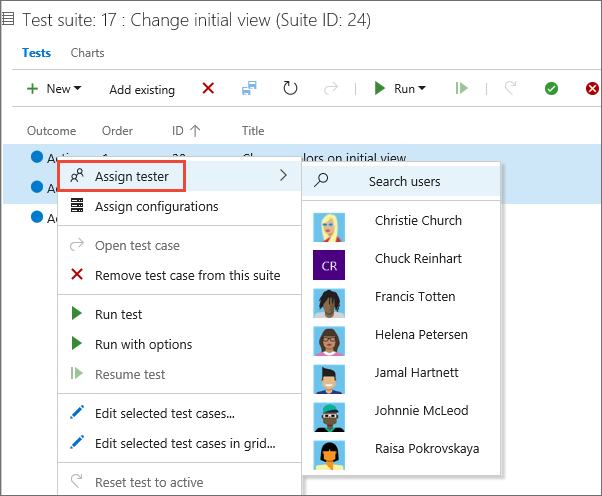
You can reassign test cases so that another tester can run them. Select the tests that you want to reassign. Then open the shortcut menu (choose the "..." ellipses or right-click) and select the tester you want to run the tests.
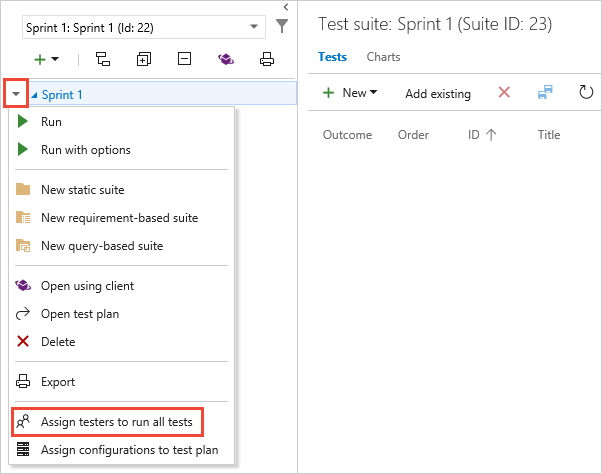
Or, you can assign all the test cases in a test suite to multiple testers. This is useful for acceptance testing. Open the shortcut menu for the test plan and choose Assign testers to run all tests.
Add or remove testers from the list. After you select the testers, tick the Send email checkbox and edit the message as required so they know that tests are ready for them to run.
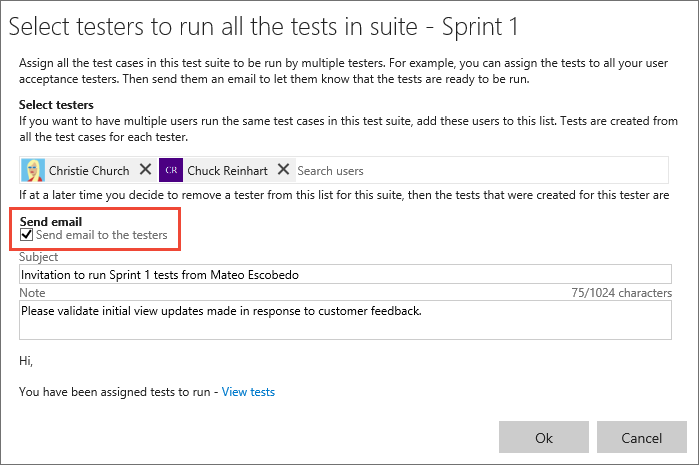
The email contains a link that testers can open to see the list of assigned tests. Testers need just Basic access to run tests from Azure Test Plans.
Manage test cases
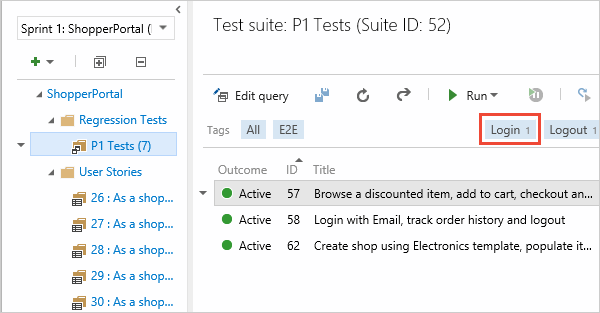
You can tag test cases and view test cases only with specific tags. For example, tag all the tests related to signing in so that you can rerun these tests if a bug is fixed for that page. Then you can filter on that tag from the Test Plans web portal.
To add new tags to add to work items, you must have Basic access or higher and have the project-level Create new tag definition permissions set to Allow. for more information, see Add work item tags.
You can add and edit tags when you edit a test case, or bulk edit tags in the grid view. You can also create suites based on queries when you use tags.
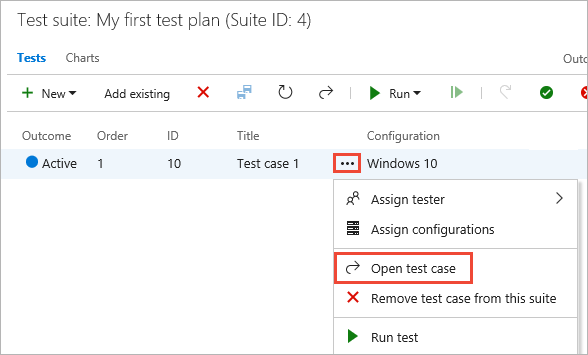
You can rename or delete test cases. Open the test case from its shortcut menu.
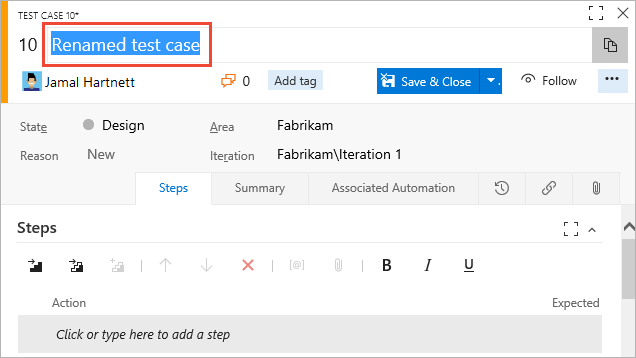
Here you can rename the test case.
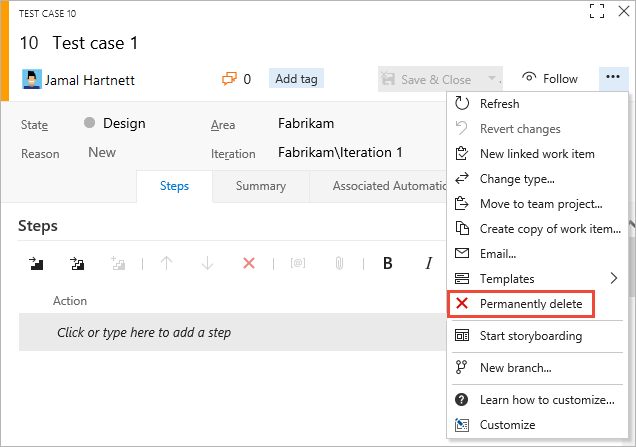
Or you can permanently delete the test case.
To delete test plans and test suites, you must be a member of the Project Administrators group or have the Area Path node-level Manage test plans or Manage test suites permission set to Allow. To manage or delete test artifacts, you must also have your access level set to Basic + Test Plans or Visual Studio Enterprise.
To delete test plans and test suites, you must be a member of the Project Administrators group or have the Area Path node-level Manage test plans or Manage test suites permission set to Allow. To manage or delete test artifacts, you must also have your access level set to Basic + Test Plans or Visual Studio Enterprise. For more information, see Delete test artifacts in Azure Boards.