
Ócáid
Mar 17, 9 PM - Mar 21, 10 AM
Bí ar an tsraith meetup chun réitigh AI inscálaithe a thógáil bunaithe ar chásanna úsáide fíor-dhomhanda le forbróirí agus saineolaithe eile.
Cláraigh anoisNí thacaítear leis an mbrabhsálaí seo a thuilleadh.
Uasghrádú go Microsoft Edge chun leas a bhaint as na gnéithe is déanaí, nuashonruithe slándála, agus tacaíocht theicniúil.
Applies to: Azure Logic Apps (Consumption + Standard)
Workflow actions such as Flat File and XML Validation require a schema to perform their tasks. For example, the XML Validation action requires an XML schema to check that documents use valid XML and have the expected data in the predefined format. This schema is an XML document that uses XML Schema Definition (XSD) language and has the .xsd file name extension. The Flat File actions use a schema to encode and decode XML content.
This article shows how to add a schema to your integration account. If you're working with a Standard logic app workflow, you can also add a schema directly to your logic app resource.
An Azure account and subscription. If you don't have a subscription yet, sign up for a free Azure account.
The schema file that you want to add. To create schemas, you can use Visual Studio 2019 and the Microsoft Azure Logic Apps Enterprise Integration Tools Extension.
Nóta
Don't install the extension alongside the BizTalk Server extension. Having both extensions might produce unexpected behavior. Make sure that you only have one of these extensions installed.
On high resolution monitors, you might experience a display problem with the map designer in Visual Studio. To resolve this display problem, either restart Visual Studio in DPI-unaware mode, or add the DPIUNAWARE registry value.
Based on whether you're working on a Consumption or Standard logic app workflow, you'll need an integration account resource. Usually, you need this resource when you want to define and store artifacts for use in enterprise integration and B2B workflows.
Tábhachtach
To work together, both your integration account and logic app resource must exist in the same Azure subscription and Azure region.
If you're working on a Consumption logic app workflow, you'll need an integration account that's linked to your logic app resource.
If you're working on a Standard logic app workflow, you can link your integration account to your logic app resource, upload schemas directly to your logic app resource, or both, based on the following scenarios:
If you already have an integration account with the artifacts that you need or want to use, you can link your integration account to multiple Standard logic app resources where you want to use the artifacts. That way, you don't have to upload schemas to each individual logic app. For more information, review Link your logic app resource to your integration account.
The Flat File built-in connector lets you select a schema that you previously uploaded to your logic app resource or to a linked integration account, but not both. You can then use this artifact across all child workflows within the same logic app resource.
So, if you don't have or need an integration account, you can use the upload option. Otherwise, you can use the linking option. Either way, you can use these artifacts across all child workflows within the same logic app resource.
Limits apply to the number of artifacts, such as schemas, per integration account. For more information, review Limits and configuration information for Azure Logic Apps.
Based on whether you're working on a Consumption or Standard logic app workflow, schema file size limits might apply.
If you're working with Standard workflows, no limits apply to schema file sizes.
If you're working with Consumption workflows, the following limits apply:
If your schema is 2 MB or smaller, you can add your schema to your integration account directly from the Azure portal.
If your schema is bigger than 2 MB but not bigger than the size limit for schemas, you'll need an Azure storage account and a blob container where you can upload your schema. Then, to add that schema to your integration account, you can then link to your storage account from your integration account. For this task, the following table describes the items you need:
| Item | Description |
|---|---|
| Azure storage account | In this account, create an Azure blob container for your schema. Learn how to create a storage account. |
| Blob container | In this container, you can upload your schema. You also need this container's content URI later when you add the schema to your integration account. Learn how to create a blob container. |
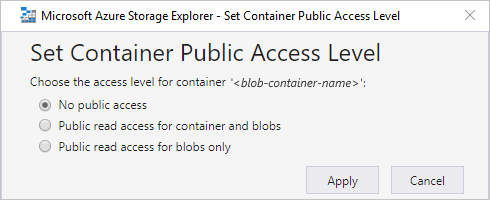
| Azure Storage Explorer | This tool helps you more easily manage storage accounts and blob containers. To use Storage Explorer, choose a step: - In the Azure portal, select your storage account. From your storage account menu, select Storage Explorer. - For the desktop version, download and install Azure Storage Explorer. Then, connect Storage Explorer to your storage account by following the steps in Get started with Storage Explorer. To learn more, see Quickstart: Create a blob in object storage with Azure Storage Explorer. |
To add larger schemas, you can also use the Azure Logic Apps REST API - Schemas. For Standard workflows, the Azure Logic Apps REST API is currently unavailable.
Usually, when you're using an integration account with your workflow, you add the schema to that account. However, if you're referencing or importing a schema that's not in your integration account, you might receive the following error when you use the element xsd:redefine:
An error occurred while processing the XML schemas: ''SchemaLocation' must successfully resolve if <redefine> contains any child other than <annotation>.'.
To resolve this error, you need to use the element xsd:import or xsd:include instead of xsd:redefine, or use a URI.
If you're working with a Consumption workflow, you must add your schema to a linked integration account.
If you're working with a Standard workflow, you have the following options:
Add your schema to a linked integration account. You can share the schema and integration account across multiple Standard logic app resources and their child workflows.
Add your schema directly to your logic app resource. However, you can only share that schema across child workflows in the same logic app resource.
In the Azure portal, sign in with your Azure account credentials.
In the main Azure search box, enter integration accounts, and select Integration accounts.
Select the integration account where you want to add your schema.
On your integration account resource menu, under Settings, select Schemas.
On the Schemas pane toolbar, select Add.
For a Standard logic app resource, the following steps apply only if you want to add a schema directly to your resource. Otherwise, add the schema to your integration account.
On the logic app resource menu, under Settings, select Schemas.
On the Schemas pane toolbar, select Add.
On the Add Schema pane, enter a unique name for your schema.
Next to the Schema box, select the folder icon. Select the schema to upload.
When you're done, select OK.
After your schema file finishes uploading, the schema appears in the Schemas list. On your integration account's Overview page, under Artifacts, your uploaded schema also appears.
In your logic app project's structure, open the Artifacts folder and then the Schemas folder.
In the Schemas folder, add your schema.
To update an existing schema, you have to upload a new schema file that has the changes you want. However, you can first download the existing schema for editing.
The following steps apply only if you're updating a schema that you added to your logic app resource. Otherwise, follow the Consumption steps for updating a schema in your integration account.
In the Azure portal, open your logic app resource, if not already open.
On the logic app resource menu, under Settings, select Schemas.
After the Schemas pane opens, select your schema. To download and edit the schema first, on the Schemas pane toolbar, select Download, and save the schema.
On the Schemas pane toolbar, select Add.
On the Add schema pane, enter a unique name for your schema.
Next to the Schema box, select the folder icon. Select the schema to upload.
When you're done, select OK.
After your schema file finishes uploading, the updated schema appears in the Schemas list.
The following steps apply only if you're deleting a schema that you added to your logic app resource. Otherwise, follow the Consumption steps for deleting a schema from your integration account.
In the Azure portal, open your logic app resource, if not already open.
On the logic app resource menu, under Settings, select Schemas.
After the Schemas pane opens, select your schema, and then select Delete.
To confirm you want to delete the schema, select Yes.
Ócáid
Mar 17, 9 PM - Mar 21, 10 AM
Bí ar an tsraith meetup chun réitigh AI inscálaithe a thógáil bunaithe ar chásanna úsáide fíor-dhomhanda le forbróirí agus saineolaithe eile.
Cláraigh anoisOiliúint
Cosán foghlama
Use advance techniques in canvas apps to perform custom updates and optimization - Training
Use advance techniques in canvas apps to perform custom updates and optimization
Deimhniú
Microsoft Certified: Azure for SAP Workloads Specialty - Certifications
Demonstrate planning, migration, and operation of an SAP solution on Microsoft Azure while you leverage Azure resources.
Doiciméadúchán
Define trading partners for workflows - Azure Logic Apps
Add trading partners to your integration account for workflows in Azure Logic Apps using the Enterprise Integration Pack.
Exchange X12 messages in B2B workflows - Azure Logic Apps
Exchange X12 messages between partners by creating workflows with Azure Logic Apps and Enterprise Integration Pack.
Create and manage integration accounts
Create and manage integration accounts for building B2B enterprise integration workflows in Azure Logic Apps with the Enterprise Integration Pack.