אירוע
9 באפר׳, 15 - 10 באפר׳, 12
קוד העתיד עם בינה מלאכותית והתחברות לעמיתים ומומחים של Java ב- JDConf 2025.
הירשם כעתהדפדפן הזה אינו נתמך עוד.
שדרג ל- Microsoft Edge כדי לנצל את התכונות, עדכוני האבטחה והתמיכה הטכנית העדכניים ביותר.
In this article, you'll learn how to integrate TAS with Microsoft Entra ID. When you integrate TAS with Microsoft Entra ID, you can:
To get started, you need the following items:
In this article, you configure and test Microsoft Entra single sign-on in a test environment.
To configure the integration of TAS into Microsoft Entra ID, you need to add TAS from the gallery to your list of managed SaaS apps.
Alternatively, you can also use the Enterprise App Configuration Wizard. In this wizard, you can add an application to your tenant, add users/groups to the app, assign roles, as well as walk through the SSO configuration as well. Learn more about Microsoft 365 wizards.
Configure and test Microsoft Entra SSO with TAS using a test user called B.Simon. For SSO to work, you need to establish a link relationship between a Microsoft Entra user and the related user in TAS.
To configure and test Microsoft Entra SSO with TAS, perform the following steps:
Follow these steps to enable Microsoft Entra SSO.
Sign in to the Microsoft Entra admin center as at least a Cloud Application Administrator.
Browse to Identity > Applications > Enterprise applications > TAS > Single sign-on.
On the Select a single sign-on method page, select SAML.
On the Set up single sign-on with SAML page, click the pencil icon for Basic SAML Configuration to edit the settings.
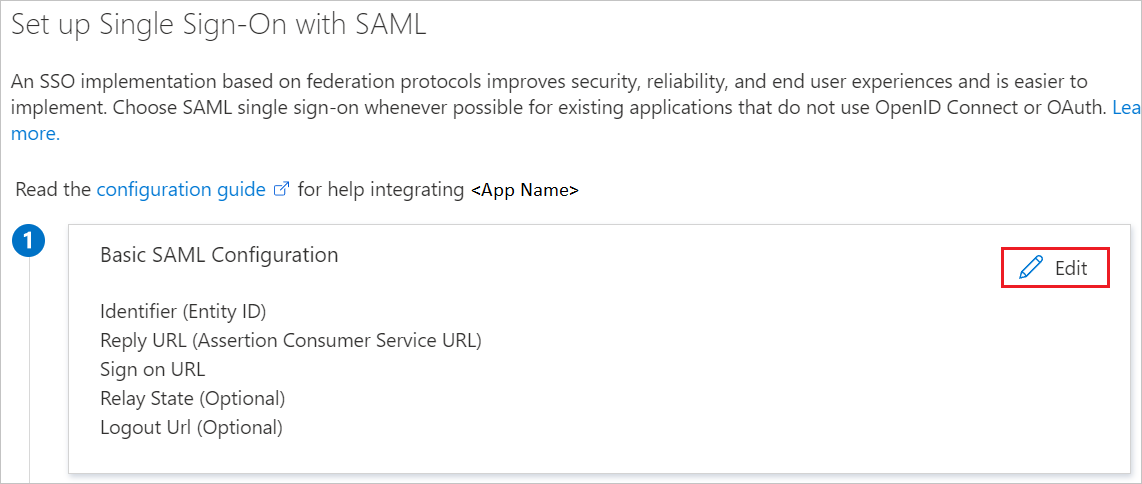
On the Basic SAML Configuration section, If you wish to configure the application in IDP initiated mode, perform the following steps:
a. In the Identifier text box, type a URL using the following pattern:
https://taseu.combtas.com/<DOMAIN>
b. In the Reply URL text box, type a URL using the following pattern:
https://taseu.combtas.com/<ENVIRONMENT_NAME>/AssertionService.aspx
Click Set additional URLs and perform the following step if you wish to configure the application in SP initiated mode:
In the Sign-on URL text box, type a URL using the following pattern:
https://taseu.combtas.com/<DOMAIN>
הערה
These values are not real. You will update these with the actual Identifier, Reply URL and Sign-on URL which is explained later in the article. You can also refer to the patterns shown in the Basic SAML Configuration section.
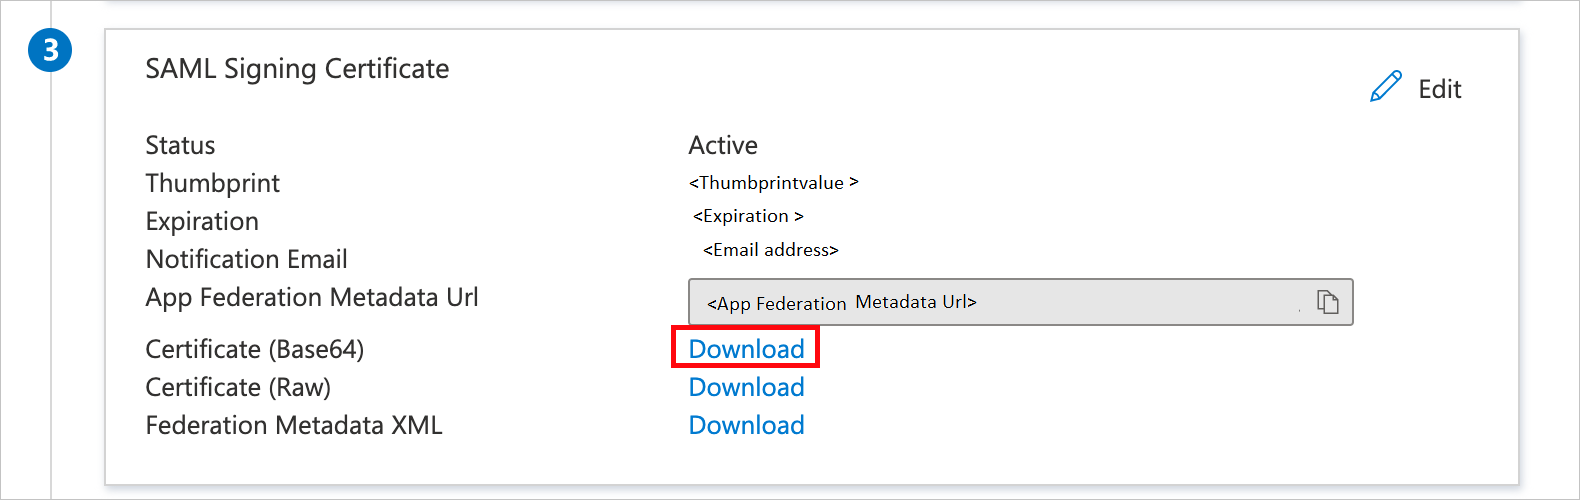
On the Set up Single Sign-On with SAML page, in the SAML Signing Certificate section, click Download to download the Certificate (Base64) from the given options as per your requirement and save it on your computer.
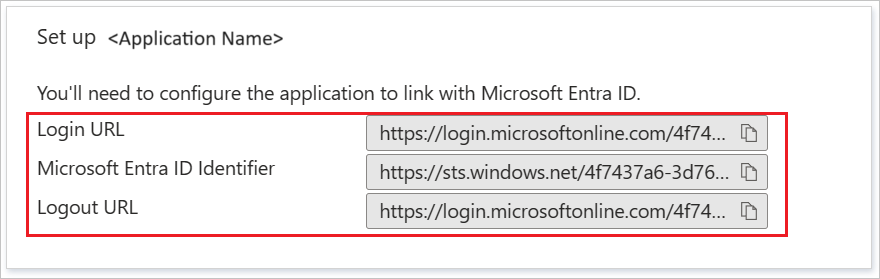
On the Set up TAS section, copy the appropriate URL(s) as per your requirement.
In this section, you'll create a test user called B.Simon.
B.Simon.B.Simon@contoso.com.In this section, you'll enable B.Simon to use single sign-on by granting access to TAS.
In a different web browser window, login to TAS as an Administrator.
On the left side of menu, click on Settings and navigate to Administrator and then click on Manage Single sign on.

On the Manage Single sign on page, perform the following steps:

a. In the Name textbox, type your environment name.
b. Select SAML2 as Authentication Type.
c. In the Enter URL textbox, paste the value of Login URL which you copied previously.
d. In Notepad, open the base-64 encoded certificate that you downloaded, copy its content, and then paste it into the Enter Certification box.
e. In the Enter New IP textbox, type the IP Address.
הערה
Contact TAS support team to get the IP Address.
f. Copy the Single Sign On URL and paste it into the identifier (Entity ID) and Sign on URL textbox of Basic SAML Configuration in Azure portal. Please note that the URL is case sensitive and must end with a slash (/).
g. Copy the Assertion Service URL in the setup page and paste it into the Reply URL textbox of Basic SAML Configuration in Azure portal.
h. Click Insert SSO row.
In this section, you create a user called Britta Simon in TAS. Work with TAS support team to add the users in the TAS platform. Users must be created and activated before you use single sign-on.
In this section, you test your Microsoft Entra single sign-on configuration with following options.
Click on Test this application, this will redirect to TAS Sign on URL where you can initiate the login flow.
Go to TAS Sign-on URL directly and initiate the login flow from there.
You can also use Microsoft My Apps to test the application in any mode. When you click the TAS tile in the My Apps, if configured in SP mode you would be redirected to the application sign on page for initiating the login flow and if configured in IDP mode, you should be automatically signed in to the TAS for which you set up the SSO. For more information about the My Apps, see Introduction to the My Apps.
Once you configure TAS you can enforce session control, which protects exfiltration and infiltration of your organization’s sensitive data in real time. Session control extends from Conditional Access. Learn how to enforce session control with Microsoft Defender for Cloud Apps.
אירוע
9 באפר׳, 15 - 10 באפר׳, 12
קוד העתיד עם בינה מלאכותית והתחברות לעמיתים ומומחים של Java ב- JDConf 2025.
הירשם כעתהדרכה
מודול
Dowiedz się, jak Tożsamość zewnętrzna Microsoft Entra zapewnia bezpieczne, bezproblemowe środowiska logowania dla klientów biznesowych i konsumentów. Zapoznaj się z tworzeniem dzierżawy, rejestracją aplikacji, dostosowywaniem przepływu i zabezpieczeniami konta.
אישור
Microsoft Certified: Identity and Access Administrator Associate - Certifications
Demonstrate the features of Microsoft Entra ID to modernize identity solutions, implement hybrid solutions, and implement identity governance.